Once you’ve finished reading this article, you’ll know how to create lists of contacts blocked from receiving campaigns.
If you want to stop certain domains or email addresses from getting your campaign emails, you can create a list of “do-not-email” contacts.
This makes sure they won’t receive any emails, even if they appear on your recipient list by accident.
After applying a “do-not-email” list to your campaign, it will block sending for these recipients.
Why you should use “do-not-email” lists:
• Avoid reaching out to unwanted contacts: Add emails/domains your company should never contact again.
• Respect recipient preferences: Prevent sending emails to recipients who have asked not to receive any emails.
• Block bounced emails: Protect your sender reputation and don’t send to them again by mistake.
Here’s how to create and manage your Do-not-email Lists:
Step 1: Create do-not-emal list
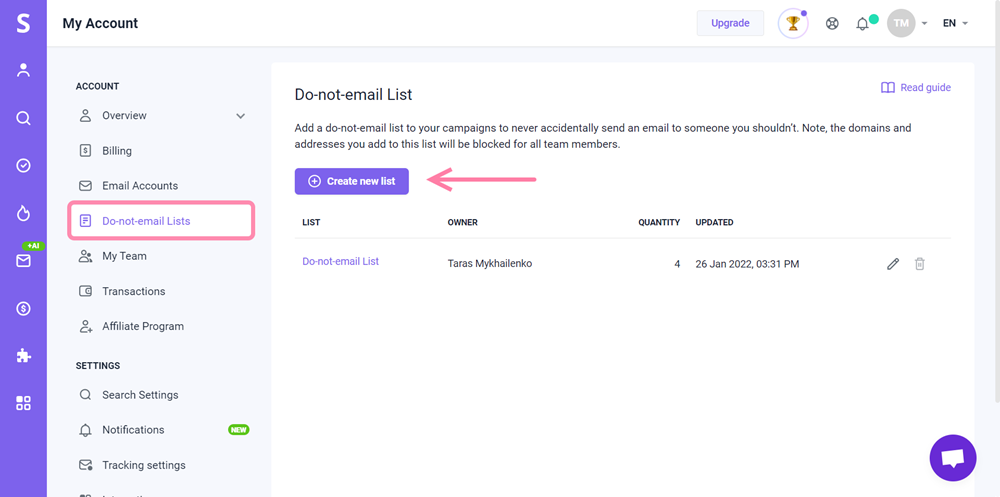
In your Account settings, open Do-not-email Lists tab.
Click the + Create new list button and name your list as you prefer.
Your newly created lists will appear on the Do-not-email Lists page.
Step 2: Add emails or domains
Your do-not-email lists can include both email addresses and domains.
To add new entries to the list:
Select a list or click the Edit icon next to it.
Then, decide how you want to add new entries:
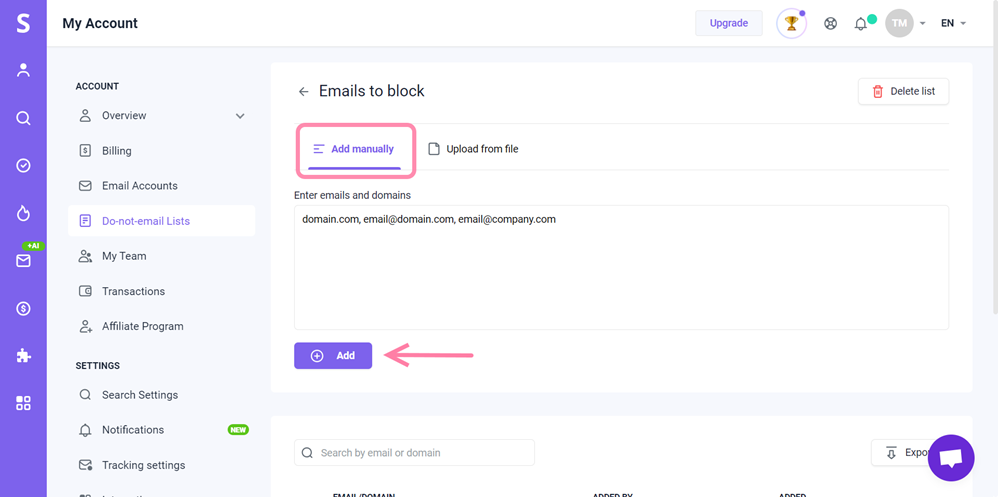
Option #1: Add manually
On the Add manually tab, you can enter required emails and domains to the input field one by one.
Option #2: Upload from file
You can simplify the process by adding multiple entries at once.
Go to the Upload from file tab.
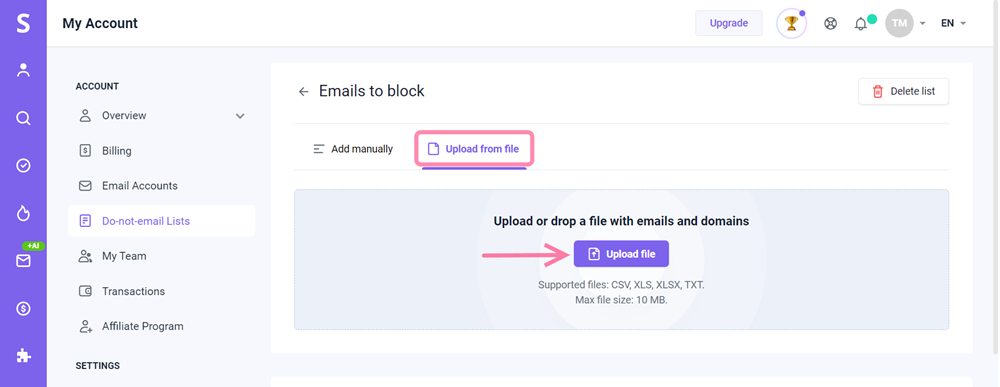
Here, you can import a file that includes emails and domains.
You can either drop it onto the highlighted area or click the Upload file button and select the file from your computer.
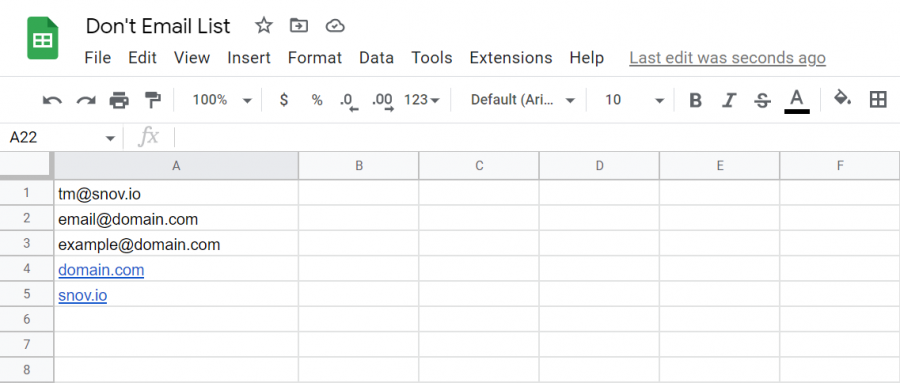
Note: Your import file must not exceed 10 MB in size and should contain email addresses or domains, with each entry on a separate line.
Supported file formats are: CSV, XLS, XLSX, or TXT.
Here’s an example of the correct file format:
Click on Add valid entries to include the emails and domains from the file.
Remember, just putting domains or email addresses in the do-not-email list won’t stop them from getting your campaigns.
You’ll have to include them in your campaign settings to make sure they’re blocked from receiving your emails.
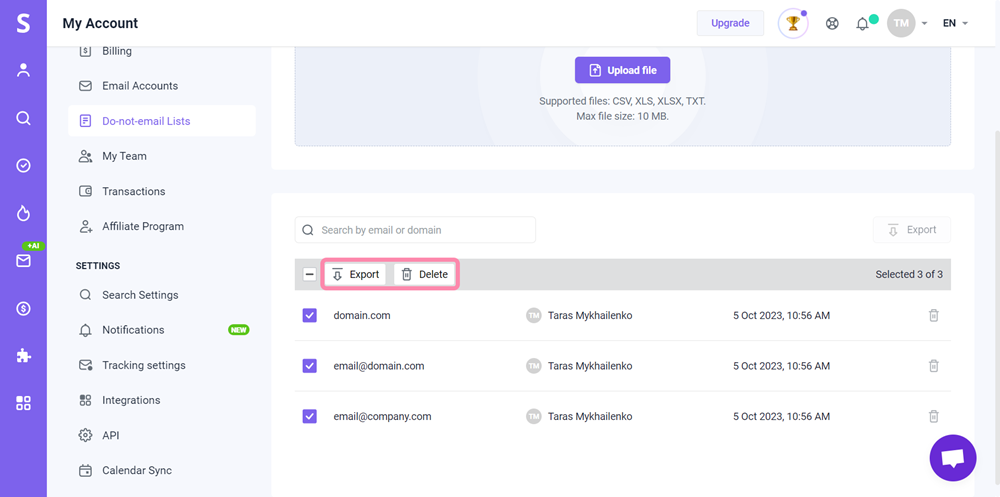
Tip: You can easily manage your “do-not-email” lists.
To remove specific entries, select them and click on Delete. To delete an entire list, click the Delete icon on the right side.
If you want to download specific entries, select them using checkboxes and click Export. To download an entire list, click the Export button on the right side.
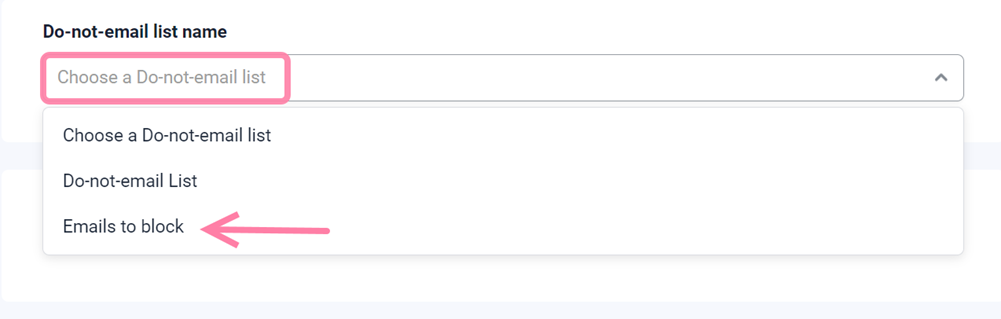
Step 3: Add do-not-email list to your campaign
When you’re in the process of creating your drip campaign, make sure to select the right do-not-email list when you reach the Prospects step.
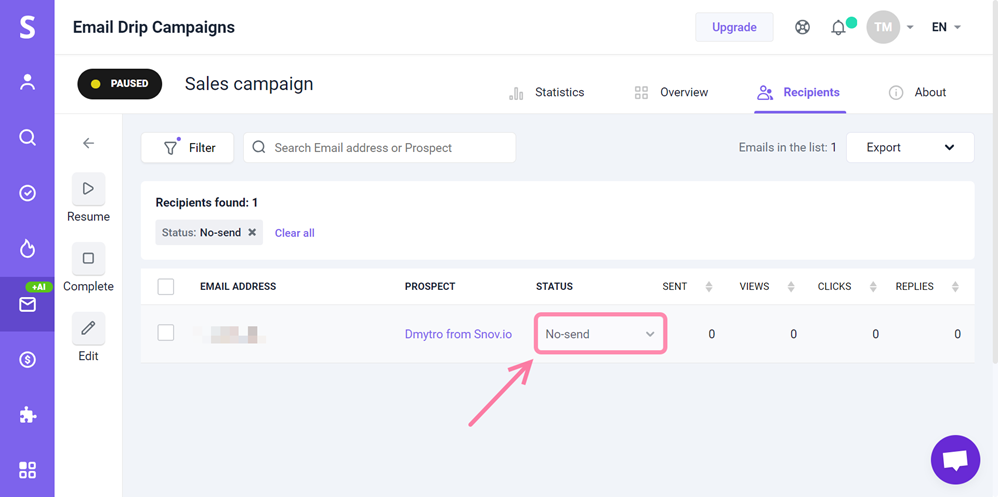
When someone you’ve added to the “do-not-email” list shows up in your campaign list, they’ll automatically get tagged with a “No-send” status.
If you have a question that wasn’t answered here, don’t hesitate to contact our Customer Care team. You can reach them at help@snov.io or through live chat.


Sorry about that 😢
How can we improve it?