In this article, you’ll learn how to upload a list of prospects or update existing prospect data in bulk using the “Import from file” option.
The import from file option in Snov.io allows you to add prospects to your account by uploading a CSV file.
Using the import, you can also update the information of existing prospects and add data to custom fields in bulk.
Recommendations for the import file format
Before you begin, make sure you have prepared the import file with the prospects.
To ensure a smooth import process, please consider these recommendations:
- File format: Besides CSV files, the import also supports TXT and XLSX formats. For better compatibility, we recommend using CSV files.
- Row limit: The import file can contain up to 100,000 rows. This limit allows you to add up to 100,000 prospects in a single import.
- Required CSV fields: The only fields required to start the import are Full Name or First Name + Last Name. Email address field is not mandatory.
- Recommended CSV fields: It’s recommended to include the following columns to your import file: Full Name, First Name, Last Name, Email, Location, Industry, Country, Social URL, Position, Company Name, Company Website, HQ Phone.
- Column headers: Make sure that all the columns in your file have headers as it will help to map the fields.
How to import prospects from a CSV file
Follow the steps below to upload a list of prospects:
Step 1. Upload a file
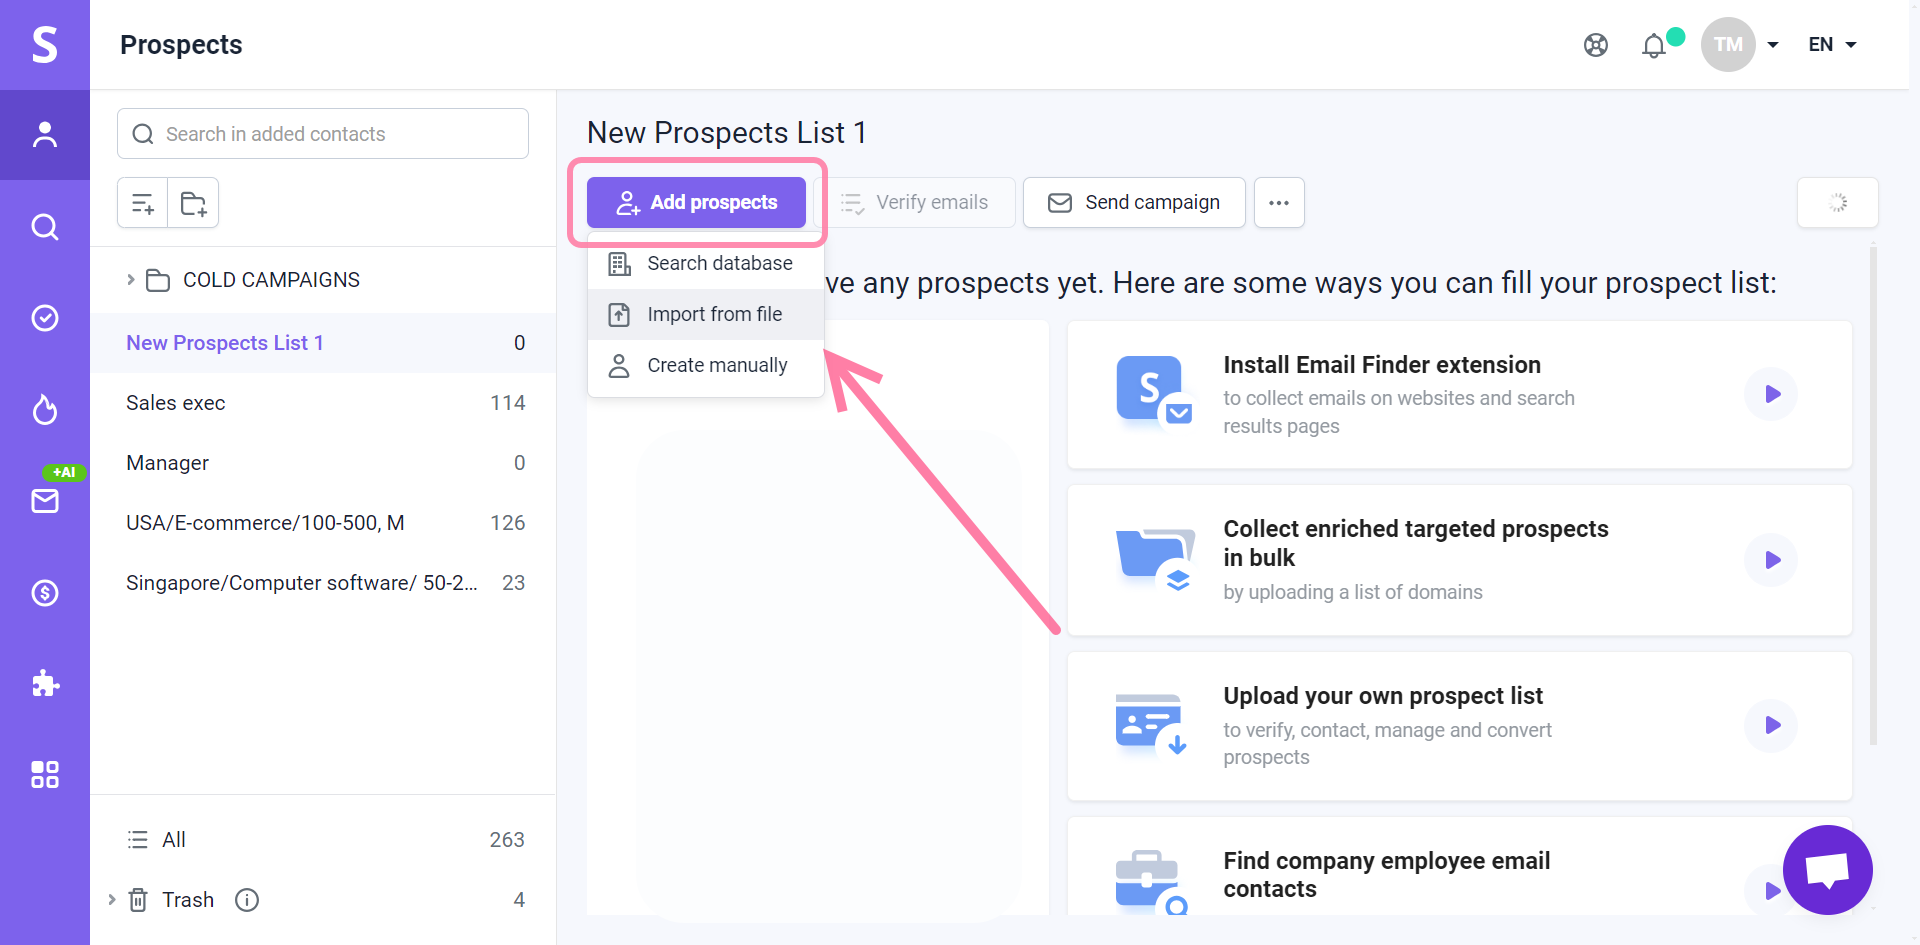
On the Prospects page in your Snov.io account, click on Add prospects.
Choose Import from file from a drop-down menu.
In the pop-up window, click on Select file.
Choose a prepared import file on your computer and click Upload file.
You’ll be redirected to the import settings page.
Step 2. Map fields
Mapping means matching CSV columns with the prospect fields. This process ensures that all the data from your file is uploaded correctly into the corresponding fields.
Snov.io automatically recognizes the columns in your file by their headers and matches the default fields automatically.
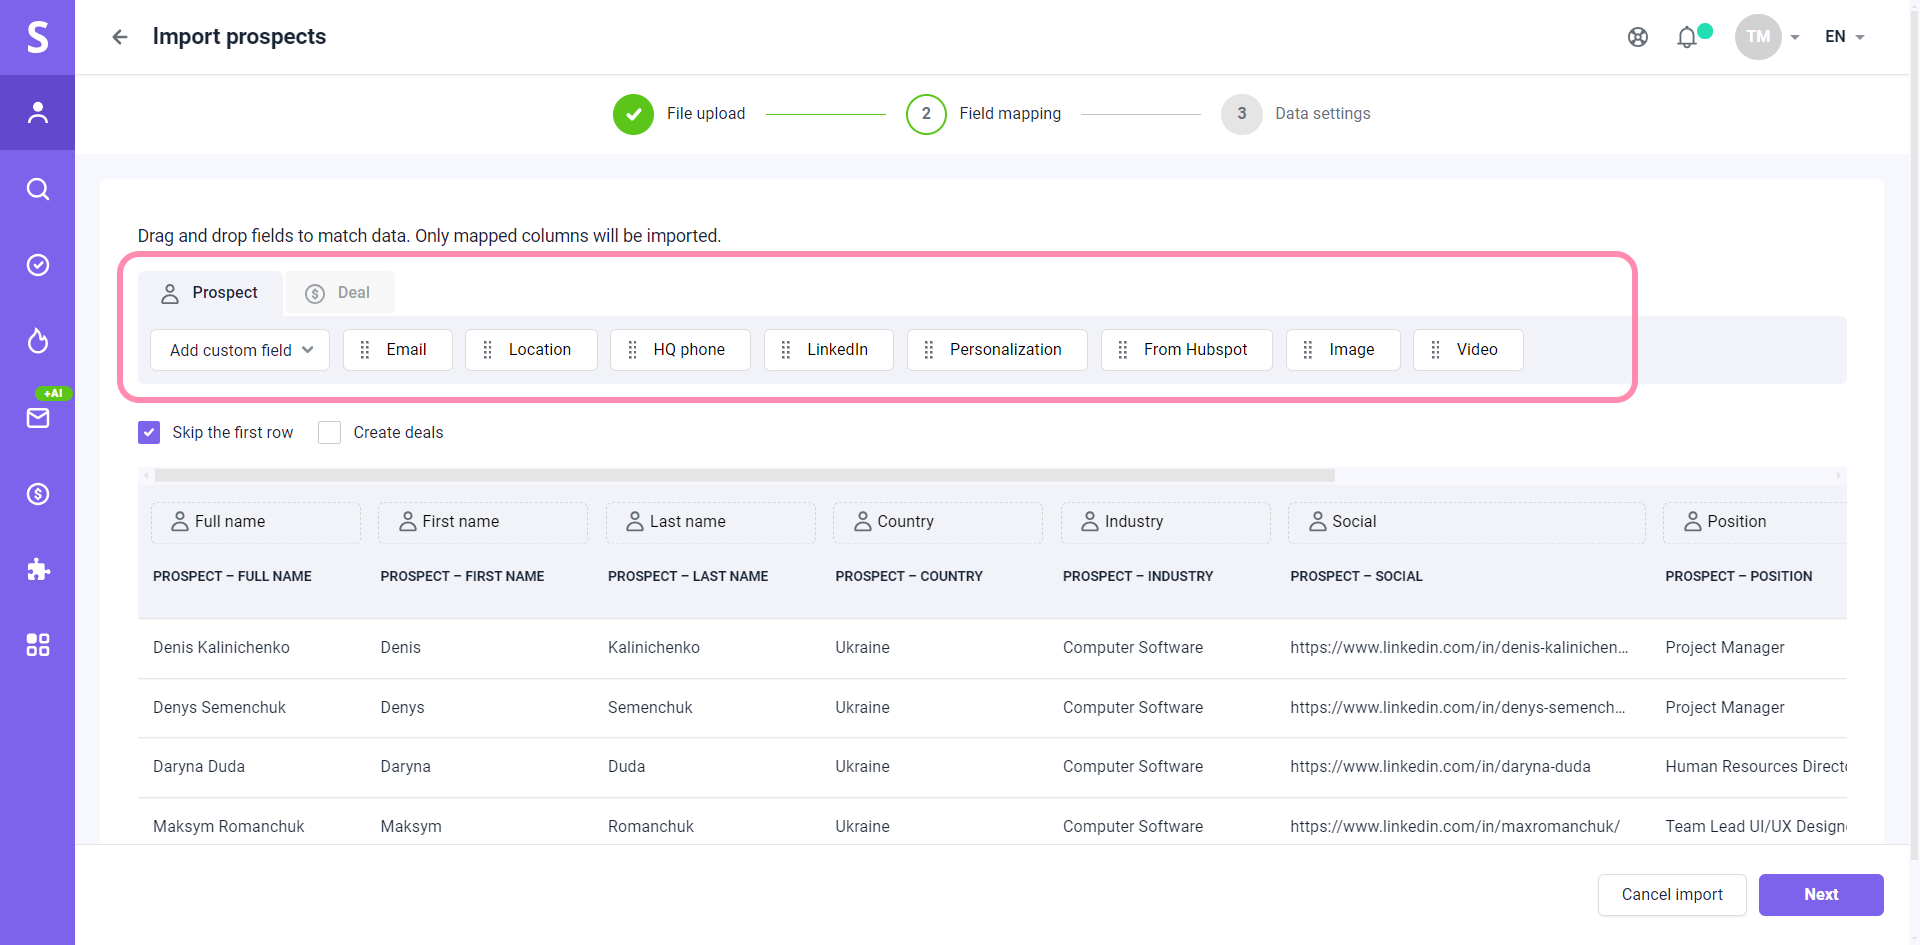
The remaining fields that are not automatically mapped will remain unmapped.
Map fields:
To map a field manually, drag & drop it to the corresponding column header.
Create custom fields:
In addition to the default fields, you can also add custom prospect fields to match the corresponding columns in your file.
Click on Add custom field and select the Prospects field type.
After mapping all fields between your import file and your Snov.io account, click Next to proceed.
Step 3. Set data settings
On this step, you’ll choose the list where you want to upload the prospects and decide how to deal with duplicates.
(1) Use the down arrow button to choose an existing list or create and select a new list directly within this step.
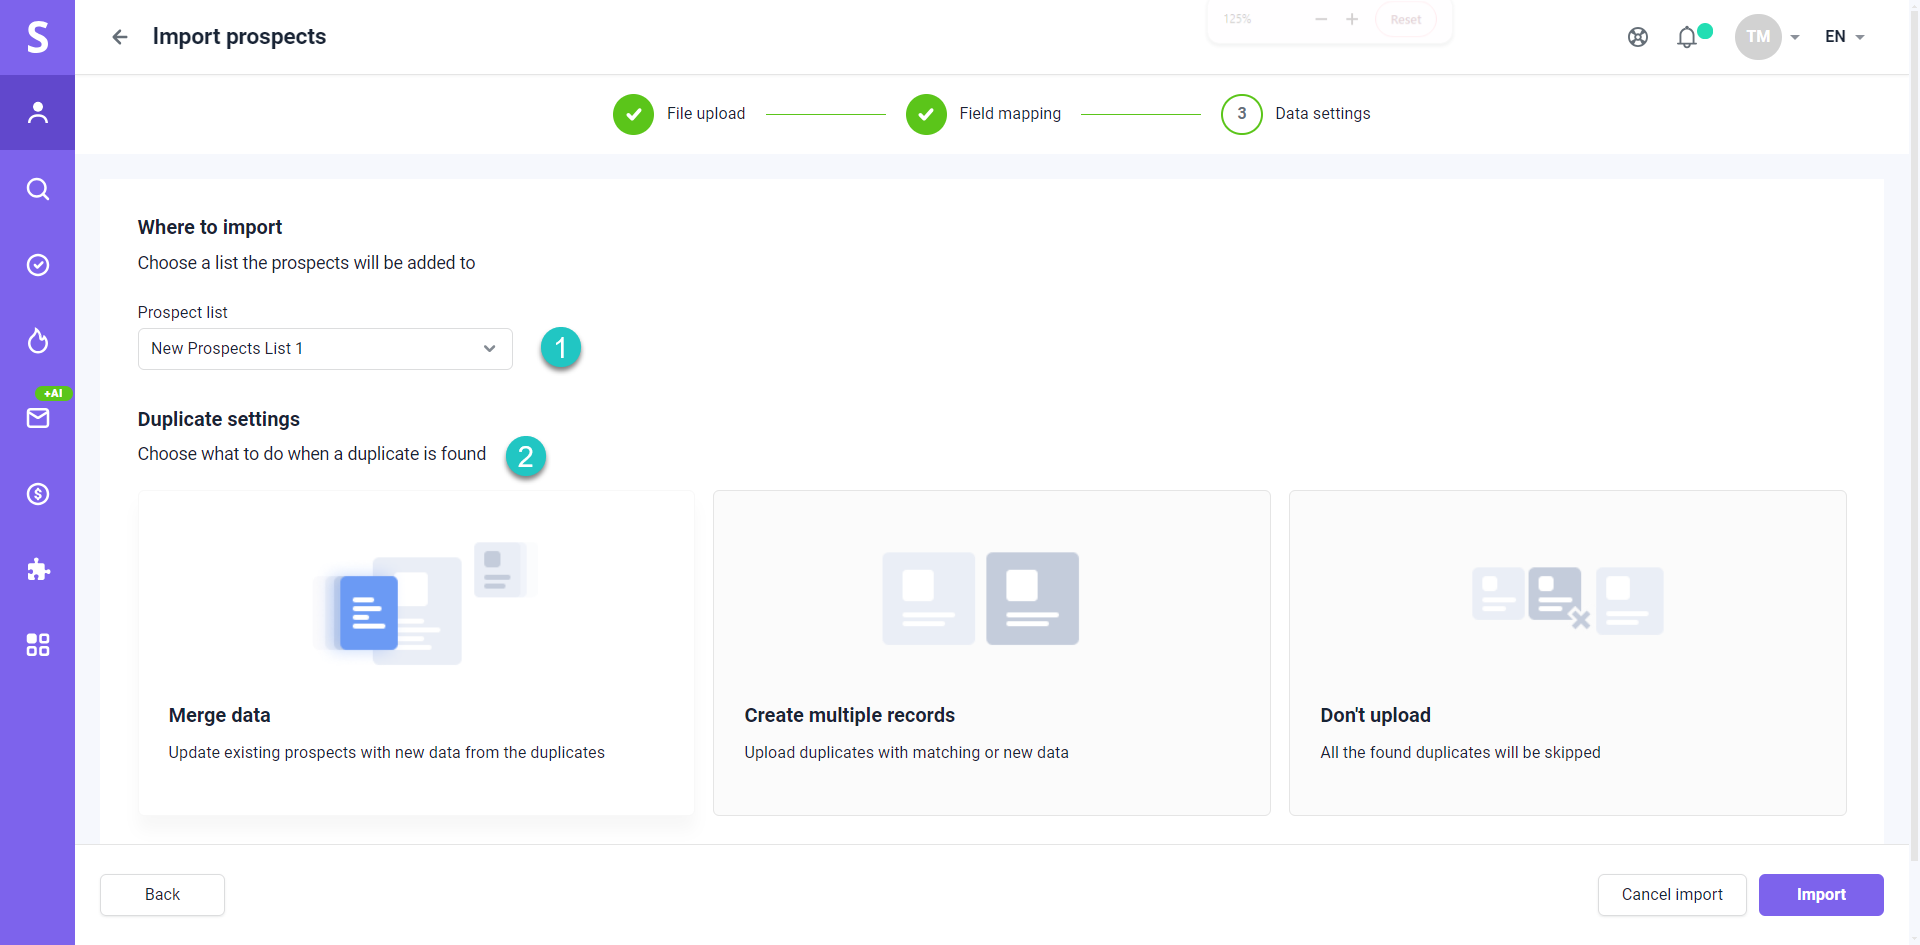
You can also choose what to do with duplicates for better prospect management.
Duplicates are the two prospects with the same email address.
(2) Below is how you can choose to manage duplicates:
-
Merge data (default): Choose this option to add new prospects and overwrite existing prospects with new data from your file. It means that duplicates will be merged into one prospect.
-
Create multiple records: Duplicates found in your file will be imported, and new prospect records will be created.
-
Don’t upload: This option skips all duplicates found in the import file. Select it if you don’t need to update prospects with new data or upload the same prospects again.
Choose how you want to manage the duplicates and click Import.
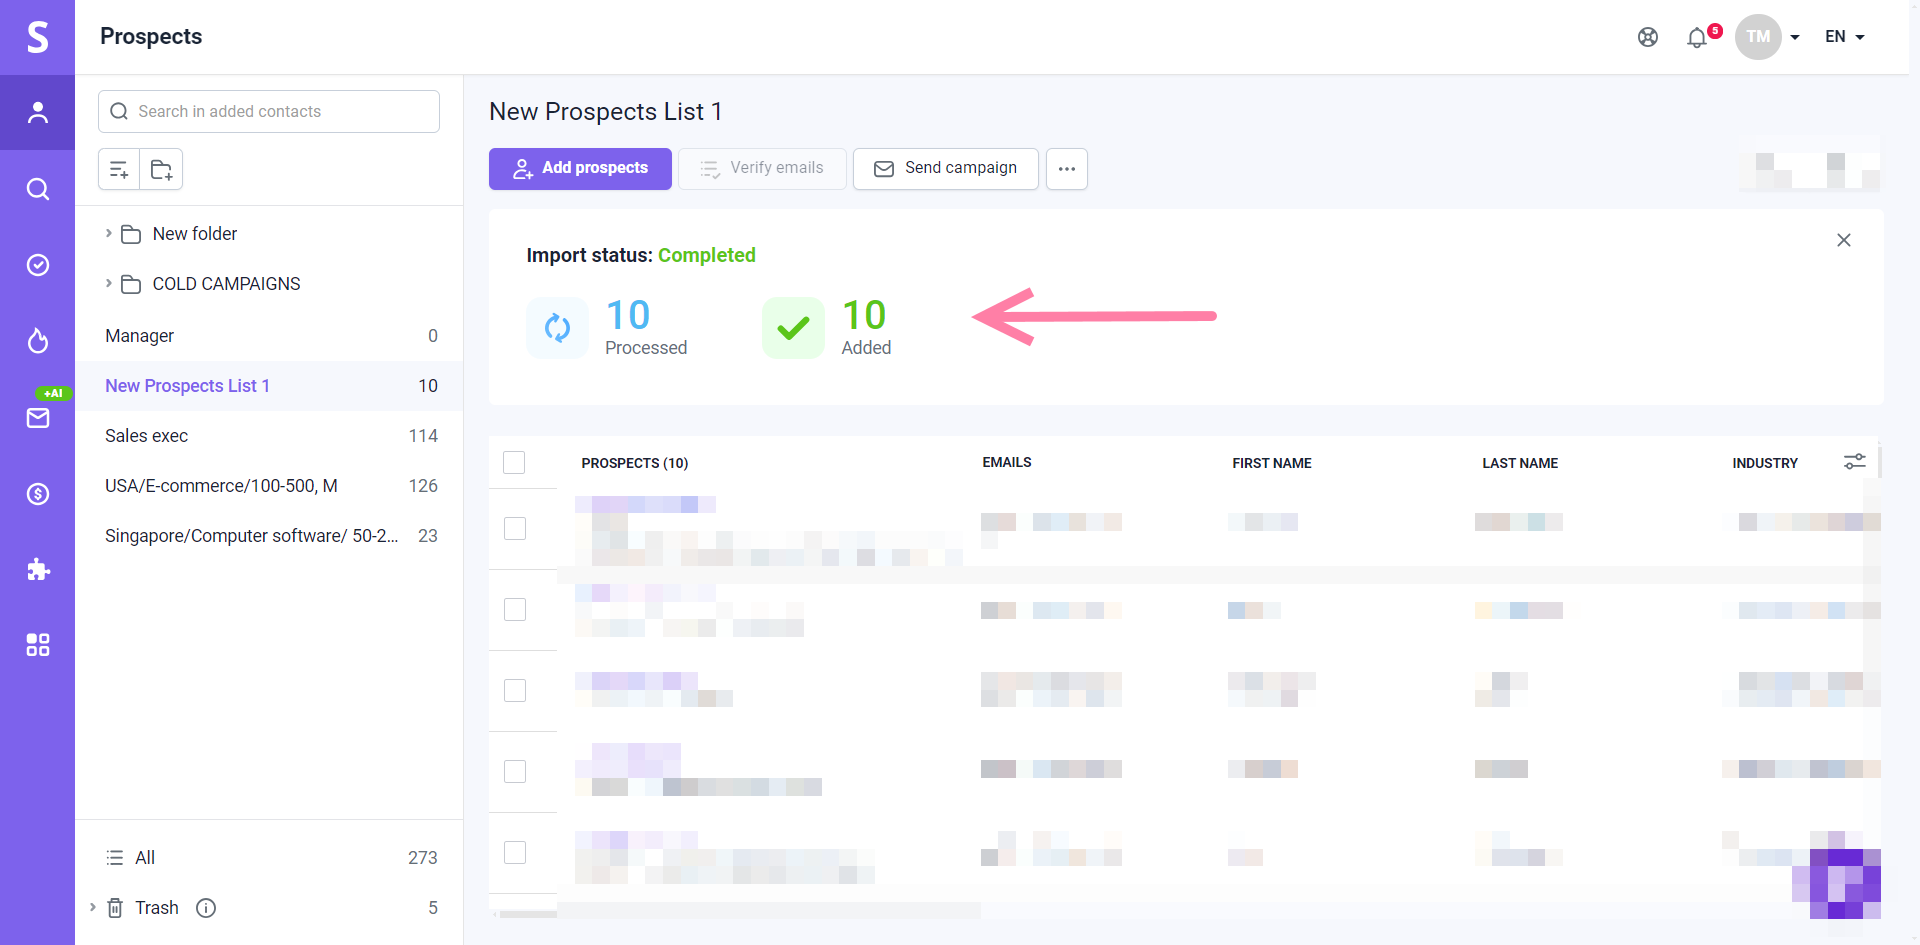
You’ll see the number of prospects added under the Import status section.
If you have a question that we haven’t covered, feel free to reach out to our Customer Care team. You can contact us at help@snov.io or through live chat. We’re here to assist you!


Sorry about that 😢
How can we improve it?