This article introduces you to the Prospects page interface and how to manage prospects from a list view.
As you collect leads through our prospecting tools, they are organized into prospects lists.
Prospects page interface lets you manage you manage your contacts with ease: sort, search, filter, move and delete prospects, add tags, create deals, manage duplicates, configure data columns display.
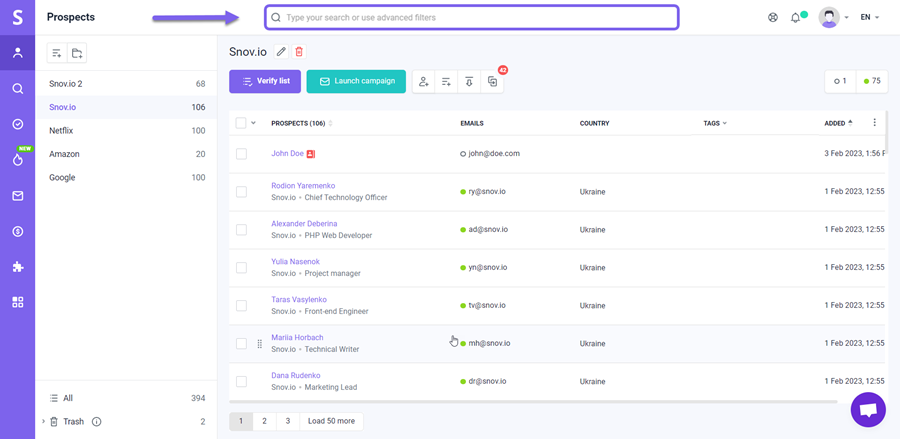
Search and filter
Prospects page lets you quickly search and find necessary profiles based on specified criteria.
Type prospect’s name or domain name or add filters in the search bar at the top.
Search results cover all your prospects lists.
Delete lists
You can move unnecessary or outdated prospect lists to the trash using the three-dot menu.
Here’s how:
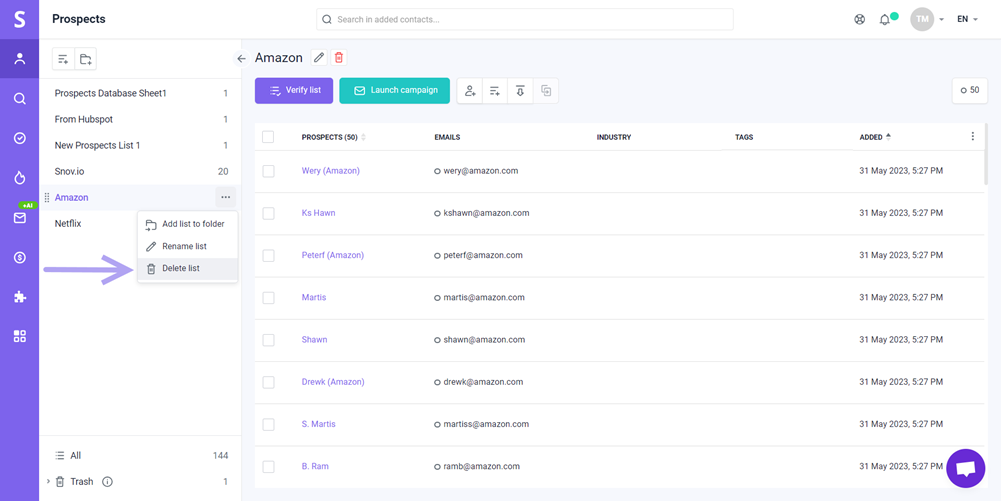
- Click on the three dots next to a prospect list.
- Select Delete list.
- Confirm the deletion by clicking Confirm.
Note: Deleted lists will be kept in the trash for 90 days, in case you accidentally delete them or need to restore them.
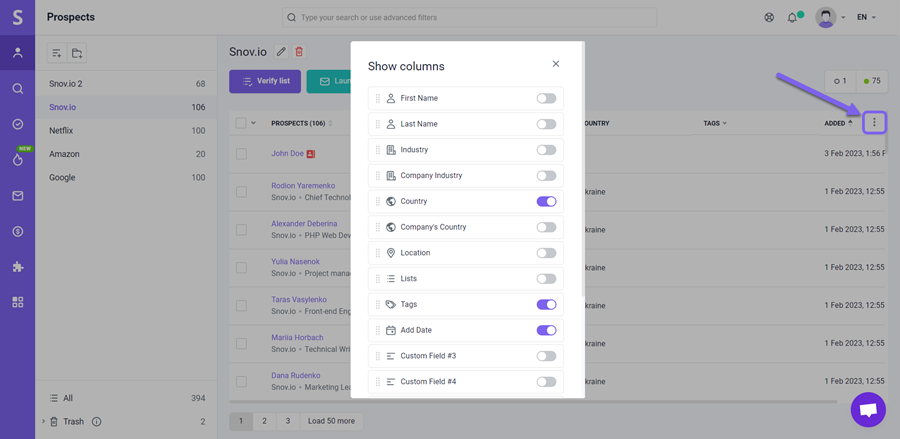
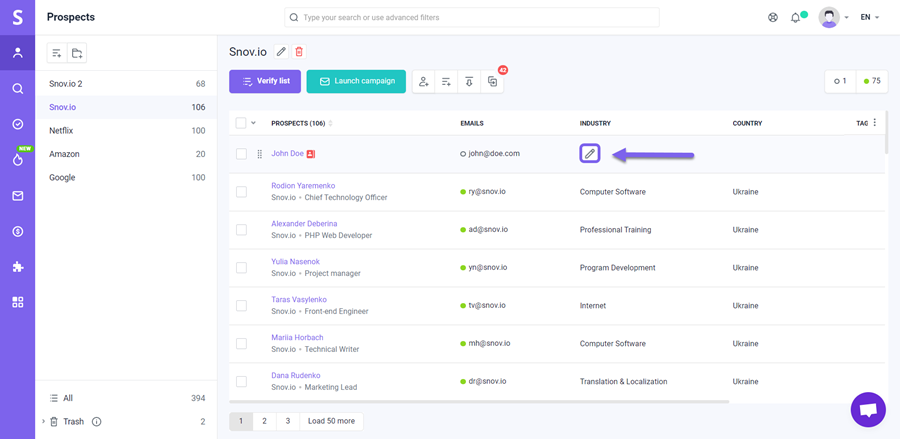
Show or hide data columns
You can edit column display for quick visual access to prospect information.
- Click three dots at the top right corner to open column settings pop-up
- Turn on the switch next to the necessary columns
- Close the pop-up to apply settings
You can also change the columns’ order by dragging them to the right position.
Use Quick actions
Quick actions on the Prospects page let you make basic modifications and actions directly from the list view, without having to open a prospect profile so you can save time and focus on engaging with your prospects.
Quick actions menu is located at the top of the list view and appears when you select (tick a box) one or multiple prospects from the list.
Quick actions include: creating a deal, verifying an email address, adding or deleting tags, moving or deleting a prospect.
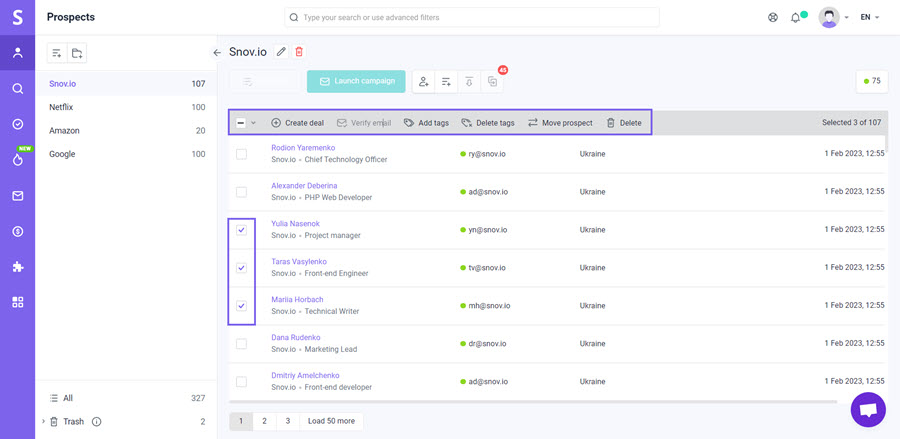
A pop-up window will appear when you select an option, asking you to confirm or select details related to the action.
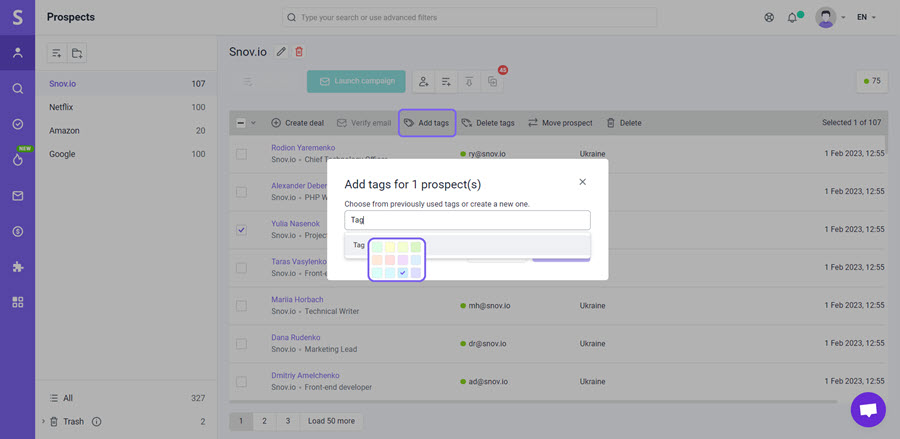
Filter by tags
Snov.io tags prospects based on their status or activities and allows you to add custom tags for filtering purposes.
There are two kinds of tags – system and custom.
System tags include: In campaign, Campaign completed, Contacted, Bounced, Replied, Unsubscribed, and Auto-replied.
Using your own tags, you can label prospects as required.
- Select prospects
- Use Add tags quick action
To filter records in the prospect list based on their tag:
- Open Tags filter box
- Set filter condition: And – to show prospects that have all tags you select; Or – to show prospects with at least one of the selected tags
- Select required tags
- Click anywhere on the prospect list screen to load results
Manage duplicates
Prospects with identical email addresses or those saved to your lists more than once are considered duplicates.
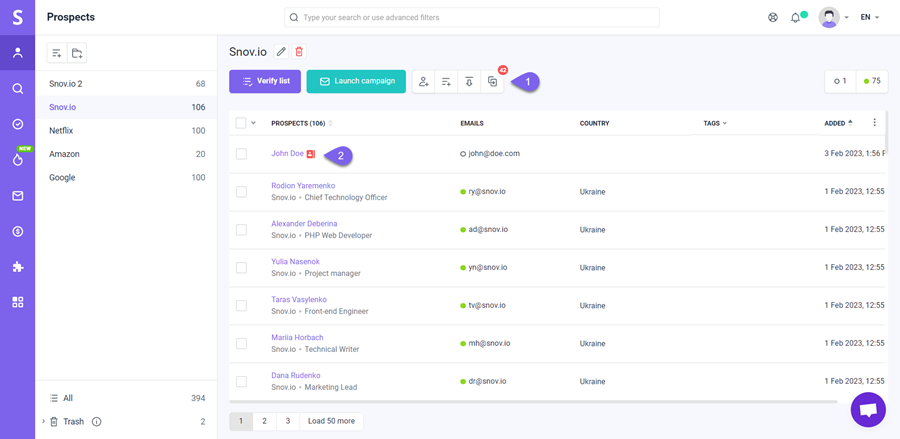
We notify you in two ways if we discover a duplicate presence in your list:
- Alert at the top toolbar
The number that shows number of duplicates in the current list.
Click the Show duplicates to filter the list of duplicates.
2. Alert next to a prospect’s name in a list view.
Notifies you that there are duplicates of this prospect.
Read more about duplicates and how to manage them here.
FAQs and tips
- Drag&drop prospects
Use drag & drop ability to quickly move prospects between lists.

- Inline editing
Edit directly on-screen without opening a prospect profile. Hover a mouse next to any field and click the edit icon.
- Colored tags
You can create tags of different colors for visual reference. Hover the cursor over coloured square and choose the desired color while adding the tag.
Still have questions? Contact our support team at any time at help@snov.io or live-support chat.


Sorry about that 😢
How can we improve it?