

Hyperise is a great image editor tool that allows adding personalization layers to images for your email drip campaigns. With its help, you can capture your recipients’ attention, boost conversions, and improve your customer experience.

Outline:
Hyperise integration with Snov.io.
To integrate Snov.io with Hyperise, follow these steps:
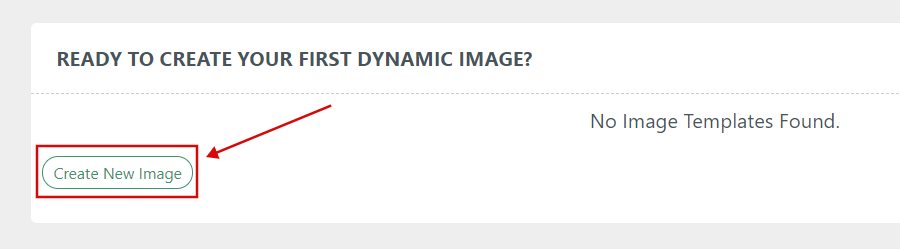
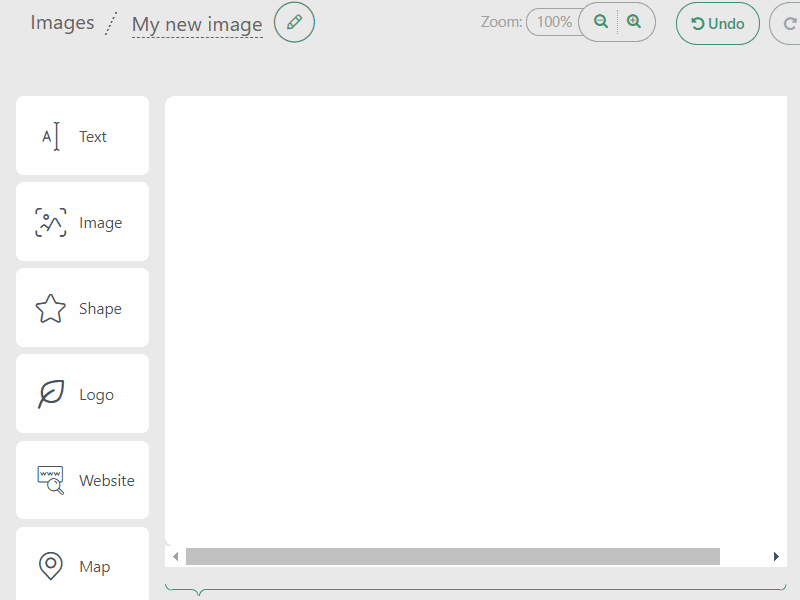
Step 1. In your Hyperise account, click the Create New Image button at the bottom of the page.

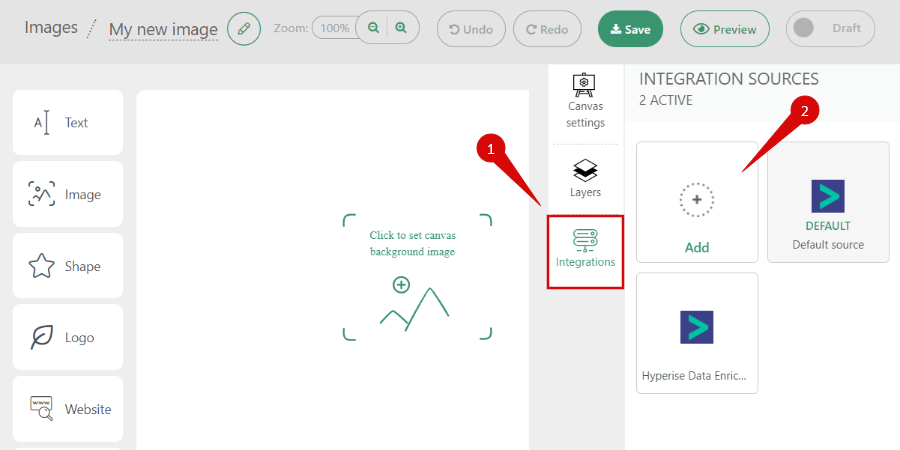
Step 2. Navigate to the Integrations tab and select Add.

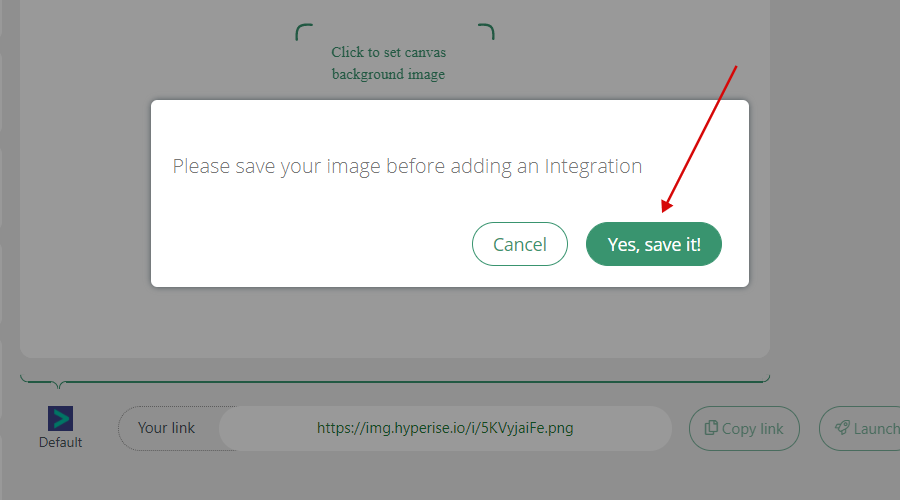
Step 3. Before adding the integration, you need to save the image. Once you click Add, you’ll see the confirmation message. Press Yes, save it!

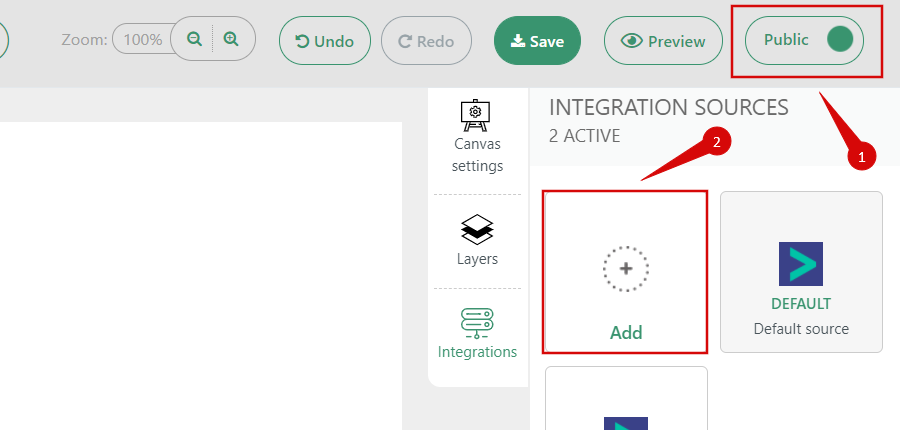
Step 4. Set your image to Public mode in the top right corner to enable personalization and select the Add button again.

Step 5. Find Snov.io in the list of tools and add the integration.
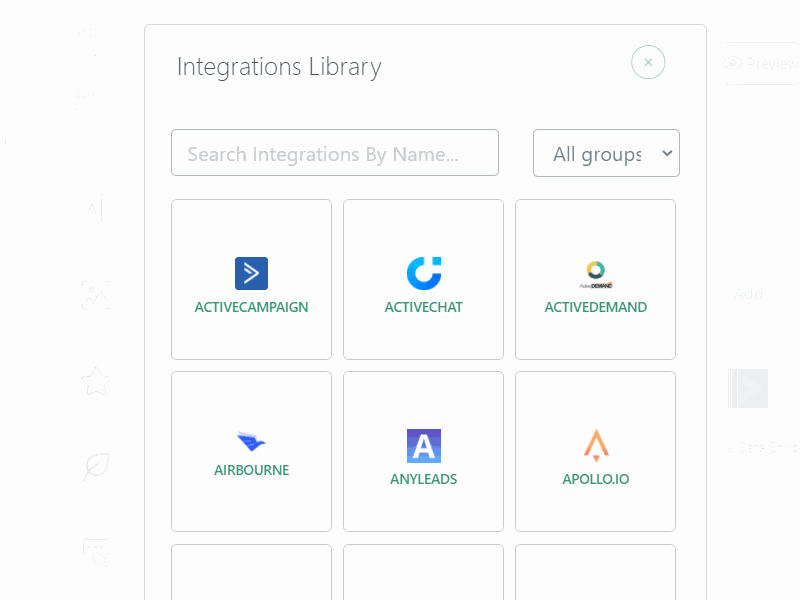

Ready! Now when you see Snov.io among the integration sources, you may start personalizing your image.
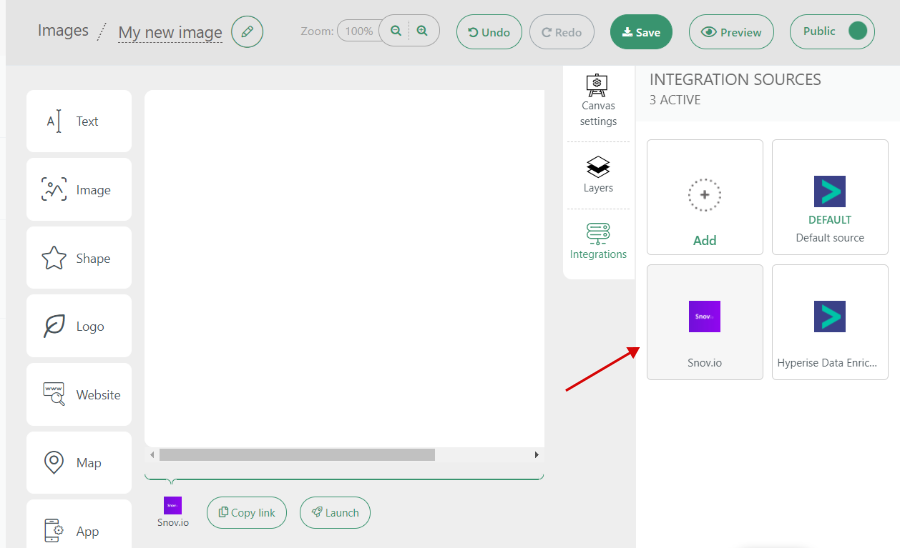

Image personalization
Hyperise provides a variety of elements you can add: Text, Image, Logo, Website, and others. To add any element to your personalized image, simply find it in the menu on the left and drag it onto the canvas.
Image
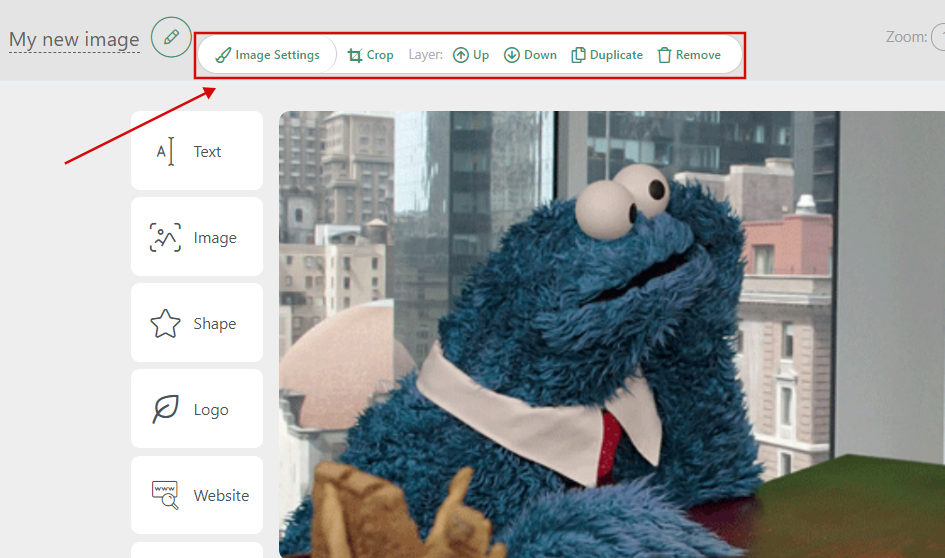
Let’s start with the Image element. Once you drag it onto the canvas, you will have an option to either upload your background image or choose one from the many stock options in the gallery.


Here you can also customize the image in the Image Settings: crop it, rotate it as you like, choose the layer, duplicate, or remove it.

Text
Now drag the Text element onto your image. Here you can format text in the Text Settings, add personalized variables in the Merge Tags, choose the layer, duplicate, or remove it.


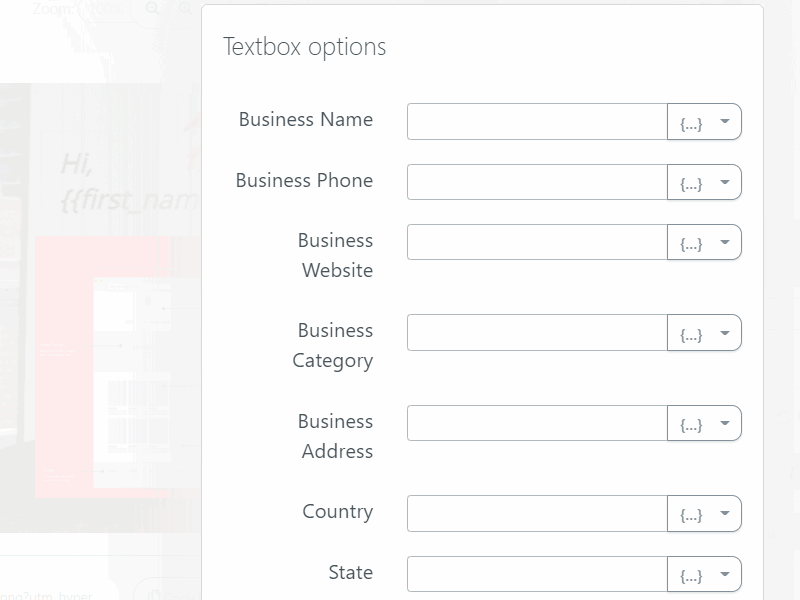
To add the personalized variable, click Merge Tags and select the needed tag. Then, navigate to Text Defaults at the bottom of the page and fill in a word or a phrase you want to appear in your image if your prospect lacks the information necessary to complete the variable.
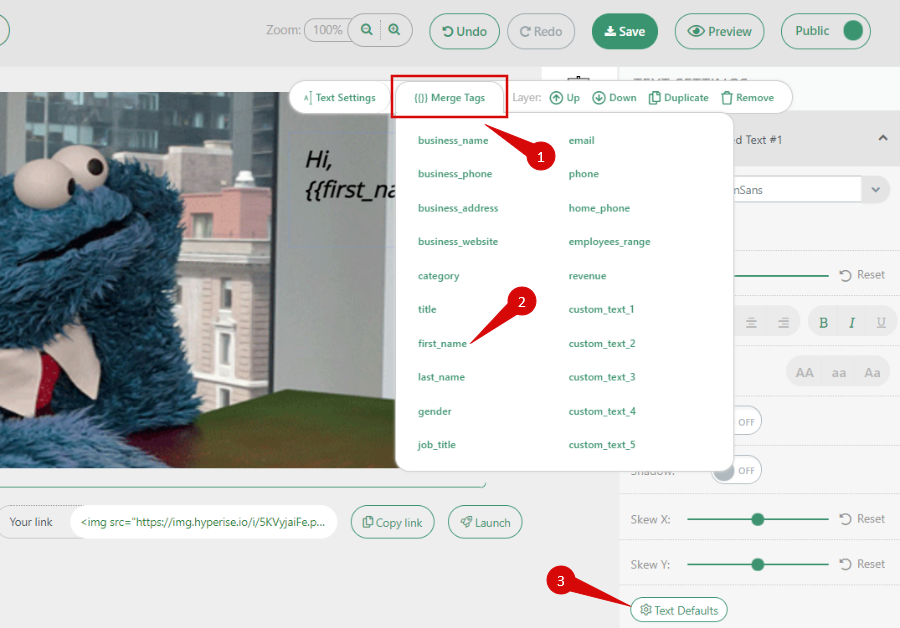

For instance, you may put “friend” instead of a first name. Your recipient will see “Hi, friend!” if they’re missing the initial variable data. Once the text default is inserted, click the Close button at the foot of the Textbox option.
Website
To depict the customer’s website in your image, drag the Website element onto the canvas.
Please ensure that your prospects in the Snov.io account have Company names in their profiles. Otherwise, choose the default picture that will be depicted if prospects are missing the needed variable data. Go to Website Settings and select Image Library.
![]()

Logo
To depict the customer’s logo, drag the Logo element onto the image. Choose the default picture in the Image Library in case the corresponding custom field in Snov.io is not filled for some prospects.
![]()

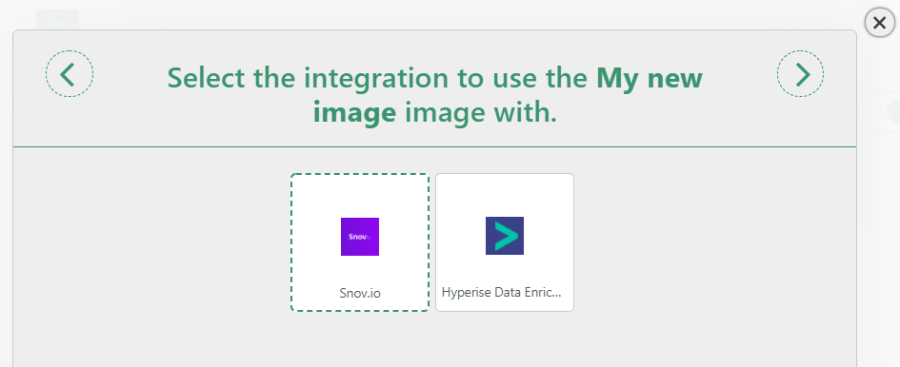
When the image is ready, click Save, then Launch.
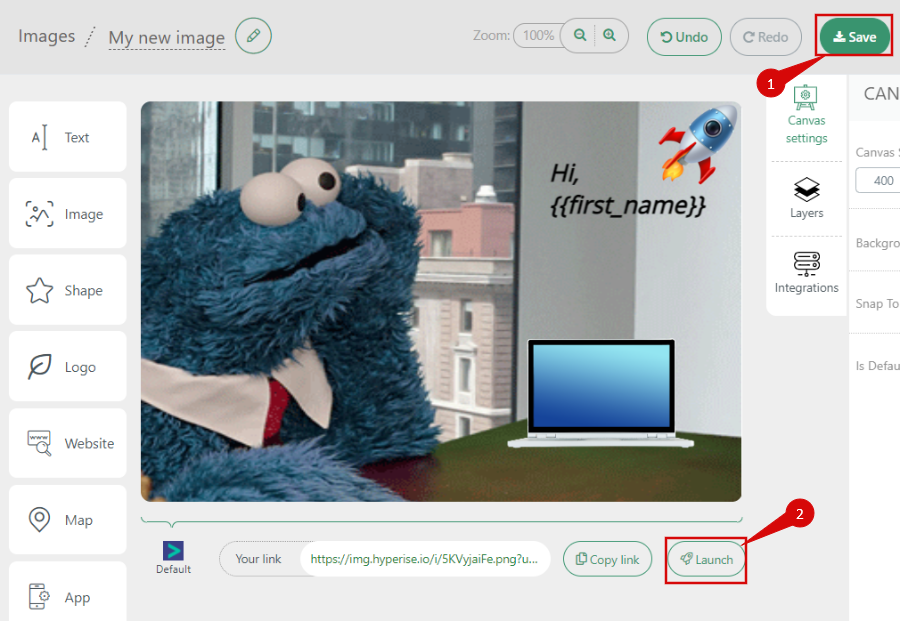

Select the Snov.io integration to use your image with and copy the image link by clicking Copy Code.

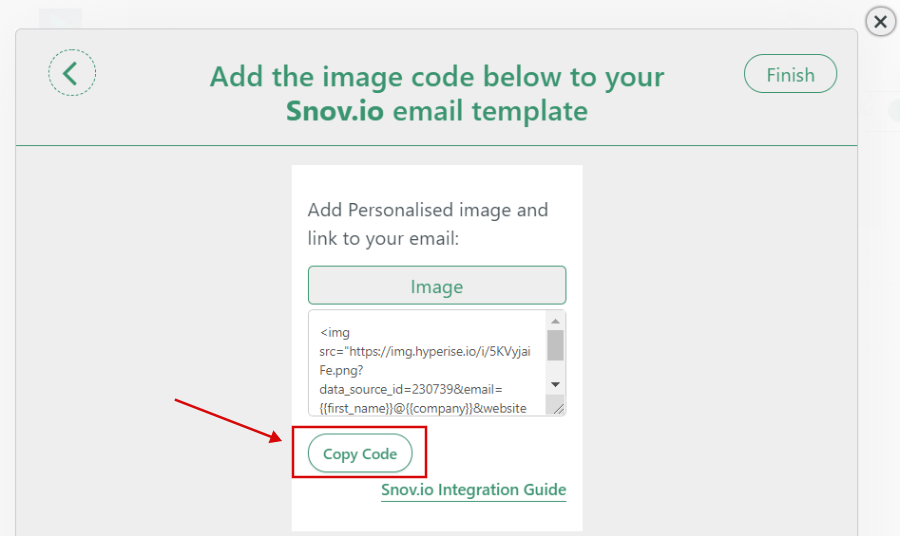

The image link copied will include all the required Snov.io tags to personalize your email.
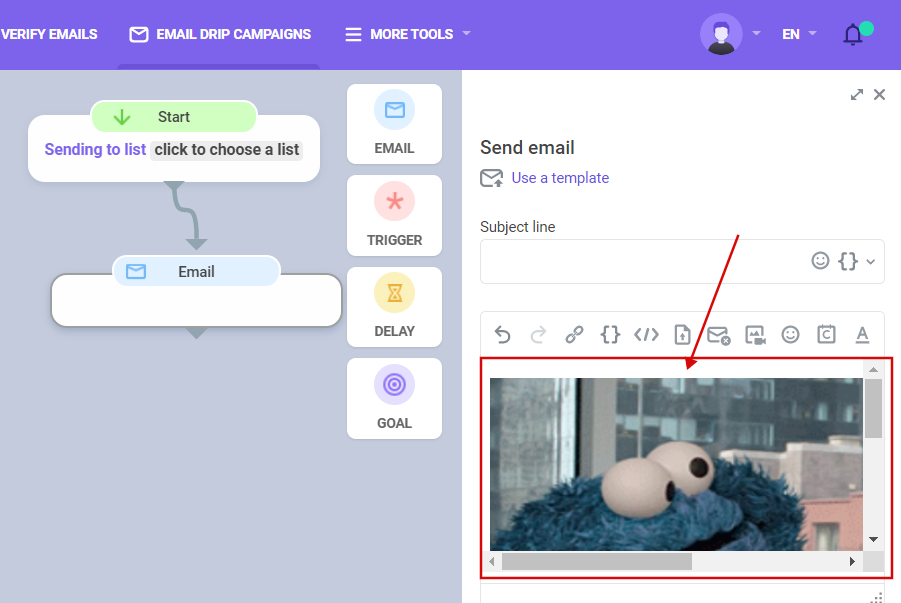
Adding image link to Snov.io message
In your Snov.io account, go to your drip campaign and paste the copied link of the image to the source code of the email.


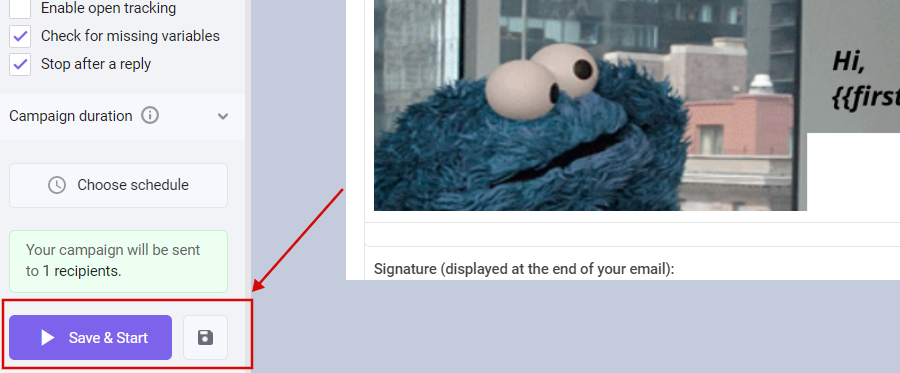
You can now switch back by clicking Ok to see your image template.

That’s it! You may now save and start your campaign. All the prospect data necessary for the image personalization will be created on the fly.

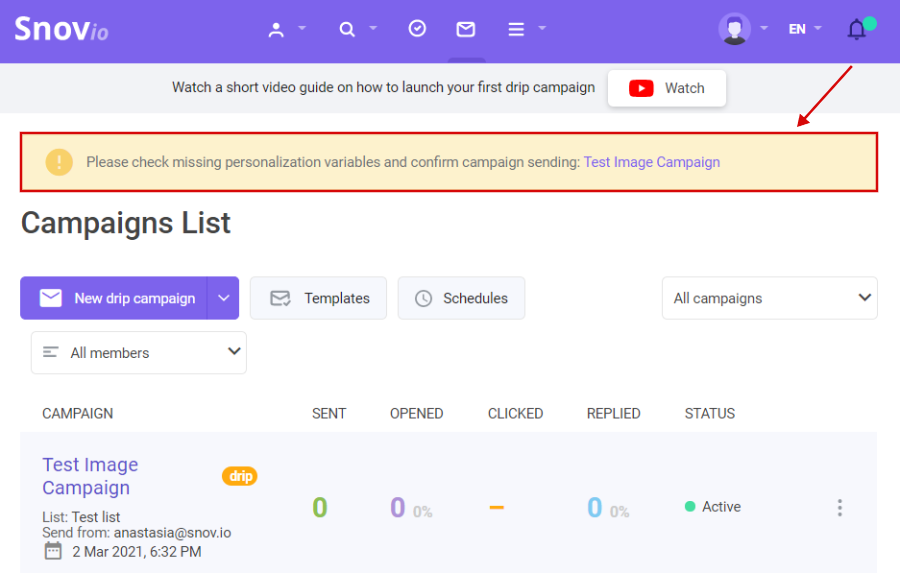
If some of your prospects have missing variables, the campaign won’t be launched for them. You’ll need to fill in the custom fields manually directly in the check box. Then click Save and Send or Send without checking, and your prospects will see the fallback value.

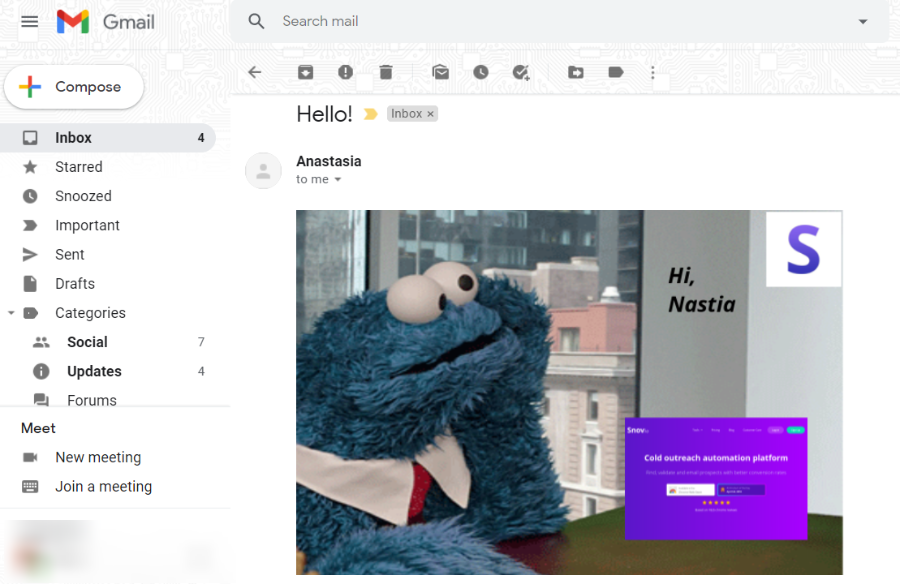
Here’s how an email will be delivered:

Contact us if you have any additional questions. We are here to support you! 🙂