

This article explains how to send InMail messages automatically in LinkedIn campaigns. The InMail action is available as a part of our Linkedin automation tool.
How to use InMail in the sequence
How to continue the sequence after InMail
How LinkedIn policies affect the “InMail” action
How to monitor InMail statistics
Using the InMail action, you can send messages to prospects you’re not connected with on LinkedIn. This allows you to get in contact faster, without having to wait until they accept your connection request.
When it’s most effective to send InMail messages:
InMail is useful for contacting leads with high conversion potential when you can’t send regular messages because they’re not part of your LinkedIn network.
How to use InMail action in the sequence
The purpose of InMail in the sequence is to contact leads who haven’t accepted your connection request. For those who are already in your LinkedIn network, use a regular Message.
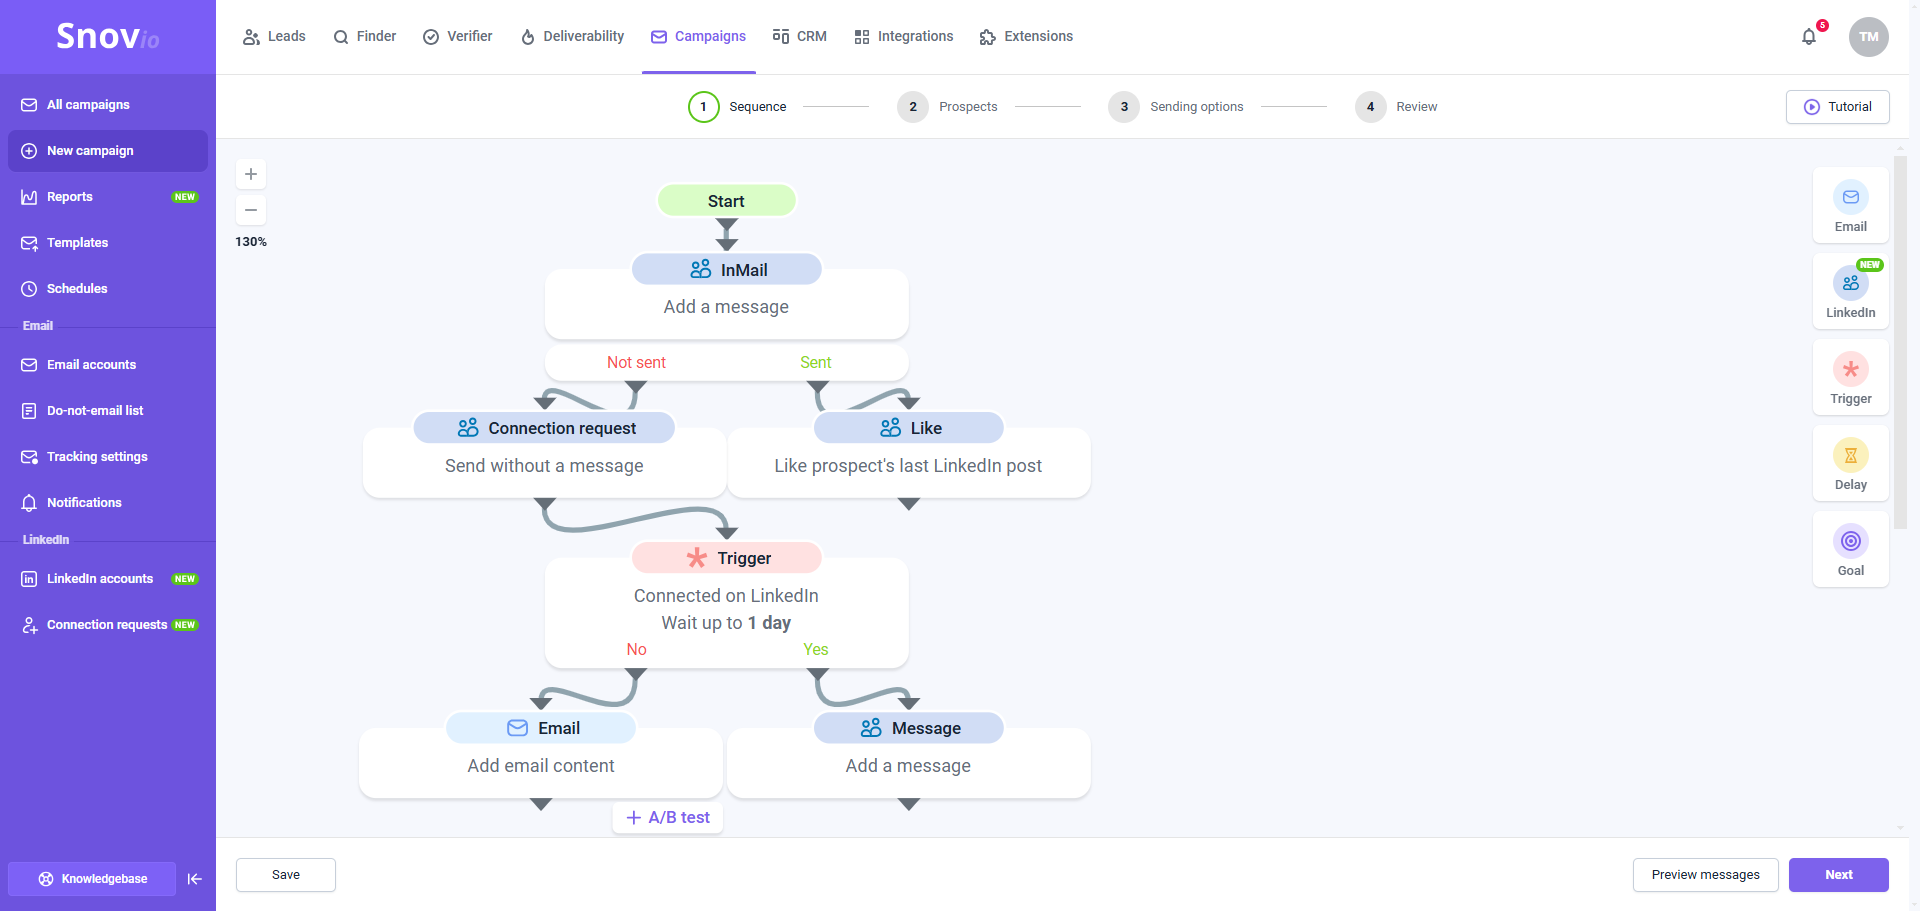
To include an InMail message in your sequence, add a LinkedIn step and select InMail from the LinkedIn actions menu while creating your sequence.
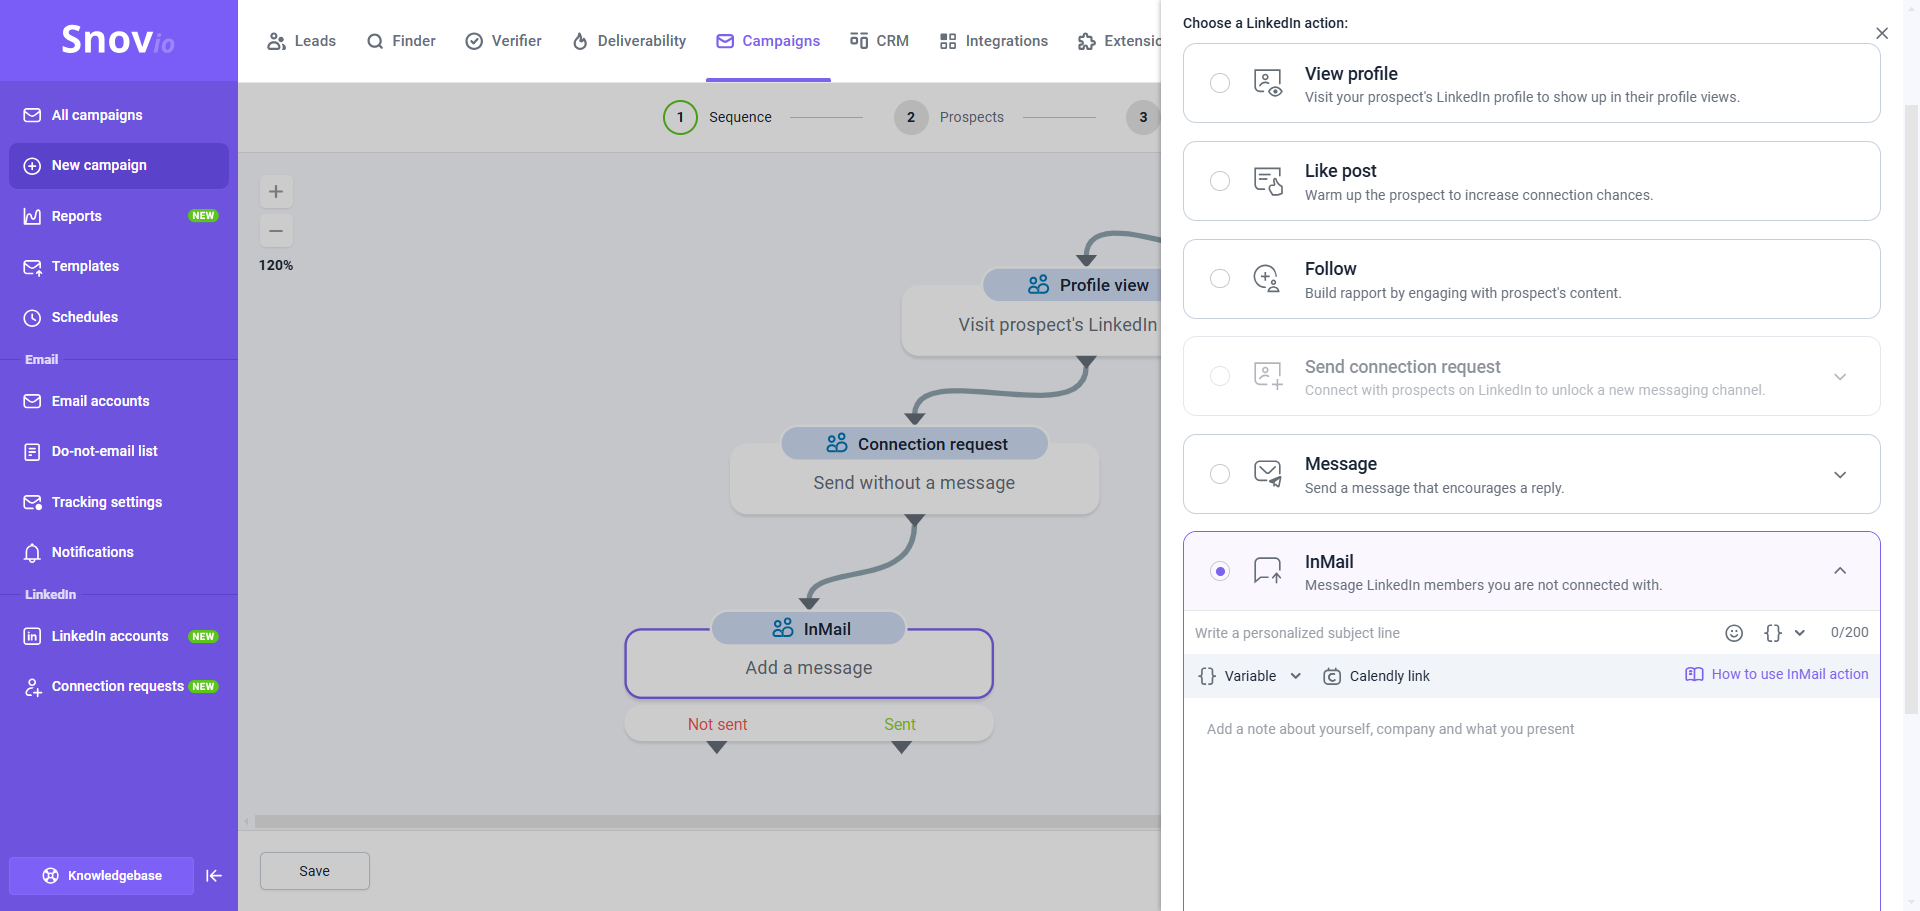

We’ll describe a few examples of how to use InMail in your sequences to maximize its value.
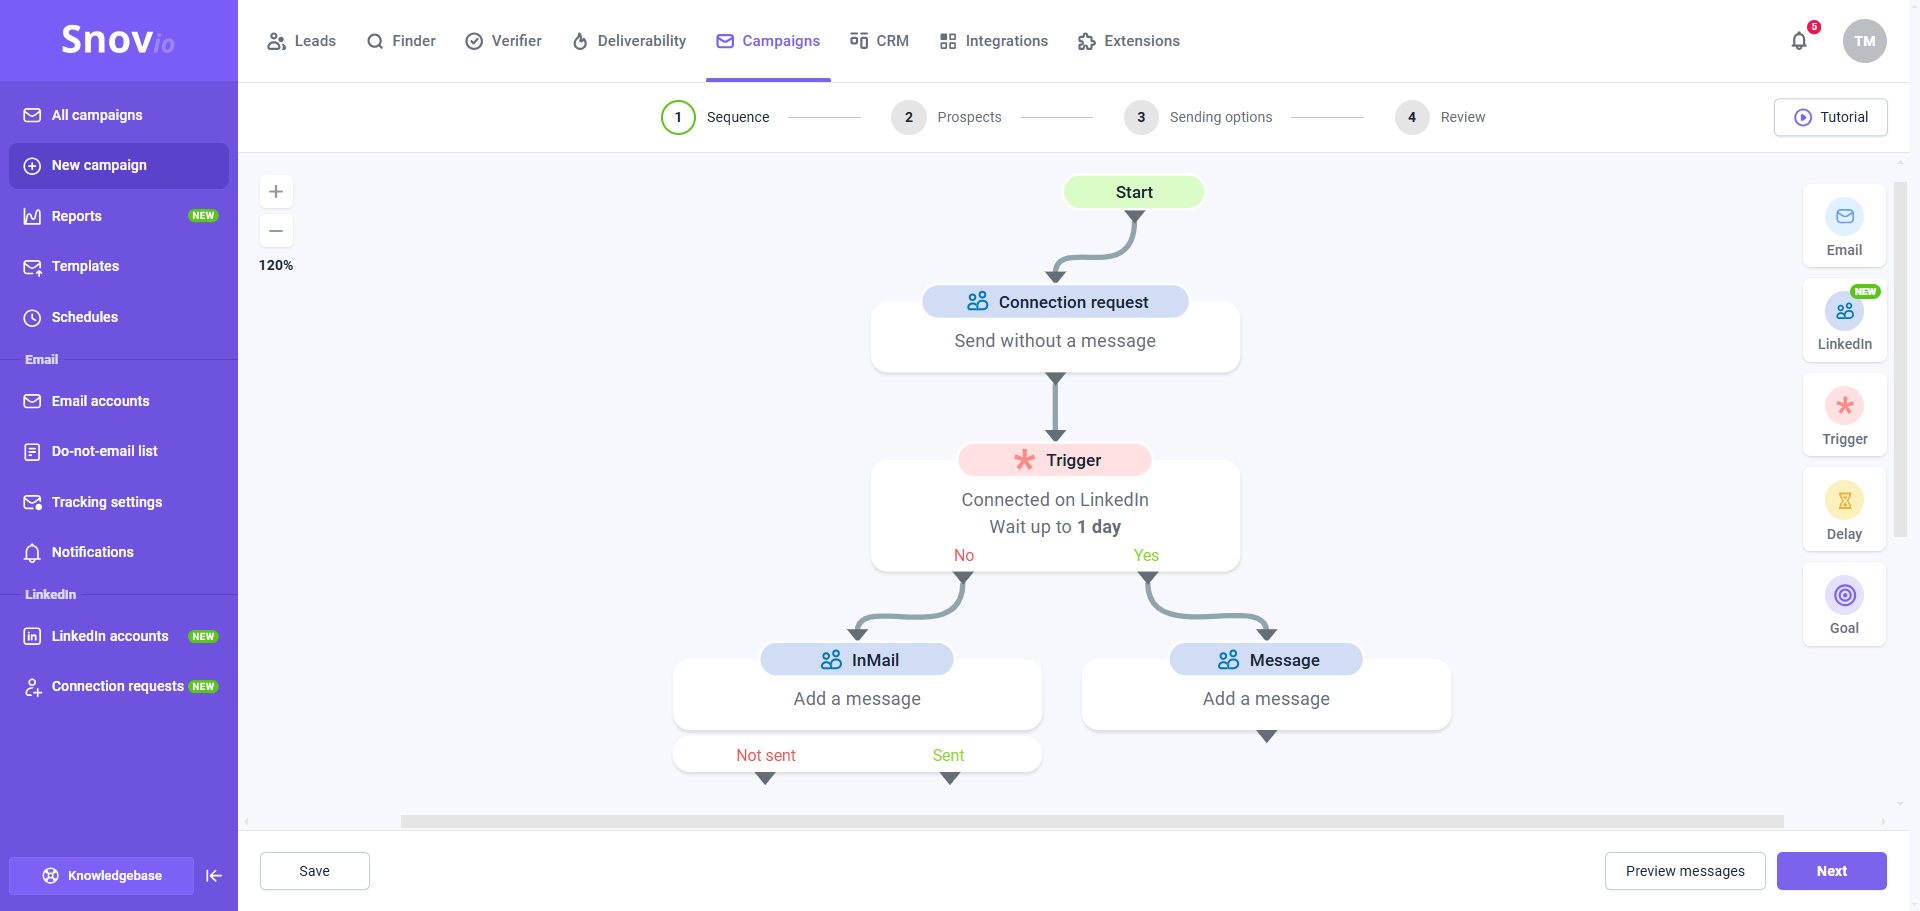
→ Condition (Check if connected on LinkedIn) → Message (Yes) → InMail (No).
You can place an InMail at any point in your sequence, whether as the starting step or before/after any other LinkedIn action or step. However, it is most effective to add an InMail after a connection request in the sequence.
InMail messages can only be sent to prospects who are not in your LinkedIn connections. Use the "Condition" element to check if prospects are already in your network before sending an InMail.
Add InMail for the "No" option (Not connected). Add a Message for the "Yes" option (Connected). Creating alternative flows with different contact methods ensures you don't miss a potential response.
In this case, the sequence will work like this:
- If a prospect hasn't accepted your connection request, they will receive an InMail.
- If a prospect has accepted your connection request, they will receive a regular message instead.
How to continue the sequence after the InMail
After the InMail step, the sequence can continue in one of two optional ways, depending on the outcome. This helps you add the next steps based on whether the InMail was sent or not.
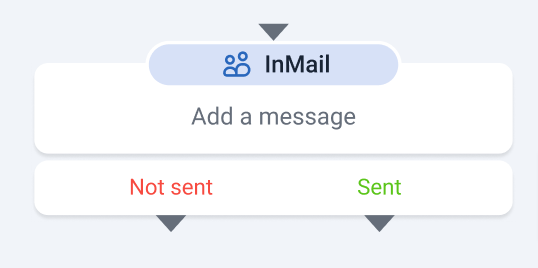

1) Sent – The InMail was successfully sent. In this case, you can either wait for a reply or maintain engagement with a profile view, follow or a like.
Due to LinkedIn's policy, you can’t send a follow-up InMail until the prospect responds to the first message. Replies to InMail messages stop the sequence for the recipient.
2) Not sent – The InMail could not be sent. In this variant, you can continue the sequence with another action or contact through an alternative channel (Email). This way, you'll avoid cases where the sequence might stop and not reach the recipient if InMail couldn’t be sent.
There are a few reasons why an InMail might not be sent:
- You've reached your InMail credit limit.
- The prospect is already one of your LinkedIn connections.
- The prospect's privacy settings prevent them from receiving InMail messages.
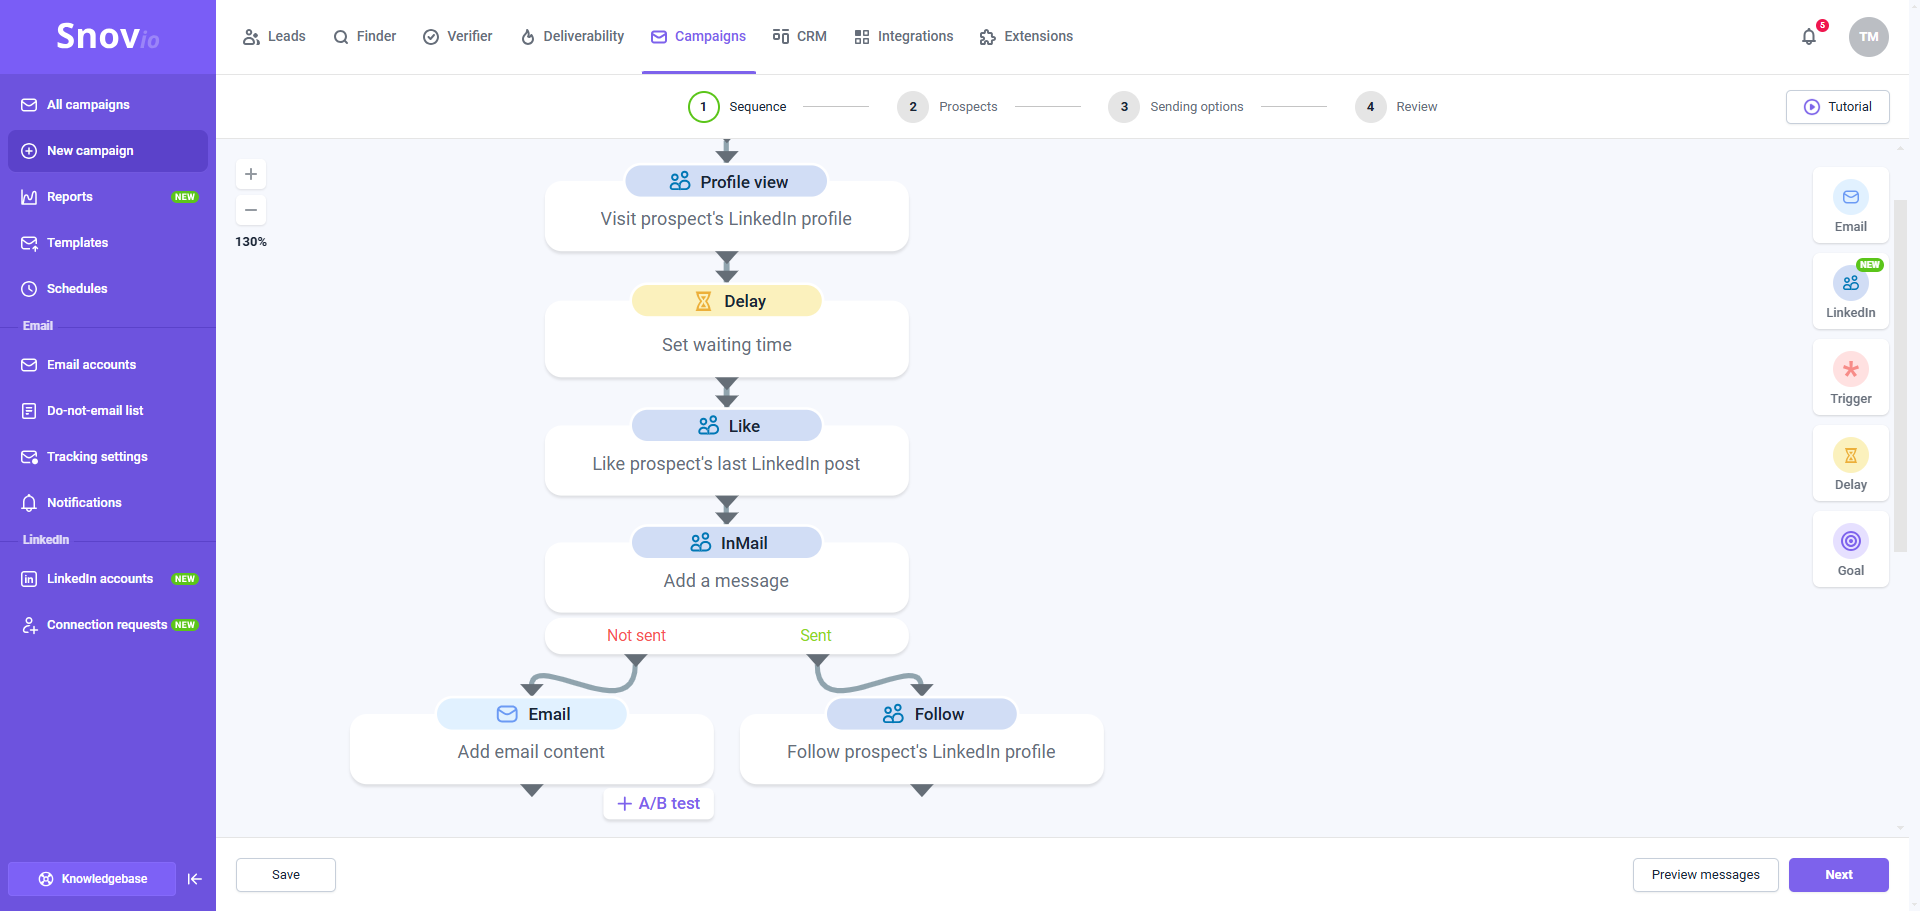
Sequence example #2: Profile view → Delay (1-2 days) → Like → InMail (Not sent) → Email.
This scenario uses InMail after some initial engagement actions. If InMail cannot be sent, the sequence will automatically switch to Email as a backup channel.
→ Condition (Check if connected on LinkedIn) → (Yes) Message – (No) Email.
In this example, if InMail cannot be sent, the sequence will send a connection request. This step opens up the ability to send a regular LinkedIn Message. If the prospect does not accept the connection request, the sequence will send an email.
What are the InMail limits on LinkedIn
Snov.io does not limit the use of InMail; you just need a unique recipient quota to contact prospects through InMail actions in sequences.
However, sending InMails from your LinkedIn account requires InMail credits, which are provided by LinkedIn.
The exact number of InMail credits you get depends on your LinkedIn subscription type. You receive InMail message credits every month based on your account type. When you run out of InMail credits, you’ll have to wait until your renewal. To increase your monthly credit limit, upgrade your LinkedIn account. You can check your available InMail credits in your LinkedIn profile settings.
InMail credits per month
This is the number of InMail message credits you receive monthly based on your LinkedIn account type:
- Premium Career: 5
- Premium Business: 15
- Sales Navigator Core: 50
- Recruiter Lite: 30
Maximum InMail message credits
This is the maximum number of InMail message credits you can accumulate on your balance in total:
- Premium Career: 15
- Premium Business: 45
- Sales Navigator: 150
- Recruiter Lite: 120
How the sequence works when you reach the InMail limit:
If you reach your InMail limit on your LinkedIn account, the sequence in Snov.io won't be able to send InMail messages. To avoid interruptions, ensure you add an alternative step under the "Not sent" option or remove the InMail step and use connection requests instead.
How LinkedIn policies affect the InMail action
LinkedIn classifies InMail messages as a Premium feature. Your ability to use the InMail action in campaigns depends on your LinkedIn plan.
If you have a Basic (free) LinkedIn plan
- You can send InMail messages to LinkedIn members who’ve enabled the Open Profile in their settings. These messages don’t use InMail credits.
- If a prospect’s profile is closed, the InMail step will not be completed.
If you have a LinkedIn Premium plan
- You can send InMail to any prospect who isn’t in your 1-st degree connections, including both free and Premium LinkedIn members.
- If the prospect has “Open Profile”, sending them an InMail is free. If their profile is closed, one InMail credit will be used for each InMail.
Even with the Premium LinkedIn plan, there are some exceptions when the InMail message may not be sent:
--> The prospect has disabled InMails
LinkedIn members can disable any inbound InMail. It can’t be sent if the prospect has turned off receiving it from anyone in their settings.
--> You don’t have InMail credits
Your InMail credits from Premium can't be used to send InMail to prospects who have Sales Navigator or LinkedIn Recruiter. Your account type must match theirs.
How to monitor InMail message statistics
Snov.io tracks statistics for InMail actions, allowing you to monitor their volume and effectiveness.
The InMail statistics include the number of InMail messages sent and the number of InMail replies received. To view these metrics, open the campaign’s Statistics dashboard for the LinkedIn channel.
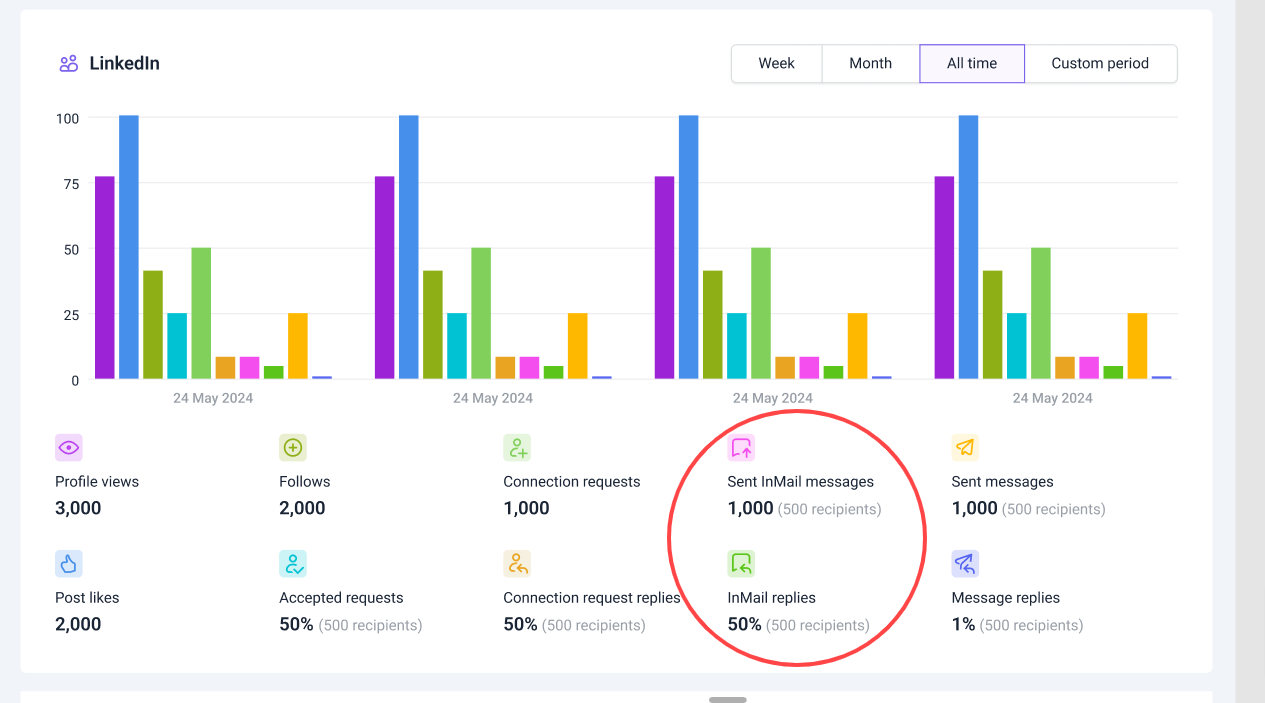

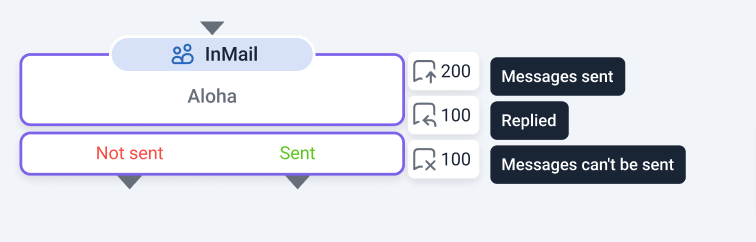
You can also check InMail metrics on the sequence Overview tab. Hover over the InMail step in the sequence and see metrics for this specific action.

If you have a question that we haven't covered, feel free to reach out to our Customer Care team. You can contact us at help@snov.io or through live chat. We're here to assist you!