This tutorial explains DKIM record and how to set it up in your domain settings to improve email deliverability. Before you begin: Make sure you have admin access to: your email provider's admin settings your domain's DNS settings (via your domain registrar account).
A DKIM record adds a digital signature to emails sent from your domain. It plays a key role in email authentication and is used by mailbox providers and spam filters.
Why DKIM record is important:
1) Signs your emails with encrypted keys (that act as your digital signature).
2) Confirms to recipient servers that emails are really sent by you.
3) Improves your domain health and strengthens your sender reputation.
DKIM record explained
The DKIM value consists of two keys generated by your email service provider.
- Private DKIM key: When you send an email, your email provider uses the private key to sign it.
- Public DKIM key: Added to your DKIM record and used by recipient servers to check the email signature. The recipient's server then checks the public key in your DKIM record to confirm that the email is trustworthy.
Your email provider should generate the necessary DKIM keys for you.
Then, add the DKIM values from your provider to your domain's DNS settings. Since Snov.io sends emails directly from your email account, you don't need to add Snov.io to your DKIM record.
Here’s an example of a DKIM record: (this is just an example; don't use it in your actual record).
v=DKIM1; k=rsa; p=MIIBIjANBgkqhkiG9w0BAQEFAAOCAQ8AMIIBCgKCAQEA7vPxh6zZ7nBLj1QUXGEXAMPLEKEY...
- Record type: Always use a TXT type for DKIM records.
- Host/Name: The value for this field is taken from DKIM settings generated by your email provider.
- Value/Content: This field contains public key. p = This is your public key, generated by your email provider.
How to set up DKIM for your domain
The DKIM record is set up in your domain's DNS settings.
Step 1: Generate DKIM keys in your email provider
The first step is to generate DKIM keys in your email provider's admin settings. For example, let’s use Google Workspace. If you're using other email provider, contact them to get the DKIM values.
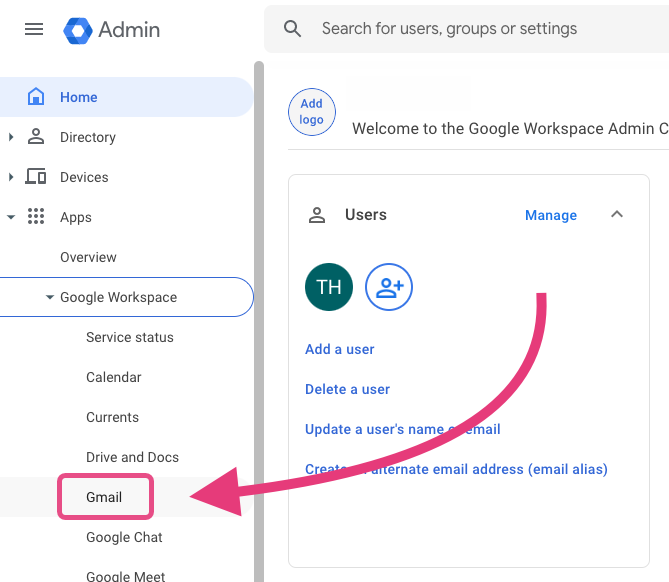
In the Google Admin console, follow this route: Apps > Google Workspace > Gmail. Click on Authenticate email.


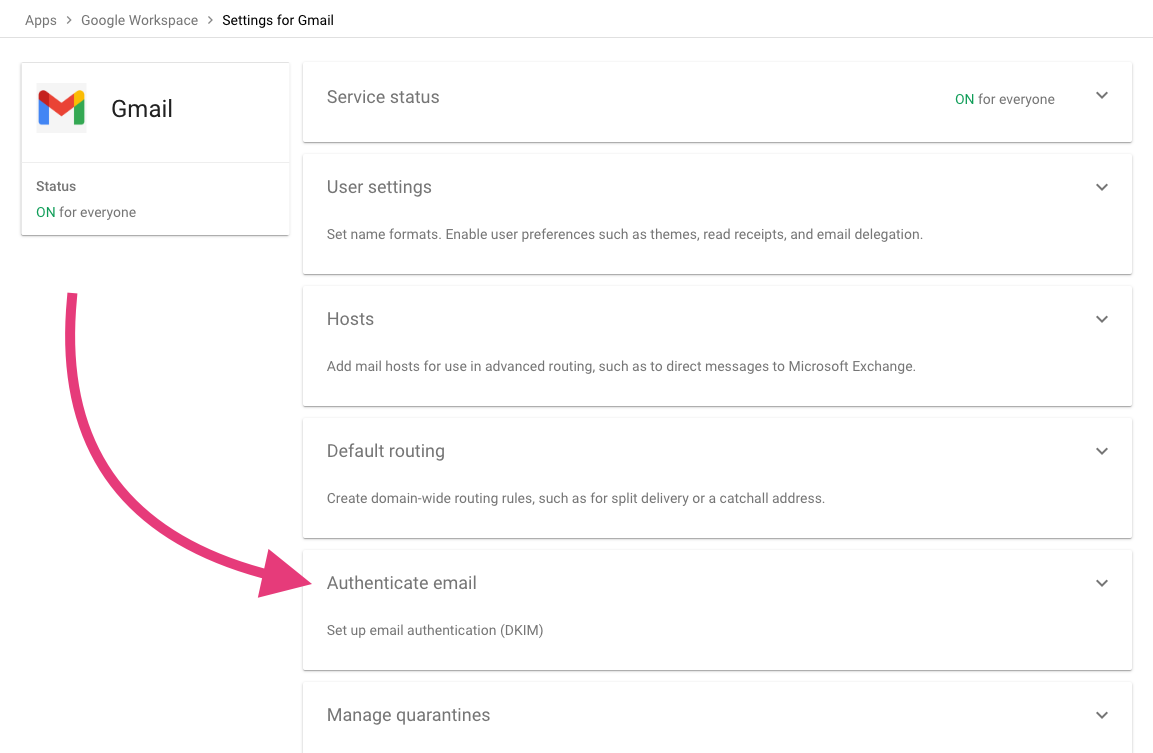
In the next menu, find the option to generate new DKIM settings. Copy the generated DKIM values and update your domain's DNS settings. Make sure you copy and paste the DKIM value (Hostname and TXT record) exactly as provided.
After completing this step, you may need to return to your provider's settings to activate DKIM. For detailed instructions, refer to Google's official documentation.
Step 2: Create DKIM record in your domain
To add DKIM to your domain, add a new record in your domain's DNS settings.
To access domain settings, log in to your domain hosting account — the platform or service where you purchased your domain name.
If you already have a DKIM record in your DNS but are unsure which email provider it belongs to, check the record to identify the provider. If you use multiple providers for sending emails, add a separate DNS record for each provider, as one record can contain only one DKIM value.
Open DNS settings and find the option to create a new record. Add the DKIM settings from your email provider to a new DNS record.
Your DKIM record parameters should have the following values:
- Record type: TXT
- Host/Name: Paste the default Hostname value provided by your email provider for DKIM (e.g., google._domainkey).
This part depends on your email provider and may look like this:
example._domainkey or example._domainkey.yourdomain.com
v=DKIM1; k=rsa; p=MIIBIjANBgkqhkiG9w0BAQEFAAOCAQ8AMIIBCgKCAQEA7vPxh6zZ7nBLj1QUXGEXAMPLEKEY...
Here's the list of Hostnames for popular email service providers:
*replace yourdomain/subdomain with your actual domain address.
Google Workspace (formerly G Suite): google._domainkey.yourdomain/subdomain
Microsoft 365 (formerly Office 365): selector1._domainkey.yourdomain/subdomain
Amazon Web Services (AWS) SES: amazonses._domainkey.yourdomain/subdomain
SendGrid: s1._domainkey.yourdomain/subdomain
Mailchimp: k1._domainkey.yourdomain/subdomain
Zoho Mail: zoho._domainkey.
Yahoo Mail: yahoo._domainkey.yourdomain/subdomain
Mailgun: mg._domainkey.yourdomain/subdomain
The DKIM names listed below are examples*. If you have any issues with DKIM using these examples, check your email provider’s official documentation for the most accurate and up-to-date configurations.
DNS settings examples
Below are a few examples of how to add a new DNS record for different providers:
If your domain provider is Namecheap:
- Log in to your Namecheap account.
- Open Domain list menu and choose your domain.
- Click on the Manage button next to your domain.
- Go to the Advanced DNS tab from the top menu.
- Click Add new record --> choose TXT record.
When adding a DKIM record in Namecheap, you should not include the actual domain name in the Host field. For example, if you're adding a record for "subdomain._domainkey.yourdomain.com," only include "subdomain._domainkey" as the Host value.


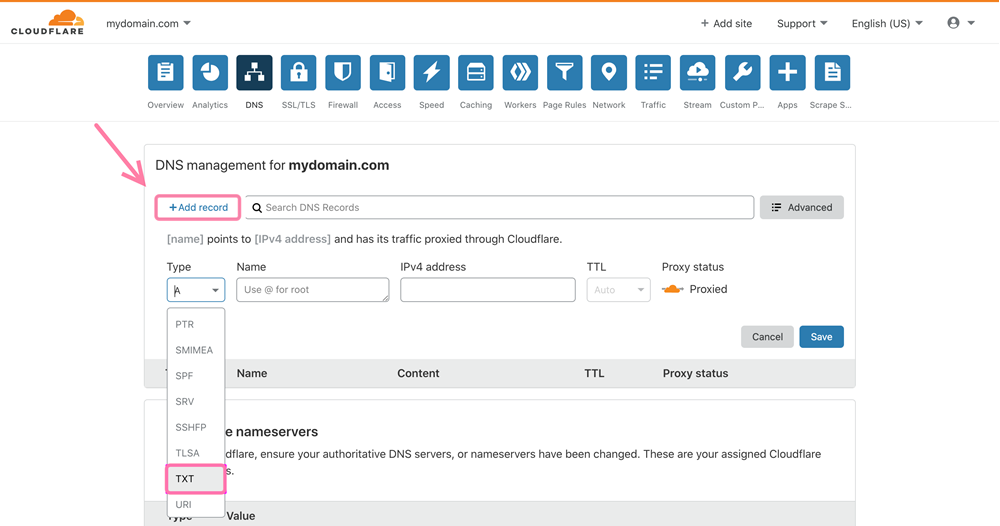
If your domain provider is Cloudflare:
- Log in to your Cloudflare account and select your domain.
- Go to the DNS tab.
- Click Add record --> select TXT type.

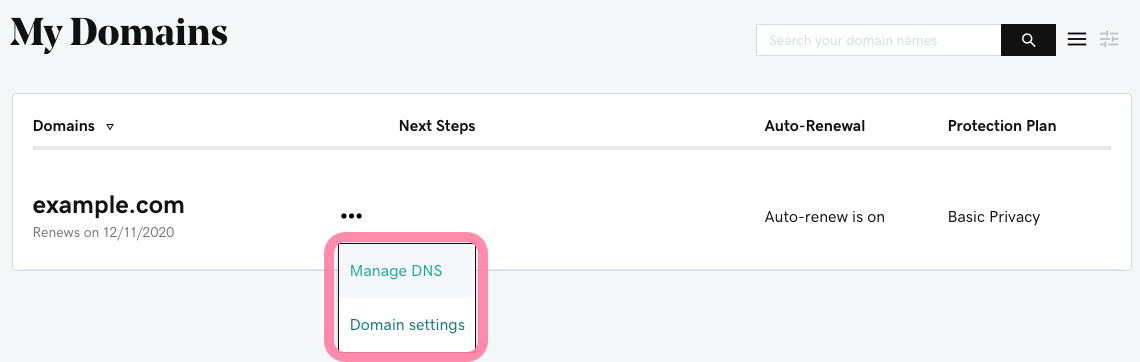
If your domain provider is Godaddy:
- Log in to your Godaddy account.
- Go to Domains page, select the domain and click Manage DNS.
- Click Add record --> select TXT type.

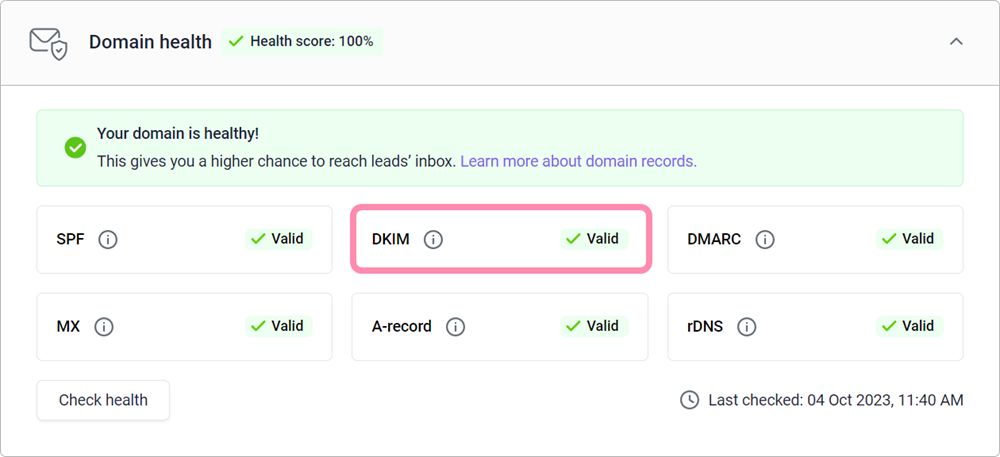
How to check your DKIM record
To check if your DKIM record is set up and working, run a free test in your email account settings. Wait about 48 hours after making changes to ensure they’ve fully updated.
Go to your email accounts list. Find the email account linked to your domain and click Edit.
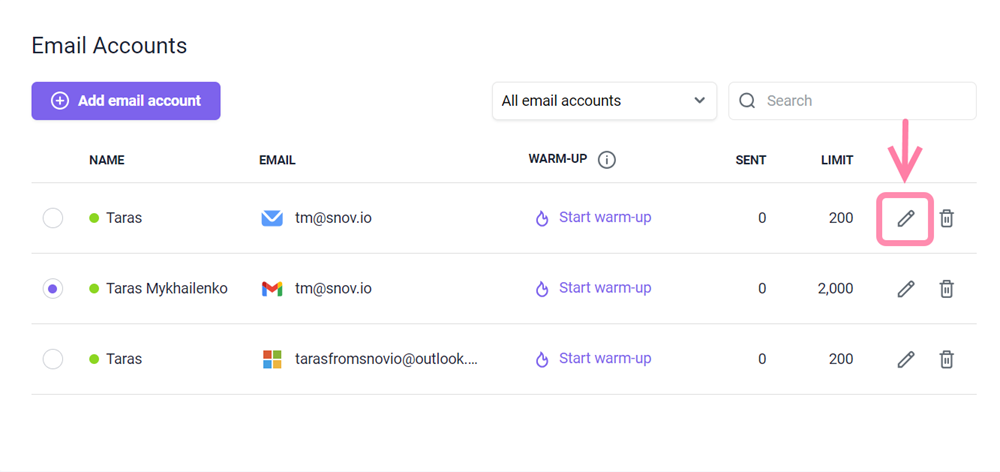

Scroll down to the Optional settings section and select the Domain health tab. Click Check health. Once the check is finished, you'll see the status of your DKIM record, along with other domain records.