This tutorial explains what an SPF record is and how to set it up in your domain settings to improve email deliverability when using cold email software.
Why SPF is important:
1) Helps improve sender reputation and deliverability
2) Providers use it to verify that the email server which sends emails on your behalf is allowed to do so
3) Helps protect your sender domain from any kind of email fraud or unathorized use
SPF record explained
An SPF record specifies which email servers or providers are authorized to send emails from your domain.
Your basic SPF record may look like this:
v=spf1 include:spf.example.com ~all
The part after include: specifies the provider's SPF value, which is the email server address of your email provider (spf.example.com).
The part at the end, ~all, specifies how to handle emails that fail the SPF check: "~" means that emails sent from providers not listed in your SPF should still be accepted by the recipient but marked as suspicious or spam.
An SPF record can include multiple SPF values. If you use multiple providers to send emails, add a separate include: for each provider's SPF value.
For example, if your email provider is Google, the SPF record will look like this:
v=spf1 include:_spf.google.com ~all
If you use both Google Workspace and Microsoft 365 as your email providers, the SPF record will look like this:
v=spf1 include:_spf.google.com include:spf.protection.outlook.com ~all
Remember:
Snov.io sends emails directly from your email account (using your provider’s server), so your SPF record must include your email provider’s value. You do not need to add Snov.io to your SPF record.
Add the SPF values of all email providers you use to send emails from your domain.
For example, if you use Google Workspace, adding Google’s SPF records to your domain tells other email servers that Google is authorized to send emails on your domain’s behalf.
How to set up an SPF record
SPF is one of the records in your domain's DNS settings.
To create an SPF record in domain's DNS settings:
Log in into your domain account — the platform or service where you purchased your domain name.
Find the DNS menu in your domain settings, the section where you add and manage DNS records for the domain. Look for the option to add a new record. To configure SPF, you need to create a new TXT record.
Your SPF record should have the following parameters:
- Type: TXT (default)
- Host: @ (default)
- Value:
v=spf1 include:spf.example.com ~all(depends on the email provider)
In the Value field, add the SPF value from your email service provider. Make sure to include all SPF values for every provider you use.
Your domain should have only one SPF record. If you use multiple email providers to send emails, include all their SPF values in the same record.
When you switch to a new email provider or start using an additional provider, make sure to update your SPF record.
Here is the list of SPF values for popular email providers:
- Google Workspace:
v=spf1 include:_spf.google.com ~all - Microsoft Outlook:
v=spf1 include:spf.protection.outlook.com -all - Zoho Mail:
v=spf1 include:zoho.com ~all - Yahoo Mail:
v=spf1 include:spf.protection.mail.yahoo.com -all - MailChimp:
v=spf1 include:servers.mcsv.net ~all - Mailgun:
v=spf1 include:mailgun.org ~all - Amazon SES:
v=spf1 include:amazonses.com ~all - GoDaddy:
v=spf1 include:secureserver.net ~all - SendGrid:
v=spf1 include:sendgrid.net ~all
The SPF values listed above are examples and may be subject to change over time. If you have any issues with your SPF after using these examples, always check your email provider's official documentation for the most accurate and up-to-date configurations.
DNS settings examples
Below are a few examples of how to add a new DNS record for different providers:
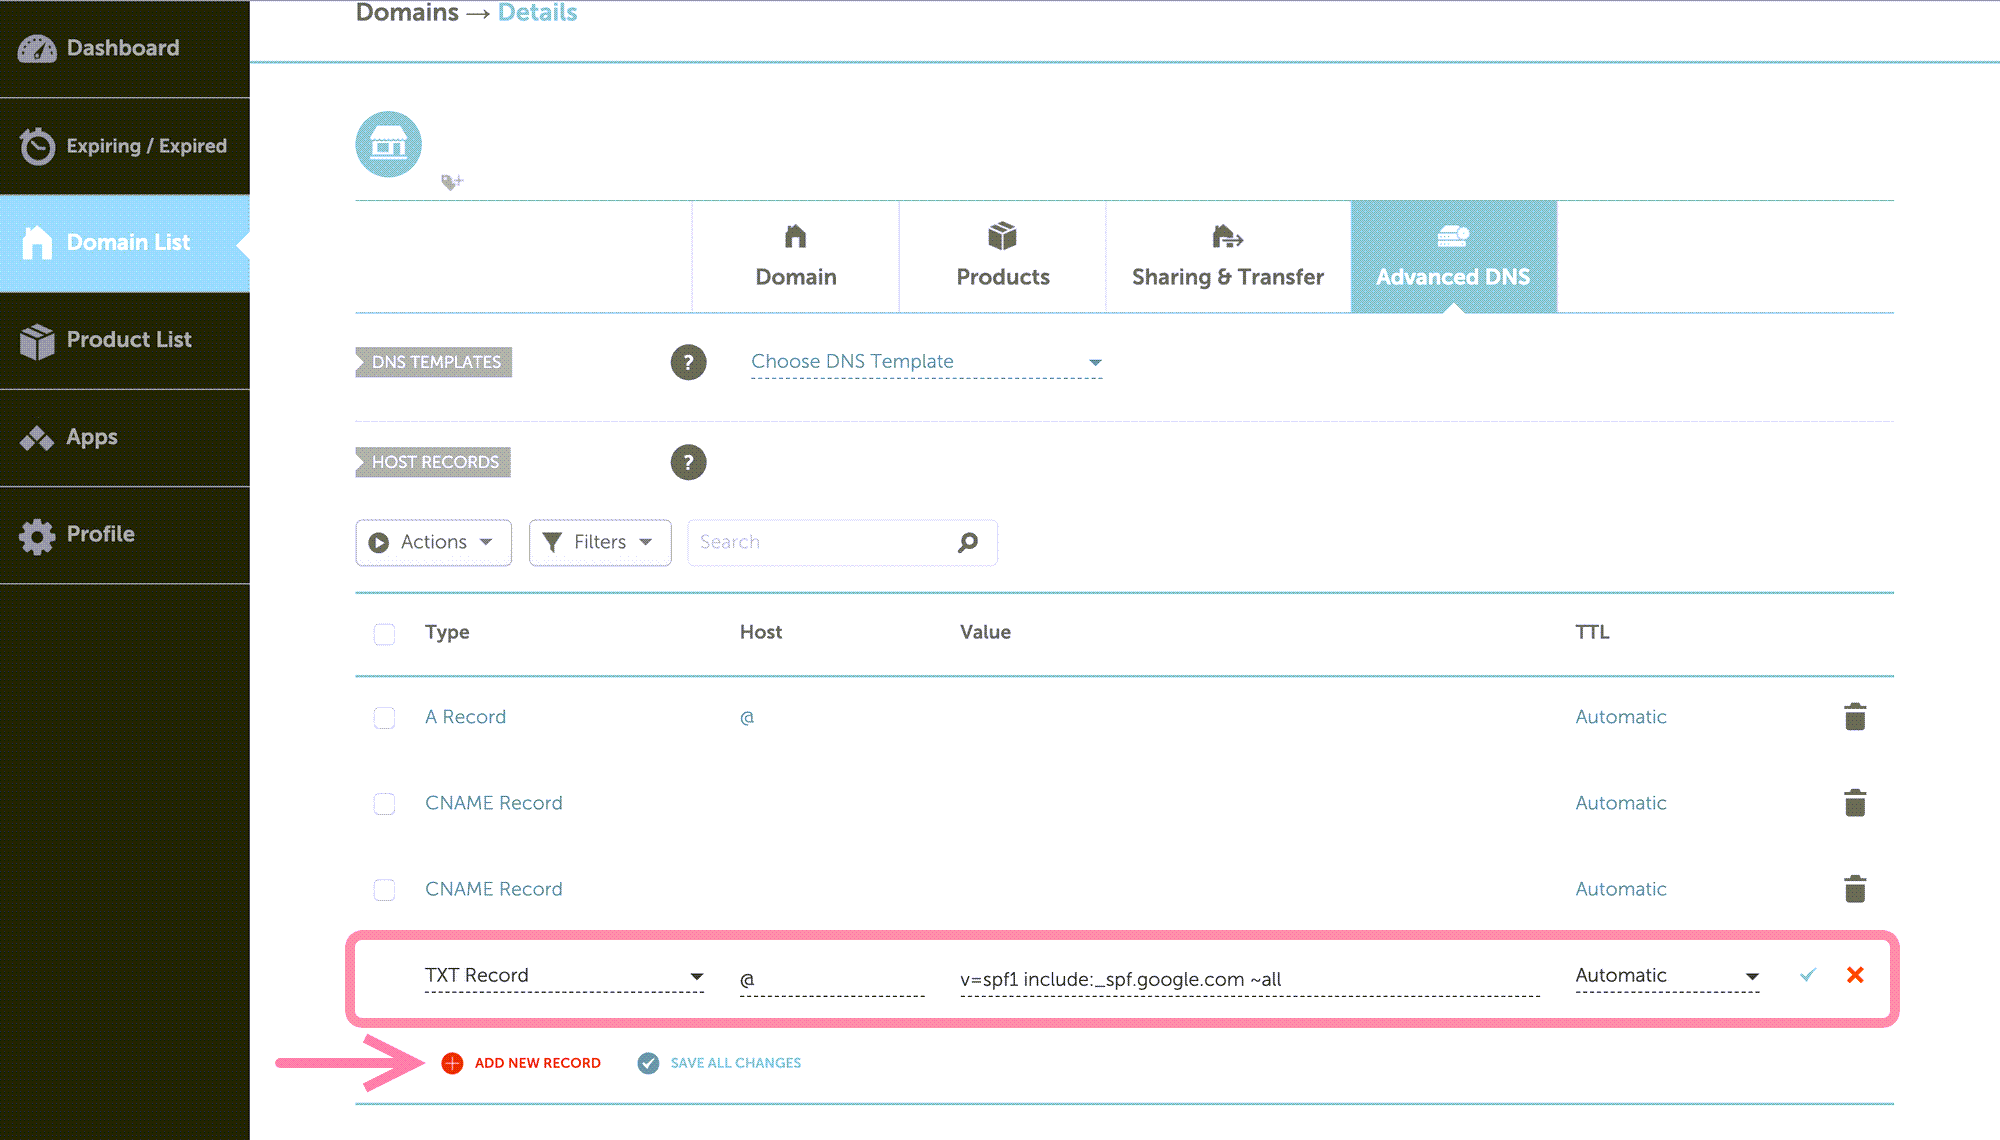
If your domain provider is Namecheap:
- Log in to your Namecheap account.
- Open Domain list menu and choose your domain.
- Click on the Manage button next to your domain.
- Go to Advanced DNS tab.
- Click Add new record --> choose TXT record.
- Put @ (or your domain name) in the Name or Host field.
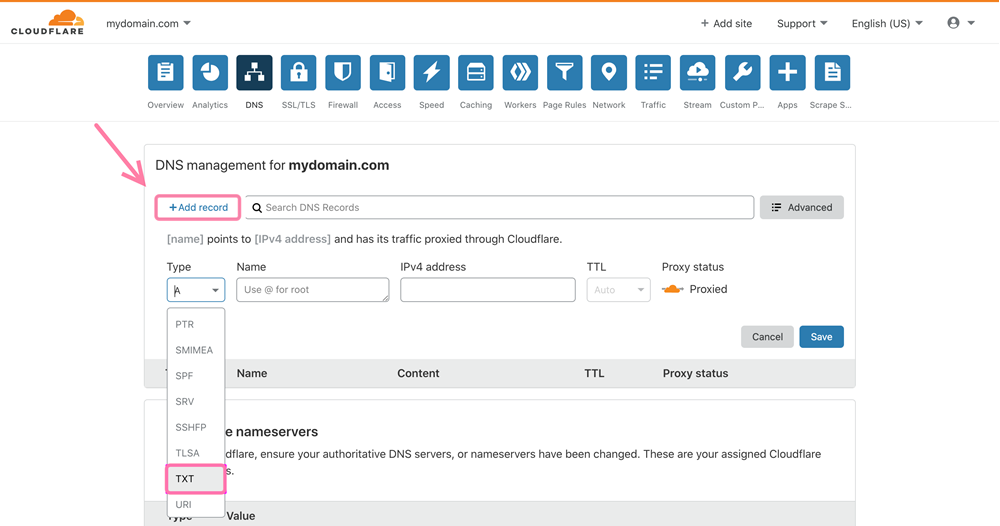
If your domain provider is Cloudflare:
- Log in to your Cloudflare account and select your domain.
- Go to the DNS tab.
- Click Add record --> select TXT type.
- Put @ (or your domain name) in the Name field.
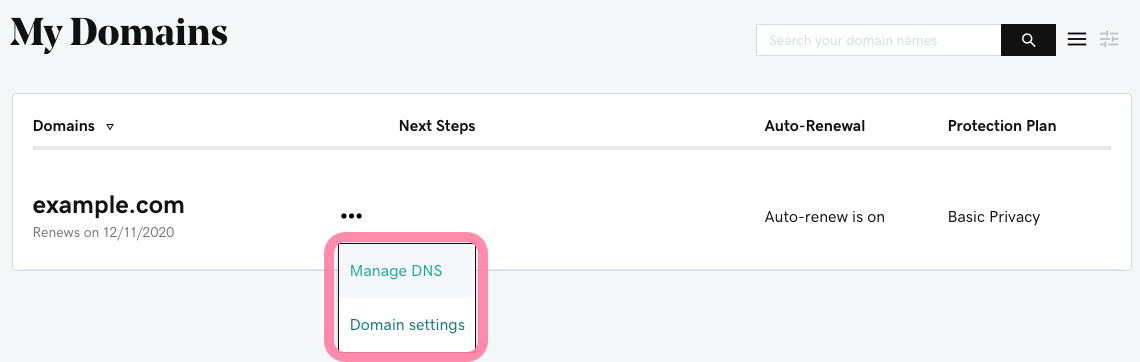
If your domain provider is GoDaddy:
- Log in to your Godaddy account.
- Go to Domains page, select the domain and click Manage DNS.
- Click Add record --> select TXT type.
- Put @ (or your domain name) in the Name or Host field.
How to check your SPF record
To check if your SPF record is set up and working, run a free test in your email account settings. Wait about 48 hours after making changes to ensure they’ve fully updated.
Go to your email accounts list. Find the email account linked to your domain and click Edit.
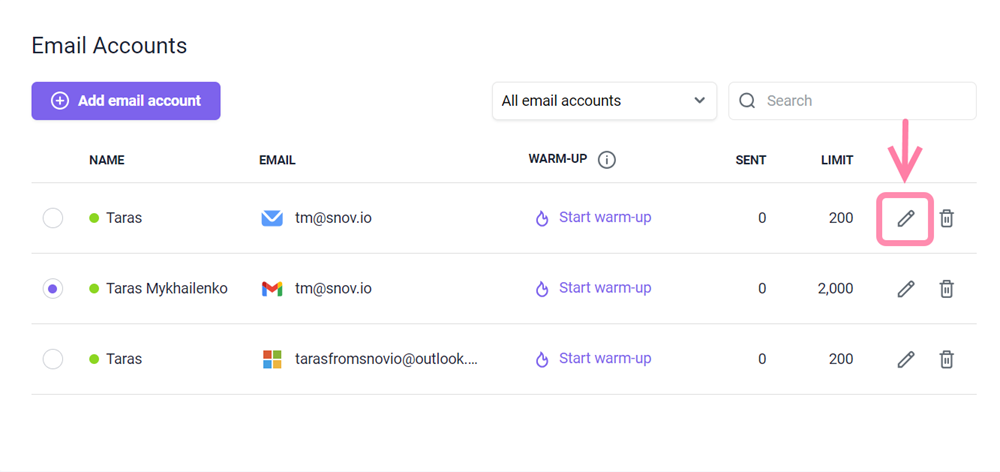
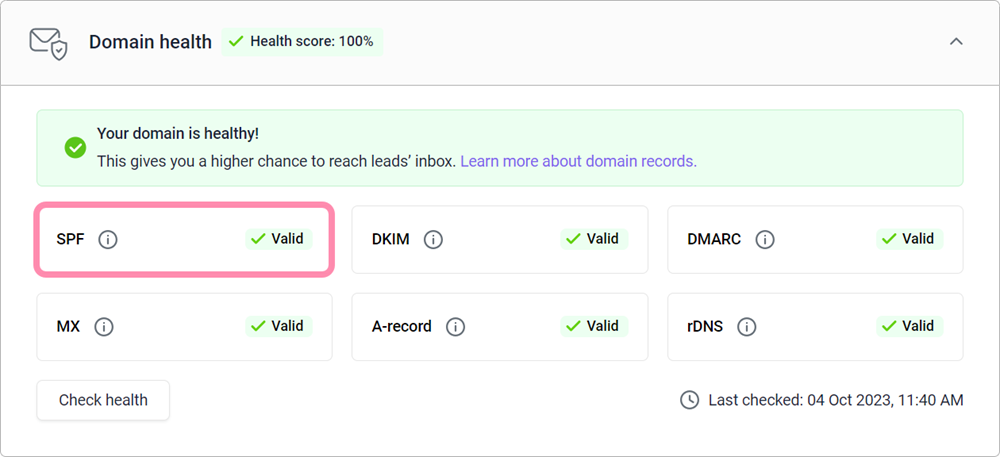
Scroll down to the Optional settings section and select the Domain health tab. Click Check health. Once the check is finished, you'll see the status of your SPF record, along with other domain records.
If you have a question that we haven't covered, feel free to reach out to our Customer Care team. You can contact us at help@snov.io or through live chat. We're here to assist you!


Sorry about that 😢
How can we improve it?