This tutorial explains the DMARC record and how to set it up in your domain settings to improve your domain's health and security.
Before configuring DMARC, ensure that SPF and DKIM records are already set up and have been active for at least 48 hours.
A DMARC record allows you to add an email authentication policy for your domain, specifying how receiving servers should handle emails that fail SPF and DKIM checks.
DMARC record explained
Here's the basic DMARC record example:
DMARC policy: The part after "p=" is responsible for policy. This policy specifies what will happen to emails that cannot pass SPF and DKIM checks. You can use the default policy (p=none), or change it to (p=quarantine) or (p=reject) if you want stricter protection.
There are three options for a DMARC policy:
p=none→ This is a monitoring-only policy (not recommended). It allows all emails to be delivered, even if they fail the checks.p=quarantine(recommended)→ This policy tells email providers to mark emails that fail the checks as suspicious and send them to the spam folder. This helps protect your domain from spoofing while still allowing recipients to view these emails.p=reject→ This policy blocks all emails that fail DMARC checks, preventing them from reaching even the spam folder. It is the strictest setting, fully protecting your domain from unauthorized use, but it may sometimes result in legitimate emails being blocked.
DMARC reports:
The DMARC record includes the email address after "rua=mailto:"—this is the special email address where aggregate reports are sent.
Create a separate mailbox and it to your DMARC record if you want to receive them. These reports show email authentication statistics and help with potential security issues. These reports will be generated automatically and sent to this email address. (For more details, see the "View DMARC reports" section of this article.)
How to set up DMARC record
DMARC is added as a record in your domain's DNS settings.
Step 1: Create a new record in domain settings
To add DMARC to your domain, create a new record in your domain's DNS settings.
To access domain settings, log in to your domain hosting account — the platform or service where you purchased your domain name.
Open DNS settings and find the option to create a new record.
Step 2: Add DMARC parameters
Your DMARC record should have the following parameters:
- Record type: TXT (default). The DMARC record is added as a TXT record in the DNS settings.
- Host/Name: In this field, enter "
_dmarc.userdomain.com"(Replace "userdomain" with your actual domain name address). Some domain providers automatically add the domain name to this field, so entering just_dmarcmight be enough.
- Value/Content: In this field, enter the DMARC record value:
Default DMARC record:
v=DMARC1; p=none; rua=mailto:your-email@yourdomain.com. (Replace the email address after "mailto:" with the real address you created for reports.)
Recommended DMARC record:
v=DMARC1; p=quarantine; rua=mailto:your-email@yourdomain.com. (Replace the email address after "mailto:" with the real address you created for reports.)
Save the record in your DNS settings and wait up to 48 hours for the changes to take effect.
DNS settings examples
Below are a few examples of how to add a new DNS record for different providers:
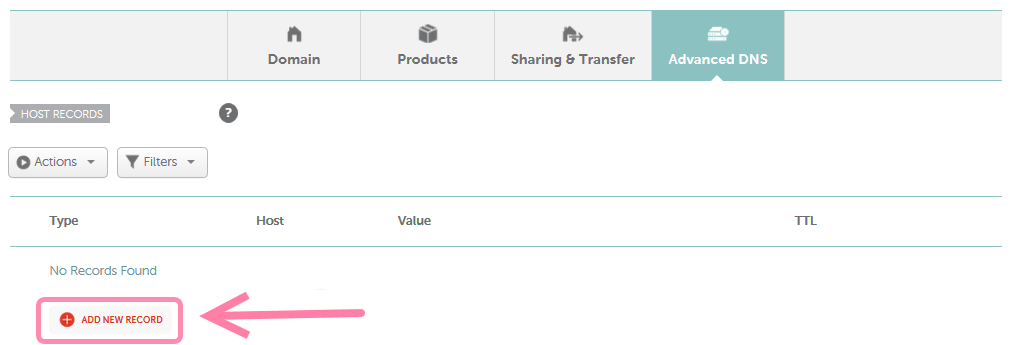
If your domain provider is Namecheap:
- Log in to your Namecheap account.
- Open Domain list menu and choose your domain.
- Click on the Manage button next to your domain.
- Go to the Advanced DNS tab from the top menu.
- Click Add new record --> choose TXT record.
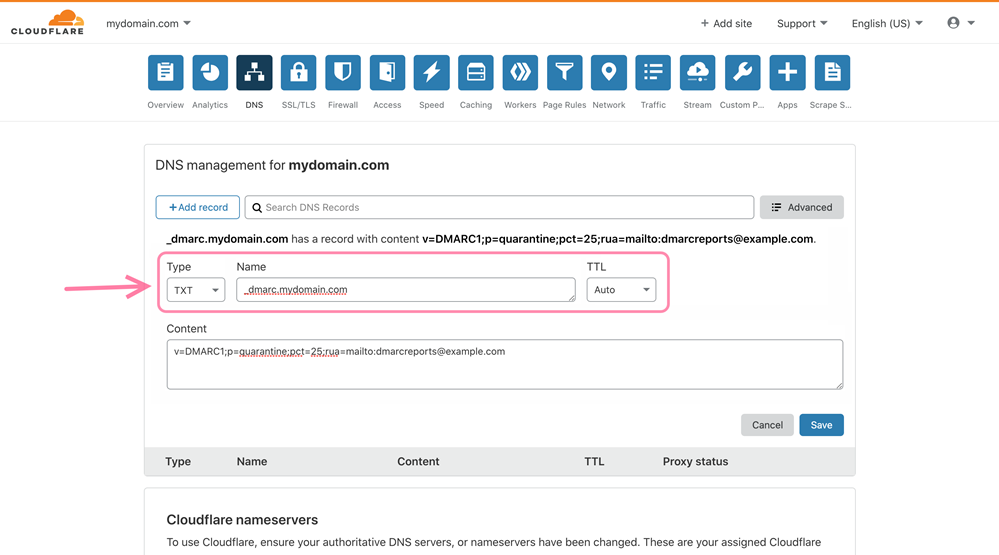
If your domain provider is Cloudflare:
- Log in to your Cloudflare account and select your domain.
- Go to the DNS tab.
- Click Add record --> select TXT type.
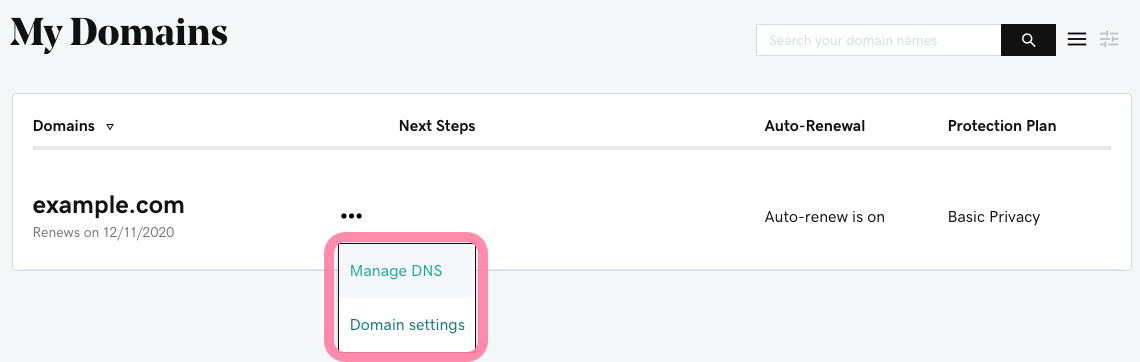
If your domain provider is GoDaddy:
- Log in to your GoDaddy account.
- Go to Domains page, select the domain and click Manage DNS.
- Click Add record --> select TXT type.
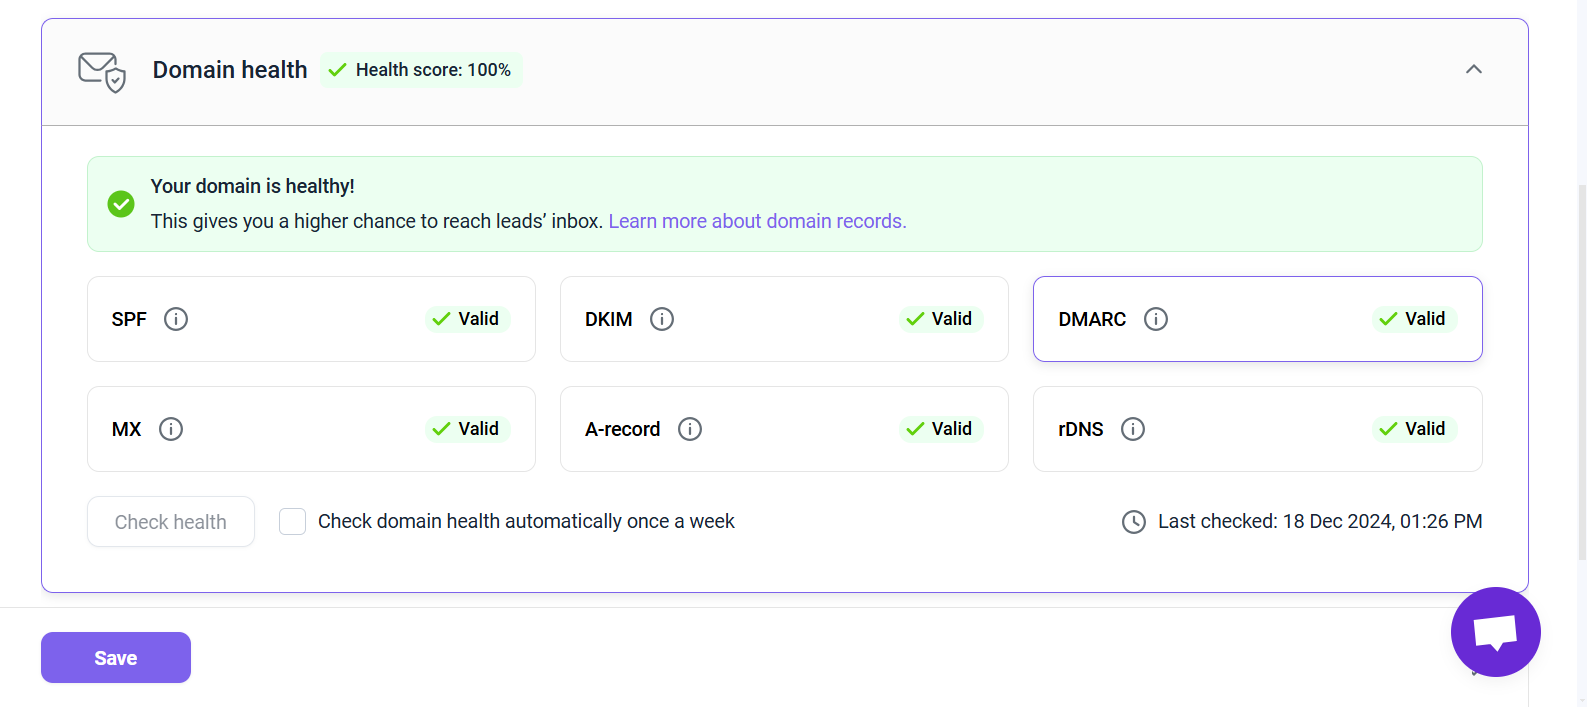
How to check DMARC record
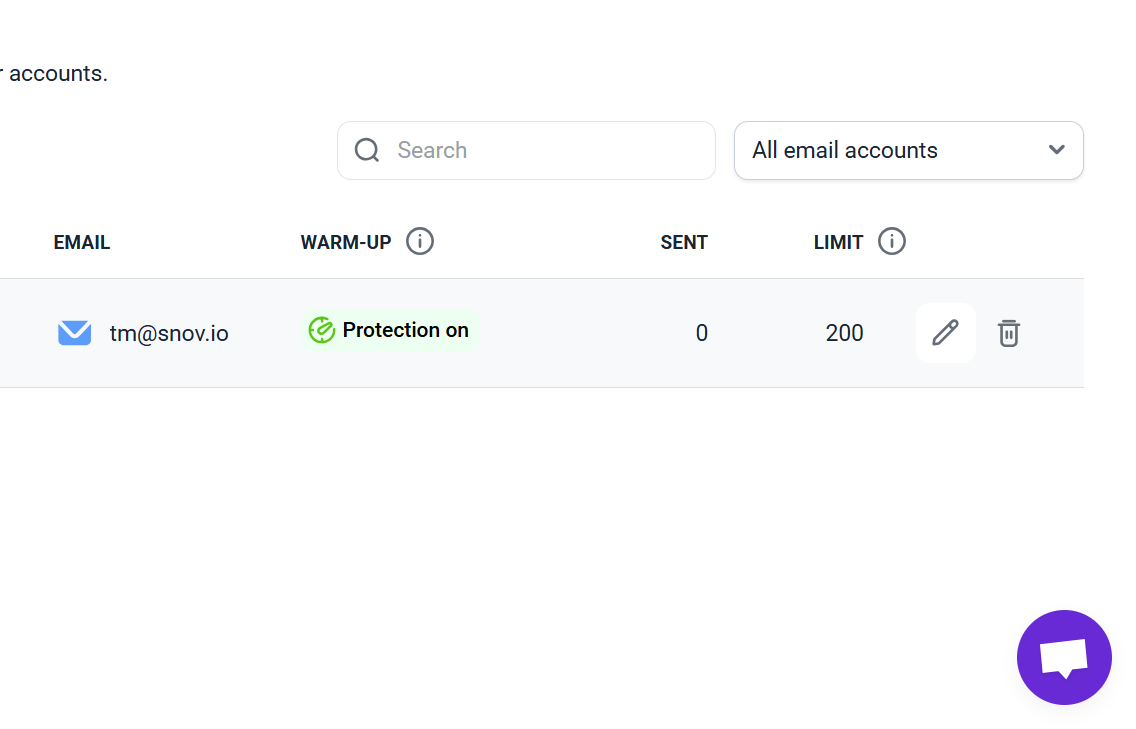
To ensure your DMARC record is correctly configured and has propagated in DNS, perform a quick test in your email account settings. To do it, go to your email accounts list and open the settings of the account under the relevant domain (click Edit icon).
Before checking DMARC, wait approximately 48 hours after making changes to ensure they are fully applied to your domain settings.
Go to the Optional settings section, select the Domain health tab, and click Check health. After the check is complete, you’ll see the status of your DMARC record (along with other DNS records). A Valid status means your record is correctly set up and active. If there’s an issue, the check will show it.
How to view DMARC reports
DMARC reports are automated emails that provide details about emails sent from your domain and help detect email security issues.
Why review DMARC reports:
1) Track the percentage of emails from your domain that pass or fail SPF and DKIM checks
2) Monitor email activity: which IP addresses or email servers send emails on your behalf
3) Detect outgoing emails from your domain that are failing authentication
Receive DMARC reports
They are automatically sent from recipient servers to the email address specified in your DMARC record.
Make sure the email address specified in your DMARC record has enough storage to keep incoming reports. This is why it’s recommended to create a separate new mailbox.
To receive and view DMARC reports, you need to set up a DMARC record for your domain. Ensure it includes the "rua=mailto:" tag with the appropriate email address.
For example: "v=DMARC1; p=none; rua=mailto:dmarc-reports@yourdomain.com; Without this parameter, reports will not be sent.
Find and download DMARC reports
While your email campaigns are active, regularly check your inbox for daily DMARC reports.
Look for email reports corresponding to the dates of your active campaigns. These emails have attachments in XML format containing DMARC report.
Download the attached file to your computer.
Review DMARC reports
DMARC reports in their raw form can be complex for most users to understand. To make the data more accessible and easier to interpret, use DMARC report analyzers that you can find online.
These tools can help analyze DMARC XML files and convert the report into a readable format or a dashboard, providing insights and helping identify issues that need attention. Check your DMARC or upload your XML file to any of the recommended tools below.

Data in DMARC report
<report_metadata>:
Metadata about the report, such as the company name, report ID, and the date range covered in the report.
<policy_published>:
The DMARC policy active for your-domain.com.
<record>:
Details for email senders used by your domain:
-
-
<source_ip>: The IP address of the email sender.<count>: Number of emails from this sender.<policy_evaluated>: Indicates the policy checked (e.g., reject, none) and the results of DKIM and SPF checks.<auth_results>: The statistics of DKIM and SPF checks.
-
Examples of issues found in DMARC report
Example 1: Sender IP:
Issue: SPF check failed and DKIM passed. This could indicate a mistake in SPF records or an unauthorized IP sending emails on behalf of your-domain.com.
Fix: Verify the SPF record for your-domain.com and ensure all sending servers you use are included. This will usually be your email provider's servers.
Example 2: Sender IP:
Issue: Both SPF and DKIM checks failed for emails sent from spam-domain.com. This means a potential attempt to impersonate your-domain.com.
Fix: Check the harmful sender IP and take actions to block it. Set DMARC policy to reject to prevent such emails from reaching recipients.


Sorry about that 😢
How can we improve it?