This guide explains how Email Warm-up helps your emails reach your prospects.
Launching campaigns too soon can hurt deliverability and your sender reputation. Warm up your sender accounts first to improve your inbox placement.
Snov.io includes these features to make warm-up simple and effective:
1) Bulk warm-up launch
Start the warm-up process for multiple email accounts at the same time.
2) Targeted email warm-up
Warm up email accounts from any provider and run targeted warm-ups to improve deliverability with specific inbox providers.
3) Premium sender pool
Warm-up runs automatically using a premium sender pool. You only need to monitor progress and deliverability results.
4) Built-in automated strategies
Choose warm-up strategies tailored for new email accounts or for accounts with deliverability and reputation issues.
How Email Warm-up works
Email warm-up boosts deliverability by creating realistic sending and reply activity through a network of real mailboxes, helping your account look like an active, trusted sender.
During warm-up, Snov.io also pulls messages out of Spam and marks them as read and important, reinforcing positive engagement signals.
Over time, this steady activity helps email providers trust your mailbox and improves your sender reputation.
Start email warm-up
To get started, connect your mailbox to Snov.io first.
If you previously connected a Gmail mailbox using Google sign-in, reconnect via SMTP so warm-up can run.
In the email settings, use an app password instead of your regular password. To generate an app password, you’ll need to enable 2-step verification in your Google account first.
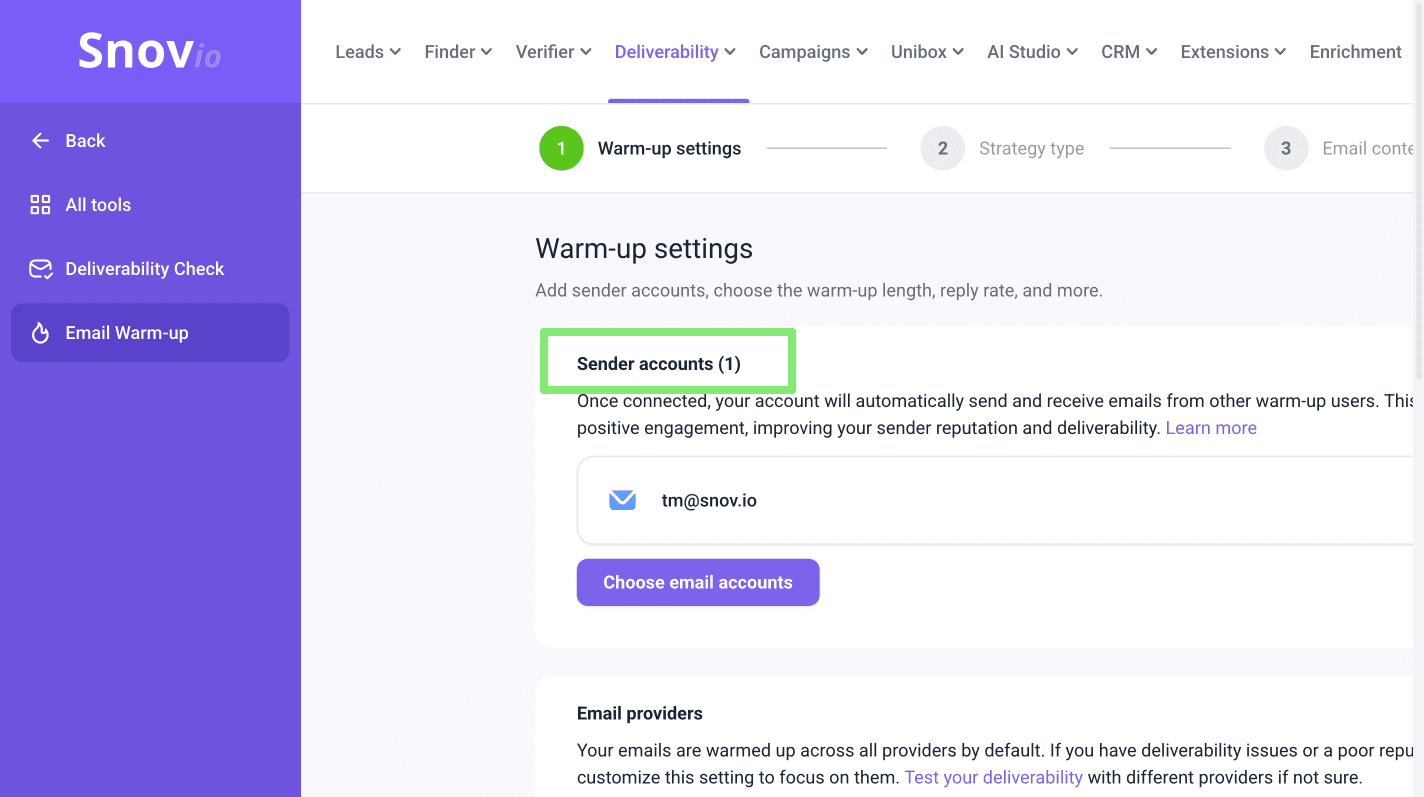
Sender accounts
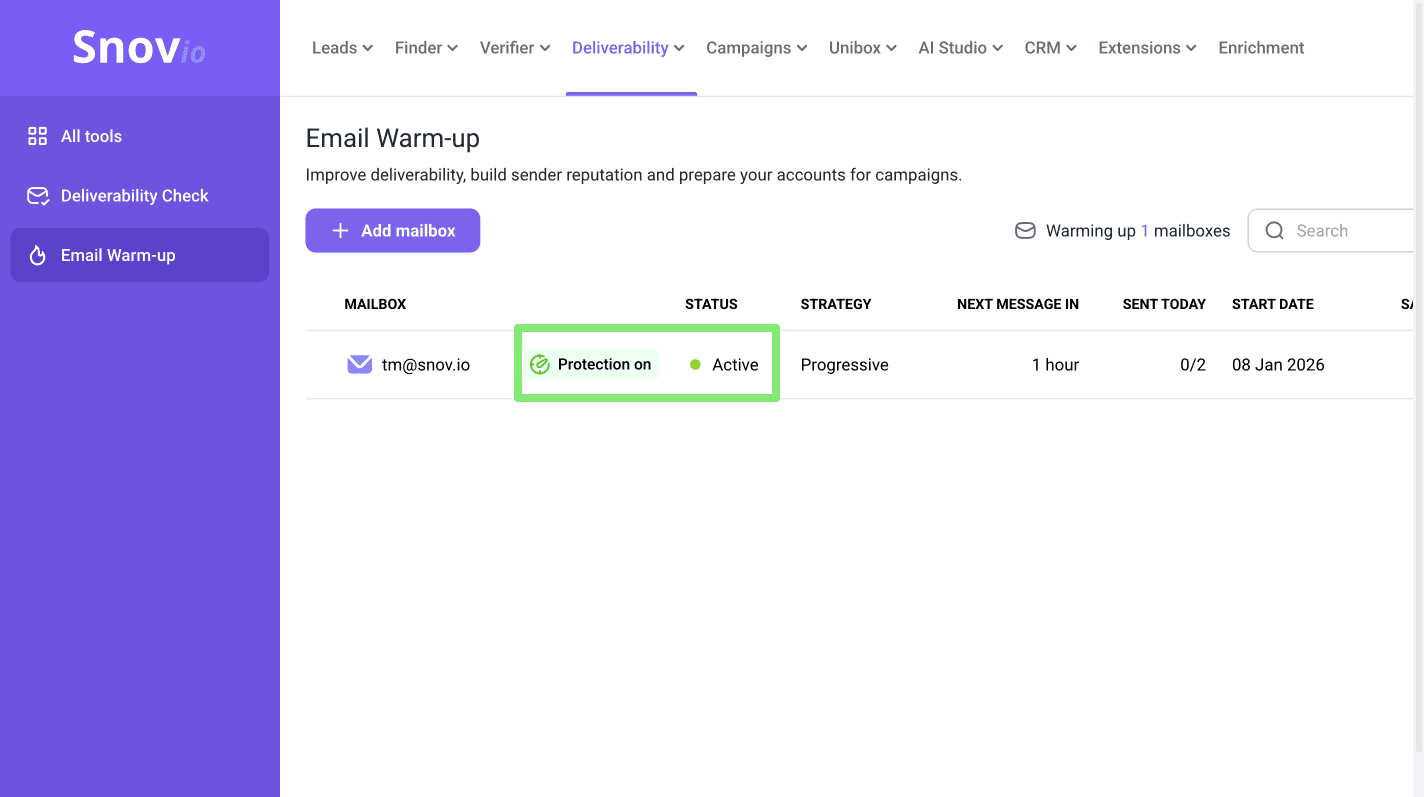
Go to Email Warm-up and click Add mailbox.
Select one or more email accounts to warm up. You can start the warm-up in bulk for multiple mailboxes.
When to warm up new senders:
- Right after you connect them, before starting campaigns
When to warm up existing senders:
- After a pause in outreach (the account hasn’t been used in campaigns for some time)
- To fix existing deliverability issues
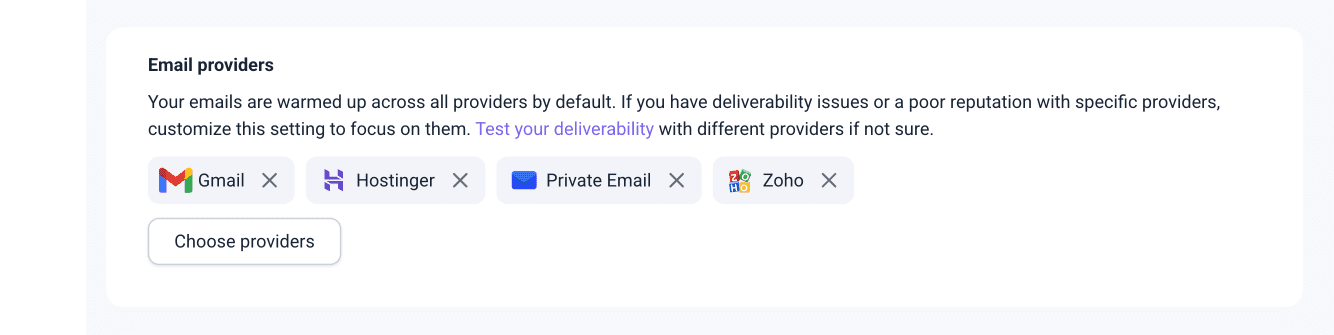
Email providers
Choose specific email providers to run a targeted warm-up.
Targeted warm-ups help restore or improve reputation with certain inboxes and improve deliverability for recipients who use them. Learn more about targeted warm-up.
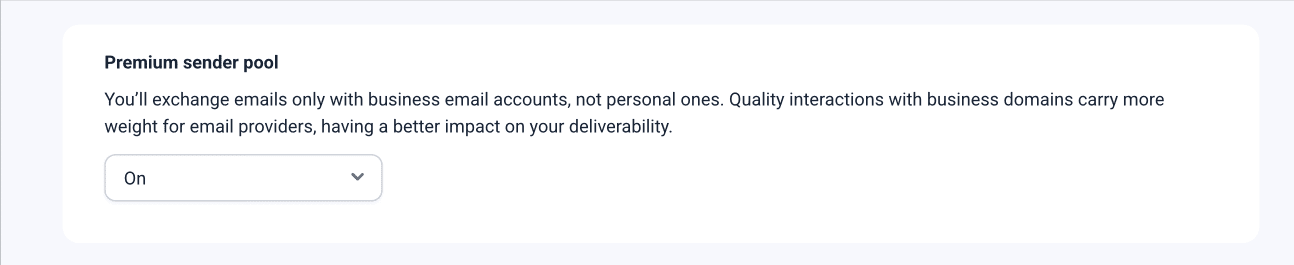
Premium sender pool
Enable premium warm-up pool to warm up your account only with business email domains (instead of free domains). This better recreates B2B communication and speeds up reputation growth.
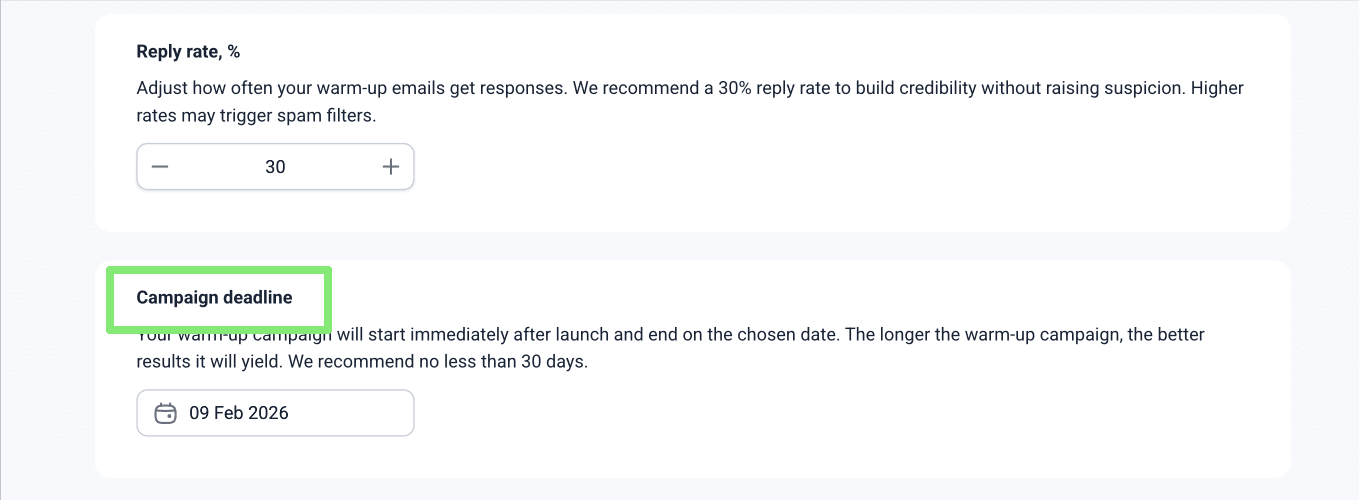
Reply rate
Set the reply rate — what percentage of emails should get replies during warm-up.
Snovio recommends setting your warm-up reply rate to 30%. The maximum is 45% because a higher reply rate may look unnatural.
Replies have the strongest impact on sender reputation. Automatic replies during warm-up help build it more effectively.
Campaign deadline
Choose a warm-up end date.
Recommended warm-up period:
- New domains and accounts: For a first-time warm-up of a new mailbox, Snov.io recommends 4 weeks of warm-up before you start sending real outreach.
- Existing mailboxes: When returning to outreach after a break or resolving minor deliverability issues, Snov.io recommends warming up for at least two weeks.
- Reputation recovery: 6 weeks of warm-up for domains with serious deliverability problems or spam issues.
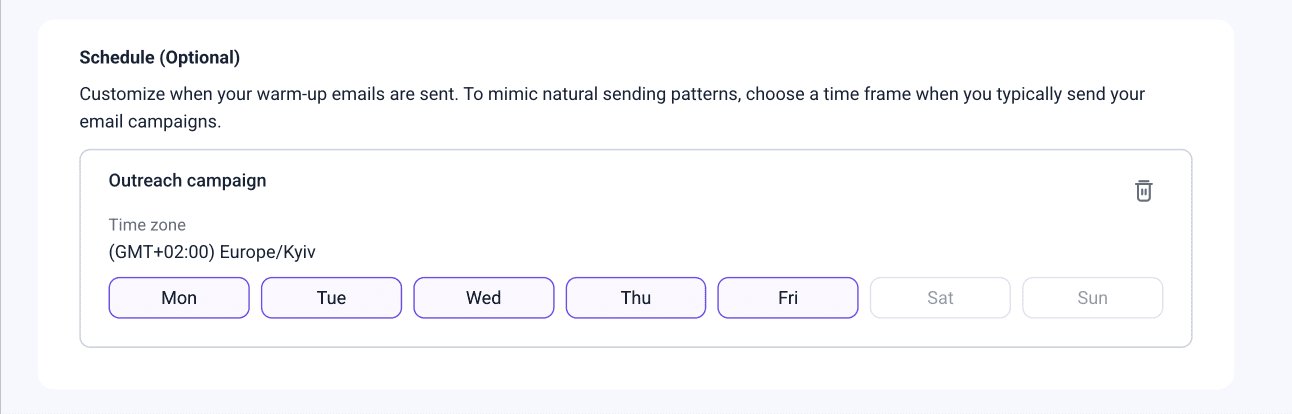
Warm-up schedule
Set the warm-up activity time — the days and hours when warm-up emails are sent.
For best results:
-
Match the schedule to your real campaign timing
-
Use the same timezone and working hours
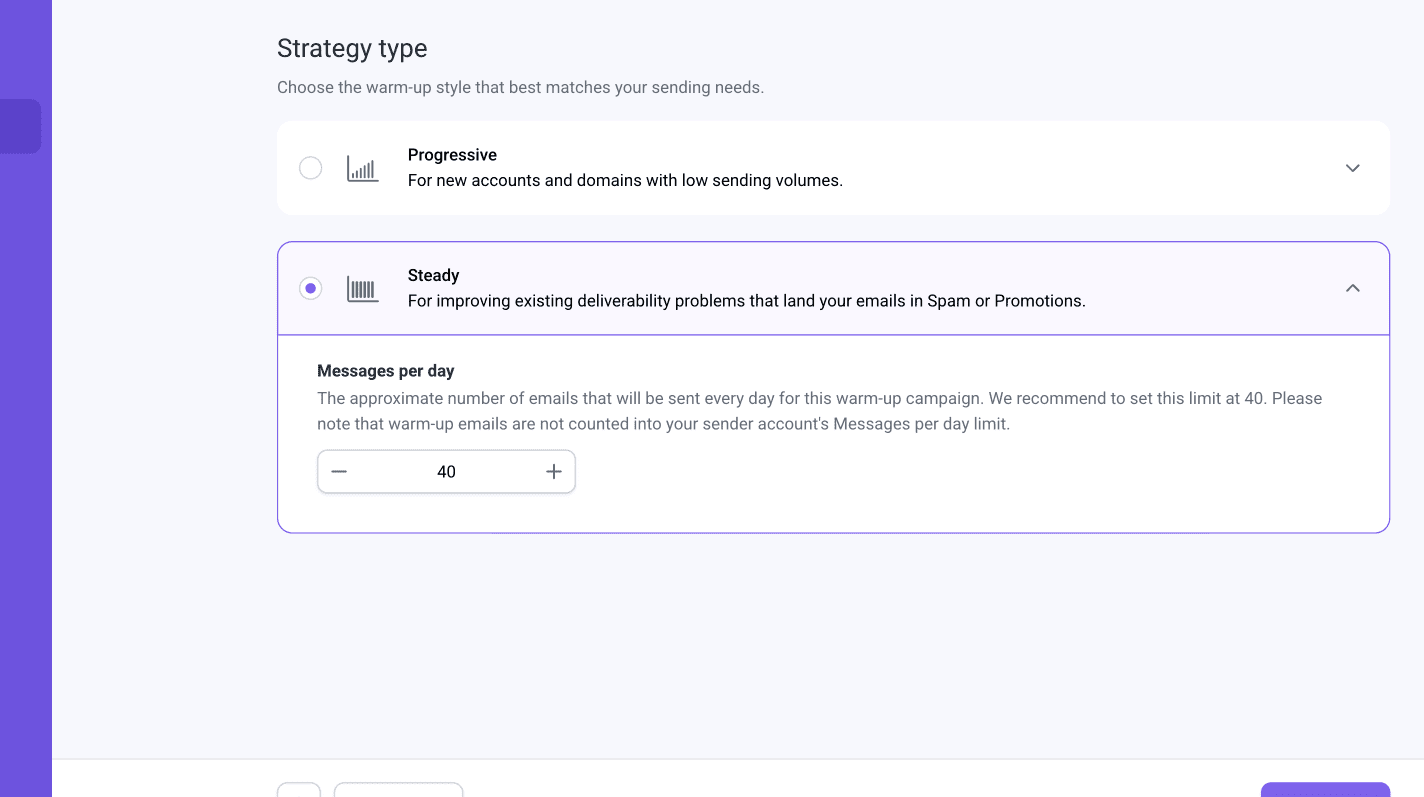
Choose a warm-up strategy
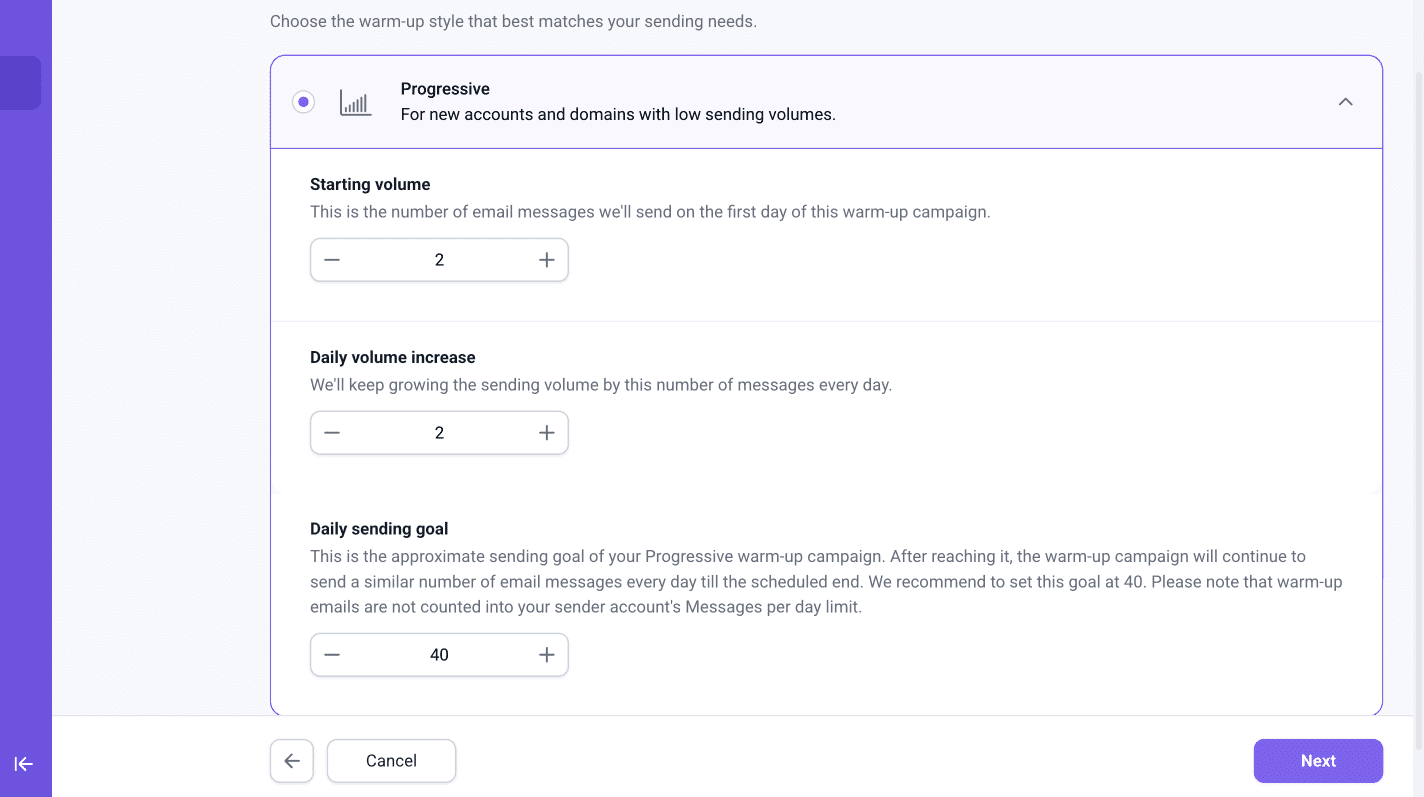
Progressive warm-up
The number of emails increases gradually over time until you reach your goal limit. This is the recommended setting.
Best for:
-
First-time warm-up on a new account
-
Re-warm previously used accounts after a period of inactivity
Recommended settings
- Starting volume: This is the number of emails we’ll send on the first day of the warm-up. Snovio recommends starting with 2 emails per day. The maximum starting limit is 5 emails.
-
Daily volume increase: The number of emails added to the limit each day. Set it to 2 emails.
-
Daily sending goal: The maximum daily warm-up volume. Snovio recommends your warm-up goal 40 emails per day.
Steady warm-up
Warm-up sends the same number of emails each day until it ends. This option is best if your mailbox is already warmed up and you want to maintain high deliverability.
Best for:
-
improving deliverability for accounts with a low inbox rate
-
rebuilding sender reputation after spam issues
-
supporting deliverability while your campaigns are already running
Emails per day: Snovio recommends setting this limit to 40 emails.
This number cannot be higher than your email account’s Messages per day limit. When running campaigns alongside warm-up, ensure your total sending isn't higher than 50 emails per day.
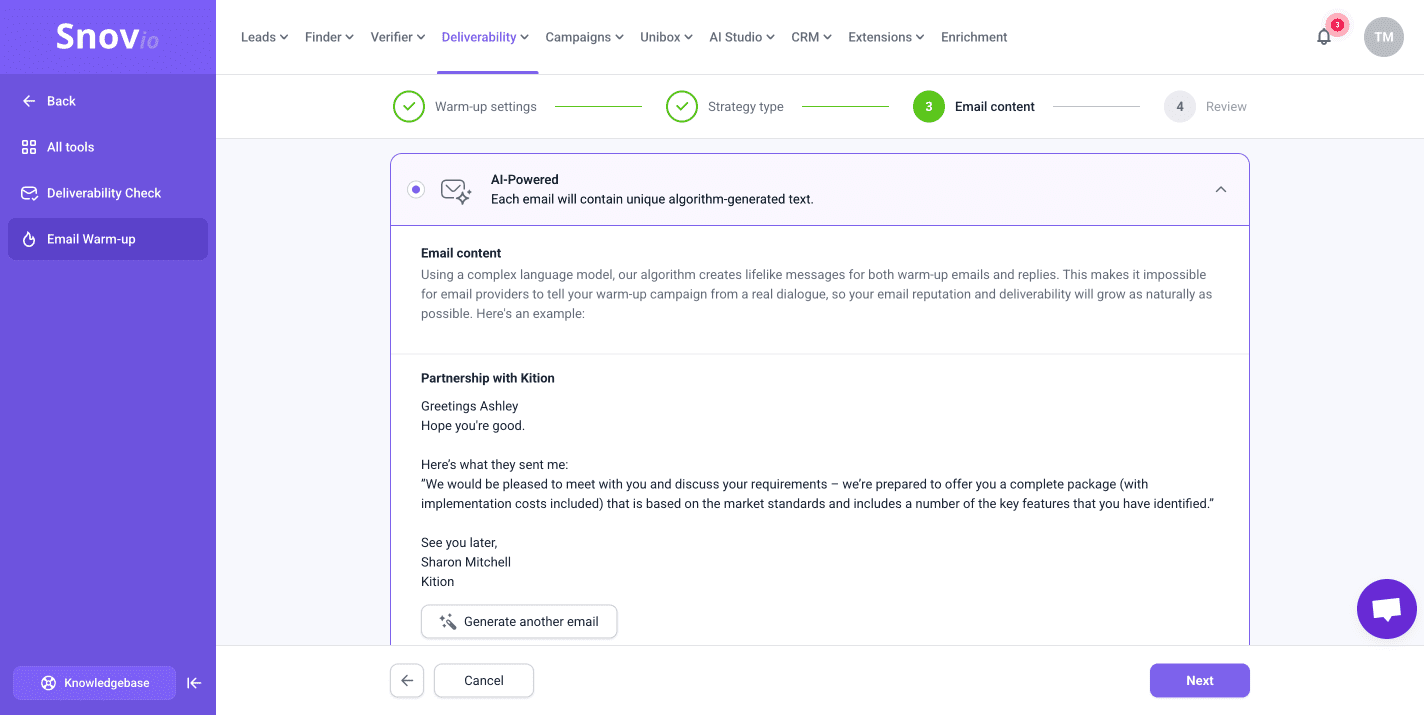
Warm-up email content
Specific template warm-up
The specific content type is best for active accounts that are already sending campaigns or have sent campaigns before.
Use the real email template you plan to send in your campaigns. Warm-up helps improve its deliverability before you start emailing real prospects.
Recommended settings:
-
Add Spintax variables to make your warm-up more natural
-
Enable Plain text mode to improve warm-up progress
- Add the same custom tracking domain you use for campaigns to improve deliverability.
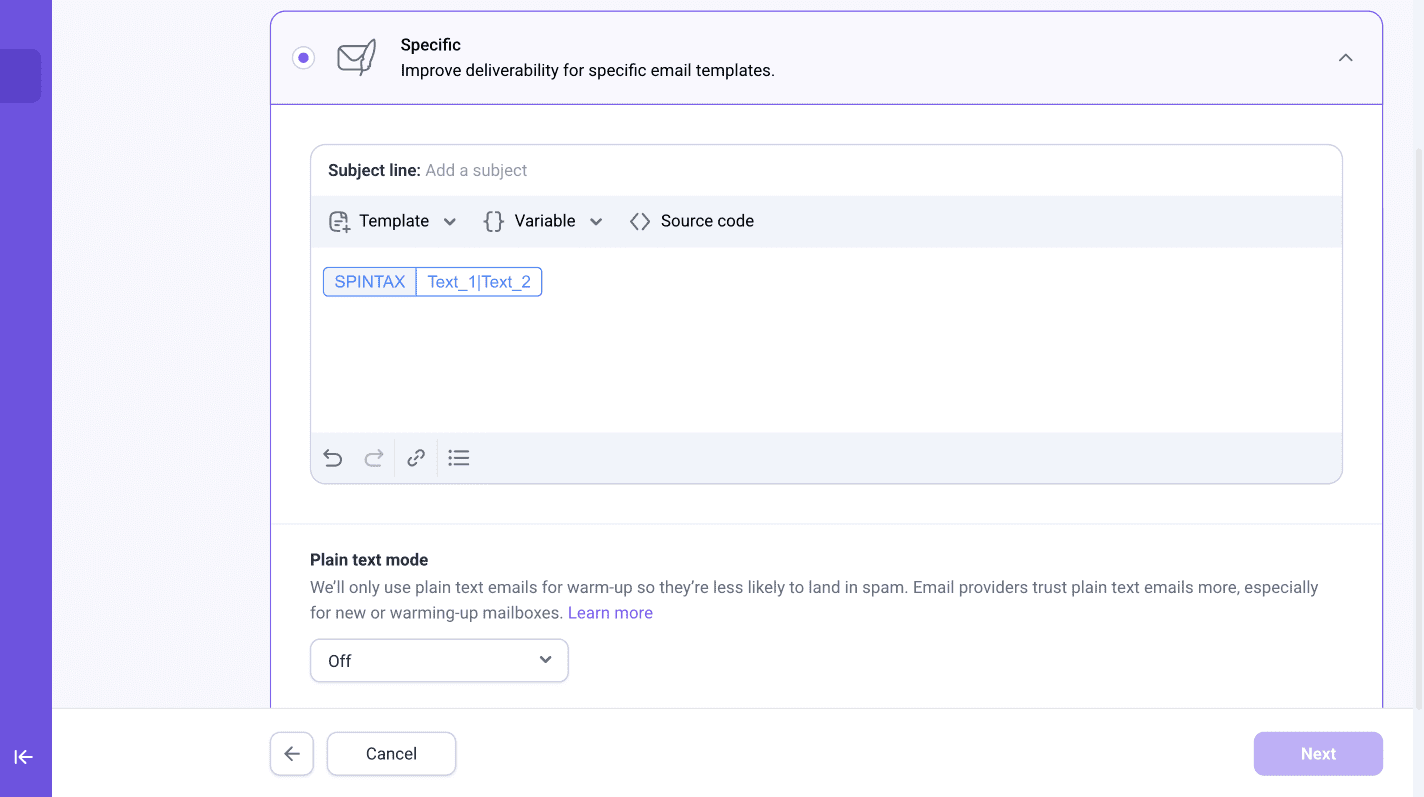
Spintax in Warm-up
Spintax is a great way to improve warm-up progress by adding variation to your emails. For best results, add meaningful variations.
Using only synonyms in your spintax may not yield the desired results.
Check warm-up status
To check your warm-up status, go to the Warm-up dashboard.
Your deliverability score will improve over time as the warm-up progresses. Saved from Spam shows how many emails Snov.io marked as safe to improve your sender reputation.
Manage active warm-ups
From the Warm-up dashboard, you can:
-
View which accounts are currently warming up
-
Pause a warm-up or mark it as completed
-
Reactivate accounts that were paused or stopped
-
Update settings/strategy and warm-up limits in bulk
-
Review warm-up progress and check each account’s deliverability score
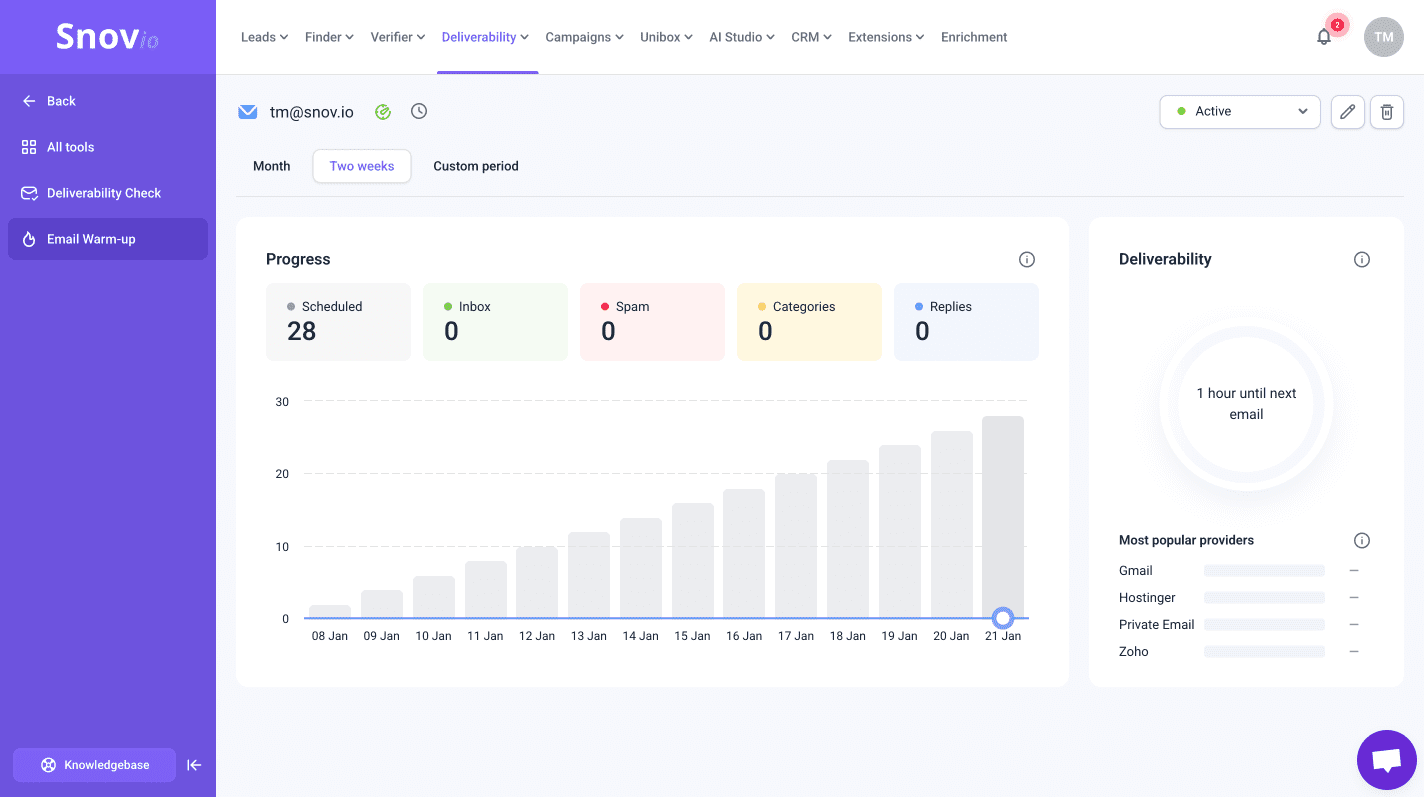
Review warm-up analytics
Click your warm-up campaign from the list to view its metrics.
What to track in warm-up:
-
Deliverability score (main success metric): the total percentage of emails that reached the inbox during the warm-up
-
Inbox placement over time: Review results in the Two-week or Month timeframe to track improvement over time.
-
Results by email provider
Below the overall deliverability score, you’ll see a breakdown by email provider. If you selected specific providers for warm-up, results will appear for those providers.
This helps you understand your reputation with each provider and the deliverability you can expect when emailing recipients who use them.
A warm-up is considered successful when your Deliverability reaches 90% or higher and your daily sending goal is reached.
After warm-up: Next steps
For mailboxes with an existing reputation problem, warm-up alone may not be enough—especially if other issues are affecting deliverability. Make sure your domain is properly configured and follow email deliverability best practices.
Snov.io also offers a comprehensive Email Deliverability video course to help you identify what’s holding your campaigns back and improve results.
Check your deliverability score
Warm-up helps build sender reputation, but inbox placement also depends on your sending setup and what’s inside the message:
-
Infrastructure: domain reputation, SPF/DKIM/DMARC, and sending configuration
-
Content: HTML/plain text balance, links, wording, and other spam signals
Run deliverability tests under realistic campaign conditions to spot issues before you launch.
Follow email deliverability best practices
To help your emails avoid spam filters and improve sender reputation, follow email best practices. This increases your chances of reaching the inbox and can reduce bounce rates.
Start writing your email templates
Prepare more email templates for your outreach. Use Snov.io’s AI Studio Email AI Writer to generate value-driven drafts personalized to your product’s key selling points.

Sorry about that 😢
How can we improve it?