

This article provides a checklist to improve email deliverability and lower the number of delivery errors.
Step 1: Verify your email list -->
Step 2: Exclude grey and yellow emails -->
Step 3: Use SMTP connection -->
Step 4: Lower your daily limit -->
Step 5: Disable tracking or set up a custom domain-->
Step 6: Check domain health and test deliverability -->
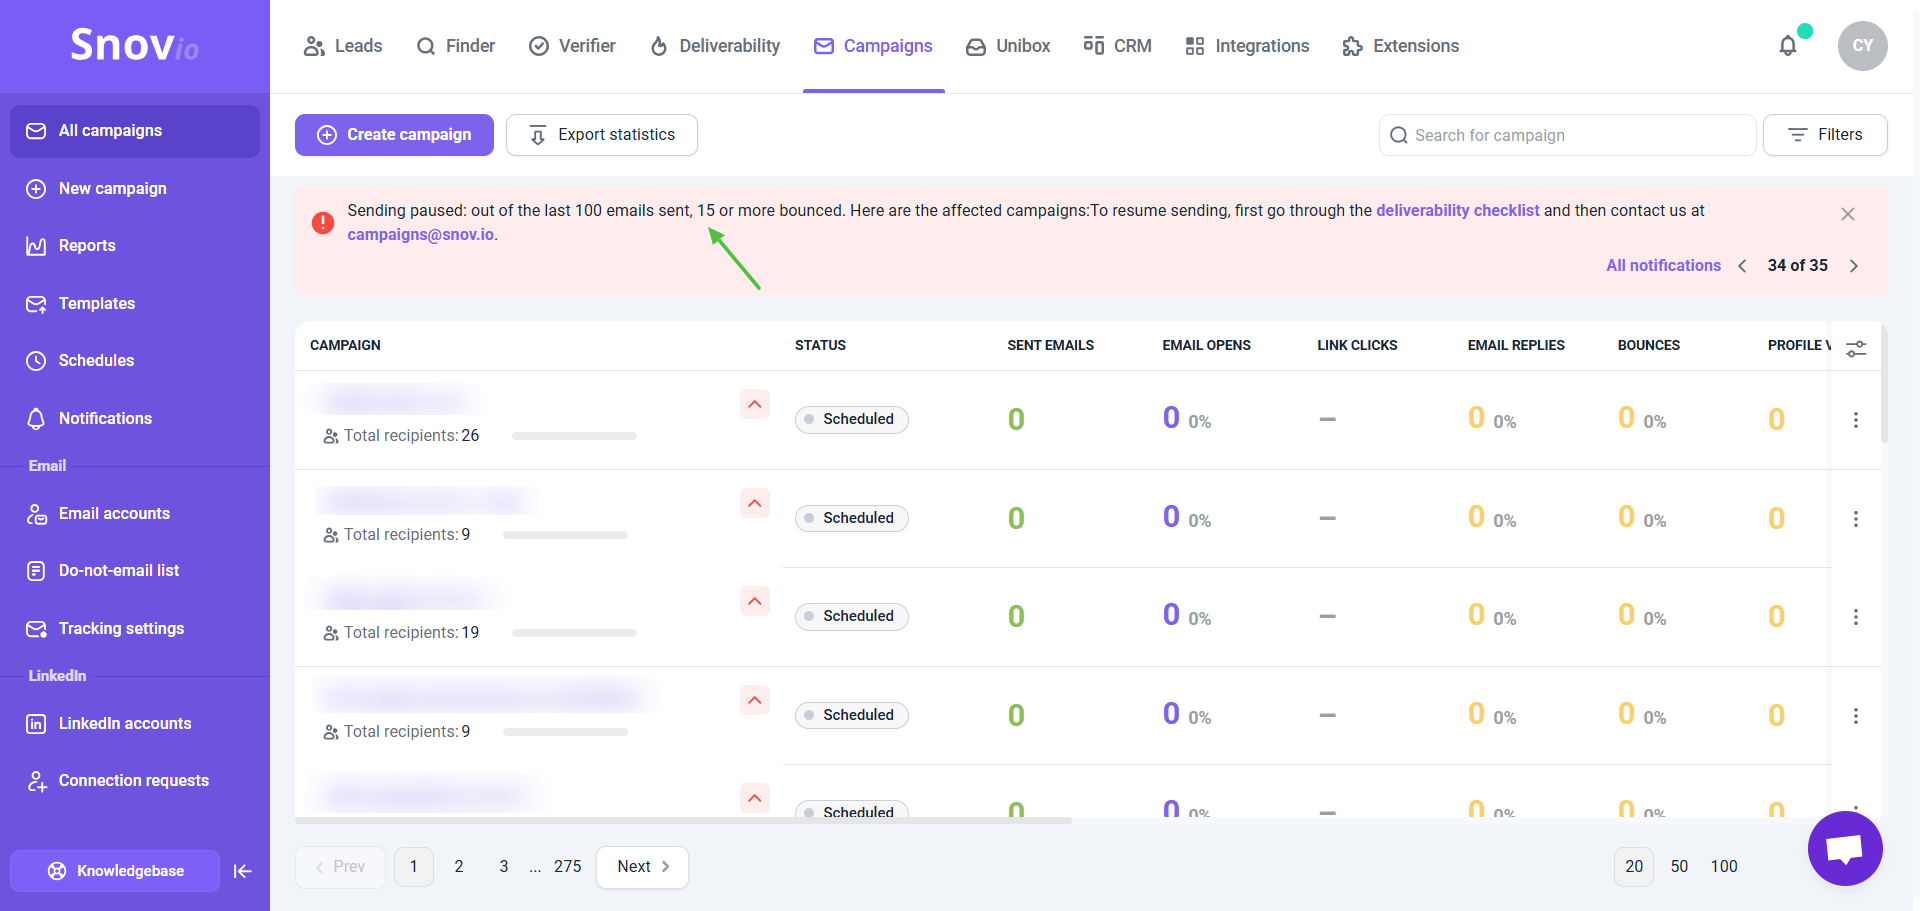
Why campaign is automatically paused
The bounce rate in your email campaigns shows the percentage of emails that couldn’t be delivered due to errors.
Tracking this metric is important because a high bounce rate can harm your sender reputation and campaign results.

How to reduce the bounce rate
Below, we'll outline the recommended steps for lowering bounce rates and improving the results of your campaigns.
Step 1: Verify your email list
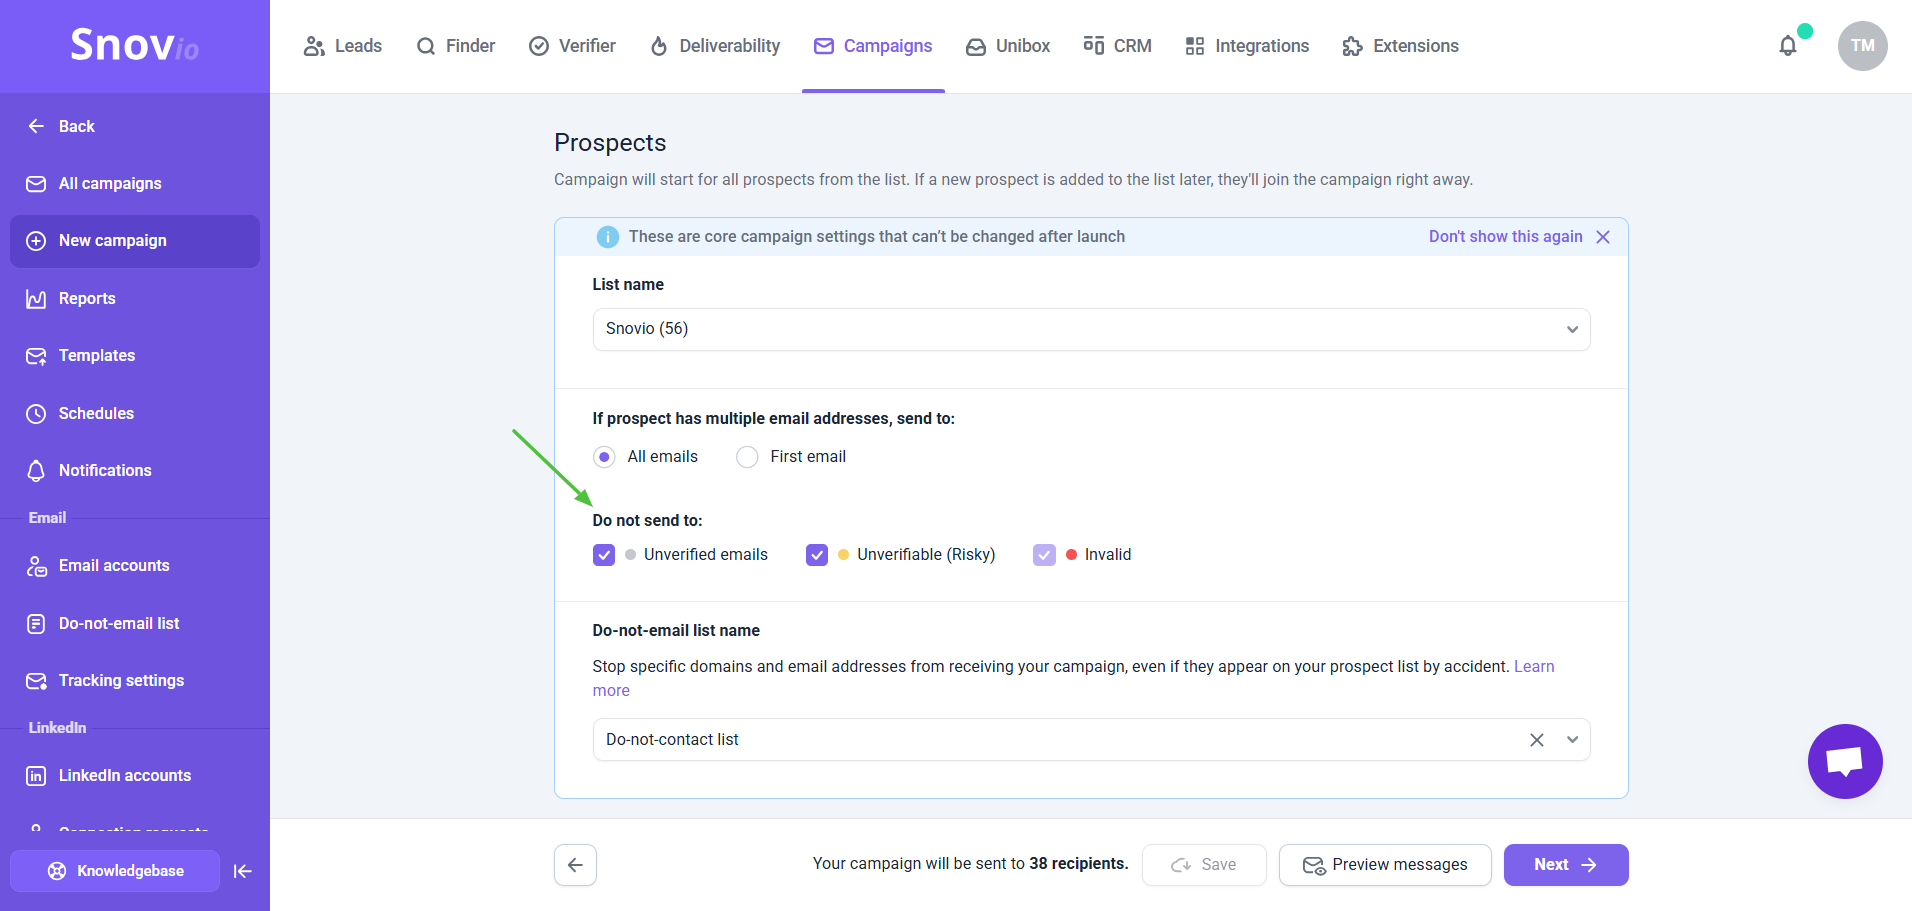
If your list has many unverified or Unverifiable (yellow) emails, some may bounce.
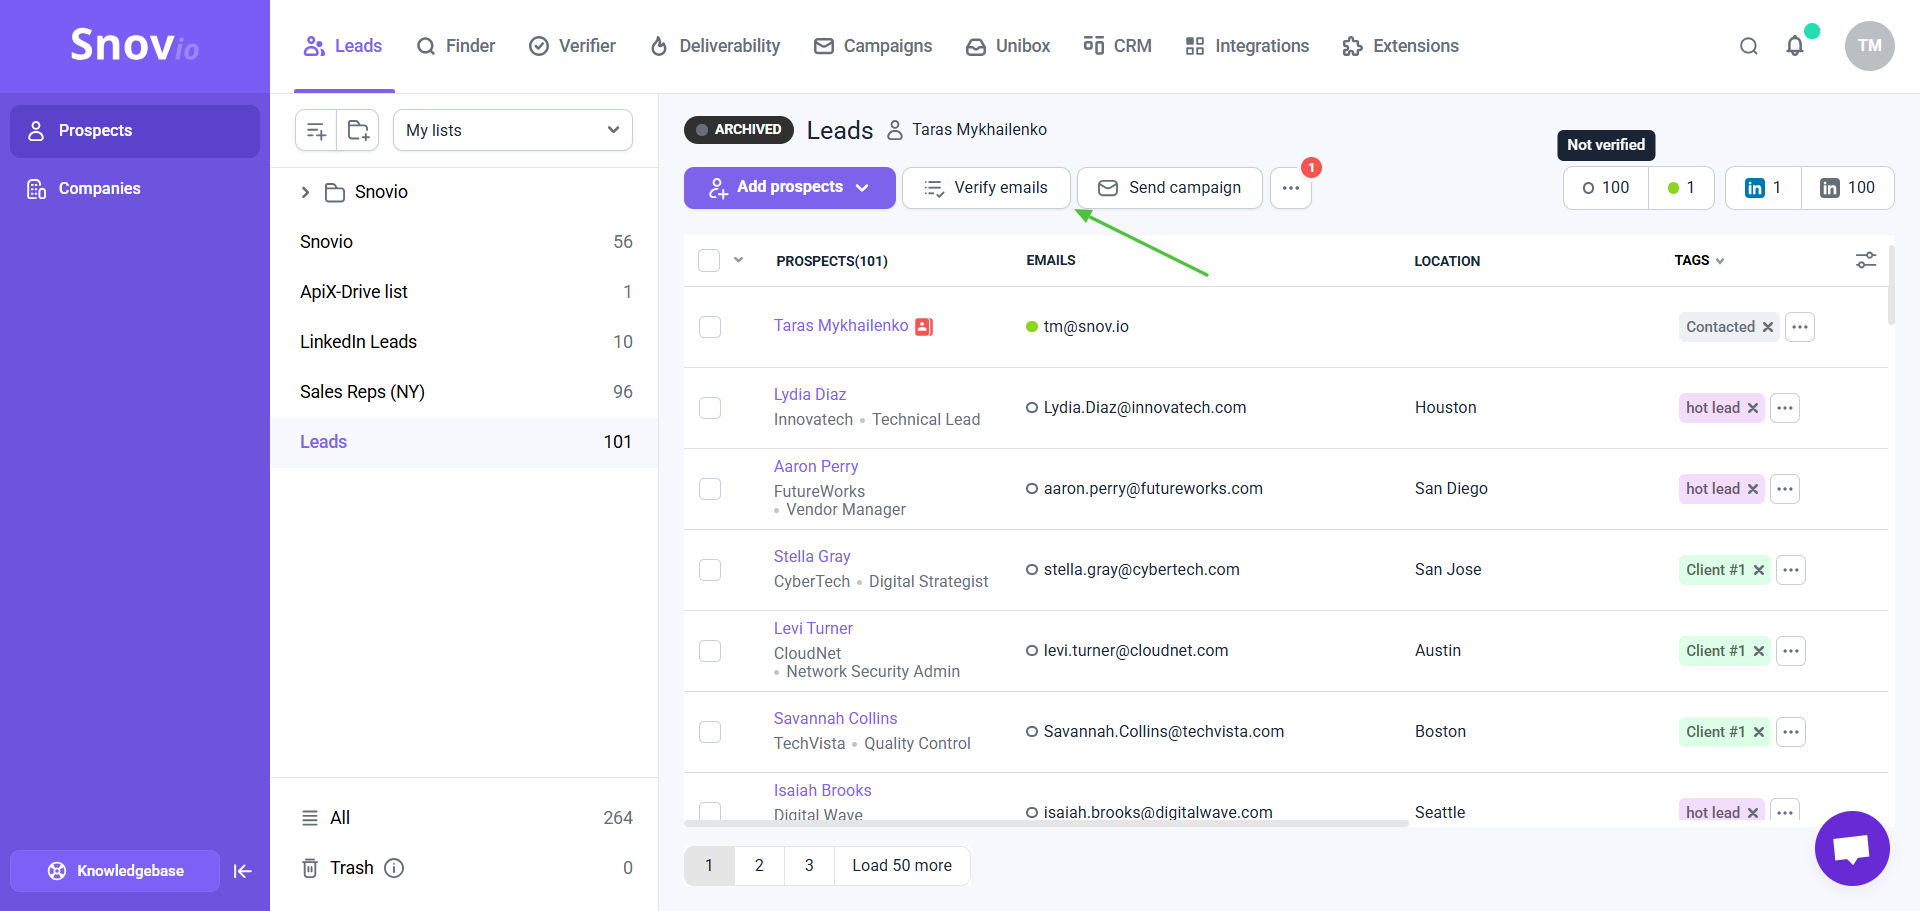
Step 2: Add email filters (only before launch)
Apply filters to the recipient lists to automatically exclude grey and yellow emails that have a higher chance of bouncing due to their unconfirmed status.
With this option, the emails that have a selected status are automatically removed from your recipient list. If you add new prospects after the campaign starts, these filters will also work.

Step 3: Use SMTP connection
If you're using Google or Microsoft email accounts, it's generally better to connect them via SMTP for sending campaigns. While direct integration will work, SMTP is the preferred type of connection.
Learn how to connect your Gmail via SMTP.
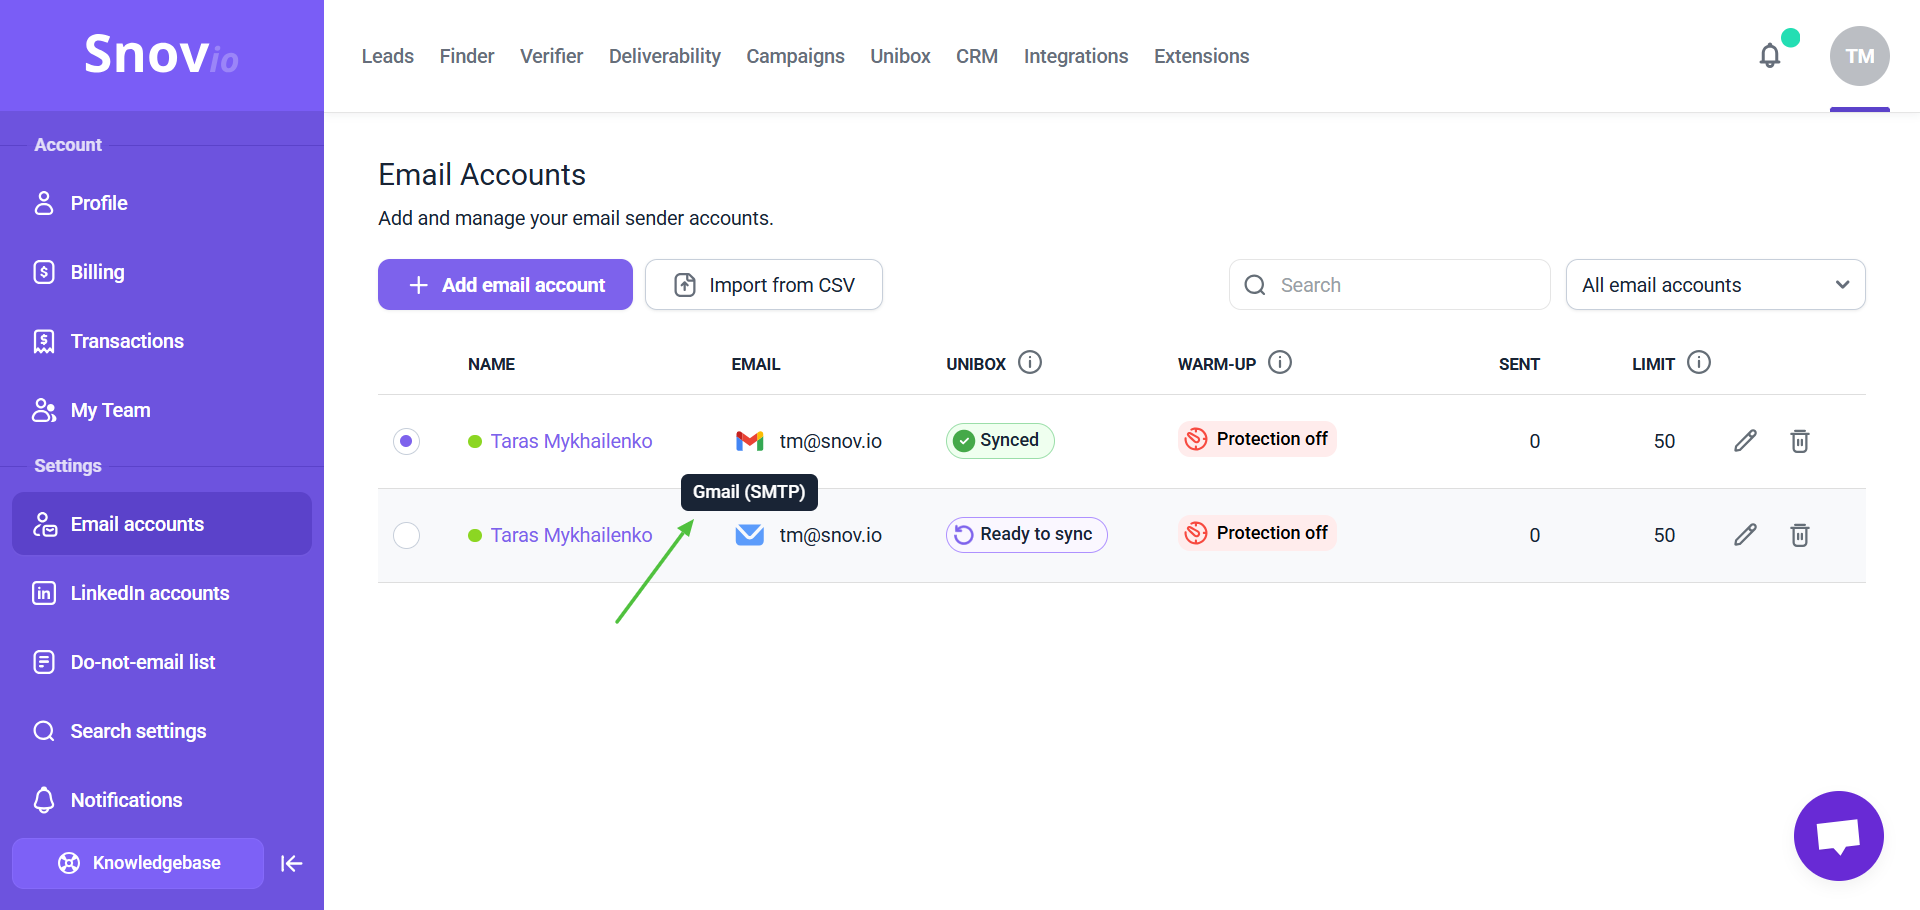

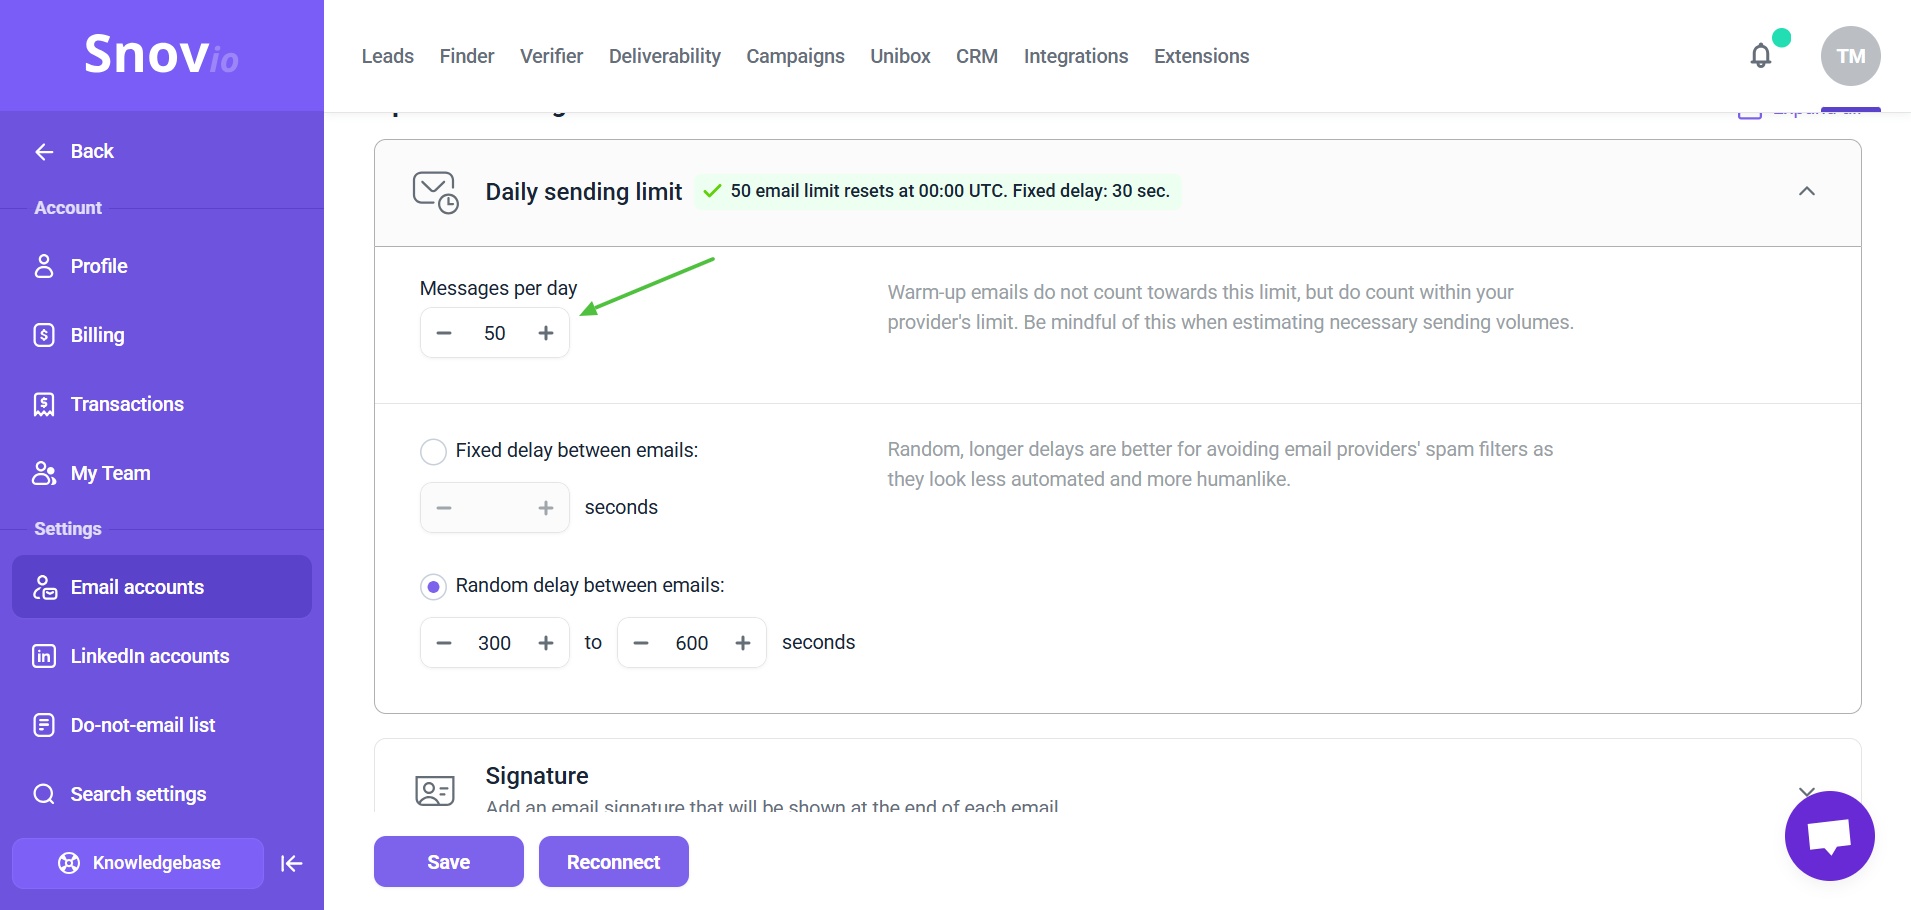
Step 4: Lower your daily sending limit
Sending too many emails may appear to providers as spamming, especially if you send cold emails.
Go to Email accounts. Click the Edit icon next to your sender account. Scroll down to the Optional settings section. Under the Daily sending limit tab, adjust the Messages per day value.
Also set longer, random intervals between emails in email account settings. To make your sending pattern look more natural to providers, enable Random delay between emails and set it to 300–600 seconds (5–10 minutes).

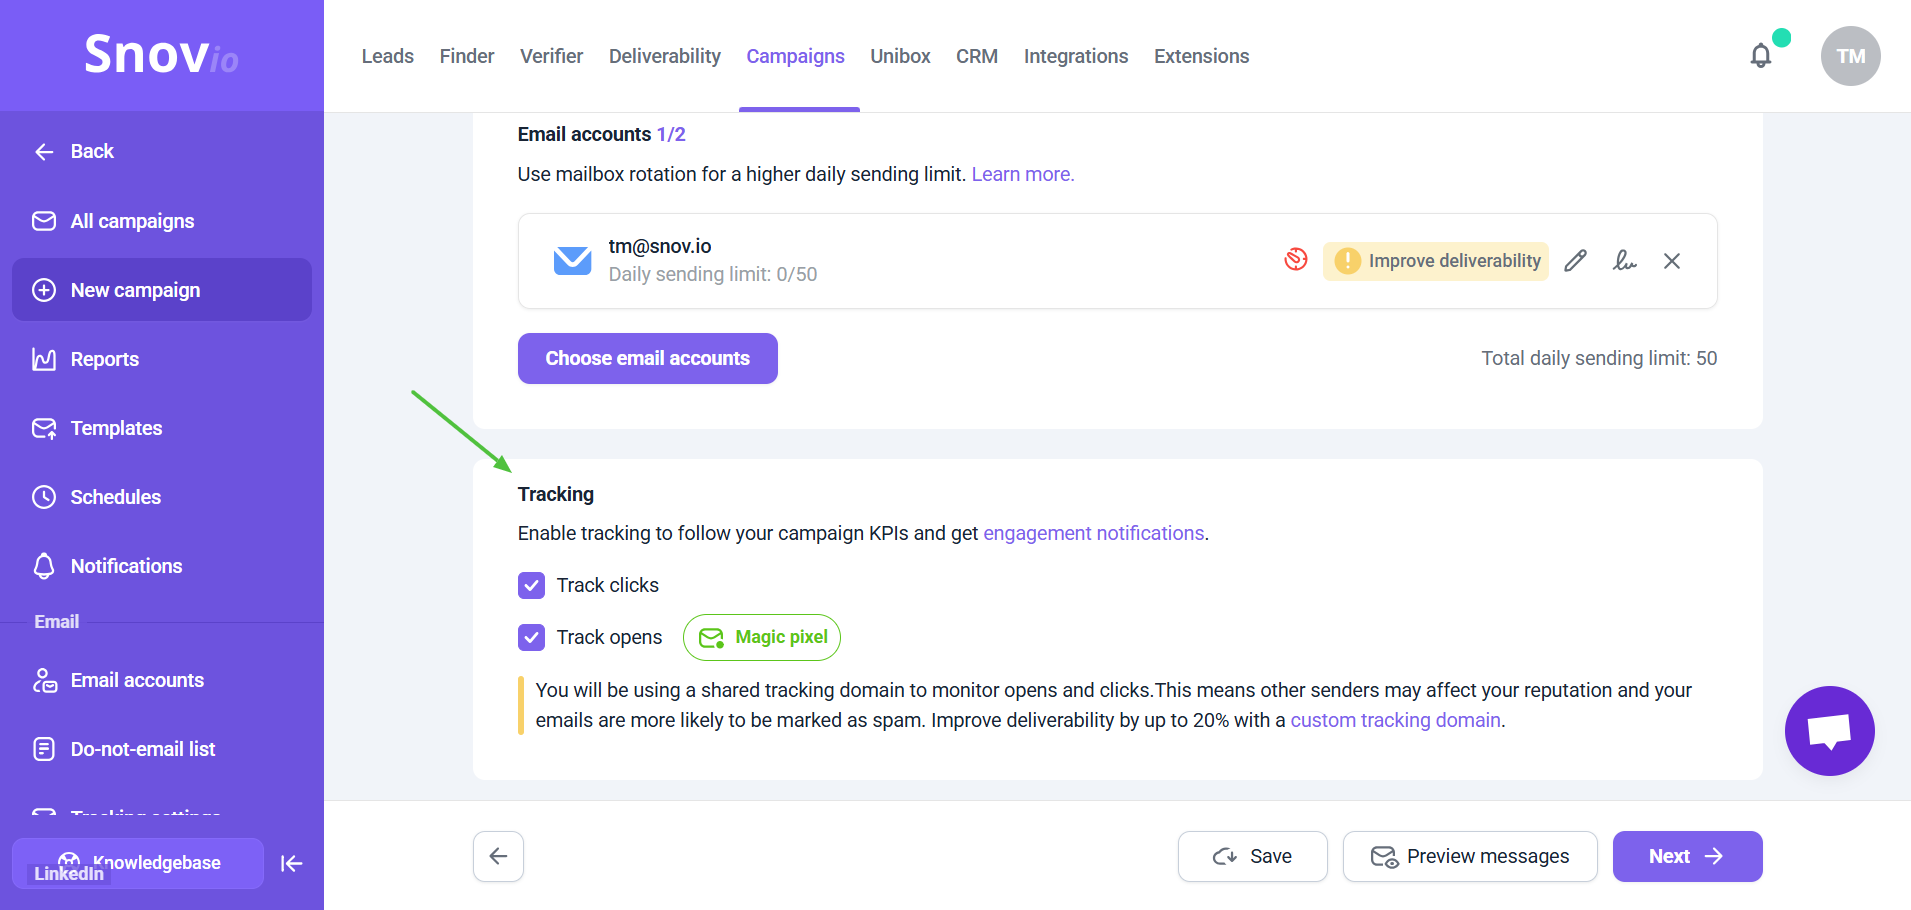
Step 5: Disable tracking or set up a custom domain
Tracking helps you collect statistics and monitor engagement reports, but it can also impact email deliverability.
If your sequences depend on tracking for checking conditions, a custom domain is a must-have. This guide will help you set it up.
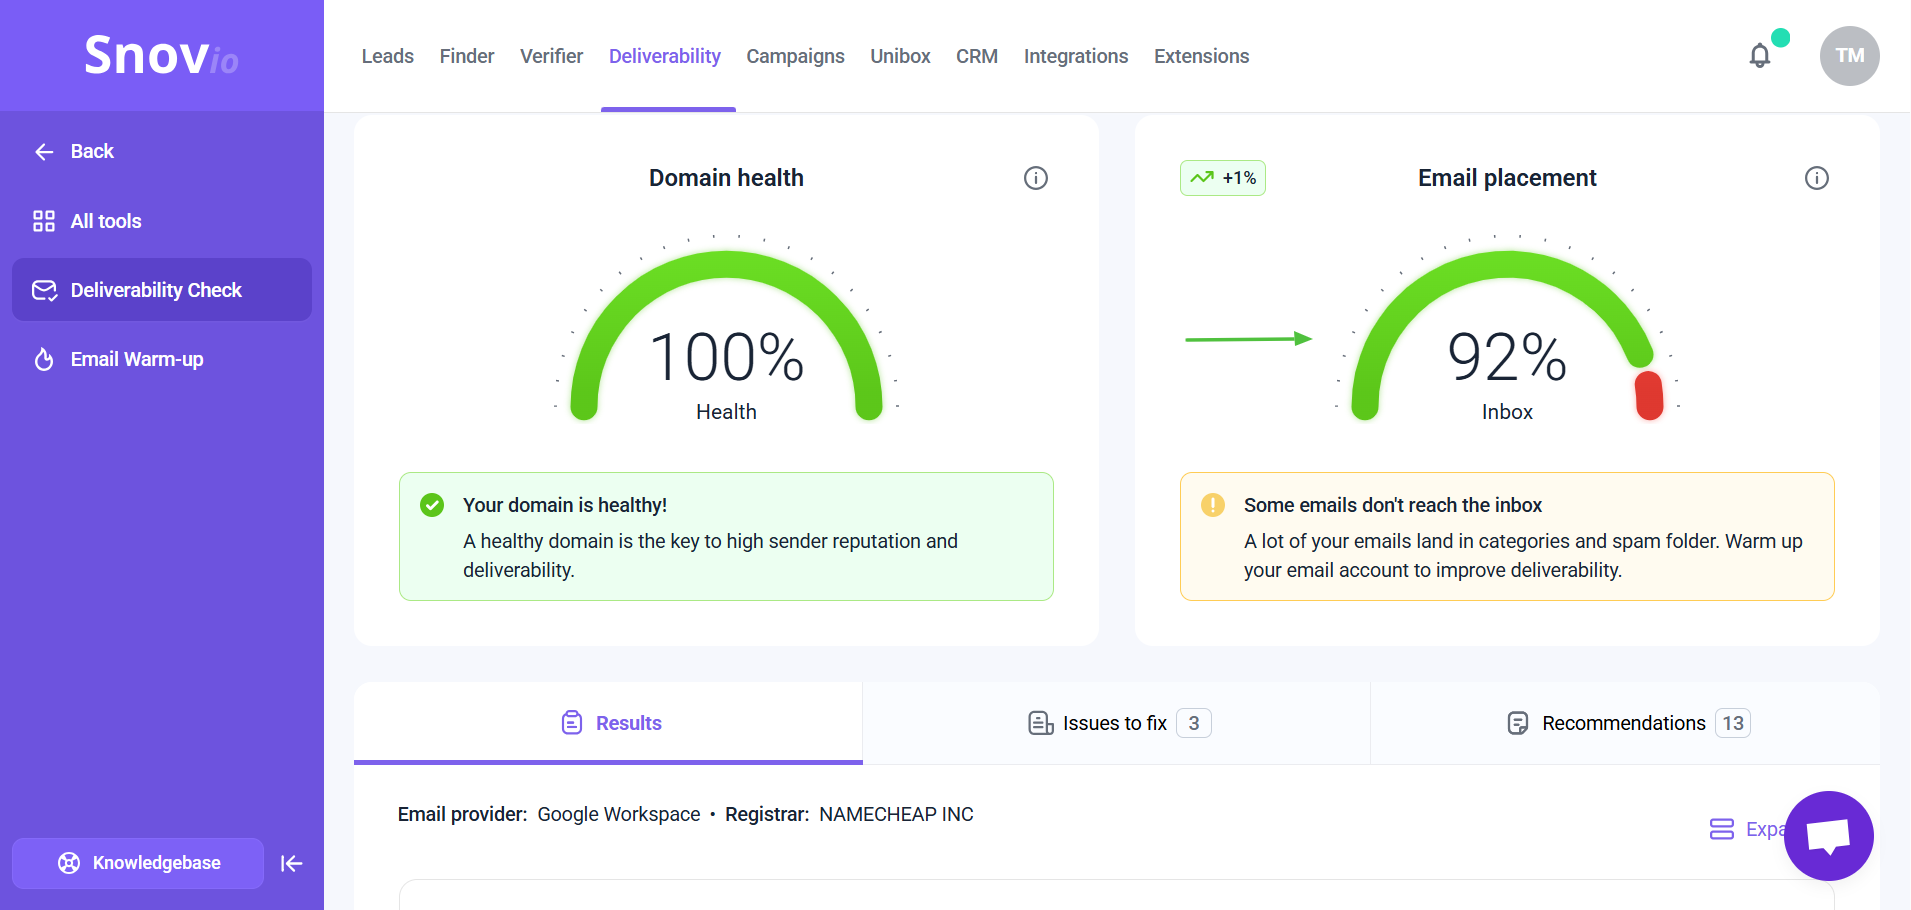
Step 6: Check domain health and test deliverability
To identify potential issues with your email infrastructure, use our deliverability check.
It helps you troubleshoot your domain’s DNS settings, email content, and other factors that may cause bounces or affect email placement.
You can test your sender email accounts and receive personalized tips to fix any identified issues.
If you have a question that we haven't covered, feel free to reach out to our Customer Care team. You can contact us at help@snov.io or through live chat. We're here to help you!