This guide will teach you how to connect your Gmail account to Snov.io via SMTP connection.
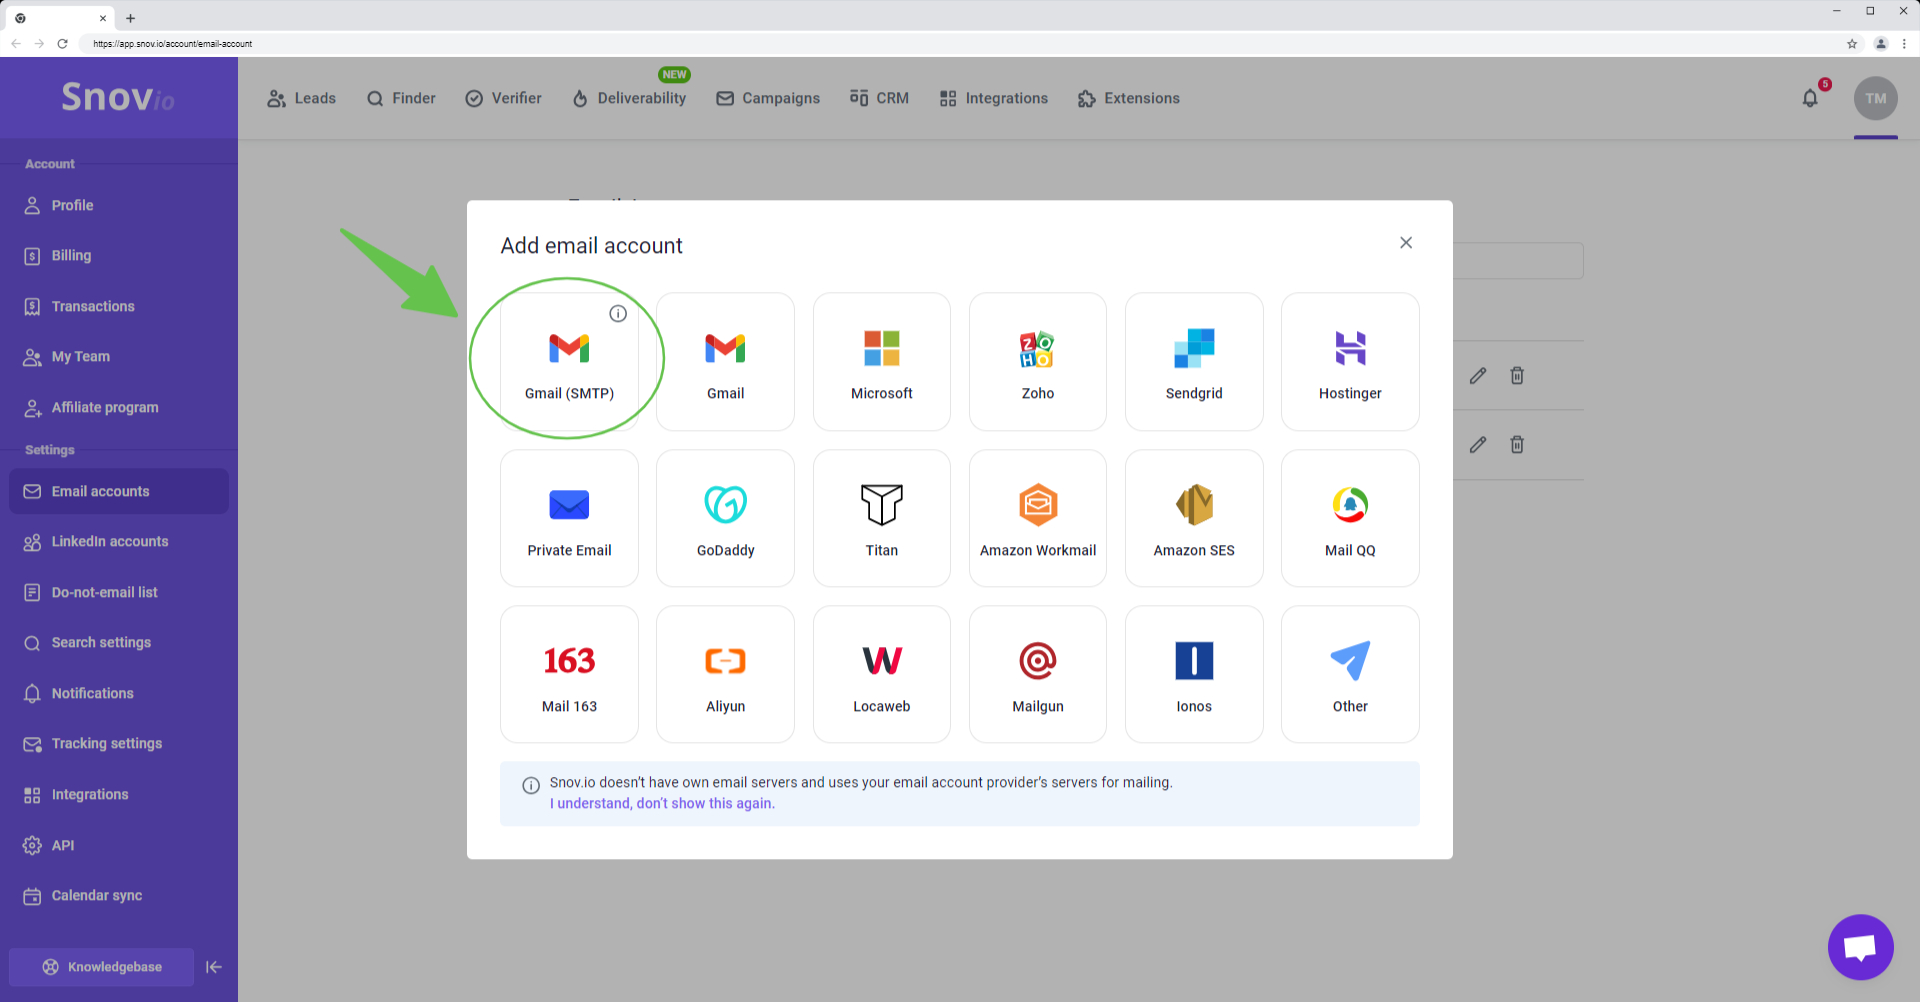
Step 1. Add a new email account
Go to the Email Accounts page. Click + Add email account button and choose Gmail (SMTP).
Step 2. Enter SMTP and IMAP settings
In the SMTP section, enter your sender details. The Gmail server settings for sending emails are automatically pre-filled.
| Field | Explainer |
| From name | This is your sender name. |
| From email | This is your sender email address. Enter the address associated with your Gmail account.
To set your Gmail alias address as the "From email", follow these steps:
Please note that you can only add alias addresses that are associated with your primary Gmail account to the "From email" field. |
| App password | Enter the "app password" created for your Gmail account. |
Step 3. Create an app password
Start by creating an app password in your Google Account settings. You'll use this password instead of your regular password when connecting your email account to Snov.io.
An app password is an alternative to your regular password. It allows the application you're using to connect with your Google Account.
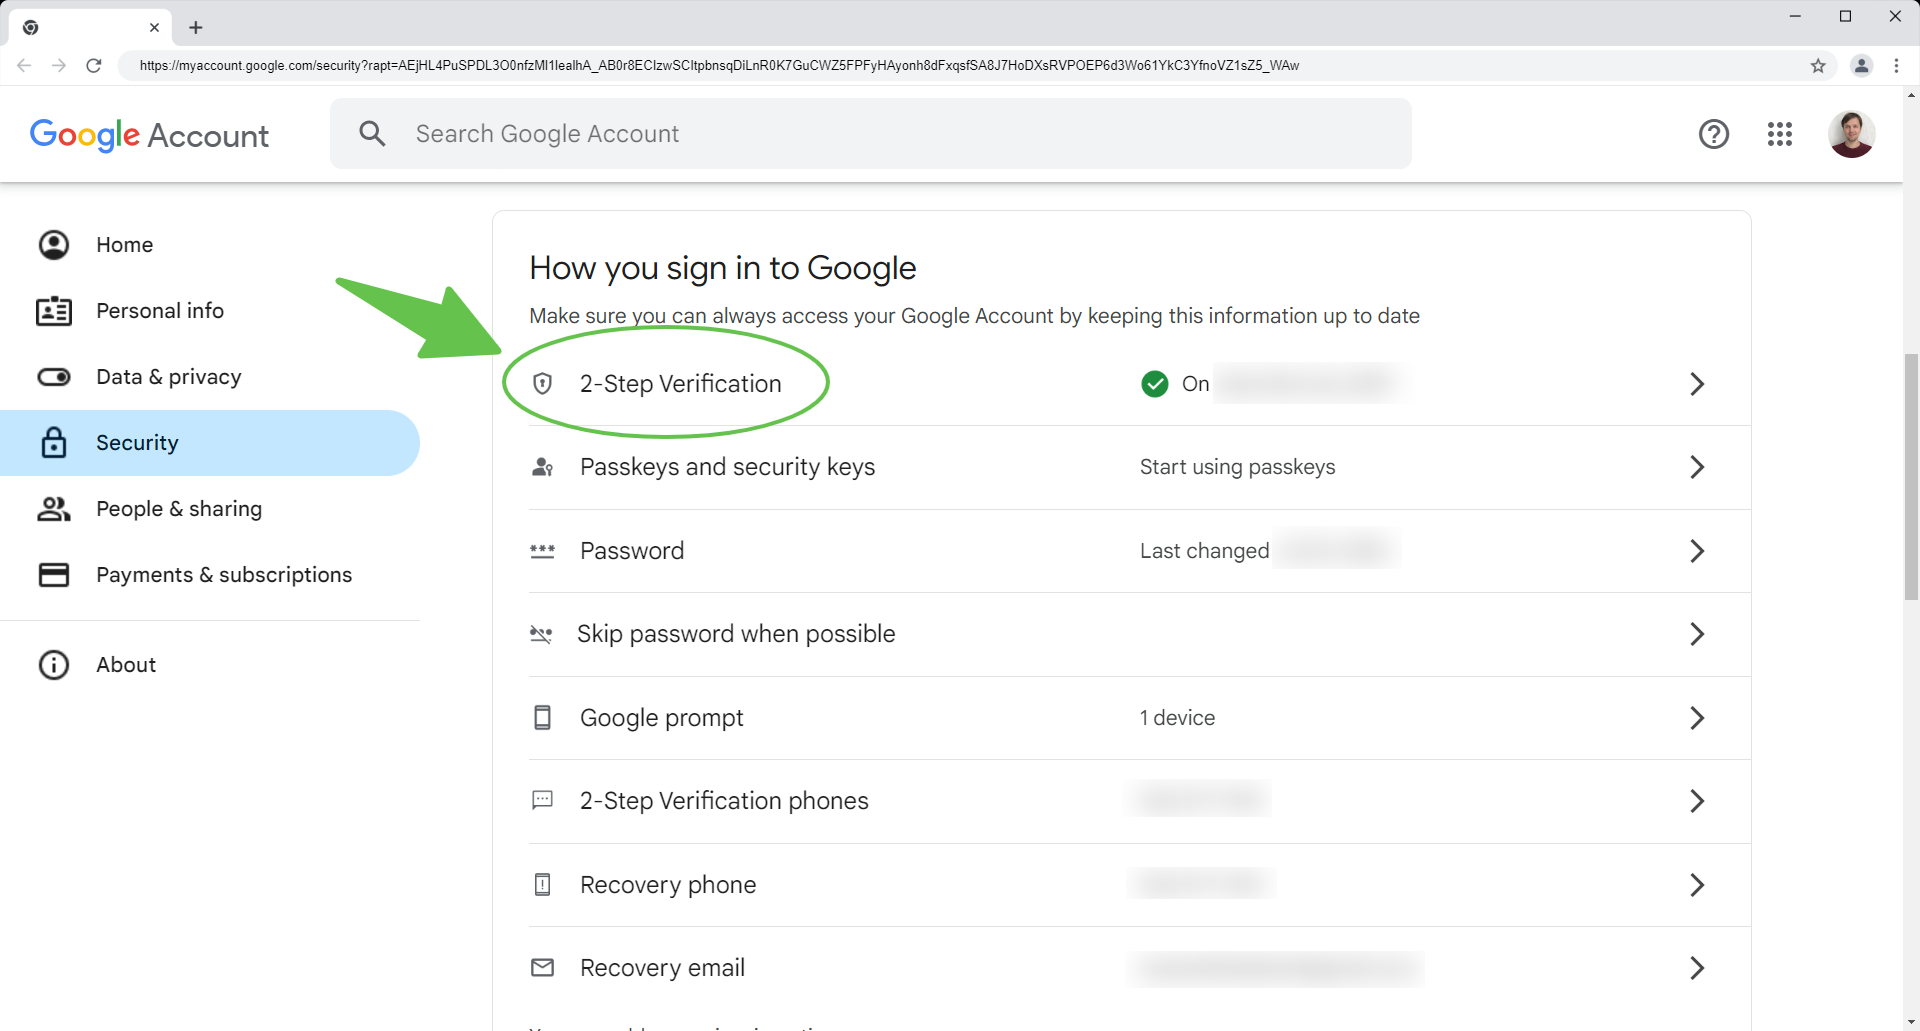
To create an app password, open the Security --> page in your Google Account settings. Scroll down to the How you sign in to Google section and click on 2-Step Verification.
On the next screen, scroll down to the bottom of the page and select App passwords.
Make sure 2-Step Verification is enabled (On) before proceeding. If it is disabled, you won't be able to create app passwords.
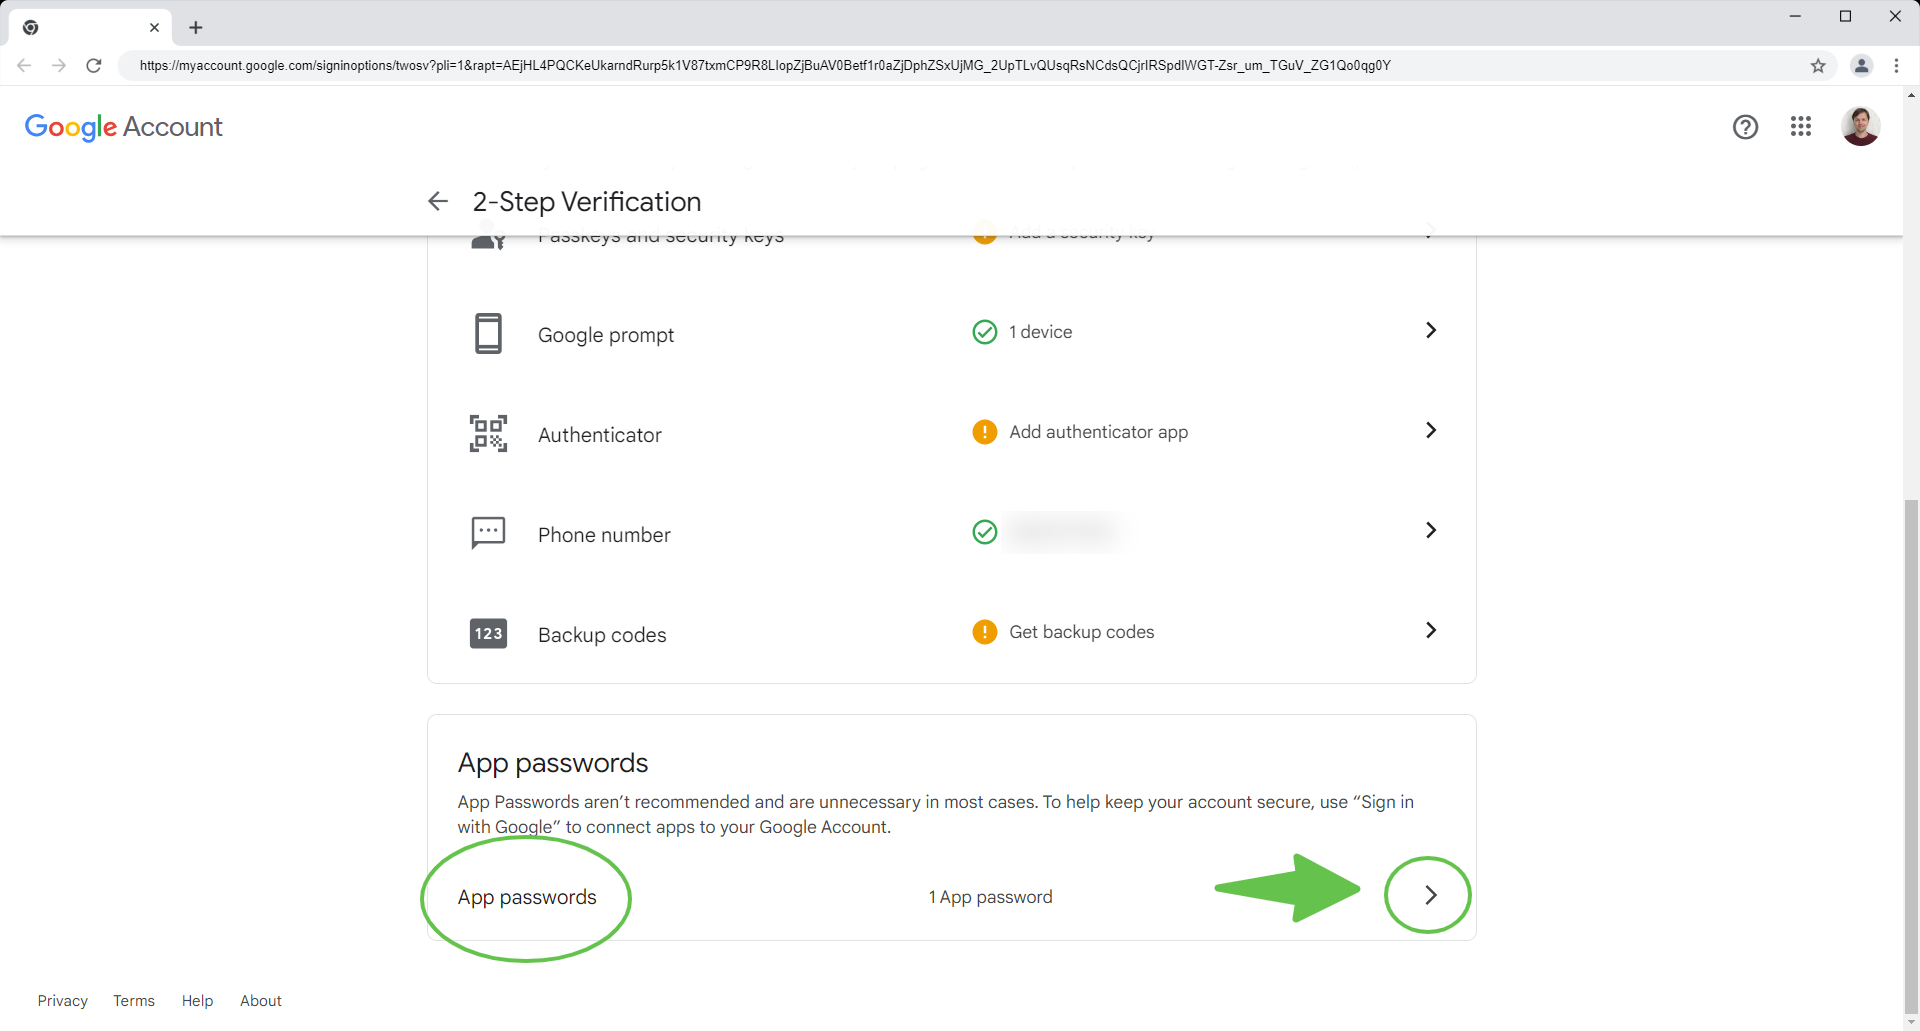
If you can't find the App passwords section in your Google Account (even after enabling 2-Step Verification), use this direct link to access it: https://myaccount.google.com/apppasswords -->
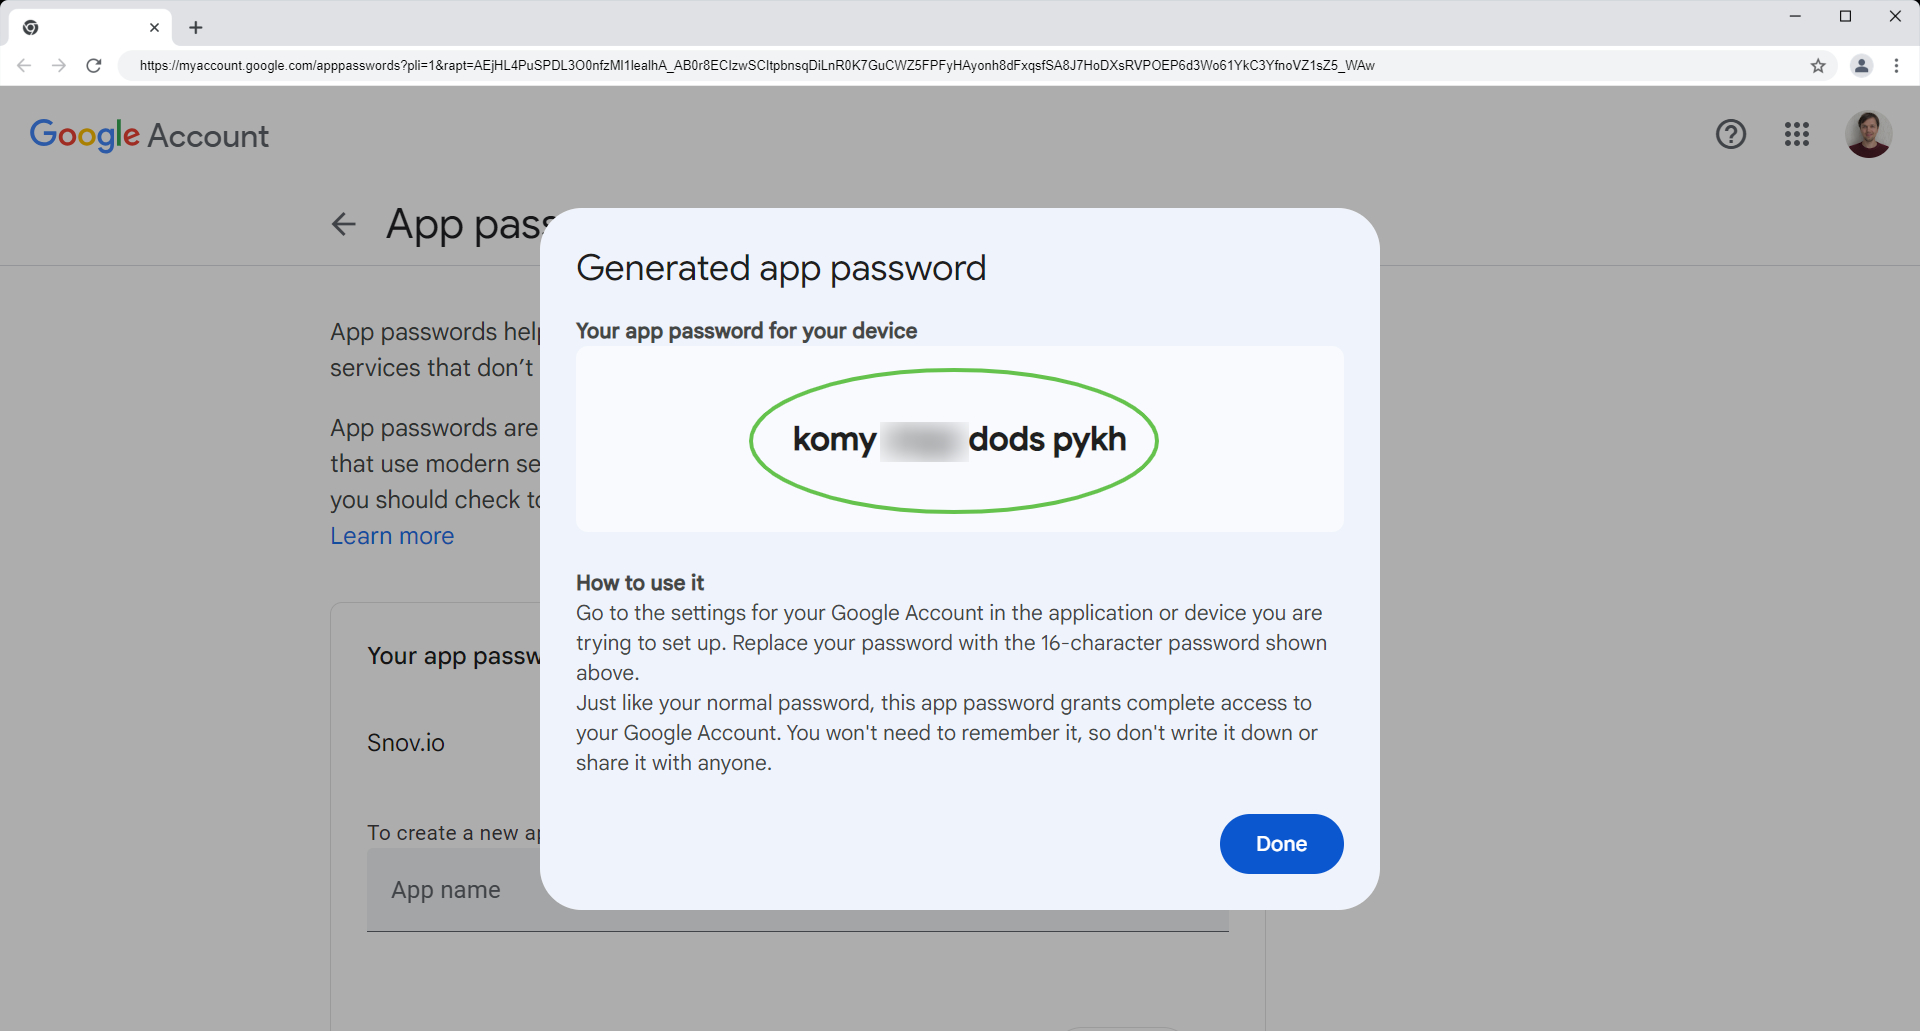
To generate a new app password, enter "Snov.io" (or any name you prefer) in the app name field and click Create.

Google will generate a unique 16-digit password. Copy it using the right-click menu or the Ctrl + C keyboard shortcut. You will need to enter it in your email account settings in the next step.
If you close the pop-up window, you won't be able to view the password again. In that case, you'll need to repeat the process to generate a new app password.
Step 4. Check connection
Complete your email account setup by testing the connection after entering all required settings. Click the Check connection button (1).
Snov.io will send you the test email with the subject "Testing your new email with Snov.io" confirming the successful connection. Click Add account down below to save it (2).
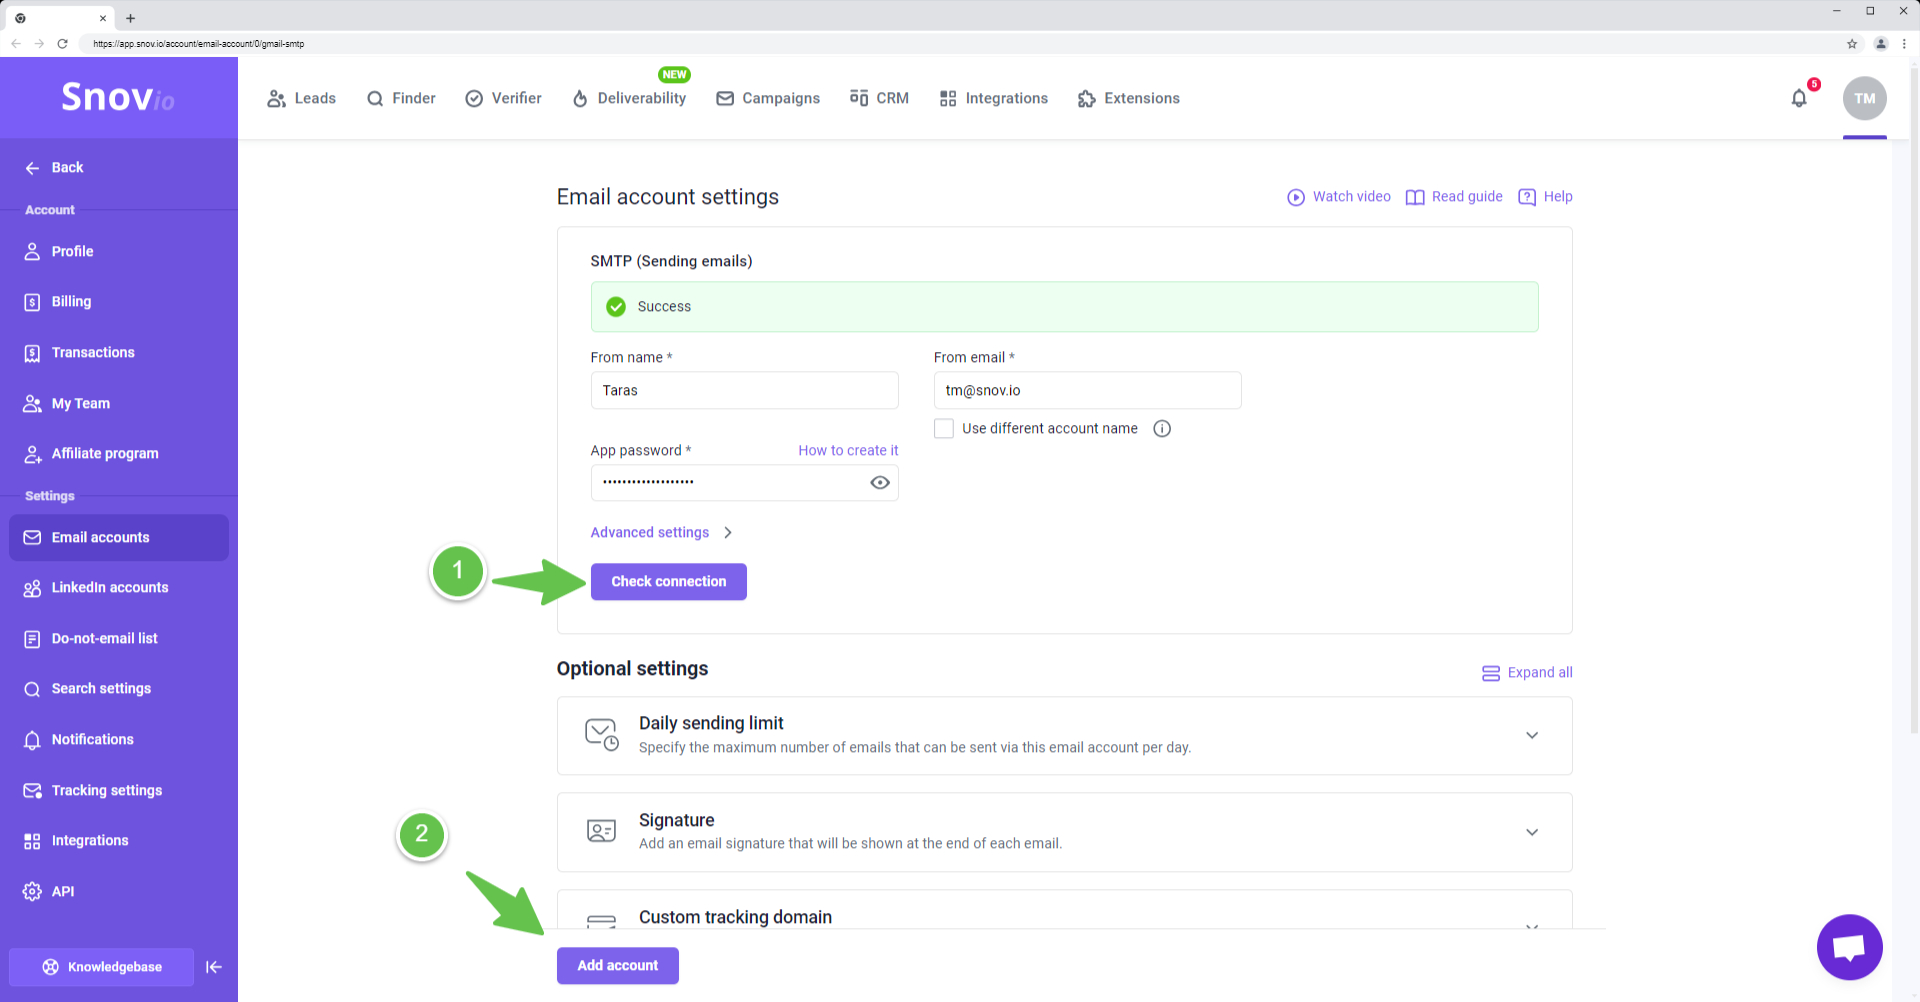
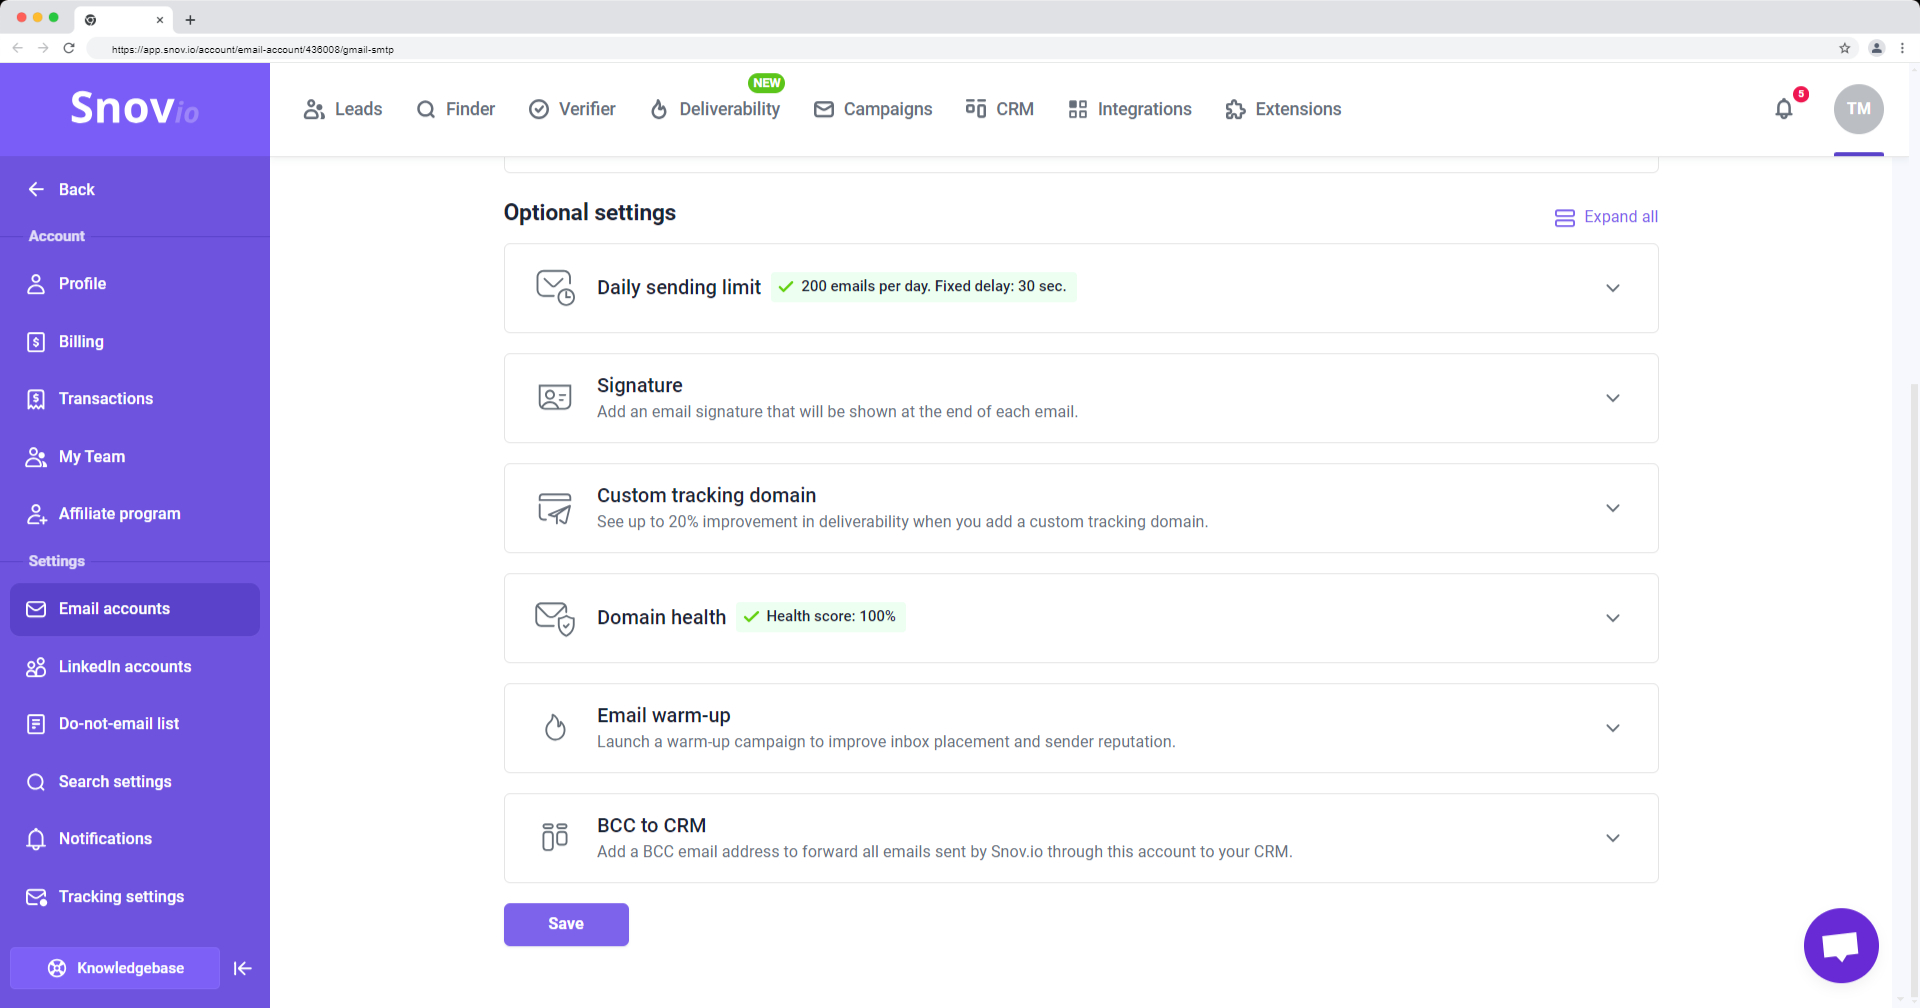
Step 5. Set advanced email settings
Each email account has optional settings that you can configure, including adding a custom "From" name and signature, setting daily sending limits, and adding custom tracking domains.
Set your daily sending limit lower than your email provider's maximum to avoid any account restrictions.
FAQs and troubleshooting:
If you encounter connection errors (Password not accepted or IMAP error) while connecting your account, follow these steps:
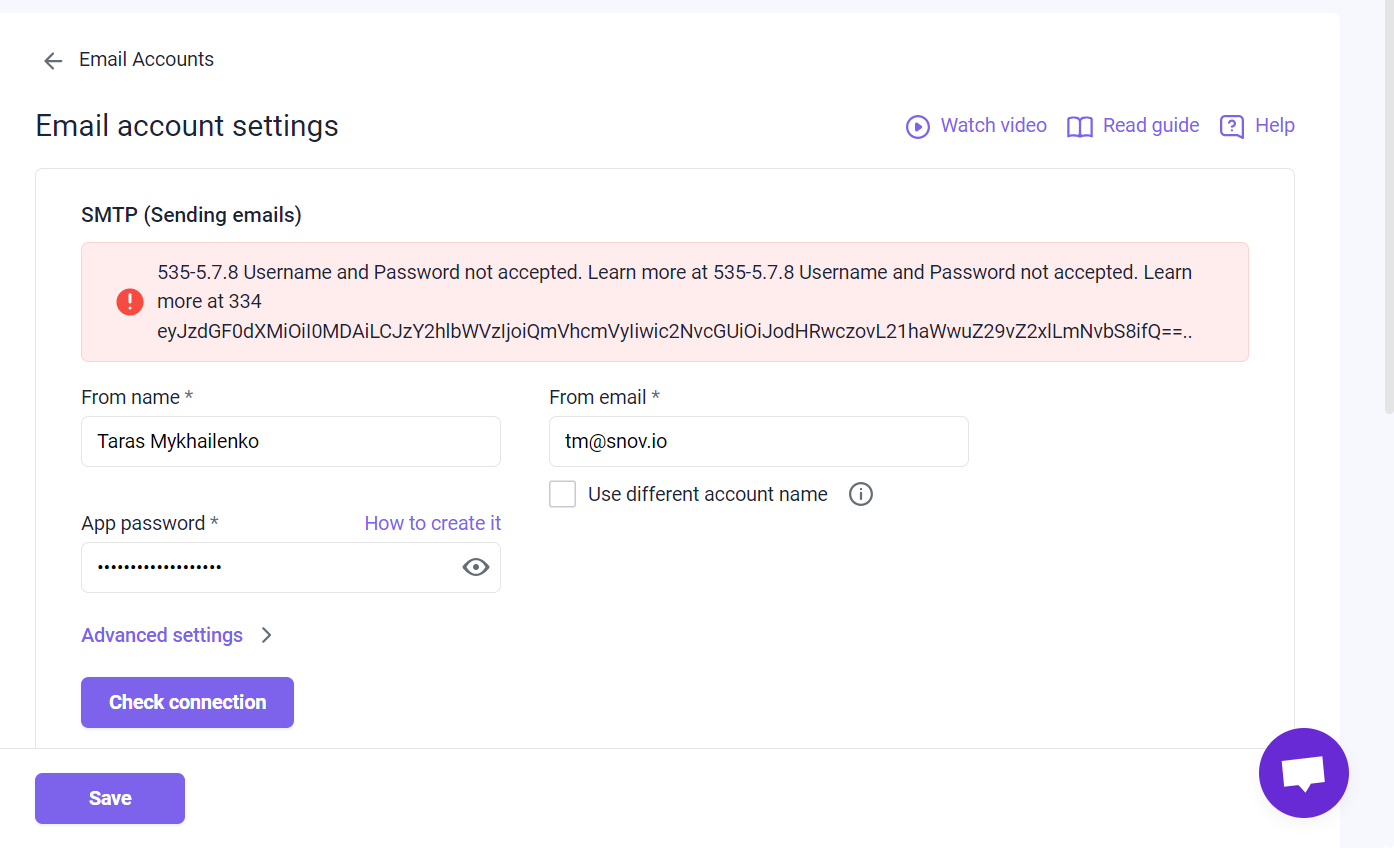
1. Make sure your app password is up-to-date
If you change your actual Google account password, your old app password will no longer work. You will need to generate a new app password and update it in your Snov.io email account settings.
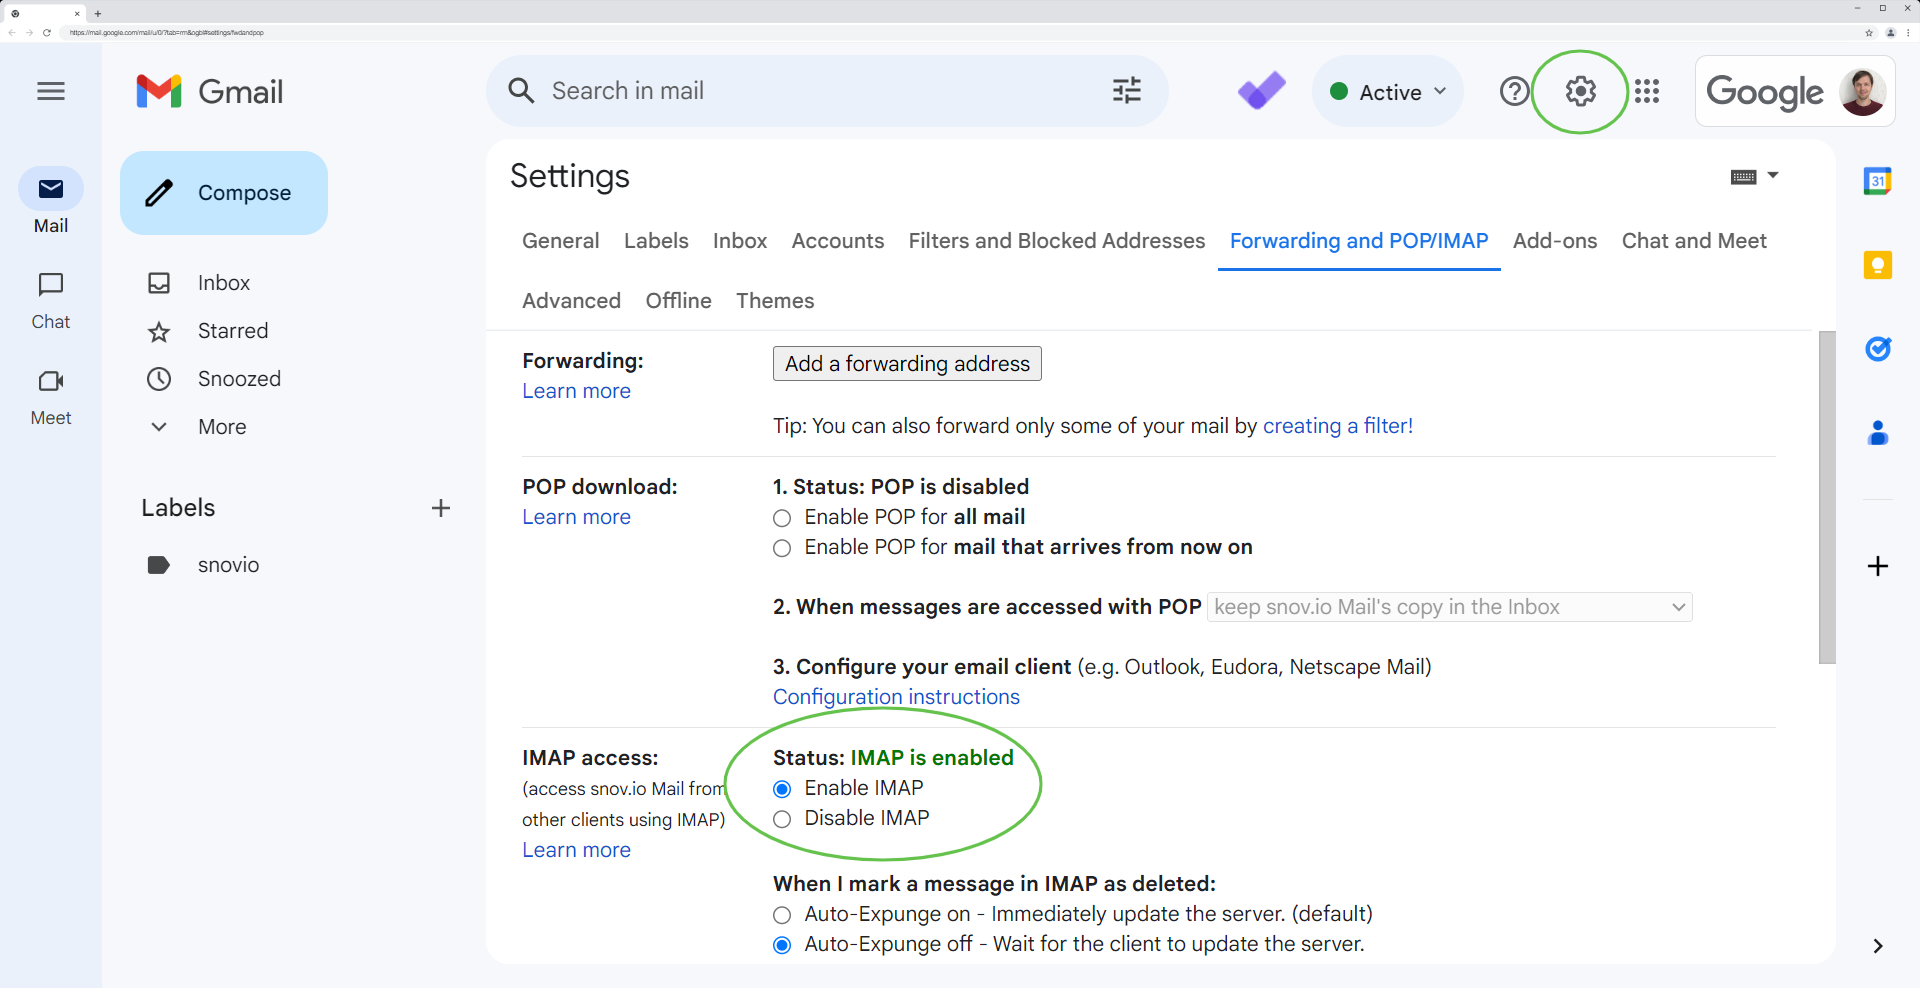
2. Check IMAP access in Gmail settings
Let's ensure IMAP is turned on in your Gmail settings for a successful connection. Open your Gmail account -->. Click on the gear icon in the top-right corner and select See all settings.
Go to the Forwarding and POP/IMAP tab. Scroll down to the IMAP access section and confirm that IMAP is enabled.
If you're still experiencing connection issues, don't hesitate to reach out to our Customer Care team. You can contact us at help@snov.io or use our live chat for assistance.


Sorry about that 😢
How can we improve it?