After connecting your LinkedIn profile to Snov.io, you can automate LinkedIn outreach and launch multichannel sequences that combine email and LinkedIn actions.
Step 5: Check your account status and SSI score
Step 6: Set daily action limits

Your account stays protected while you automate:
- Location-based proxy. Each account you connect gets a proxy in your usual login region, so your activity looks the same as when you use LinkedIn yourself.
- Encrypted connection. Your login details and personal information travel over encrypted cloud connections.
- Safe daily volumes. Daily limits keep your outreach within safe ranges, so you get results without risking your profile.
Step 1: Add LinkedIn slots
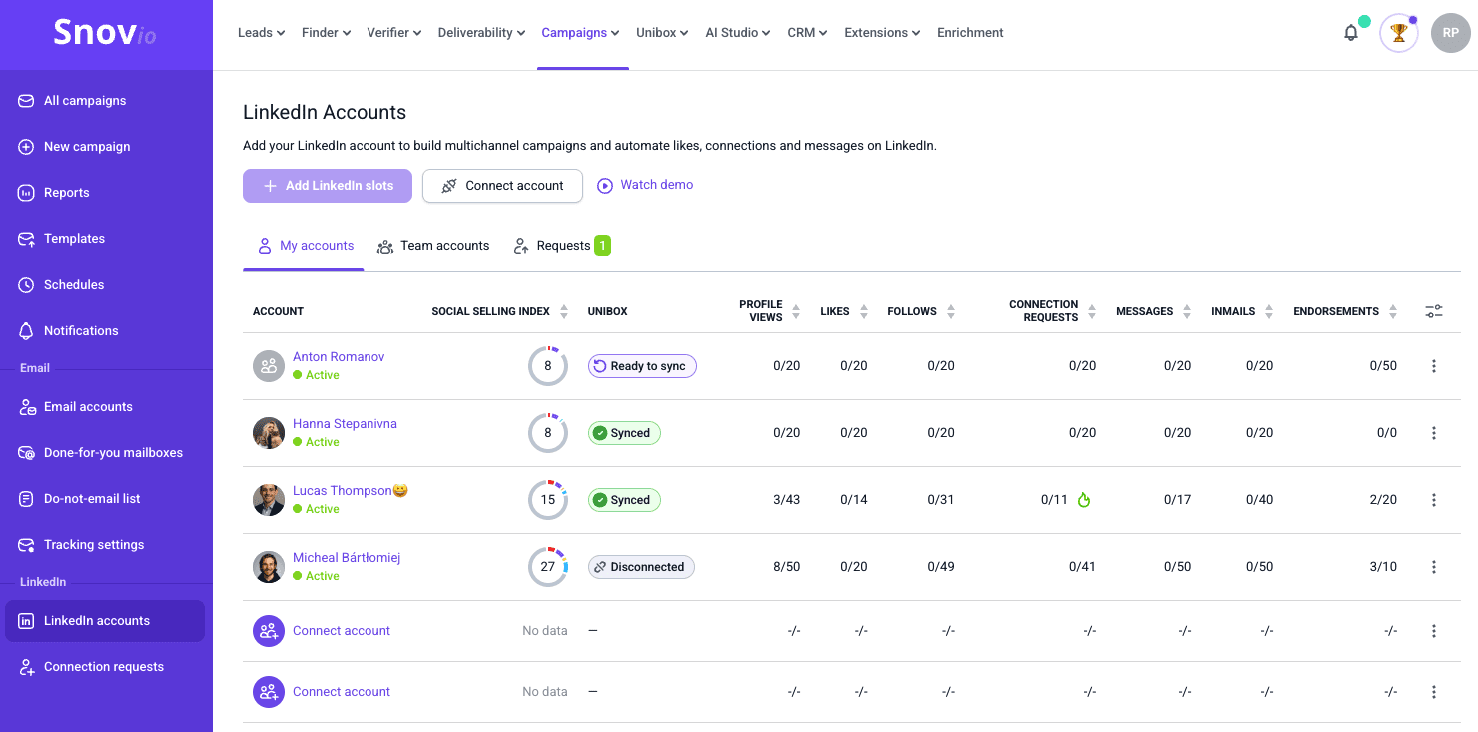
Go to the LinkedIn accounts page in your account settings. To connect your LinkedIn profile to Snov.io, you'll need a LinkedIn slot.

Billing: The price per slot depends on whether you purchase slots separately ($69/month) or together with a plan ($59/month). New slots are prorated based on the current LinkedIn Automation billing period. Read more about billing.
Safety: Each slot includes a dedicated proxy.
How many slots do you need?
The number of slots is the number of profiles you want to use for LinkedIn outreach at the same time.
One LinkedIn account is enough for small or starter campaigns. For larger lists, add more slots and connect a few extra accounts to distribute your daily actions. Follow our daily LinkedIn limit guide to estimate the right number.
Our LinkedIn Automation also supports Account rotation, allowing you to use multiple profiles to send one campaign.
Step 2: Enter account details
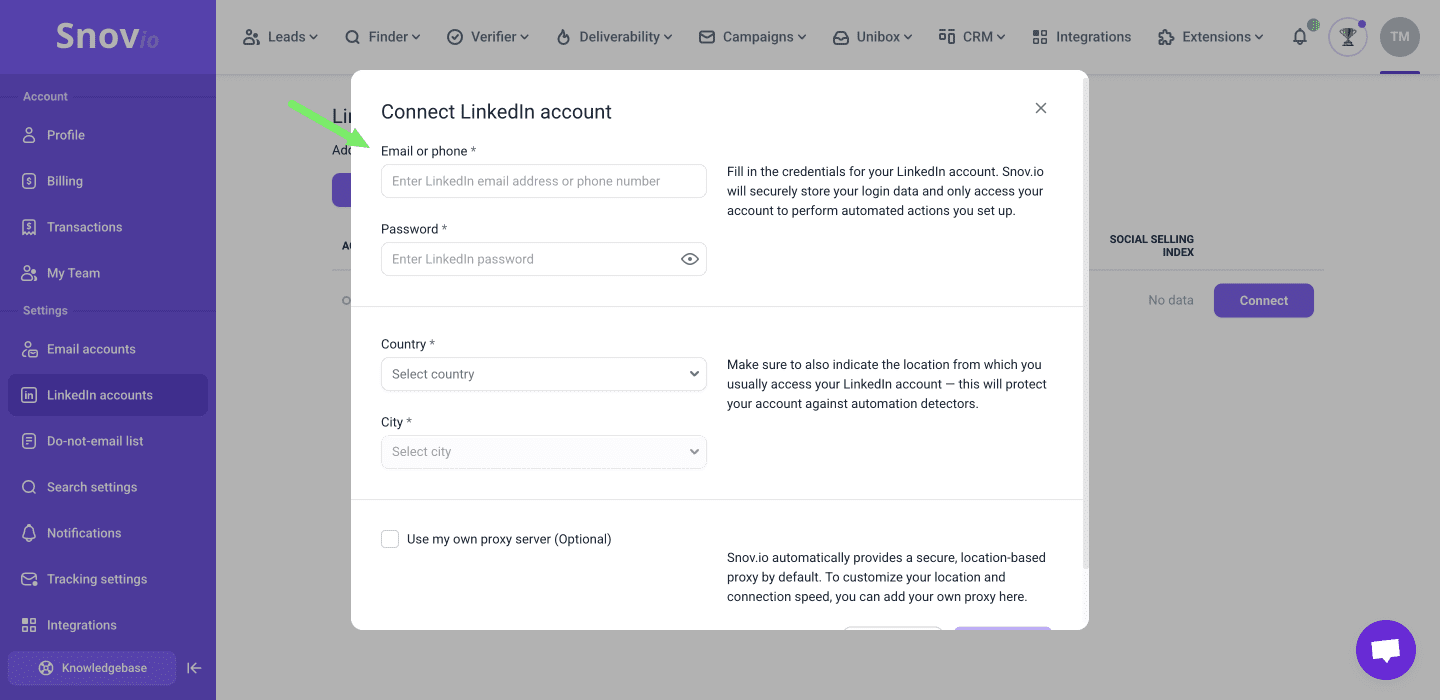
Click Connect on any active slot. A pop-up appears where you fill in these fields:
Email & password – the credentials you use to log into LinkedIn.
We need your account details to access your LinkedIn profile and perform actions on your behalf during automation.
Location (Country, city) – choose the region where you usually access your LinkedIn profile.
Snov.io will assign a location-specific proxy based on your selection. This makes your activity appear from the exact location as usual.
Step 3: Add a proxy server
To keep your automation safe, LinkedIn accounts in Snov.io run through a proxy connection.
The proxy masks automated actions so they look like normal activity, helping protect your account from detection.
Default proxy
For a quick proxy setup, simply select your location (country and city) and click Connect. We’ll automatically enable a secure proxy server for your LinkedIn connection.
Custom proxy
Want to use your own proxy server instead? See this guide to set it up and to change your proxy location later.
Step 4: Set your time zone
You can set different time zones for each LinkedIn account. This helps to match account activity in Snov.io with the account's actual time and location.
How it works
By default, any LinkedIn accounts where you don't set the time zone will use the default one from your Snov.io profile, unless you change it.
The account time zone tells Snov.io when to start or stop counting your daily limits, detect replies and update statistics.
Setting the correct time zone ensures your activity looks natural and does not trigger LinkedIn's algorithm.
In the LinkedIn slot settings, select the time zone under Account info. The time zone in Snov.io should match the location on your LinkedIn profile.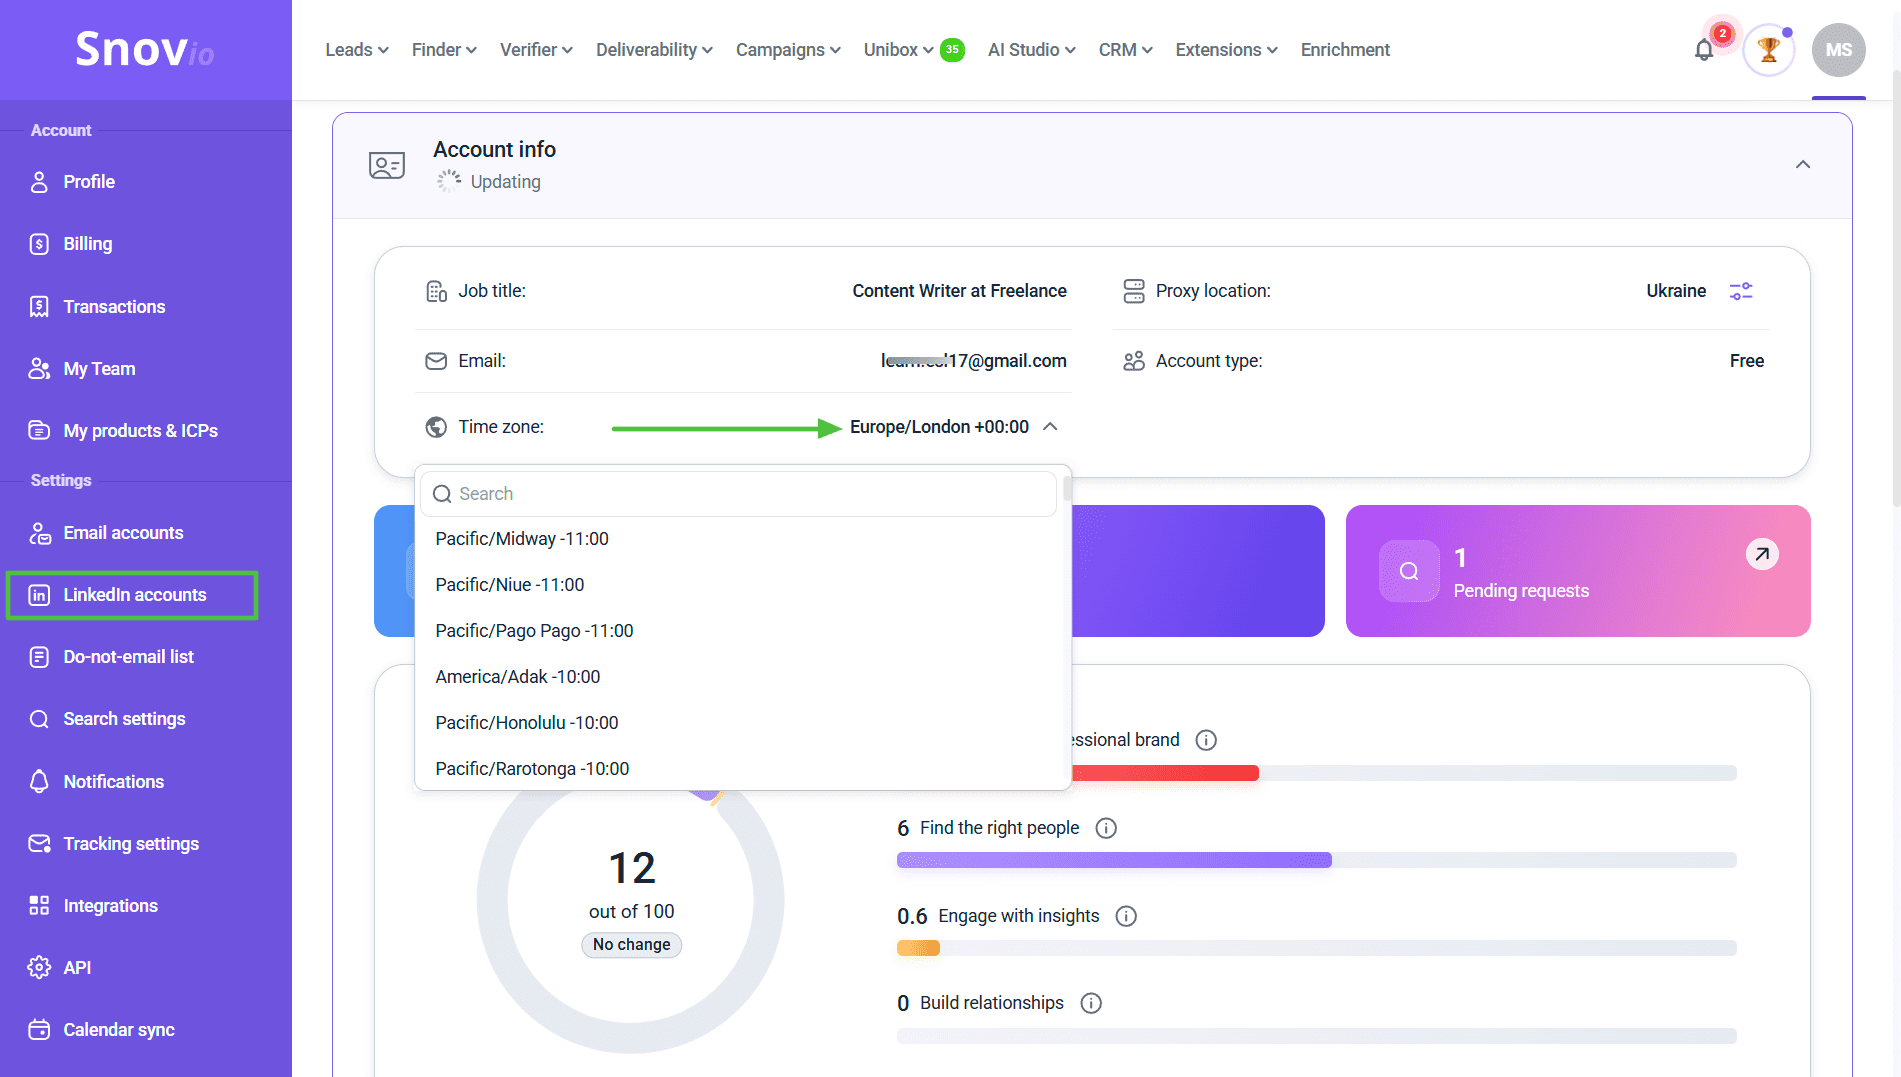

Automation actions follow the time zone you select in the campaign schedule.
Step 5: Check your account status and SSI score
After the connection is complete, your account appears in the list on the LinkedIn accounts page. There you can see its connection status, daily limit and SSI score. Snov.io updates the SSI of each connected account automatically.
A higher SSI raises the limits that are safe for your account. Read how to improve your SSI score.
Step 6: Set daily action limits
When you first connect your profile, Snov.io sets your limit to 20 automated actions per day. This ensures a safe start and leaves room for manual activity. To choose limits based on your SSI score, or to switch to flexible limits, see this guide.
What's next?
Your account is connected. Next, enable warm-up and set safe limits before you launch your first campaign.


Sorry about that 😢
How can we improve it?