This guide will show you how to automate your LinkedIn outreach with a sequence of engagement actions.
Before you start, make sure you've activated LinkedIn Automation and connected your LinkedIn account to Snov.io.
Create a sequence of LinkedIn actions
In the campaign builder, add LinkedIn actions to automate tasks like viewing or following profiles, liking posts, sending connection requests, sending messages or InMails, and endorsing skills.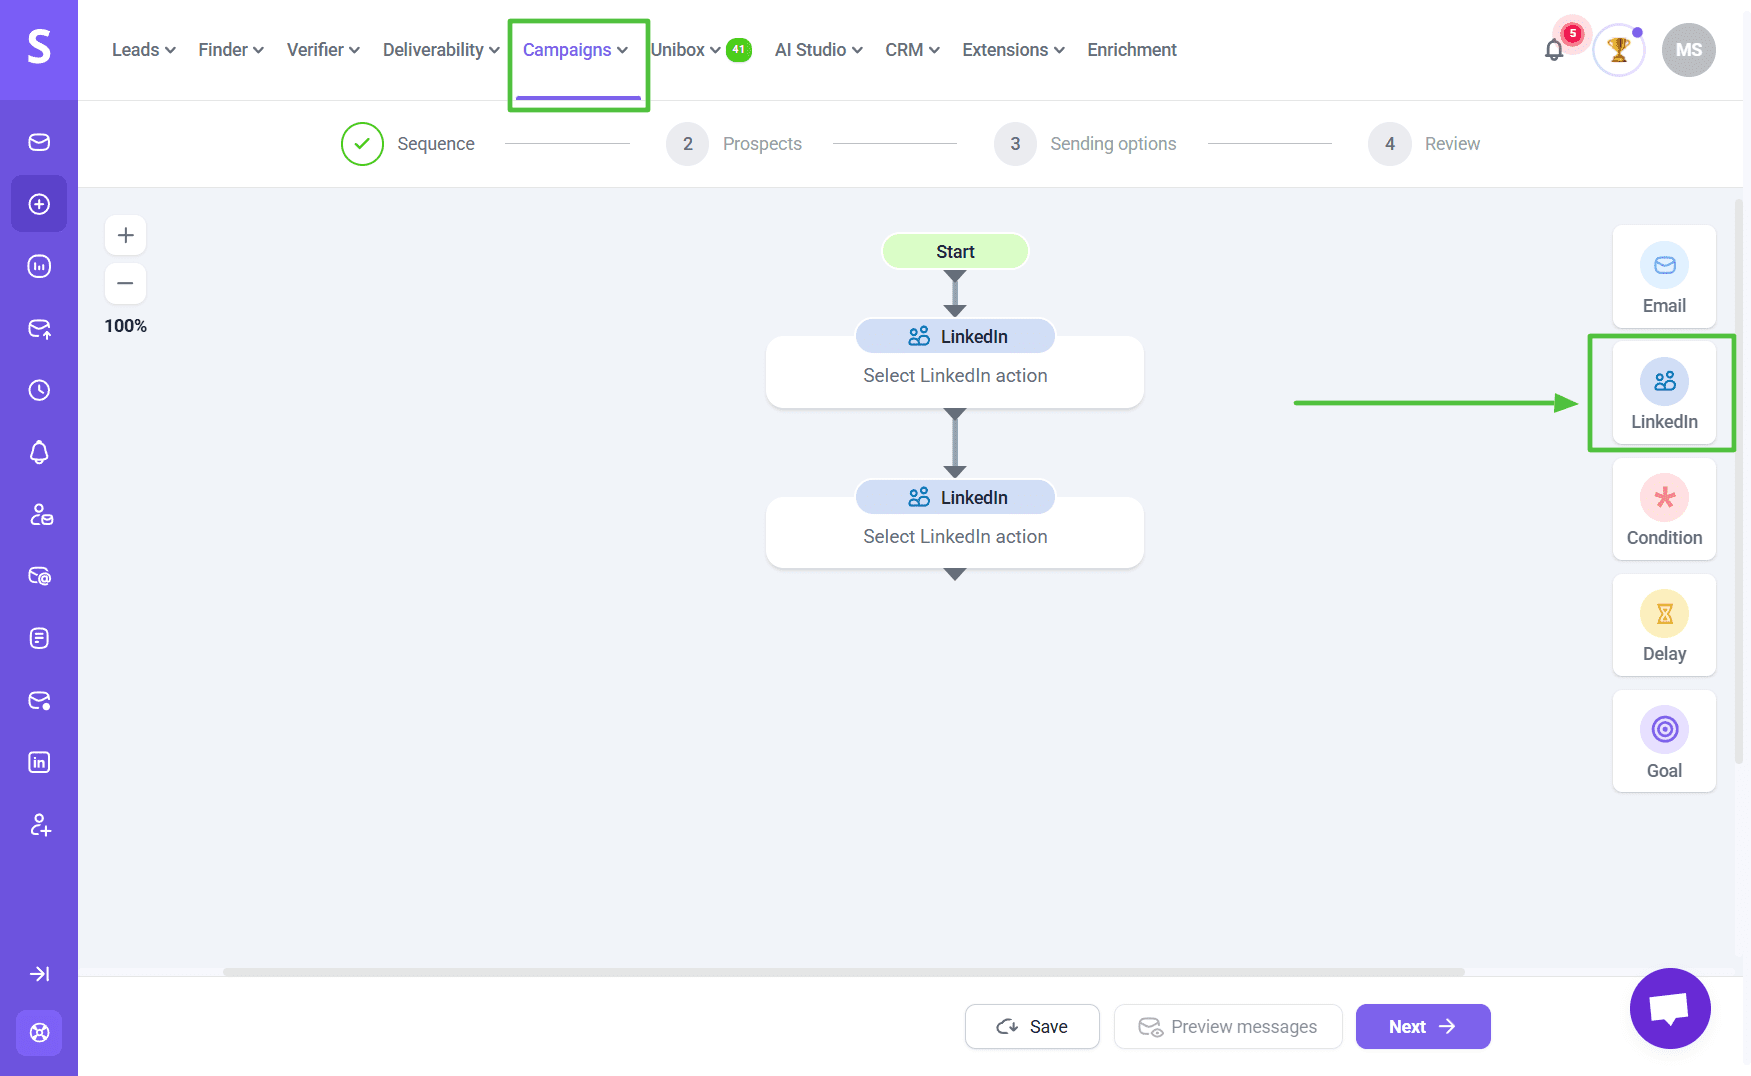
Add LinkedIn actions
To add a LinkedIn action to your sequence, select the LinkedIn step from the menu on the right, then choose the action you want it to perform.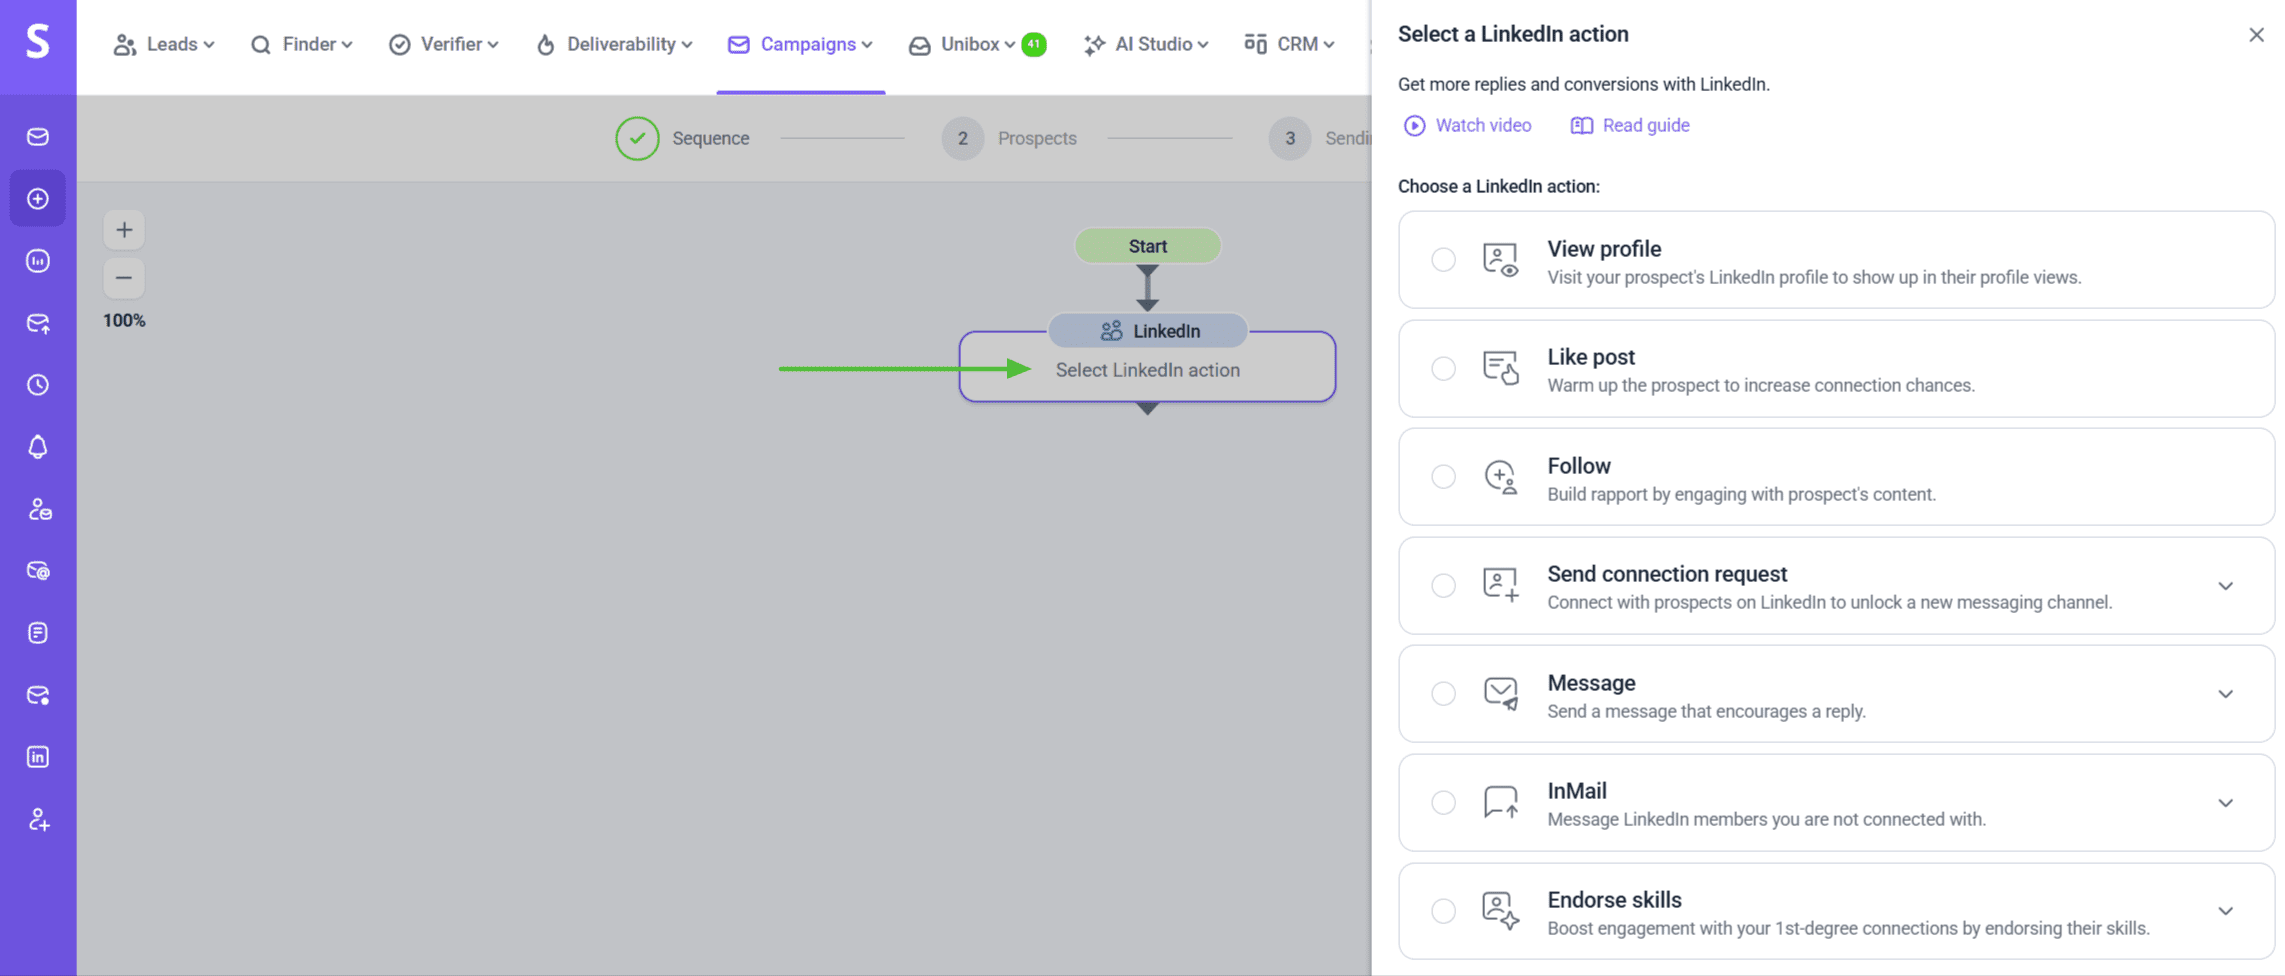
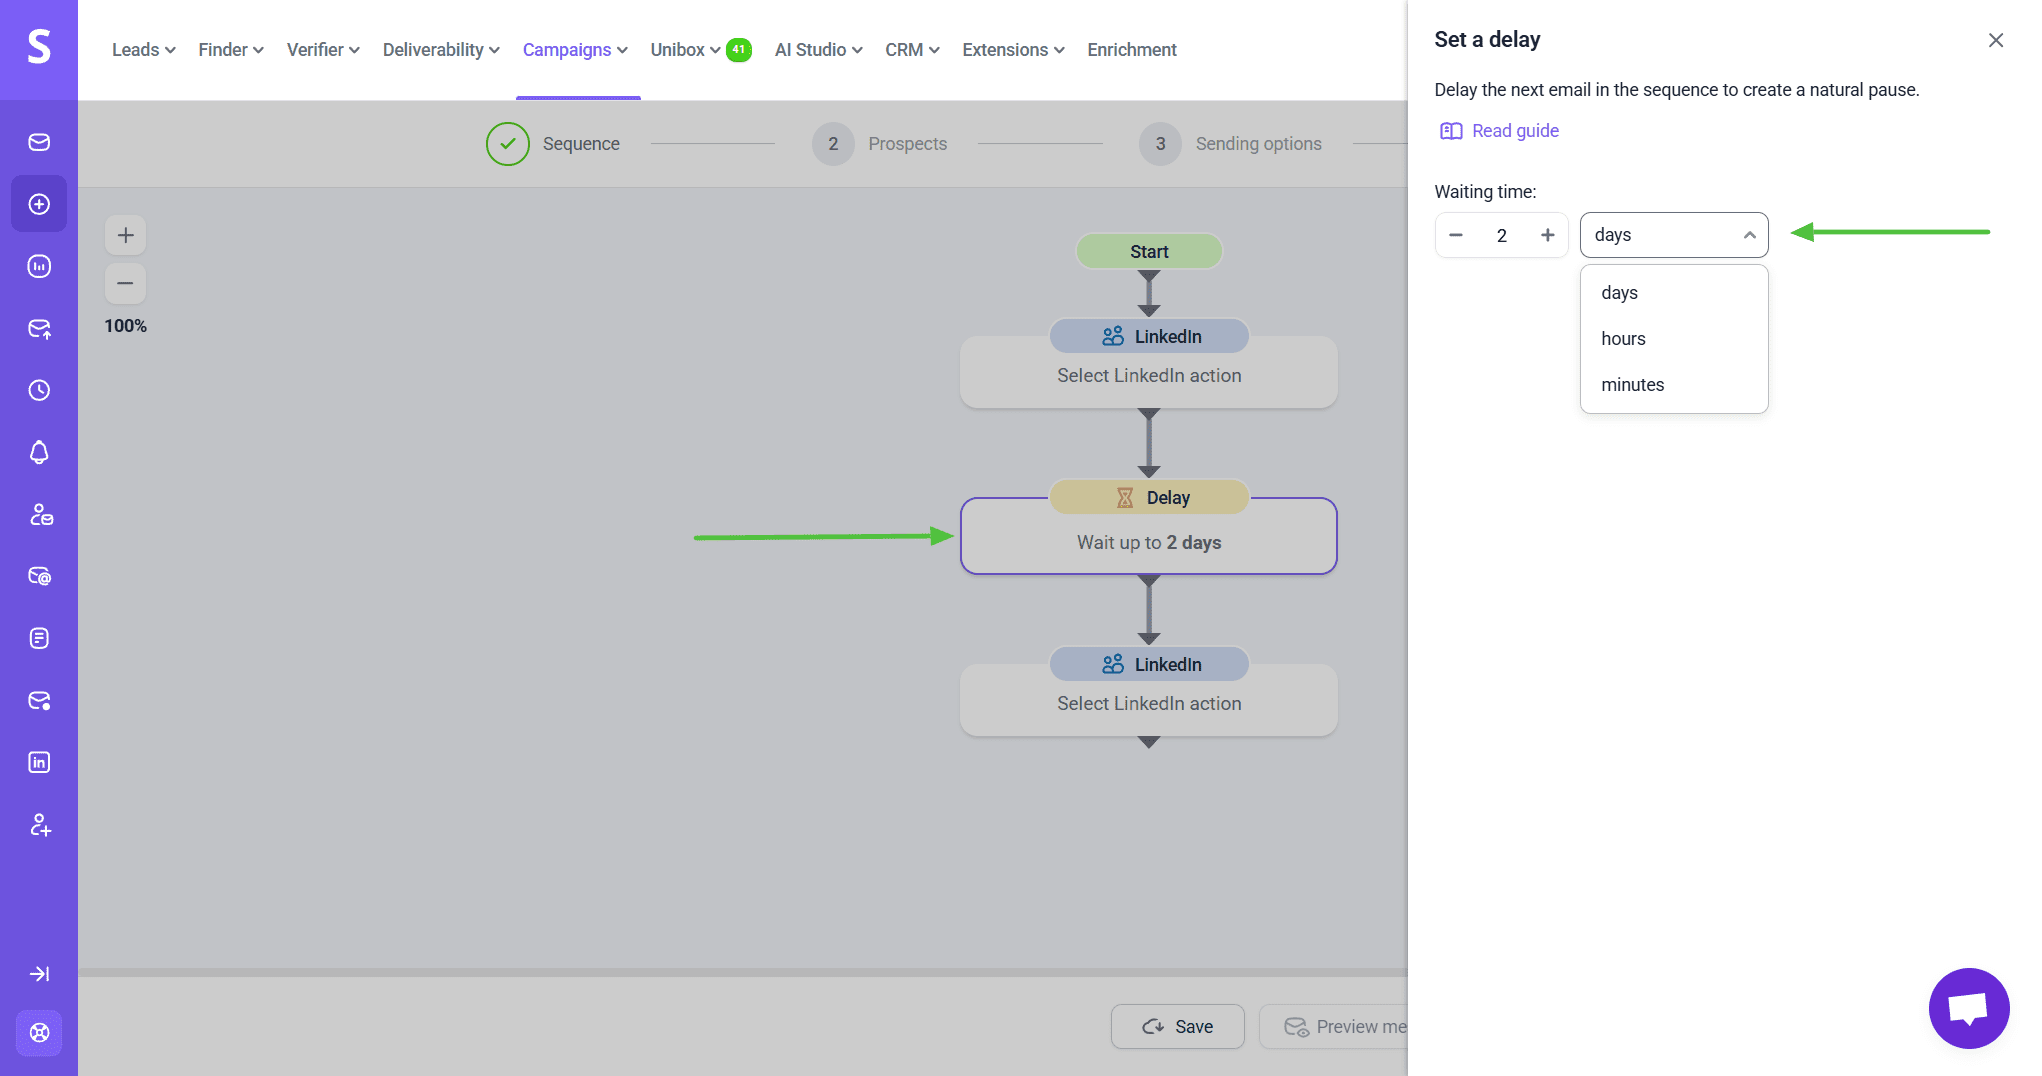
Add Delay steps between LinkedIn steps so actions do not run one after another.
 Below is a description of the LinkedIn actions available.
LinkedIn action 1: View profile
How it works
This action automatically opens your prospect’s LinkedIn profile. They may see you in their profile viewers list, which can increase the chance they notice you.
Where to use it in the sequence
Use it early in the sequence as a first interaction before you like a post, follow, or send a connection request.
How to add it to a campaign
When creating a campaign, add a LinkedIn step and select View profile from the LinkedIn actions menu on the right.
LinkedIn action 2: Like posts
How it works
This action likes one or more of your prospect's recent LinkedIn posts. Snov.io goes through the most recent posts and likes them in random order so the activity doesn't look automated.
Where to use it in the sequence
Use it after View profile and before Follow or Send connection request to create prior interaction.
How to add it to a campaign
Add a LinkedIn step and select Like posts from the LinkedIn actions menu on the right.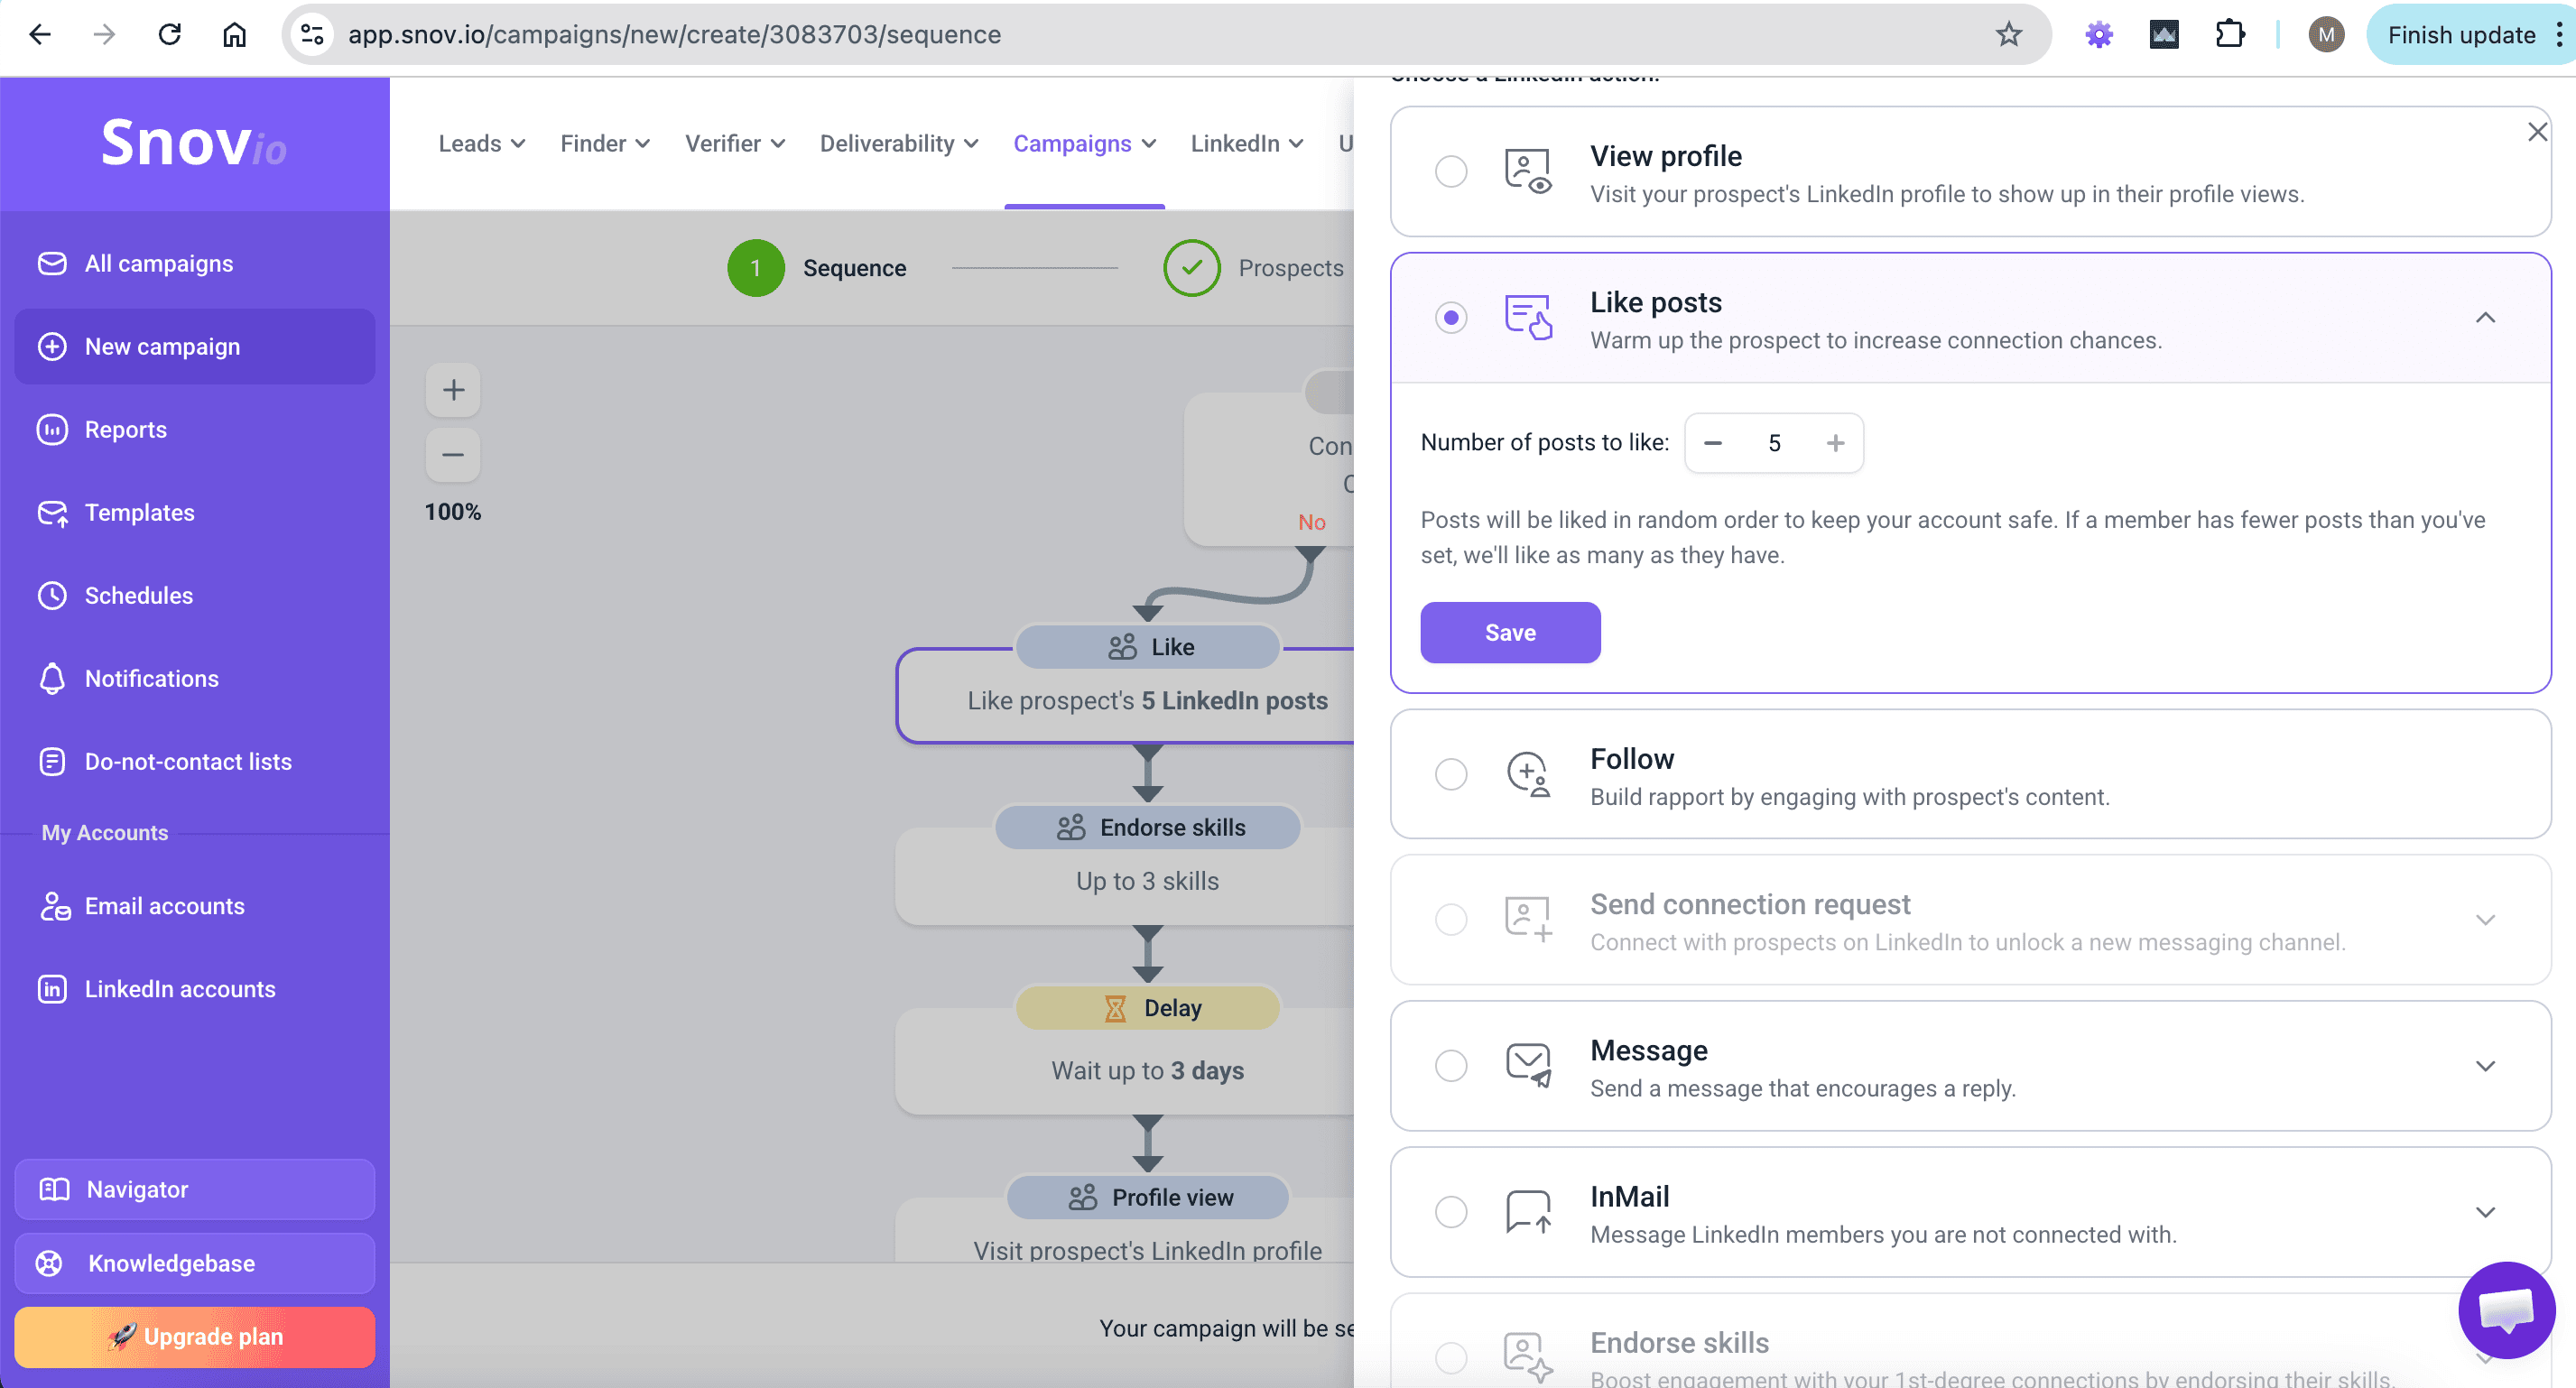 You can set the number of posts to like, from 1 to 5, in the action settings. You may need to increase the daily limit to engage more prospects.
The Likes limit counts prospects, not individual post likes. If your daily Likes limit is 20, Snov.io runs the Like posts action for 20 prospects that day, whether it likes 1 post or 5 posts for each of them.
LinkedIn action 3: Follow
How it works
This action follows the prospect on LinkedIn so your account appears in their followers list and you can see their updates.
Where to use it in the sequence
Most effective after Like post, before you send a connection request.
How to add it to a campaign
Add a LinkedIn step and select Follow from the LinkedIn actions menu on the right.
LinkedIn action 4: Send connection request
How it works
This action sends a connection request to the prospect. Adding a short note can increase the chance it is accepted.
Where to use it in the sequence
Use it after one or two warm-up steps, such as View profile and Like post, so the request feels more relevant.
How to add it to a campaign
Add a LinkedIn step and select Send connection request from the LinkedIn actions menu on the right. Personalize the note with variables, and add fallbacks so the text stays complete.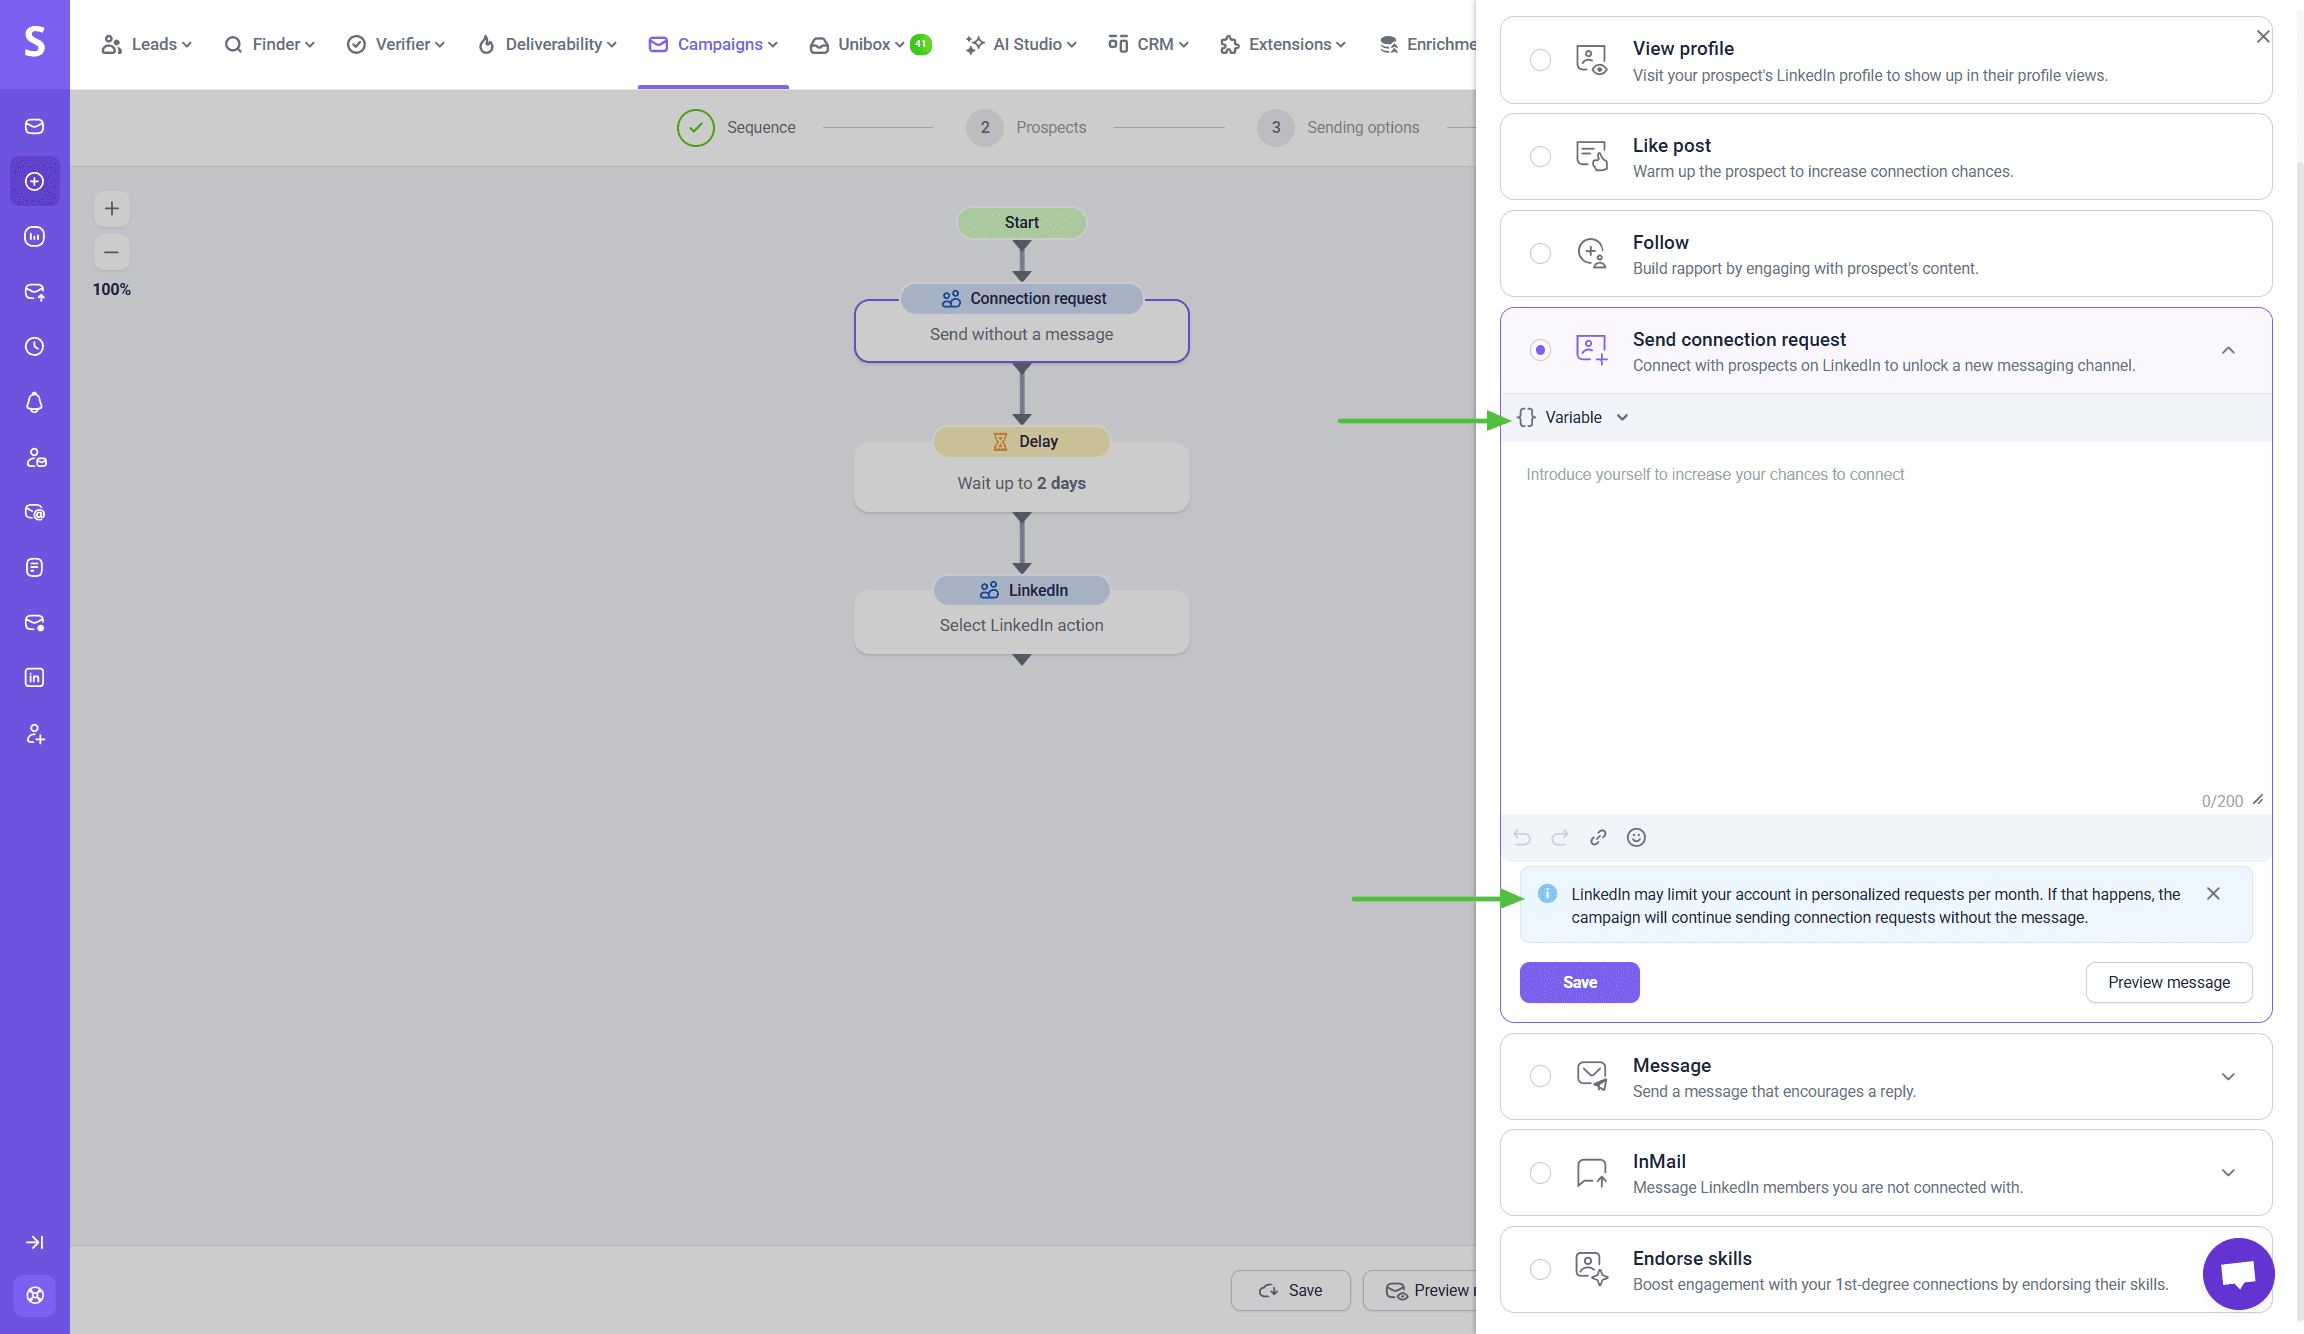
Limits
LinkedIn notes are limited to 200 characters. Free LinkedIn accounts can send up to 5 connection requests with notes per month. After that, you can still send requests without a note.
LinkedIn action 5: Check if connected on LinkedIn (Condition)
How it works
This condition checks whether the prospect is already in your LinkedIn network or has accepted your connection request.
Where to use it in the sequence
Place it after Send connection request to route prospects to the right next step. If connected, send a Message. If not connected, try InMail or switch to email.
How to add it to a campaign
Add a Condition step and choose Check if connected on LinkedIn.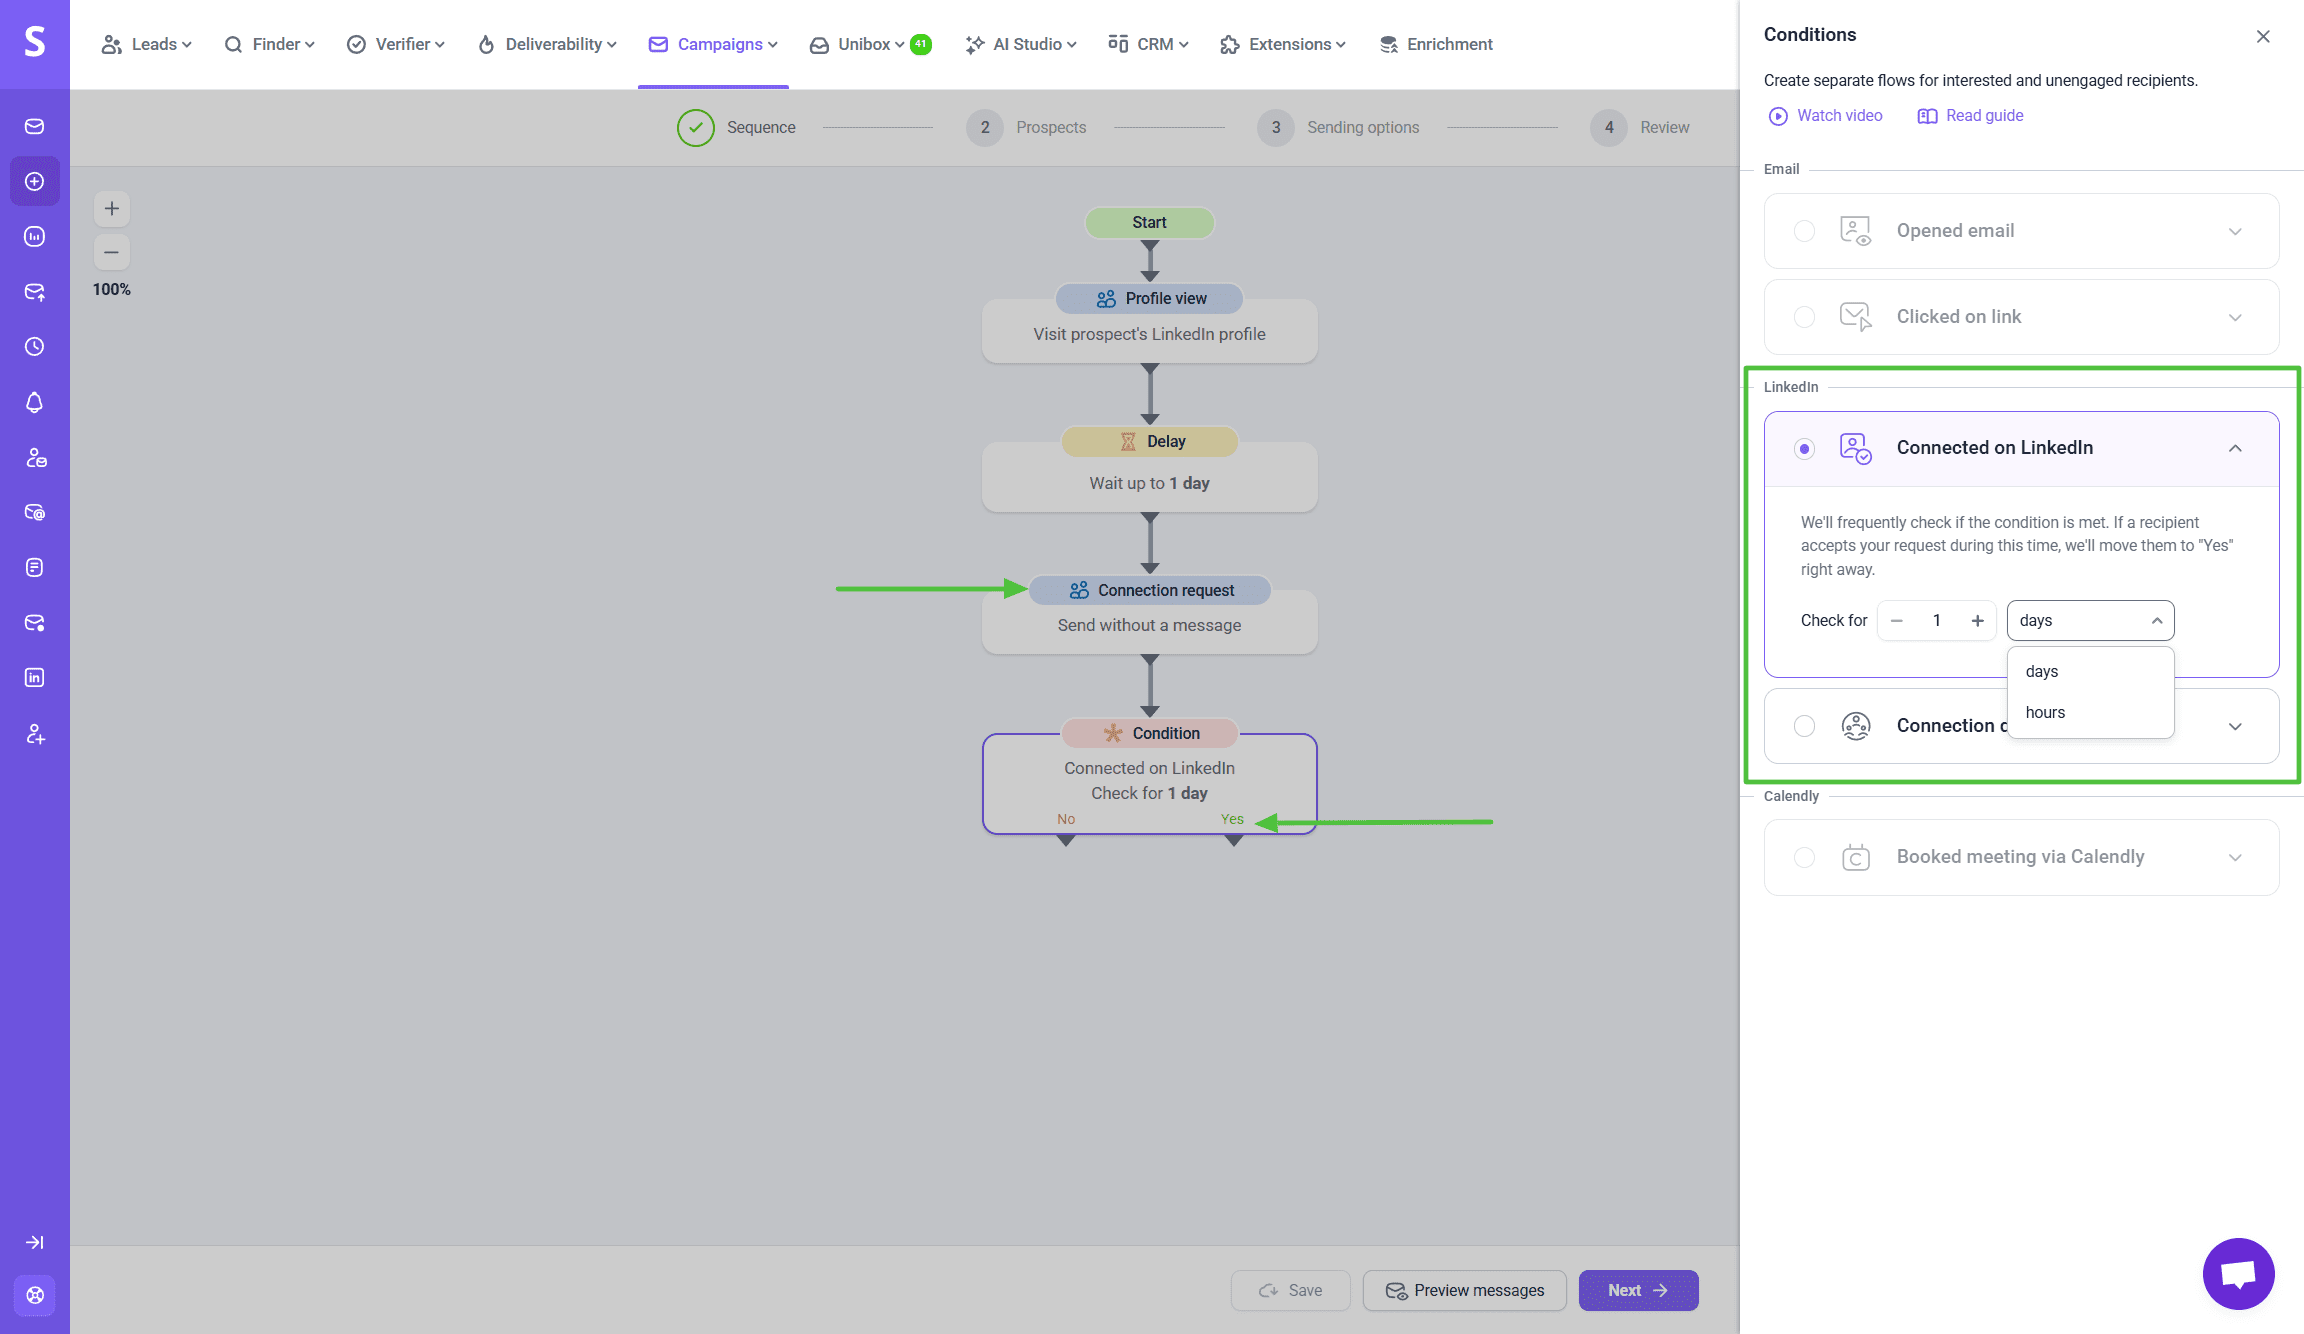
LinkedIn action 6: Message
How it works
This action sends a LinkedIn message to a prospect you’re connected with.
Where to use it in the sequence
Use it after the Check if connected condition confirms the prospect is connected.
How to add it to a campaign
Add a LinkedIn step and select Message. Use variables and dynamic content to personalize.
LinkedIn action 7: InMail
How it works
This action sends an InMail to prospects you’re not connected with on LinkedIn.
Where to use it in the sequence
Use it when the prospect has not accepted your connection request, or when regular messaging is not available.
How to add it to a campaign
Add a LinkedIn step and select InMail. Personalize it with variables and keep it short.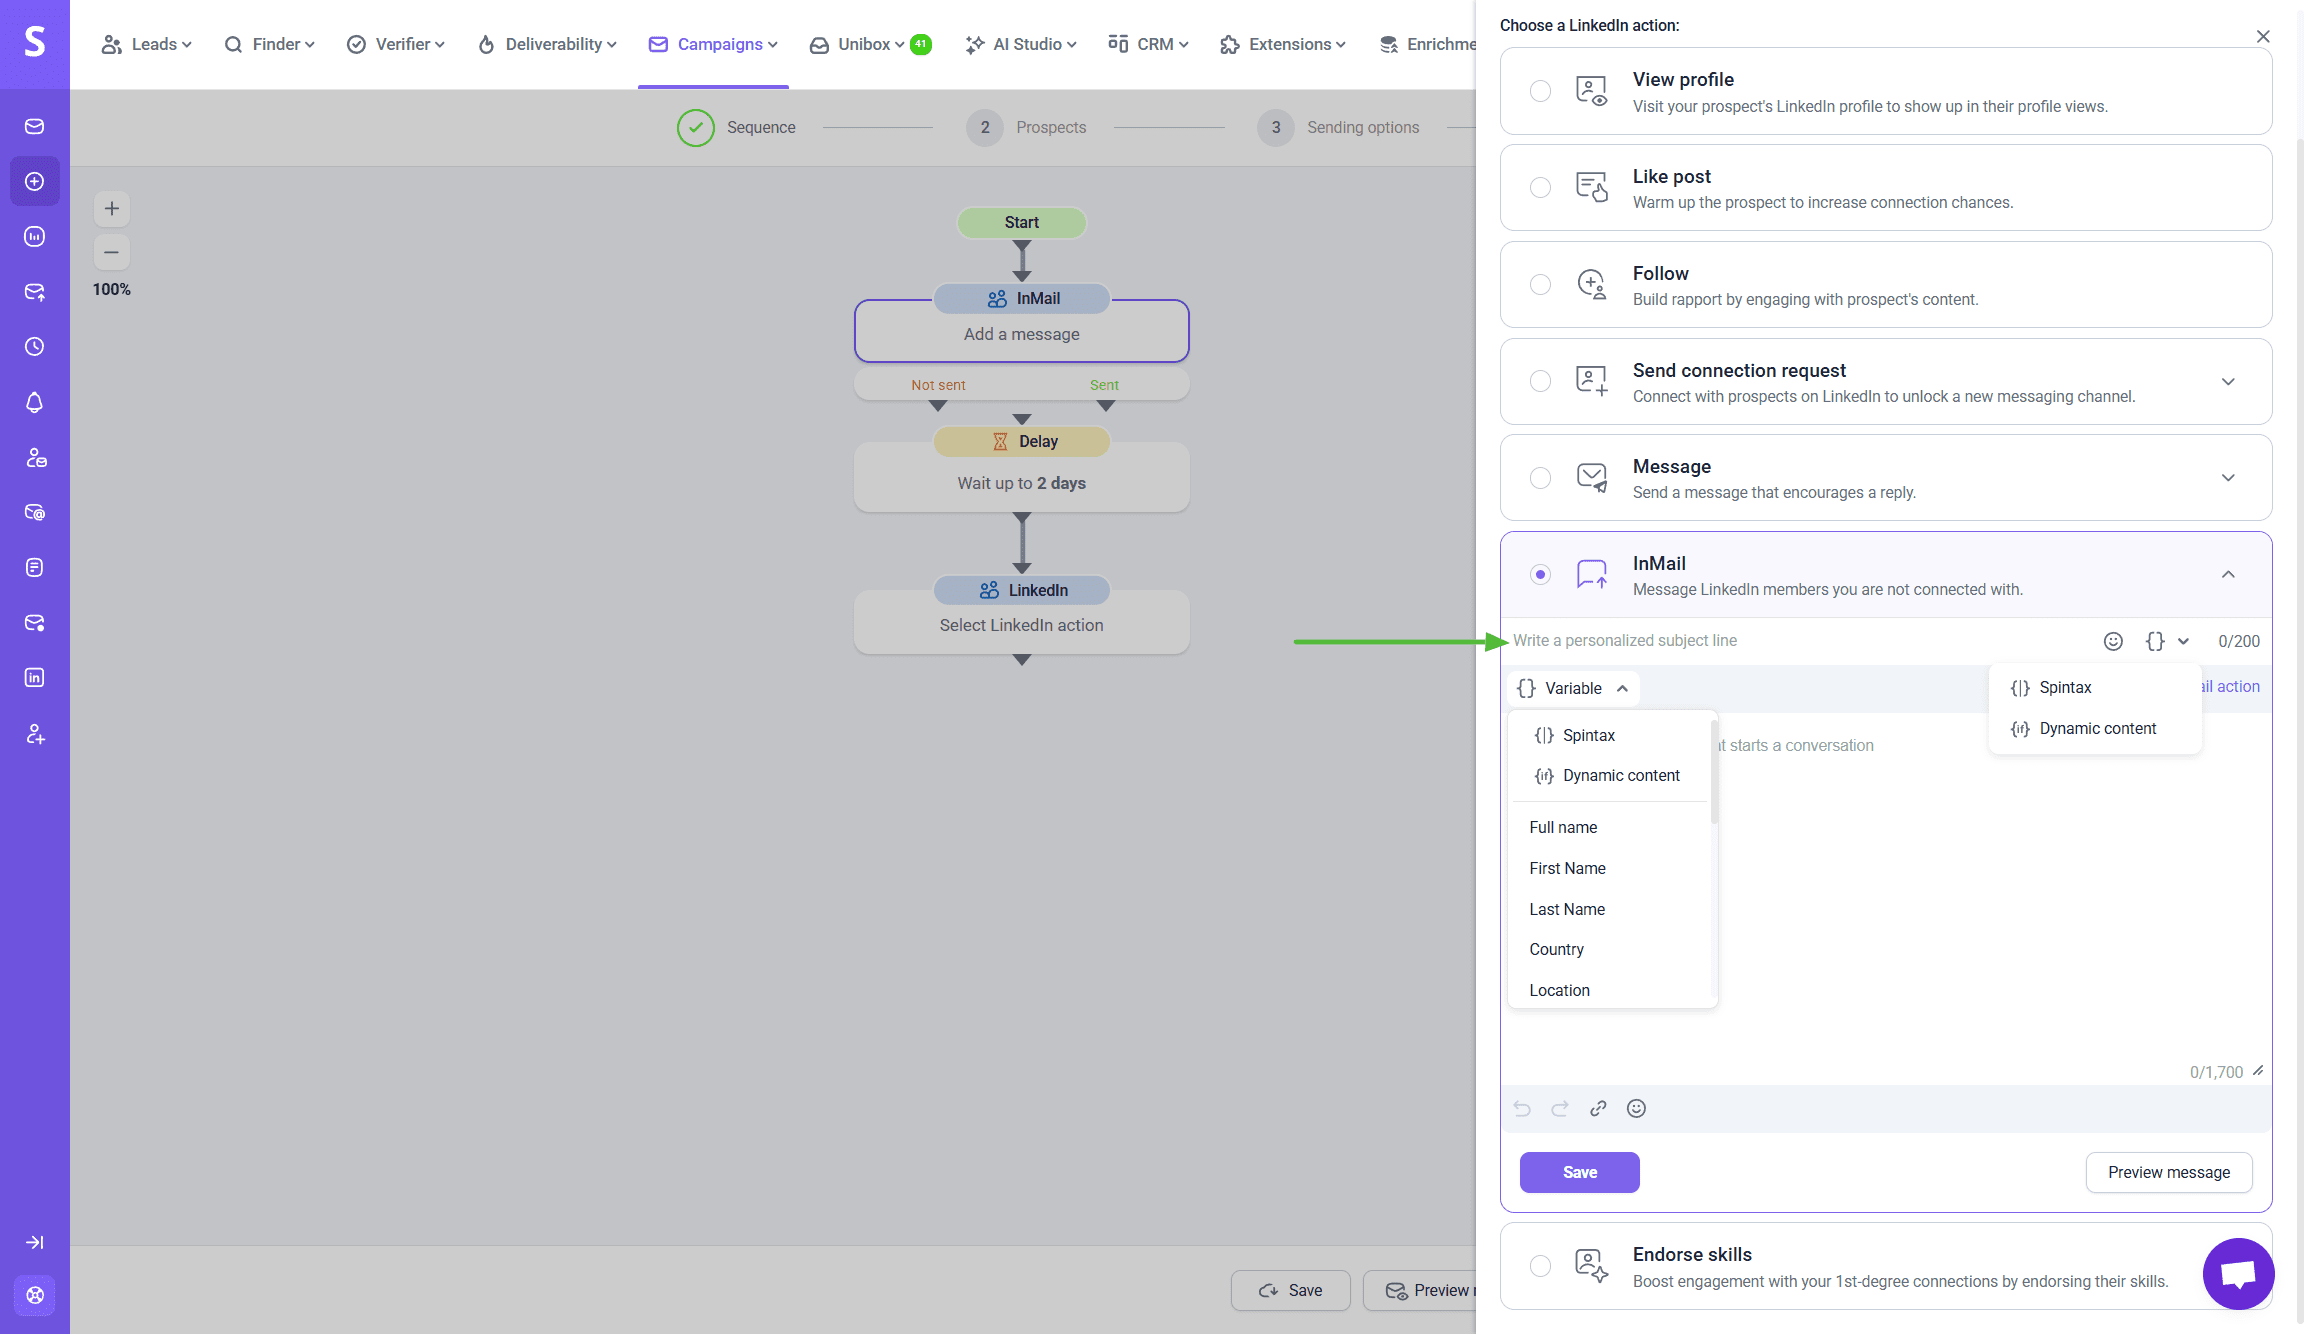
LinkedIn action 8: Endorse skills
How it works
This action automatically endorses skills on your prospect’s LinkedIn profile.
Where to use it in the sequence
Use this as an extra touchpoint to create light engagement before you send a message.
How to add it to a campaign
When creating a campaign, add a LinkedIn step and select Endorse skills from the LinkedIn actions menu on the right.
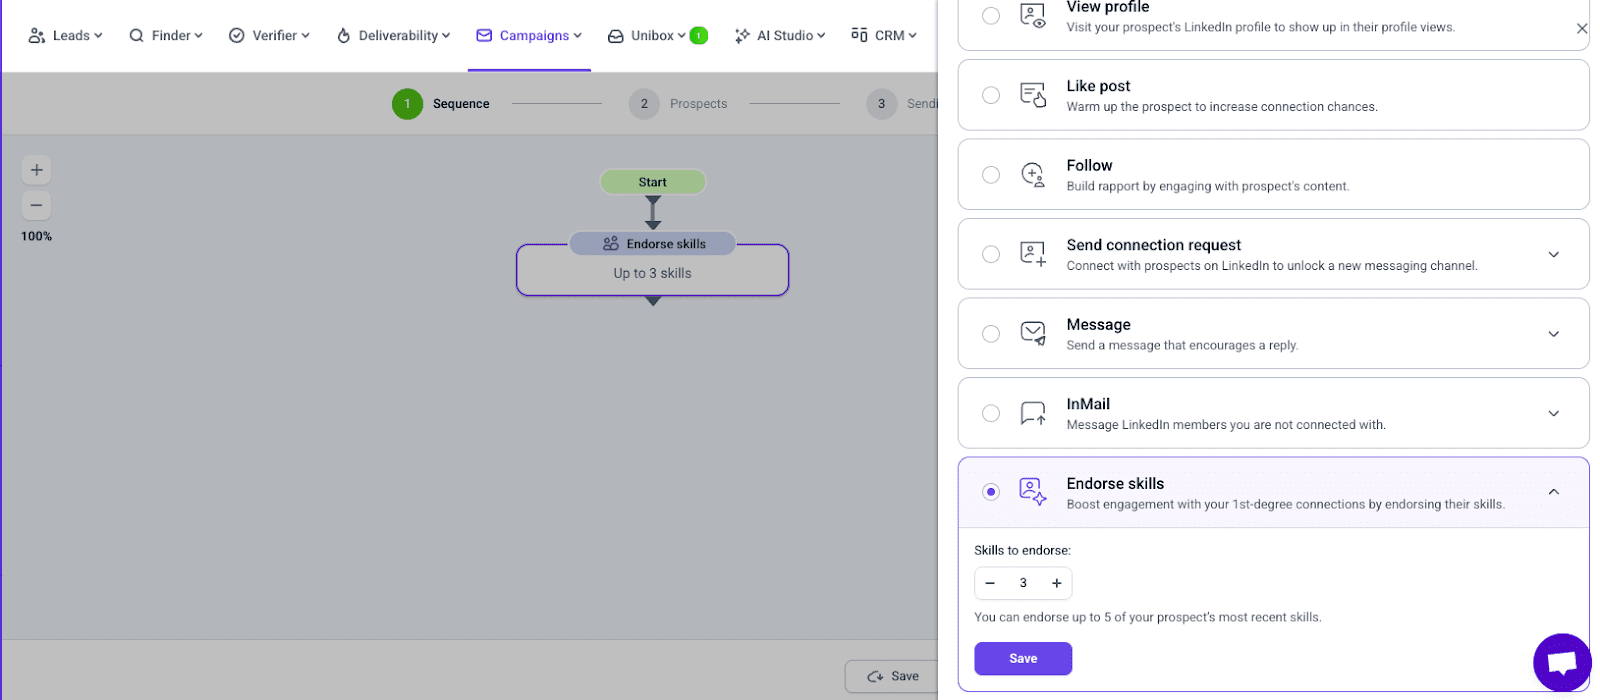
Endorsements limit per prospect
Set the maximum number of Skills to endorse in action settings.
You can endorse 1 to 5 skills per prospect.
This setting controls how many skills will be endorsed for each prospect, starting with the prospect’s most recently added skills.
Endorsements limit per account
Daily limits for this action are set in your LinkedIn account settings.
The endorsements limit counts per skill, not per prospect. So if you endorse 3 skills on one prospect’s profile, it counts as 3 endorsements.
Monitor LinkedIn automation statistics
To check the statistics of performed actions, go to the LinkedIn tab in the Statistics section of the campaign page. This page displays metrics for all tracked LinkedIn activities. Read more about LinkedIn statistics.
If you have a question that we haven't covered in this article, feel free to reach out to our Customer Care team. You can contact us at help@snov.io or through live chat. We're here to assist you!

Sorry about that 😢
How can we improve it?