This article explains how to set up BIMI for your domain to improve your sender reputation and email deliverability.
What is BIMI:
BIMI (Brand Indicators for Message Identification) is an email authentication standard that verifies your sender identity and adds your company's logo next to your emails.
The recipients on Gmail and Google Workspace will see a blue "verified" tick next to your sender’s name in your emails, indicating that you're a verified sender.

Before you start implementing BIMI, consider this to decide if it’s right for you: BIMI is meant mainly for big companies and bulk senders using email automation to reach a broad audience, like an existing client list. It offers fewer advantages for cold email outreach based on 1-on-1 communication.
1) You must be the owner of the domain where you plan to implement BIMI. You'll need to update the domain’s DNS settings.
2) BIMI works only for emails that pass DMARC authentication. You'll need to set up or update your DMARC record.
3) To enable BIMI at Gmail, you will need a Verified Mark Certificate (VMC). This is a digital certificate that proves your legal rights to use logos in emails.
4) BIMI only works with email clients that support it, such as Gmail. In other email clients that don’t support it, your logo may not be displayed.
How BIMI affects deliverability:
BIMI can give your emails a boost in every important aspect: better sender reputation → more emails reaching the inbox → increased trustworthiness for your sender account → higher engagement.
1) Better sender reputation
BIMI increases your sender reputation and email score when your emails are checked by spam filters.
2) Better email engagement
The recipients who use email clients that support BIMI will see your company's logo next to your emails in their inbox instead of a generic avatar. This adds extra trust to your emails — recipients are more likely to open an email from a trusted sender.
3) Better domain and email security
BIMI works in combination with SPF, DKIM, and DMARC records to protect your sender domain from unauthorized use, such as spoofing or phishing.
How to set up BIMI for your domain
Step 1: Add DMARC policy
BIMI only works for emails that pass the DMARC check – a policy that determines what to do with emails that haven’t passed authentication. Make sure your DMARC policy is set to either quarantine or reject for BIMI to function properly.
To check your current DMARC record status, go to your email accounts list and open settings of the account where you want to add BIMI. Scroll down to the Optional settings and select Domain health. Once the check is finished, you'll see the status of your DMARC record, along with other domain records. A “valid” status means it’s set up properly, but you may need to adjust its settings.
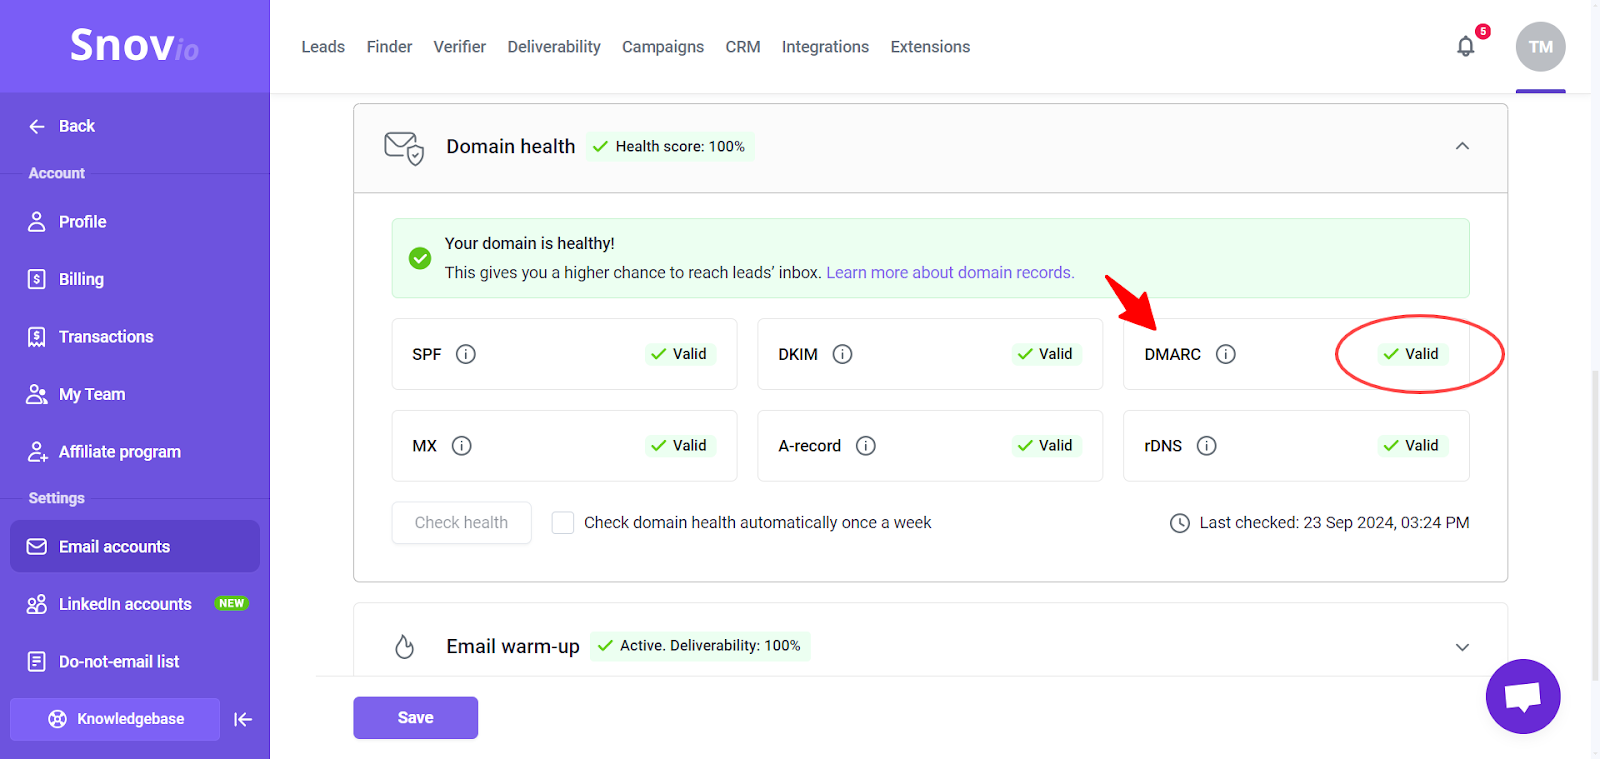
Update your current DMARC settings as shown below, or create a new record if you don’t have one yet. This is a good reason to do it if you’ve skipped it before – this will improve the security of your emails.
Required DMARC settings:
To support BIMI, your DMARC policy (p) must be set to either reject or quarantine.
Here’s an example of a correct DMARC record value for BIMI: v=DMARC1; p=reject; rua=mailto:your@snov.io
- p value is “quarantine” or “reject”. BIMI doesn’t support “none” policies that have the “none” option.
- pct is “100”. This parameter is only needed if you have a “quarantine” policy. This means the DMARC policy will be applied to 100% outgoing emails.
For the detailed steps to set up a DMARC record, read this guide.
Step 2: Prepare your company logo in SVG format
To be compliant with BIMI, your company’s logo image must follow certain guidelines. The company logo that will show up in emails must be in SVG (Scaled Vector Graphics) format. The specific profile it must use is SVG Tiny PS (Portable/Secure).
The standard SVG logo won’t meet BIMI requirements. Follow the steps below to convert it into the correct format, or ask a designer from your product team for assistance.
Convert regular SVG logo to the SVG Tiny 1.2 format
In Adobe Illustrator, you can convert an SVG file to the SVG 1.2 format. Upload your current logo to the image editor.
The image must have a square aspect ratio. Enter the same Width (W) and Height (H) in the image properties in Illustrator.
Use the export function (File → Save as). In the SVG profiles, choose SVG Tiny 1.2. Ensure that the size of the exported SVG file is no more than 32 KB.
Check more official SVG-file specifications here.
Convert SVG Tiny 1.2 logo to SVG PS format
One final conversion is needed to meet the required format. The official BIMI developer, BIMIgroup, has shared a tool to help convert logos to SVG Tiny PS.
Download it from one of the links below for your OS:
- Download for Windows 10: https://github.com/authindicators/svg-ps-converters/tree/master/gui-win10
- Download for MacOS: https://github.com/authindicators/svg-ps-converters/tree/master/gui-macos
Click the .exe file to download the application. On the next screen that appears, click View raw.
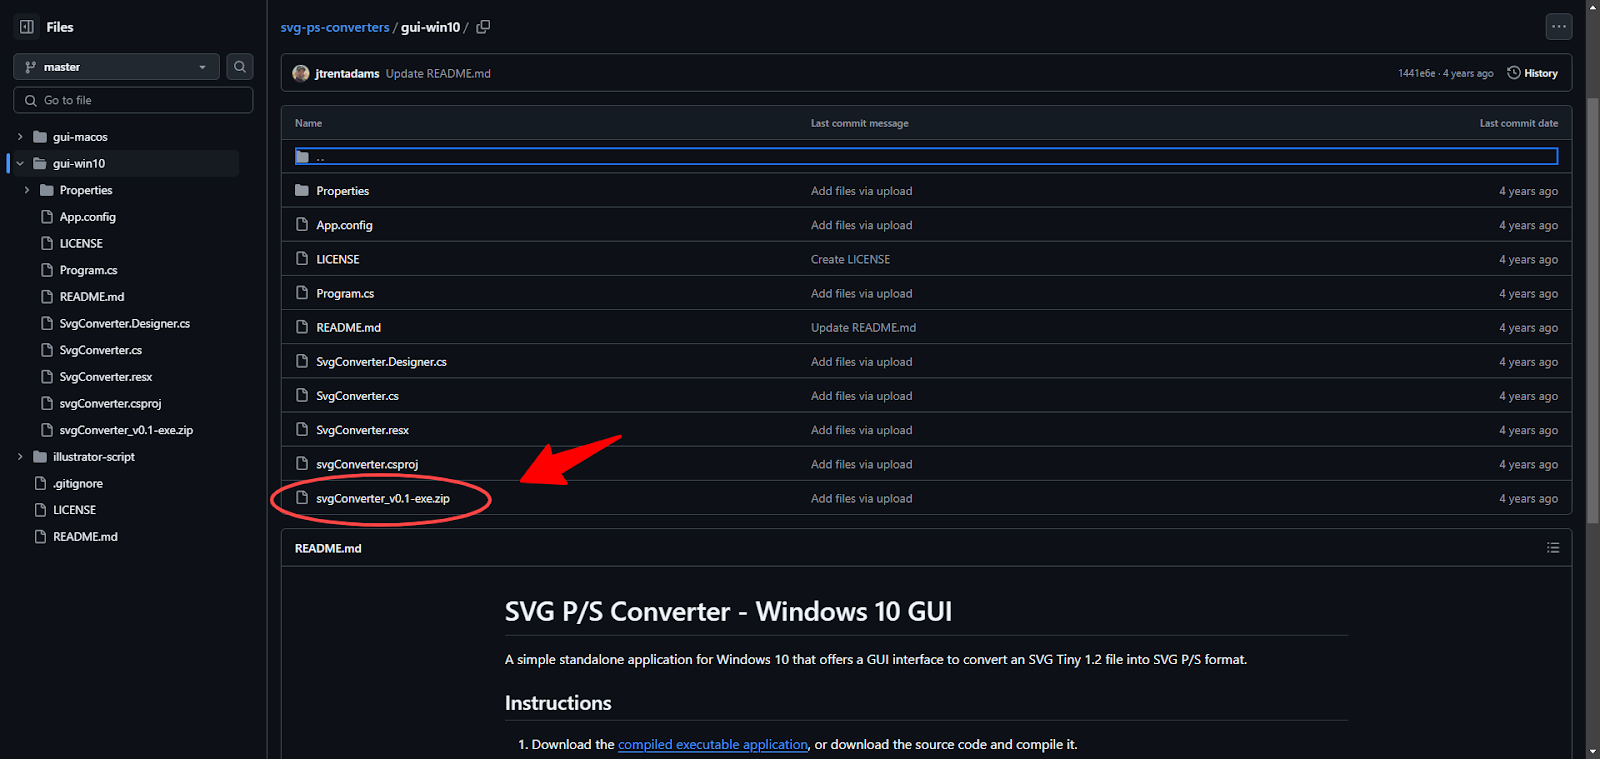
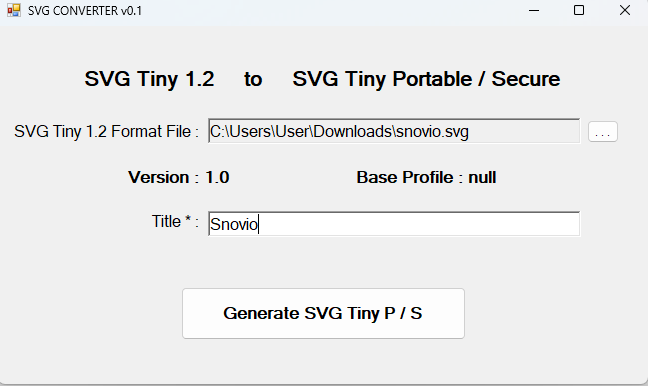
Install the application to your computer using the downloaded .exe file. Using the tool, select the directory that contains the SVG Tiny 1.2 file from the previous step. Enter your company name in the Title field and click Generate SVG Tiny P/S.
The newly generated file will be saved in the same directory as the original. The SVG Tiny PS file will be the one to use in the next steps.
Step 3: Get a VMC (Verified Mark Certificate) for your logo
This step is optional and isn’t required for basic BIMI setup, but it’s recommended to complete if you want all BIMI benefits. If you decide to skip this step (or get a certificate later), it’s still worth it to do the rest of the guide and complete a basic BIMI setup without VMC.
A Verified Mark Certificate (VMC) is a digital certificate that confirms your ownership of a logo. To get it, you'll need to submit your SVG logo and go through an approval process with a certified authority that issues the certificate.
The VMC will prove your legal right to use the logo in your email communications. Not all email providers require a VMC, but Google does to display your logo in Gmail inboxes. With a VMC, your logo will automatically appear in the avatar slot next to the email preview and replace the generic avatar.
How to get a VMC:
VMC certificates are based on a registered trademark for your logo. Before applying for a VMC, make sure your logo is registered as intellectual property. This will be checked during the approval process.
To register your logo, you can file a trademark application with your country's trademark office, such as the USPTO in the U.S. or the EUIPO in the European Union. It’s a good idea to consult a lawyer or your legal team to guide you through the process and ensure everything is done correctly.
Once your logo is registered, get a VMC from certified authorities such as Entrust or DigiCert. After getting your VMC, you will receive a certificate file in "PEM" format.
Step 4: Upload your assets to a public server
After doing the previous steps, you’ve got your BIMI assets ready: SVG Tiny PS file (logo) and PEM file (certificate). Before you can set up BIMI, you’ll need to upload your files to a server that uses a secure HTTPS protocol (HTTP is not accepted).
Both files should keep their original names – do not rename them during the upload. Once the files are uploaded, get the URLs (web address) pointing to them. You’ll need these links for your BIMI record.
You cannot use Google Drive or any online image hosting service to store your BIMI assets, as these options are not compliant. Ideally, upload the files to a directory on your own website. To do this, log in to your domain hosting account, go to the file manager, and upload the files to the public folder (directory).
Ensure the folder with BIMI assets is accessible, meaning anyone with the link can access the files. This is necessary for email providers to access the logo when verifying your BIMI record.
Once uploaded, get the direct URLs. For example, https://yourdomain.com/logo.svg. You’ll use this URL in your BIMI record.
Alternative ways to store BIMI assets:
If you don't know how to upload files to your site, there are third-party services that can host the files for your BIMI setup. For example:
PowerDMARC offers a "Hosted BIMI" service where you can upload your files. They will provide the required URLs for your BIMI record. EasyDMARC is another example of such a service.
Step 5: Add BIMI to you domain settings
BIMI is set up as a TXT record in your domain's DNS settings. Let's break down its parameters and guide you through creating it.
A default format for BIMI records looks like this: default._bimi.[your-domain] TXT v=BIMI1; l=logoURL; a=vmcURL;
- “logoURL” is the link to your logo (SVG Tiny PS file).
The SVG file added in your BIMI record must exactly match the one approved in your VMC. BIMI will not work if you add a link to a different version of the logo.
- “vmcURL” is the link to your certificate file.
If you don't have a VMC, you can leave out "a=vmcURL" part from the BIMI record. You can add it later when you get your certificate. Remember, Gmail requires a VMC, and this parameter must be included in the BIMI record for full support.
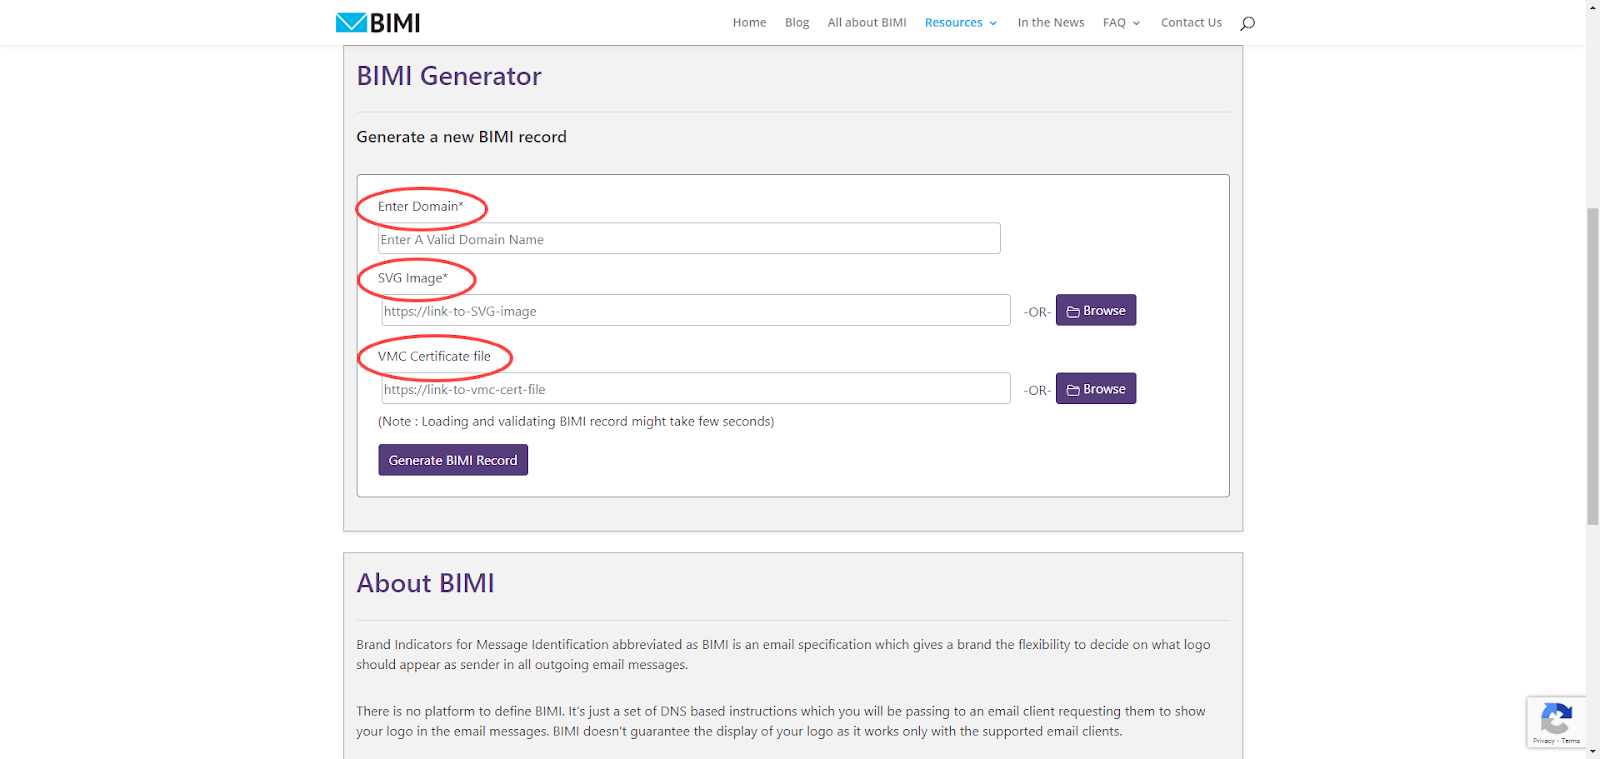
To make this step easier, use the online BIMI Generator to create your BIMI record.
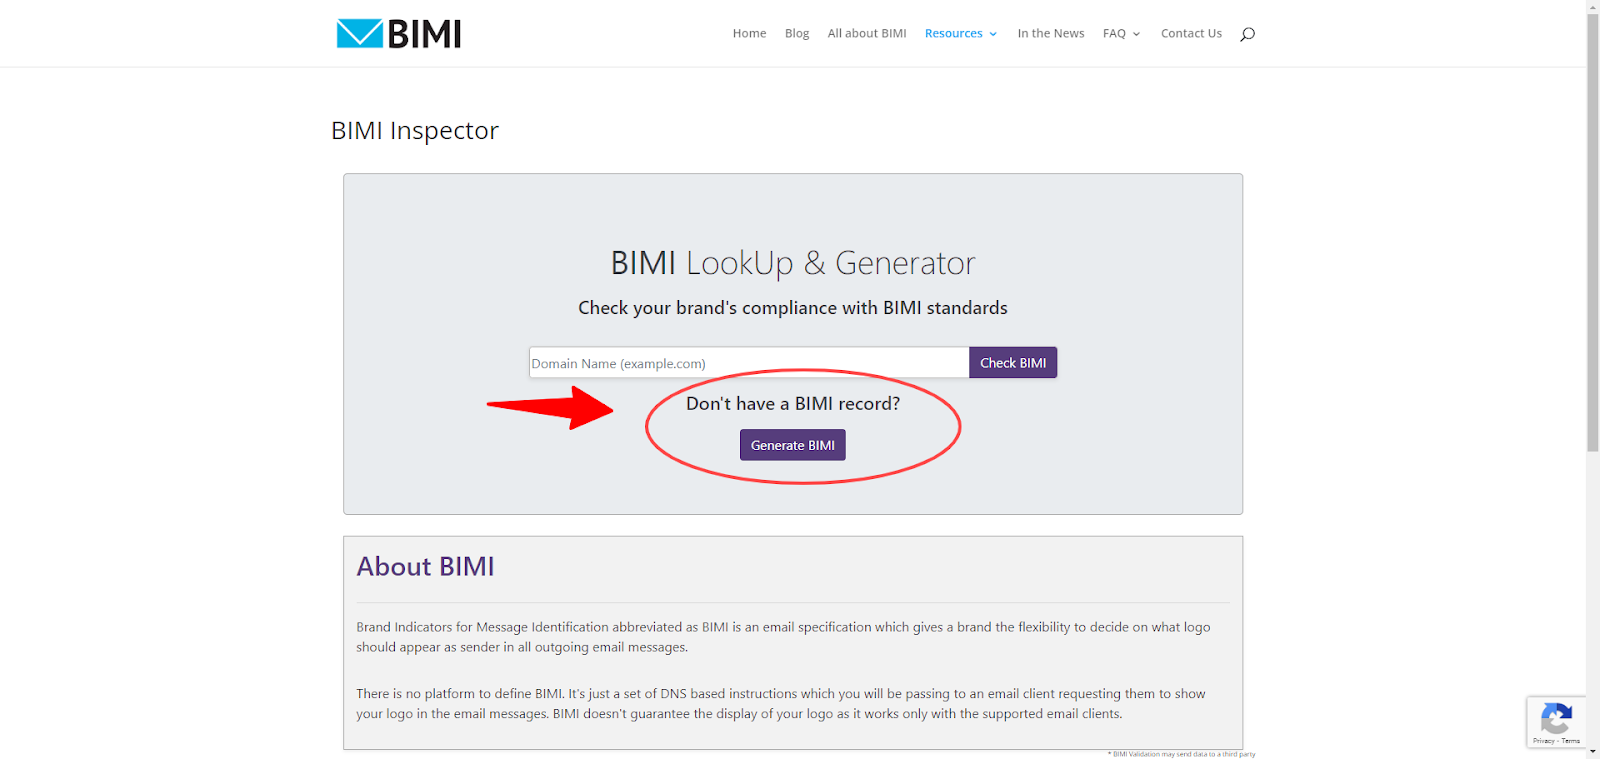
Click Generate BIMI and add these parameters:
Domain: The link to your website; SVG Image: The link to your logo; VMC link: The link to your VMC certificate.
Your generated BIMI record will look like this:
default._bimi.example.io TXT v=BIMI1;l=https://example.io/link-to-svg-file/logo.svg; a=https://example.io/link-to-pem-file/vmc_cert.pem;
You’ll use your unique record in the next step to add BIMI to your domain.
Step 6: Add a BIMI record to your domain’s DNS
This step takes place in the DNS settings of your domain – you’ll need to update them and add a new DNS record.
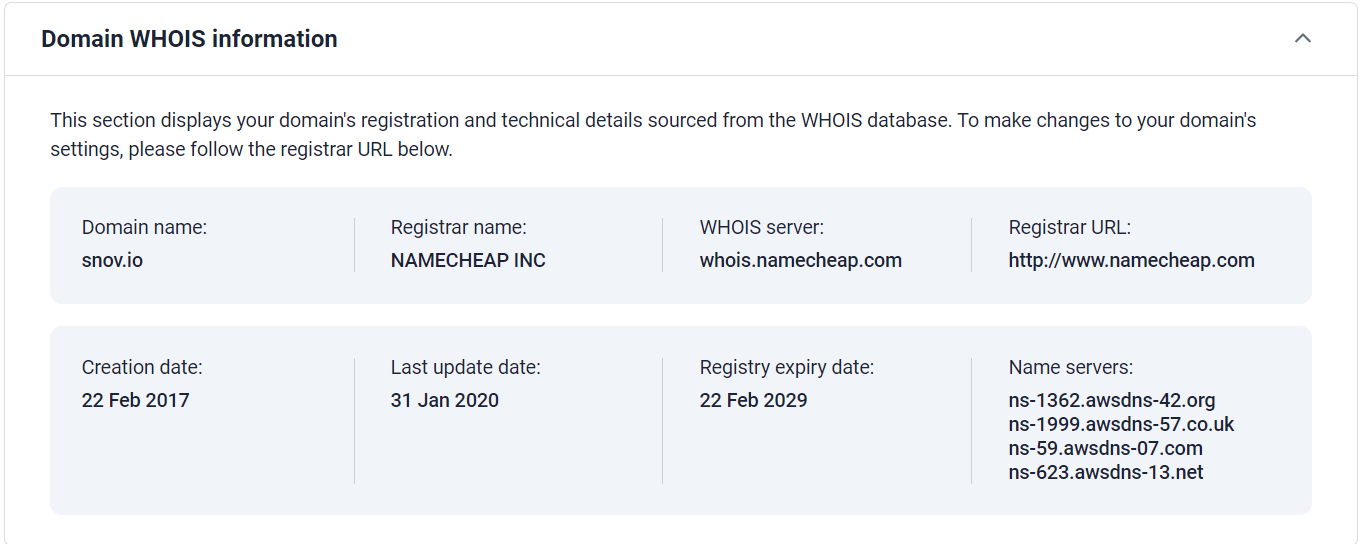
If you don’t know your domain registrar, you can find it out in the deliverability test results. Start a new test or open the details of a previous test. In the Results section, open the Domain Health tab and select Domain WHOIS Information. Here, you'll see your domain's details, including the registrar's name and Registrar URL.
To add BIMI to your domain:
Log in to your domain’s admin panel (on your registrar’s website) and find the DNS settings. This is where you add and update DNS records.
In the DNS settings, create a new TXT record. Enter the value from your BIMI record and save it.
For example, if your domain registrar is Namecheap, do the following: Log in to your Namecheap account. Open the Domain list menu and click on the Manage button next to your domain. Go to the Advanced DNS tab. Click Add new record and choose the TXT type.
In the Host field, enter the part before TXT: "default._bimi.example.io"
In the Value field, enter the part after TXT: "v=BIMI1; l=logoURL; a=vmcURL;"
Refer to your unique BIMI record from the previous step to add these parameters.
Step 7: Verify BIMI record
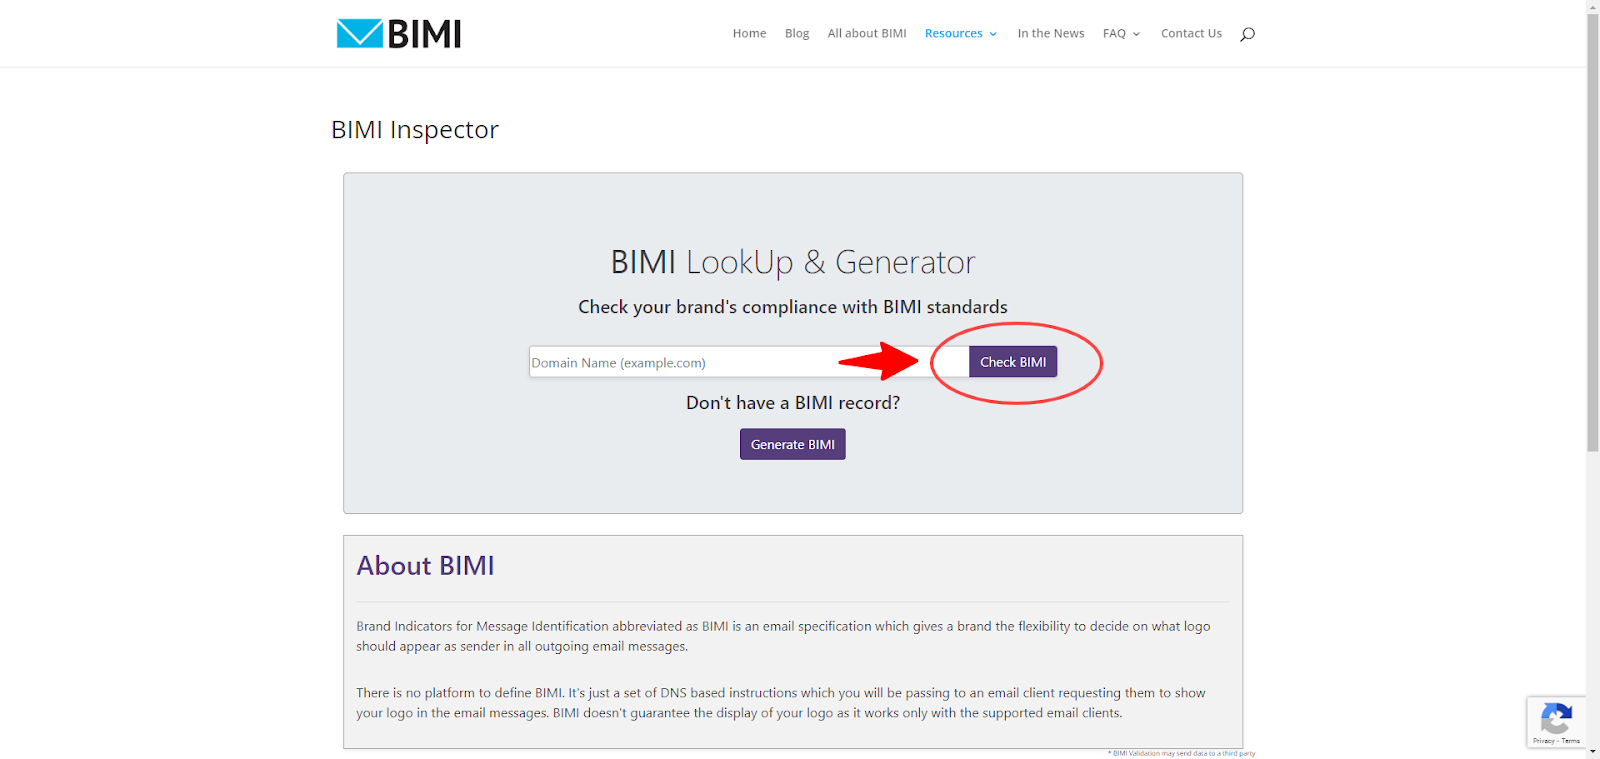
Use the BIMI Inspector tool to verify that your record is configured correctly. Enter your domain and click Check BIMI. If you see a green checkmark, your BIMI record is valid.
Note that it may take some time (up to a few days) for BIMI to be activated and start working. If the result shows that your BIMI record isn’t found, check its status again later.
Kudos to you for completing this guide and successfully setting up BIMI! Now, it’s time to enjoy the benefits: increased engagement and improved deliverability.

Sorry about that 😢
How can we improve it?