This article provides a step-by-step guide on how to use variables to include personalized videos/images into your emails in bulk.
Sending personalized images and videos can improve communication with your recipients and enhance the effectiveness of your emails by providing more engaging and memorable content.
In Snov.io Email Drip Campaigns, you have the ability to use dynamic variables and send personalized images and videos in bulk by adjusting the HTML code of your email.
By using variables in the source code, you can achieve this task at scale, instead of manually adding media links to each prospect and each email.
Inserting personalized media into your emails involves a few steps:
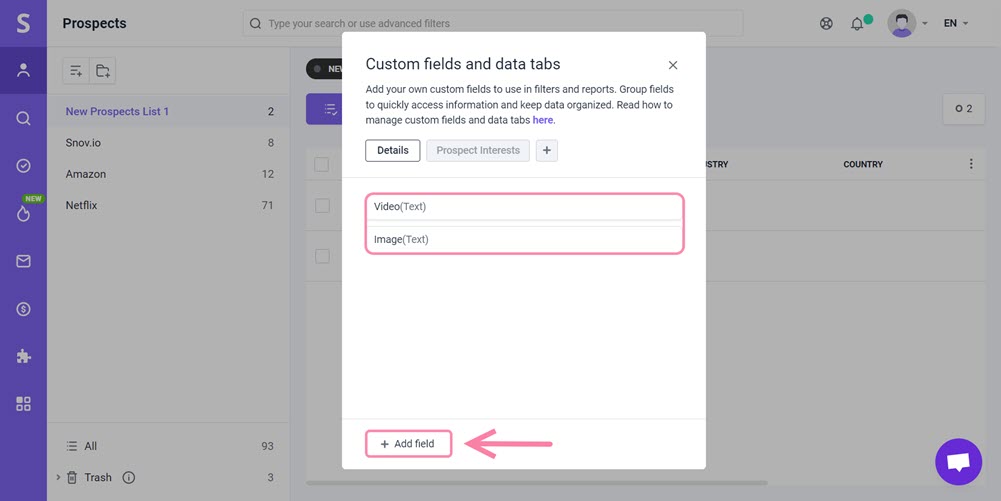
Step 1. Add custom fields for the prospects
Step 3. Add your email content
Step 5. Save and preview the email
Step 1. Add custom fields
Begin by creating custom prospect fields that will represent the variables added to your email content.
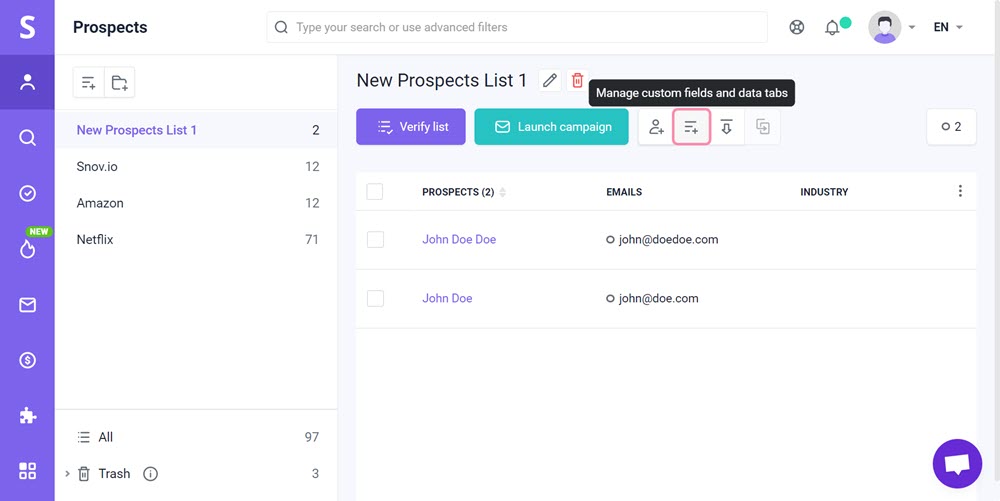
To add the fields, use the Manage custom fields option on the toolbar located at the top of the prospect list screen.
Add two fields that will contain the personalized video URL link and its corresponding thumbnail image or GIF.
Step 2. Import media links to custom fields
To move forward, you need to input values into the custom prospect fields that you have created.
To accomplish this in bulk (rather than editing every prospect manually), you will need to create a spreadsheet with hyperlinks to the personalized media, such as images or videos, that you have created for each recipient.
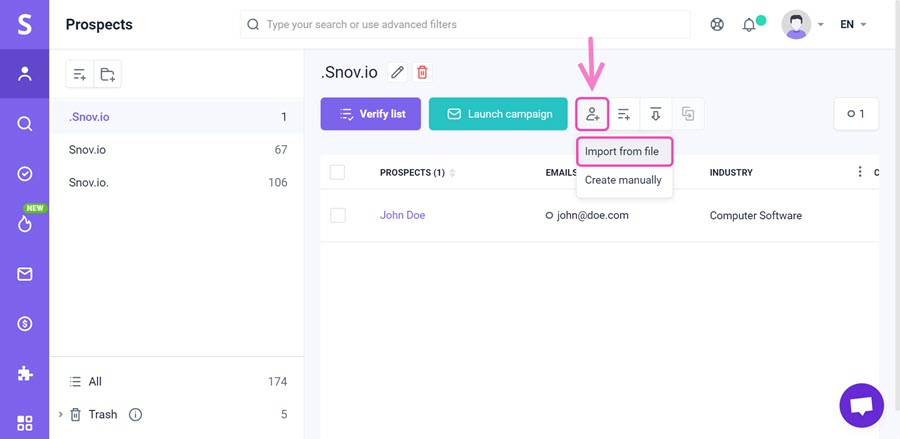
Use Import from file option:
- Upload the spreadsheet
- Match the column containing media links to the corresponding custom fields
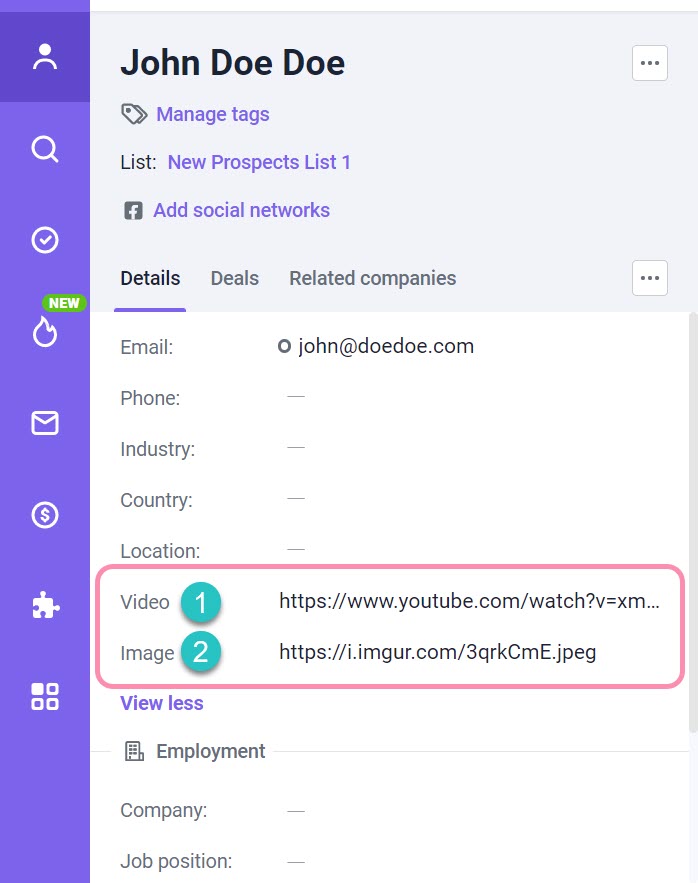
Once the import process is complete, every prospect on your list should have a field populated with a personalized video URL (1) and a thumbnail image URL (2).
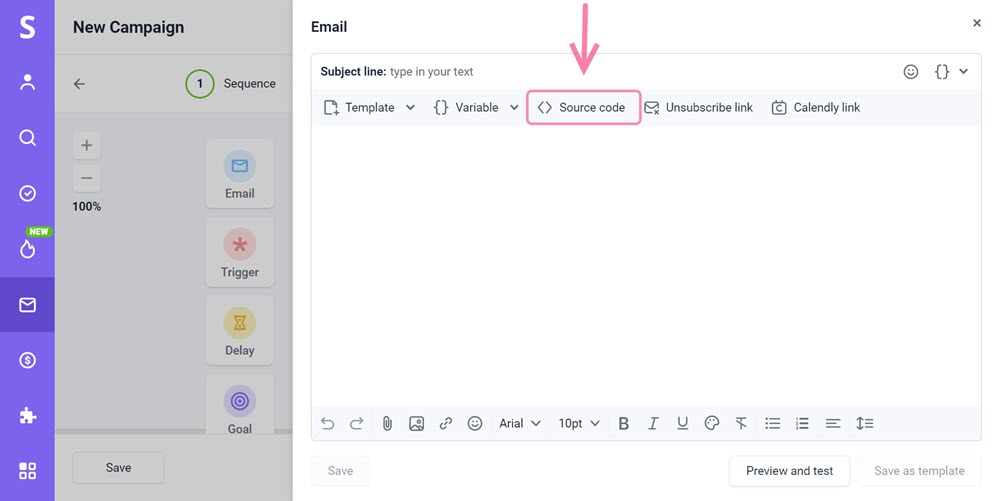
Step 3. Add your email content
The next step is to add an email element to your sequence and create its content. You can input the HTML code of your template into the source code editor to add the content.
Here's a code snippet example for the purpose of demonstration in this tutorial. Your HTML template should also contain a similar media block.
HTML code example:
<p>Check out our latest product demo:</p>
<a href="{{Video}}" target="_blank" rel="noopener">
<img src="{{Image}}" alt="Test">
</a>
Note: In the code example, the target attribute of the link is set to _blank, which will open the video in a new browser tab when clicked.
Step 4. Adjust the HTML code
Next, you'll need to edit the source code and manually add variables that will be replaced with personalized media when sending an email.
Note: To manually enter the variable, use the following format: {{customfieldname}}.
You need to customize the href attribute of the link to point to the desired video URL, and the src attribute of the image to point to the desired thumbnail image.
In other words, replace the video URL in your HTML template with a variable created in Snov.io.
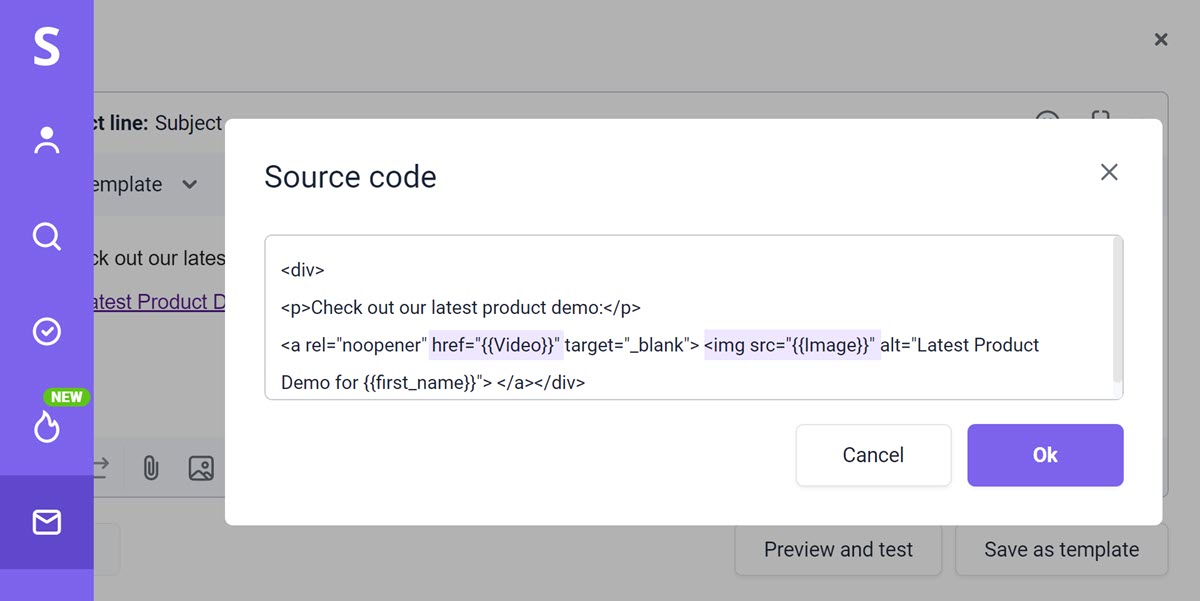
- After “href=” input "{{Video}}" variable.
- After “ img src=” input "{{Image}}" variable.
Click Ok to save changes to the source code.
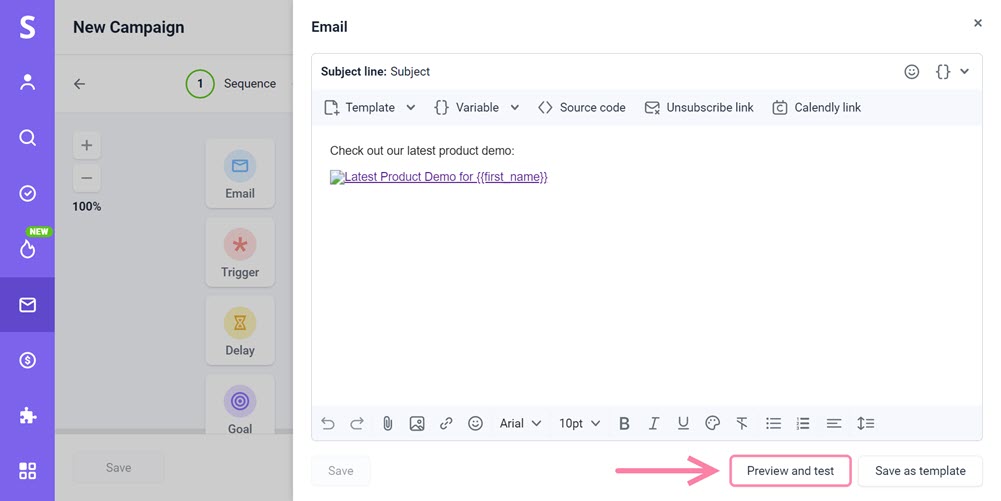
Step 5. Save and preview the email
Before sending your campaign, it's important to take a final step and preview/test your email content.
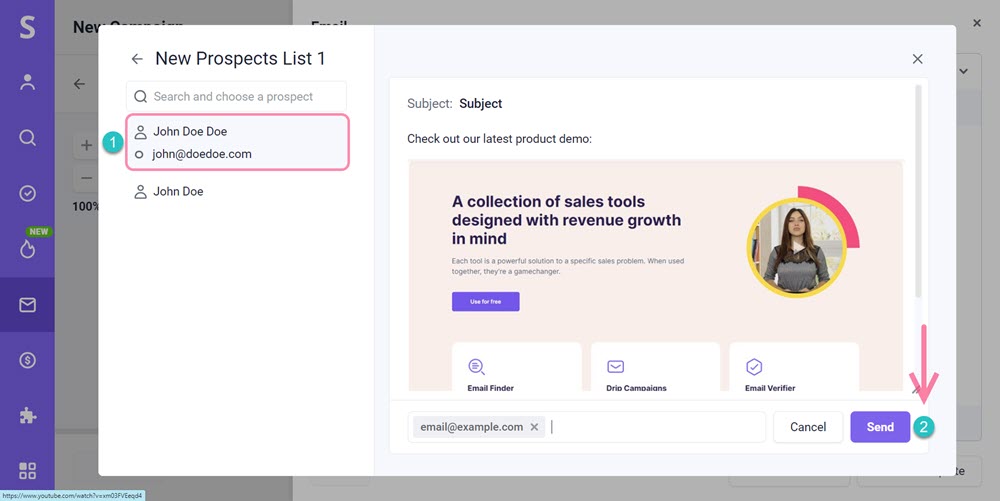
Use Preview and test option.
Select a recipient (1) to preview from the list on the right-hand side and Send (2) a test email to your test inbox.
By incorporating variables into the HTML code to personalize your media content, you can provide each prospect with a customized link when sending an email.
If you have any questions or need assistance, please don't hesitate to contact us at help@snov.io or through our live chat support.


Sorry about that 😢
How can we improve it?