Add your Microsoft mailbox to Snov.io to use it for email outreach, warm-up, and deliverability checks.
You can connect Microsoft 365 and Outlook accounts, including Microsoft business mailboxes and Outlook accounts hosted by GoDaddy.
Note: Before connecting the mailbox, make sure you can sign in to the Microsoft account and that SMTP and IMAP are enabled.
Depending on your provider, you may need to update these settings in Microsoft 365 Admin Center or in GoDaddy.
See this guide for step-by-step instructions.
Once you’re ready, follow these steps to connect your Outlook account.
Connect a new email account
In your Snov.io account, go to the Email accounts page. This is where you manage all connected sender accounts.
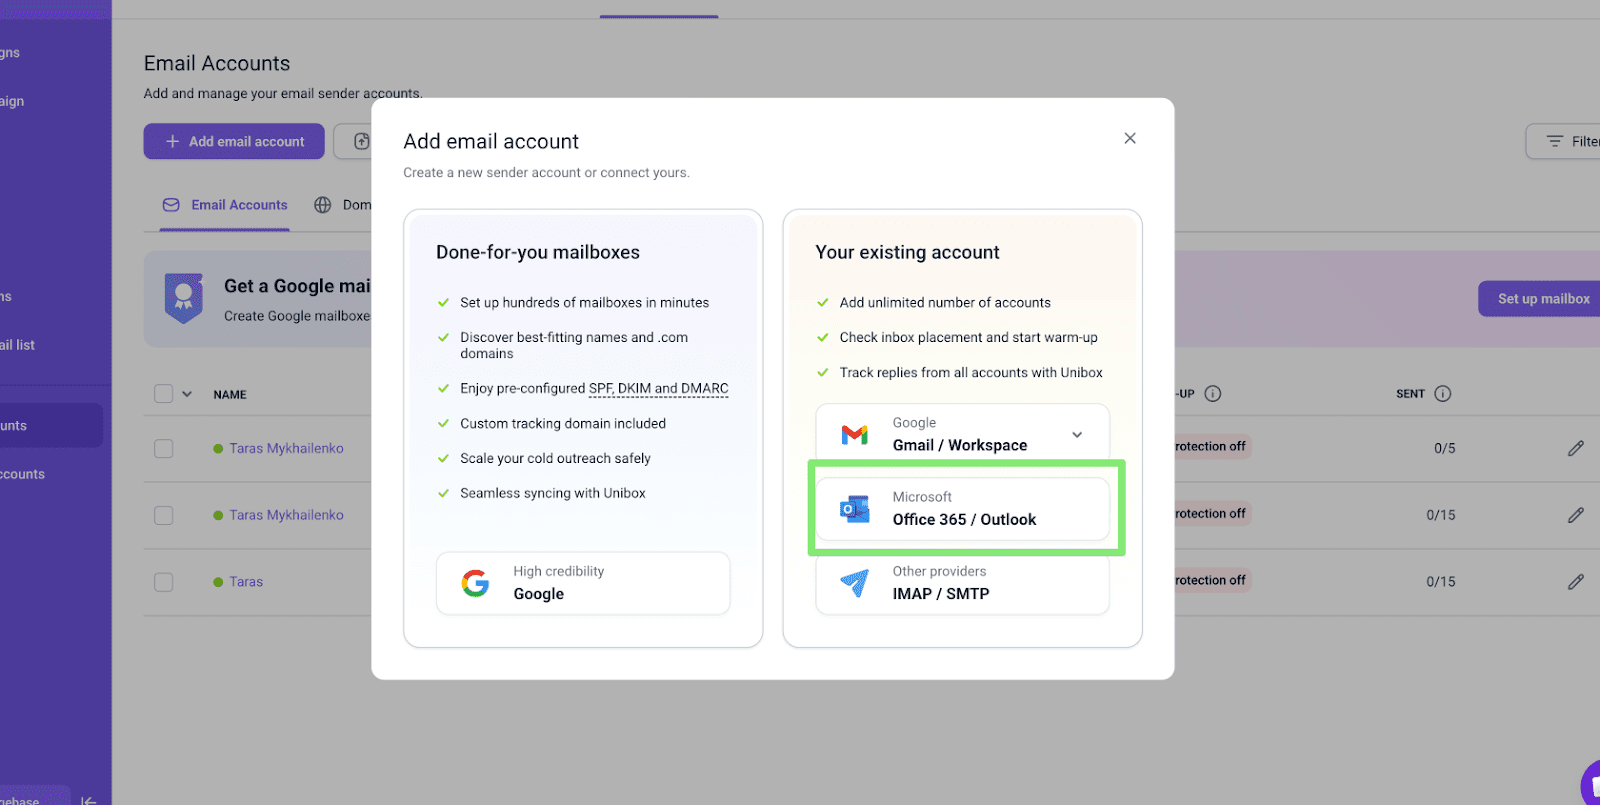
In the top-left corner, click Add email account → select Your existing email account → choose Office 365/Outlook.
Enable SMTP and IMAP access
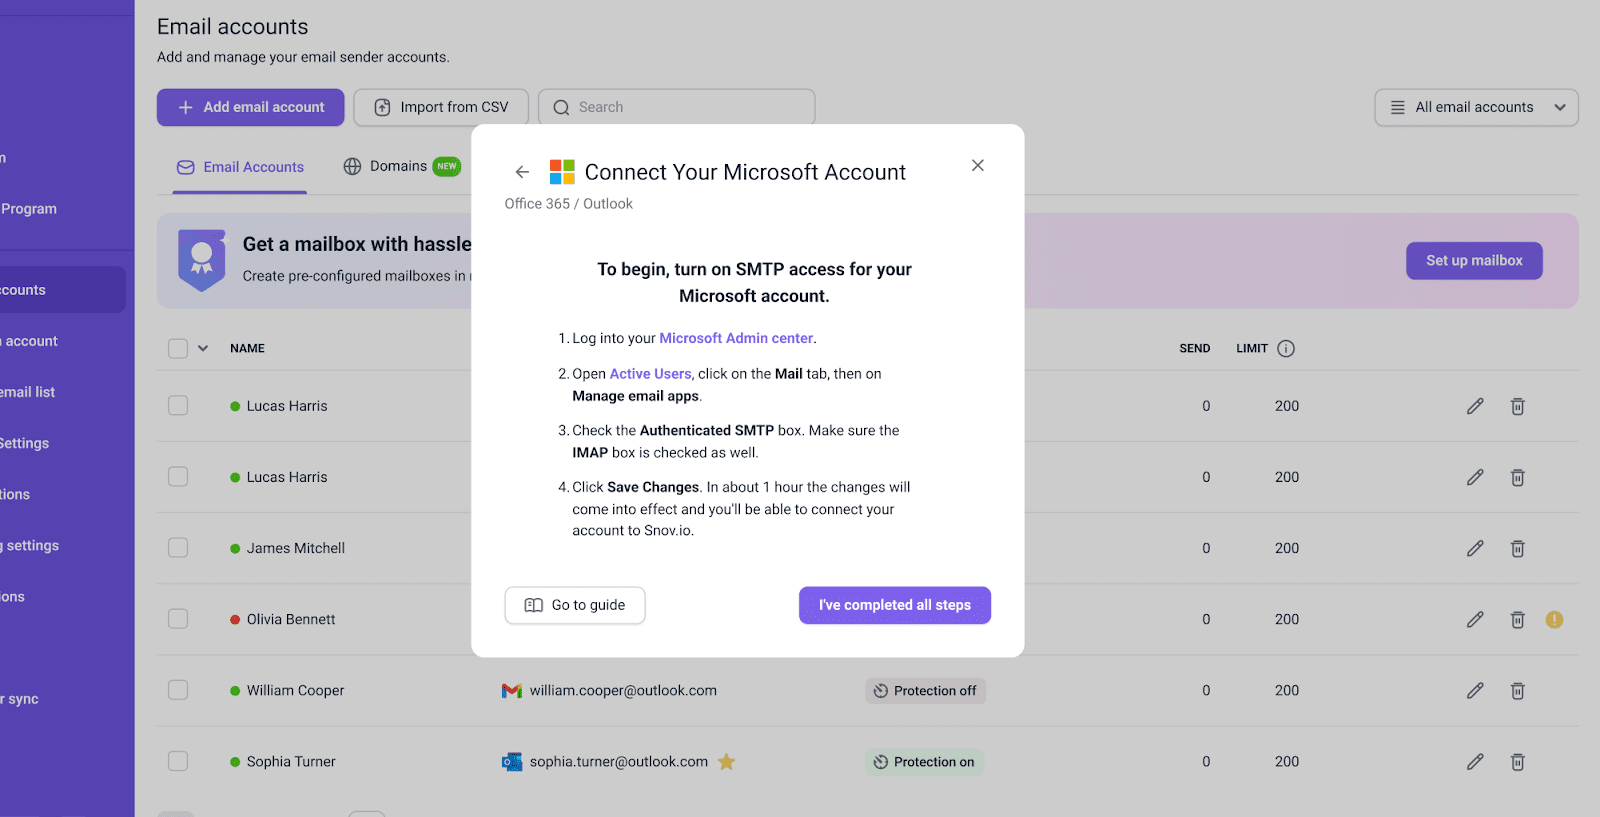
Before continuing, make sure SMTP access is enabled for your Outlook account. Without it, Snov.io will not be able to connect your mailbox.
Use the short on-screen instructions or open the detailed guide.
Once you’ve confirmed the settings, click I’ve completed all steps below to proceed.
Sign in to your Microsoft 365/Outlook account
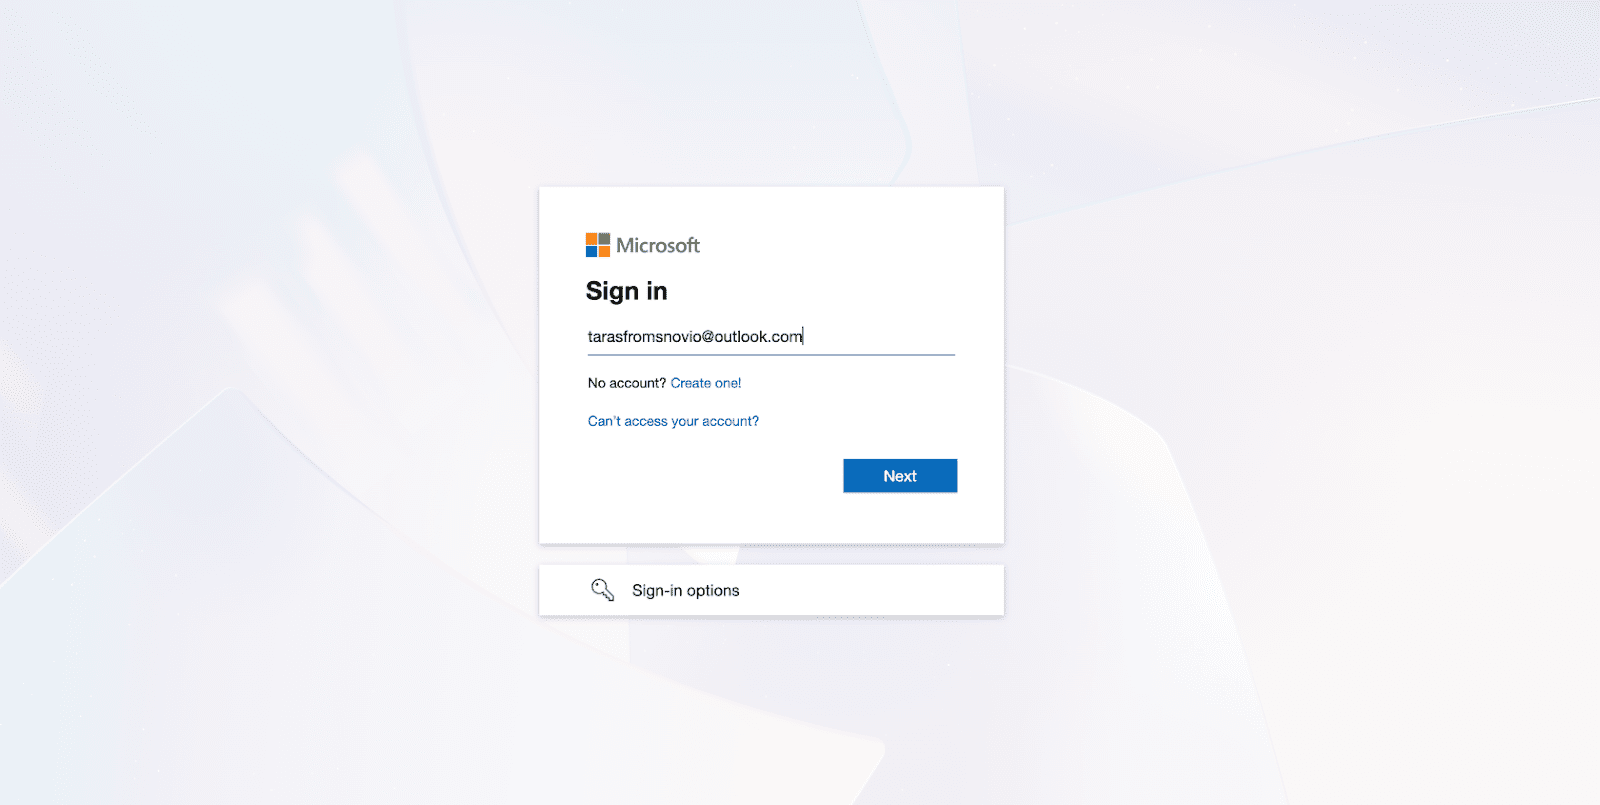
A Microsoft sign-in window will open. Enter the credentials for the mailbox you want to connect.
If a different account is shown by default, click Sign in with a different Microsoft account.
Accept the permissions request
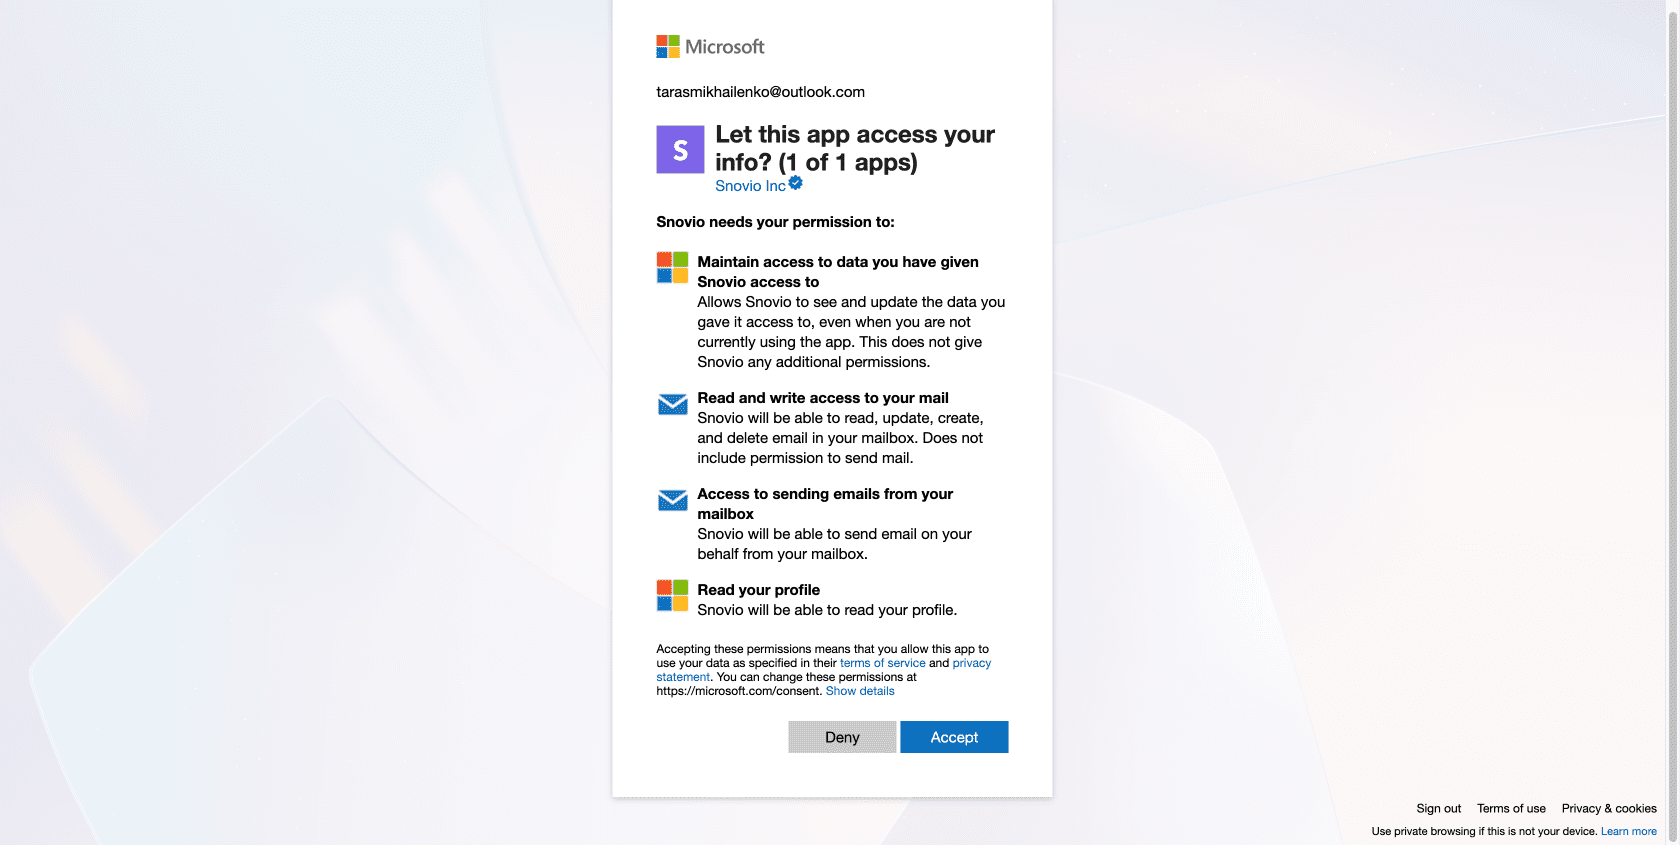
At this step, you’ll confirm that Snov.io has permission to work with this Outlook account.
Snov.io needs this access to connect to your mailbox, send emails on your behalf, and track email activity and replies for your campaign statistics and reports.
Review the requested permissions and approve access.
Click Accept to continue.
Finish account settings
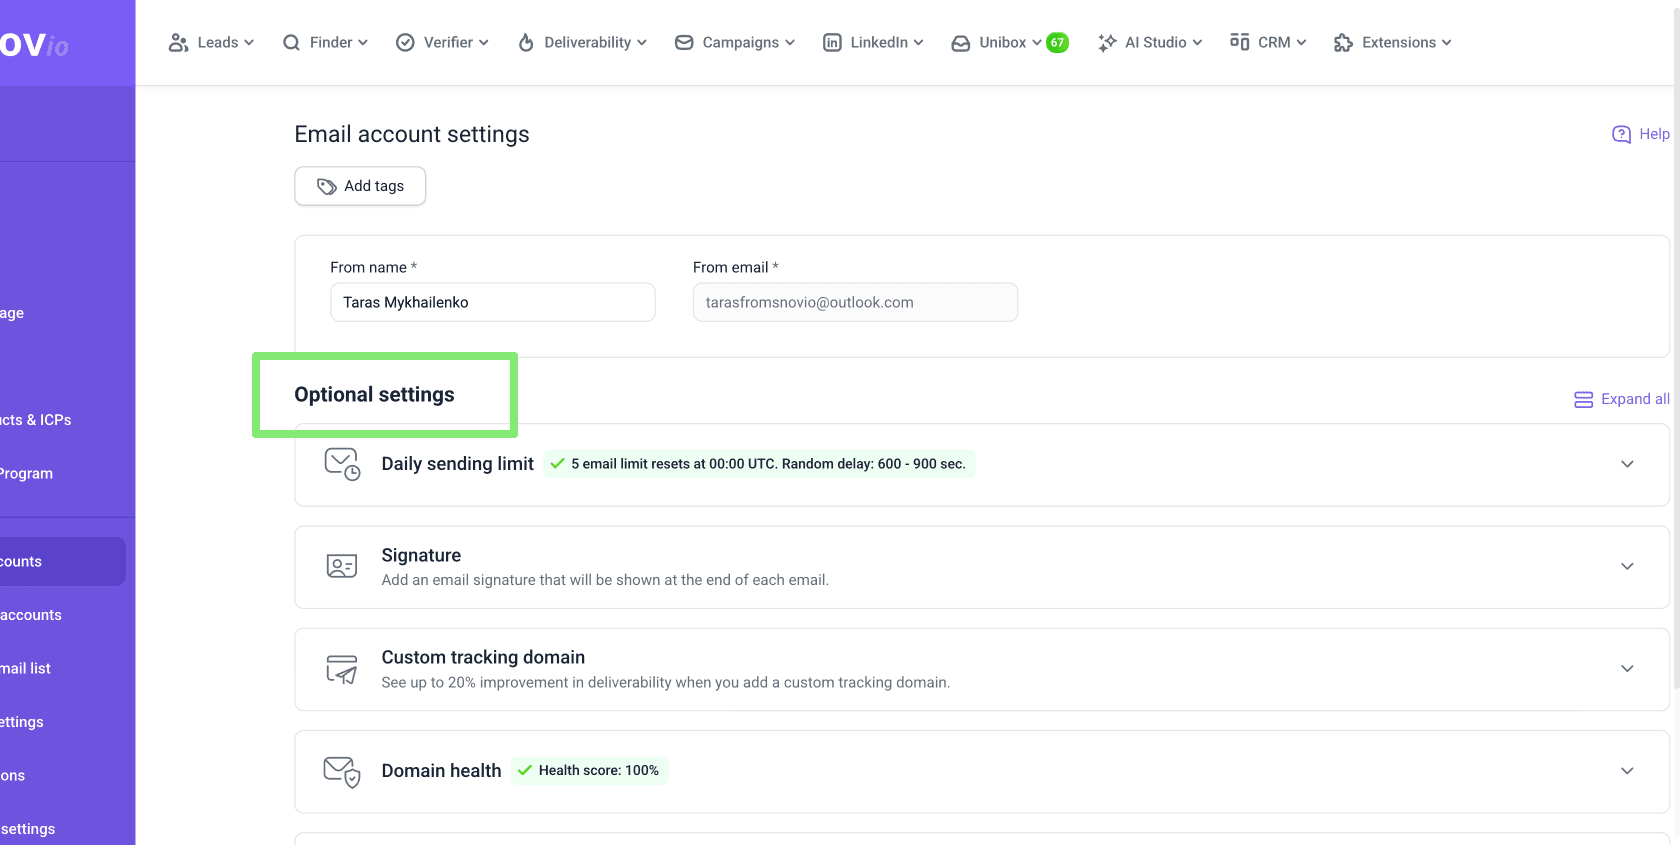
After successful authorization, you’ll see the account settings. Review the tabs and configure the settings you need.
Each connected account can have its own sending limits, signature, and other settings to help improve performance.
Custom tracking domain
If you plan to track opens or link clicks, set up a custom tracking domain. Using tracking without a custom domain can affect deliverability.
Domain health
Use the built-in test to confirm everything is configured correctly on your domain. It validates SPF, DKIM, DMARC, MX, and CNAME records.
Fix anything missing in DNS before you start warm-up or launch campaigns.
Unibox
Add accounts to built-in Unibox to manage replies across all your outreach accounts.
BCC to CRM
If you already use a CRM for lead management, you can add your CRM’s BCC address to log all emails sent from a specific account in Snov.io.
What to do after connection
Complete the rest of your account setup before launching campaigns:
- start warm-up to build sender reputation
- check domain health and fix missing DNS records
- run deliverability tests to check inbox placement
- sync the account to Unibox if you want to manage replies inside Snov.io

Sorry about that 😢
How can we improve it?