In sales, monitoring email performance is important for ensuring the success of your offer. You need to know in real-time who opens your email and is interested enough to click the link. This also helps identify which subject lines, CTAs, designs, and offers are the most attractive to your leads.
We at Snov.io have created our own email tracker that doesn’t just help you keep your finger on the pulse, but also saves your wallet and reputation. How? To understand, let’s take a quick look at how you can track emails in Gmail with Snov.io Email Tracker extension.
Outline
Email tracking: monitoring lead’s interaction
Email trackers were created to monitor the status of your outgoing emails. Every email you send is tracked and the data on it is displayed right in Gmail for you to know the email status according to the user’s actions – opened, clicked, replied, etc.
This real-time data allows you to analyze just how well your emails are performing, meaning you’ll know whether to save this particular email copy as a template if the open and click-through rates are high or, perhaps, you’ll see that some changes have to be made to the subject line and the body if the message underperforms.
The specificity of this data for each individual email is what makes email tracking so valuable to professionals in sales and marketing.

How To Know If Someone Read Your Email
11 November 2023
Best Email Tracker Of 2024: A Comparison
22 December 2023
Snov.io Email Tracker extension features
To track emails, Snov.io’s Gmail tracker adds an invisible pixel to track email opens and tags links to track clicks.
Snov.io Email Tracker is a completely free (no trials or locked features) and perfectly designed mailtracker extension for Gmail that marks every email with a status label for you to easily monitor the recipients’ interaction with your sent messages.
The label also displays the number of opens and link clicks right next to the subject line. You won’t need to deal with external windows or separate platforms to track sent messages – with Snov.io, you have everything integrated directly into Gmail.
Before you learn how to track an email with the Snov.io tracker, check out our email address tracker’s set of features and benefits:
- An unlimited email tracker
- No signatures, labels, or logos in your emails
- Full Gmail integration (with an unlimited number of accounts)
- Easy tracking preferences switch
- Opens and clicks tracking
- Real-time push notifications in your browser when an email is opened or a link is clicked
- Send later (aka scheduling) feature
- Email tracking reminder notification when a recipient doesn’t open or click your email within a set time
- Daily and weekly reports on email performance
Usually, email monitoring extensions offer a free plan in exchange for some kind of logo placement in the email body. This is where the Snov.io Email Tracker has an upper hand: we’ve created our extension not for profit but to improve our users’ lives. Hope you enjoy it!
How to track an email with Snov.io Email Tracker
So here we are – let’s find out how to track an email easily and for free. Snov.io’s Gmail tracker extension is easy to install and use. Read how you can send a tracked email in four simple steps below.
Step 1. Sign up at Snov.io (optional)
To unlock free daily or weekly reports, you need to create and log into your Snov.io account. Go to Snov.io registration page and sign up. You can sign up with Google to save time. Once registered, you can set up reports to be sent to your email, as well as view reports for specific dates right in the app. You will also automatically receive a free plan to use other Snov.io tools.
Step 2. Install the Snov.io Email Tracker
Find Unlimited Email Tracker in Chrome Web Store or click here and install the extension.
A new tab will open in your Gmail or G Suite account. If you want to start tracking emails from the suggested email address, click the Activate button. If you don’t want to track emails sent from this account, click the Never for this account or Remind me later button at the bottom.
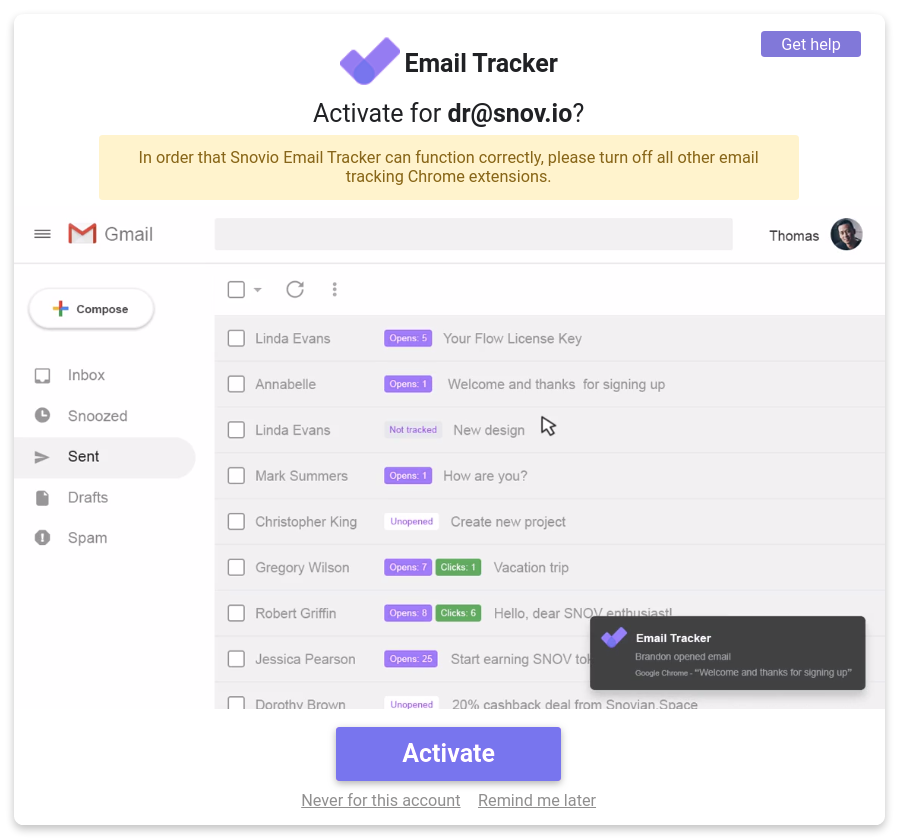
Once activated, Gmail will reload automatically to integrate Snov.io email tracker with your account and open a window with a draft test email. If you want to see how the tracker works, press Send. This test email will be sent to our test account and, once the email is opened, you will receive a push notification.
Step 3. Change email tracking preferences
Email address tracker extension can be customized according to your needs and preferences.
If you have multiple email accounts, choose which ones you would like to enable tracking for. There’s no limit on the number of tracked email accounts. Click the extension icon and in the first panel – Enable tracking for – switch the toggles opposite the preferred email addresses.
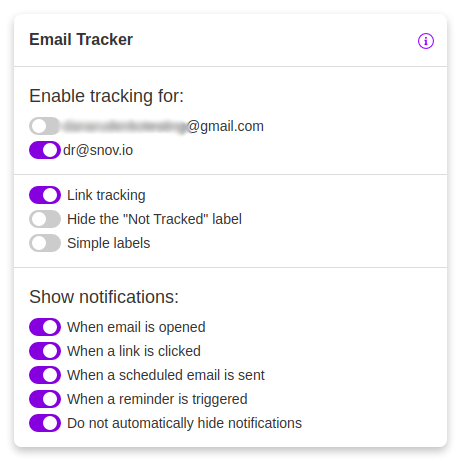
In the second section, you can enable or disable link tracking (to improve email deliverability), activate or deactivate the “Not tracked” label for untracked emails, and choose either simple or expanded labels. If you choose the expanded labels, they will contain the email status with the number of the email opens and link clicks; otherwise, only the number will be displayed.

In the last section – Show notifications – choose which email tracking notifications you want to receive:
- When an email is opened
- When a link is clicked
- When a scheduled email is sent
- When a reminder is triggered
- Do not automatically hide notifications (the notification will stay on screen until you close it)
Step 4. Compose and send your email
With an activated tracker, when you write an email in Gmail, at the bottom of the email window, next to the Send button, you will see three Snov.io icons that will help you send and track emails like a pro.
Send your message at a specific time
If the recipient is supposed to get your email at a specific time, schedule the email sending with this button.
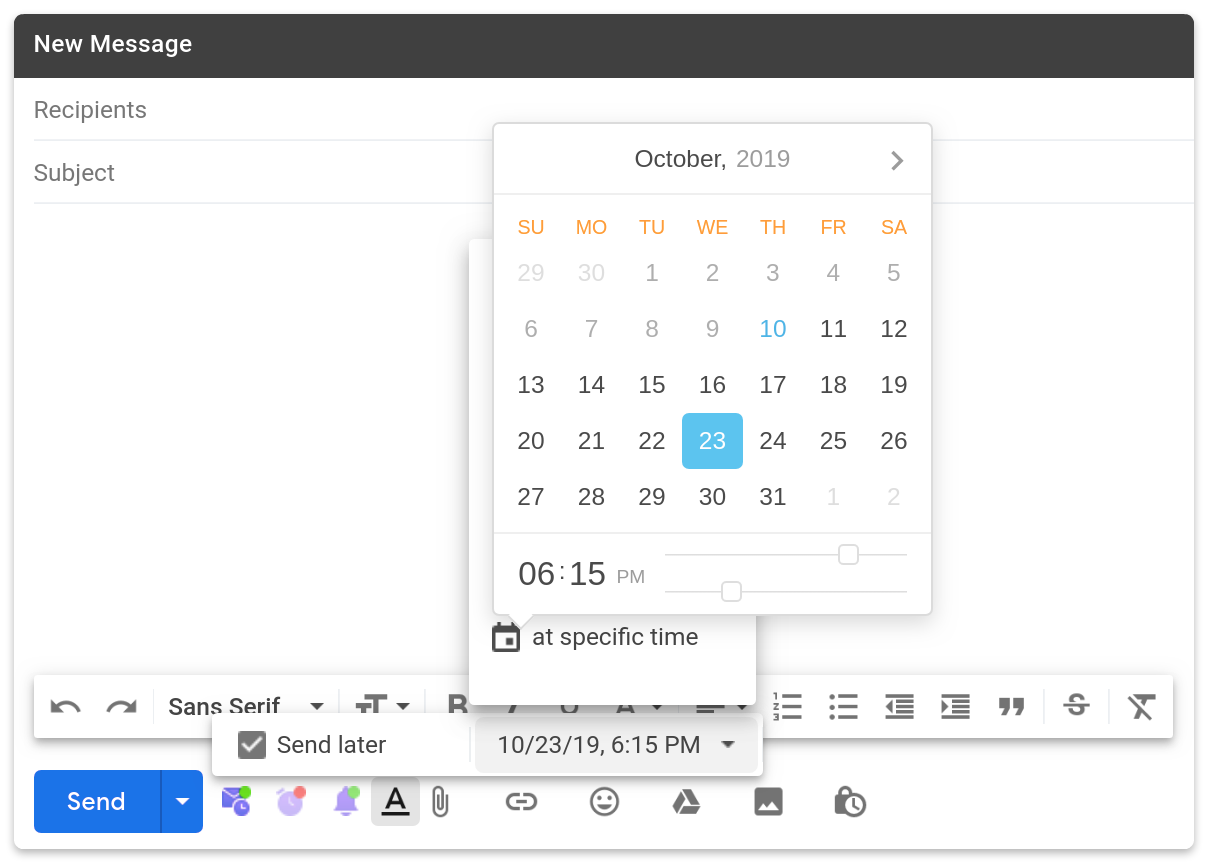
Tick the Send later checkbox and set the time when you want your email sent. The scheduled email is saved in the Draft folder until sending. Note that the schedule option doesn’t work if you reply to an email directly. However, you can always schedule a reply as a separate email.
Set a reminder
Click the clock icon, tick the Remind me box, and choose the time and actions. If the predefined action (email opened, link clicked, reply received, or regardless of the action) is not performed, you will receive an email notification.
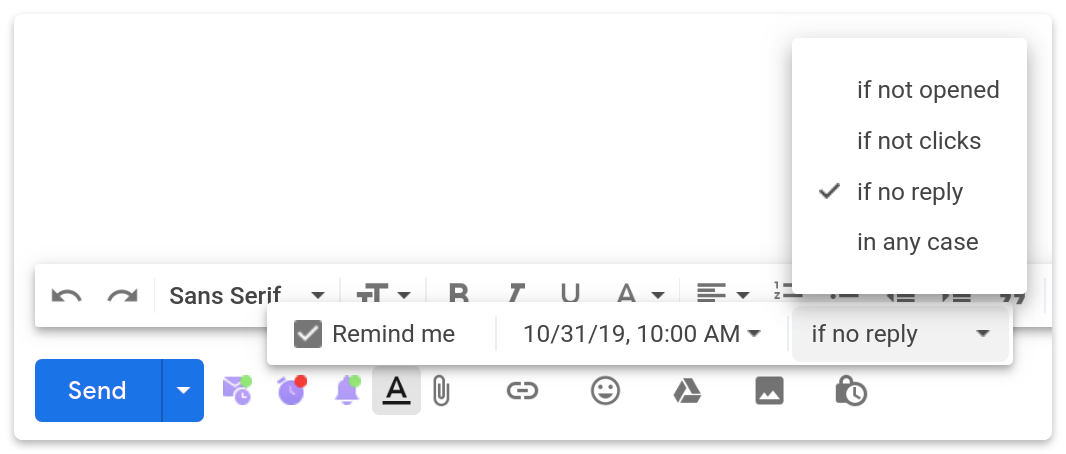
Use this as a reminder to send a follow-up email. When you send an email with this feature activated, a clock icon will appear next to the subject line.
Disable email tracking for this email
If you do not want the sent email to be tracked, simply deactivate this feature by clicking the purple bell. If there’s a red label next to the bell, the email is not tracked; if the label is green, the email is tracked. Same goes for other activated/deactivated labels.

Once you’ve set all the necessary tracking options, send your email.
Email statuses and reports
Once a tracked email is opened, you will start receiving live push notifications when your recipients open emails and click links.
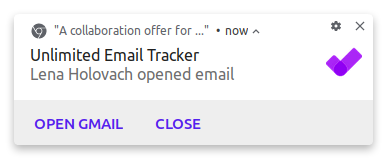
Note: Notifications pop up in different places depending on the OS. If your OS is Windows, the notifications appear in the lower right corner; if you work with Ubuntu, the notifications appear in the upper corner; on Mac OS, the notifications are in the upper right corner.
In the Inbox, every email will be marked with a respective tracker’s icon(s):
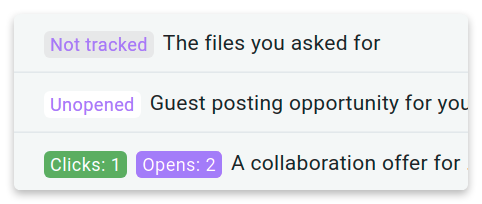
Not tracked notes the email was sent with the mailtracker deactivated.
Unopened means that the sent email is tracked but has not yet been opened.
Opens: displays the number of times an email has been opened.
Clicks: shows the number of times the recipient has followed the link inside an email.
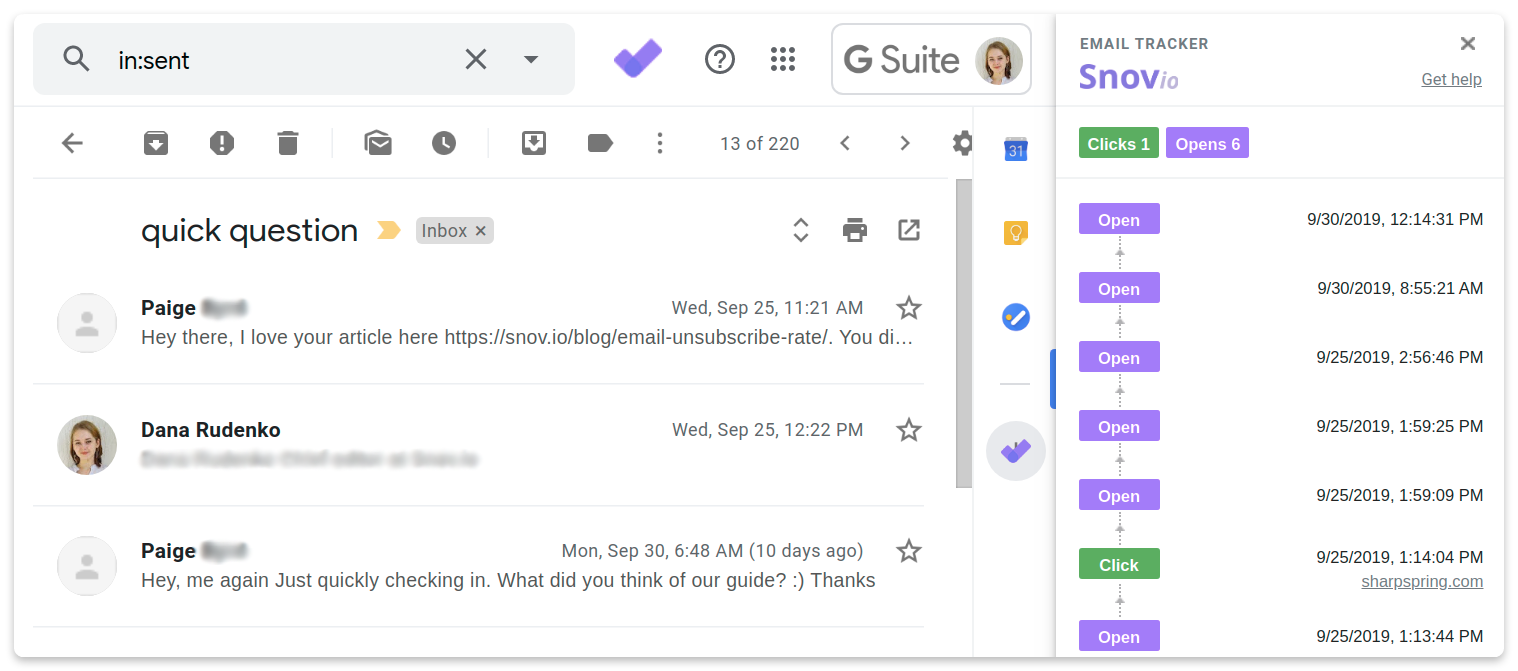
If you want to see the full email tracking history on an email, open the email and, in the right side menu, click the email tracker icon (purple checkmark). In the sidebar, you will see the report on all the emails’ opens and clicks with the exact dates and times.
If you want to receive regular reports on sent emails or just view the tracking summary, go to the Gmail tracker page in the Snov.io web app.

In the first section, Summary reports, select the email address you want to see the email tracking reports for and choose a date, today, last week or month, etc.
In the next section, Receive a report on your email performance, define the frequency of email reports – daily, weekly or both. Once set, a new section, Choose emails to receive summary reports on, appears below. Switch the toggle next to the necessary email addresses. Then, set the time for your reports and choose a timezone.
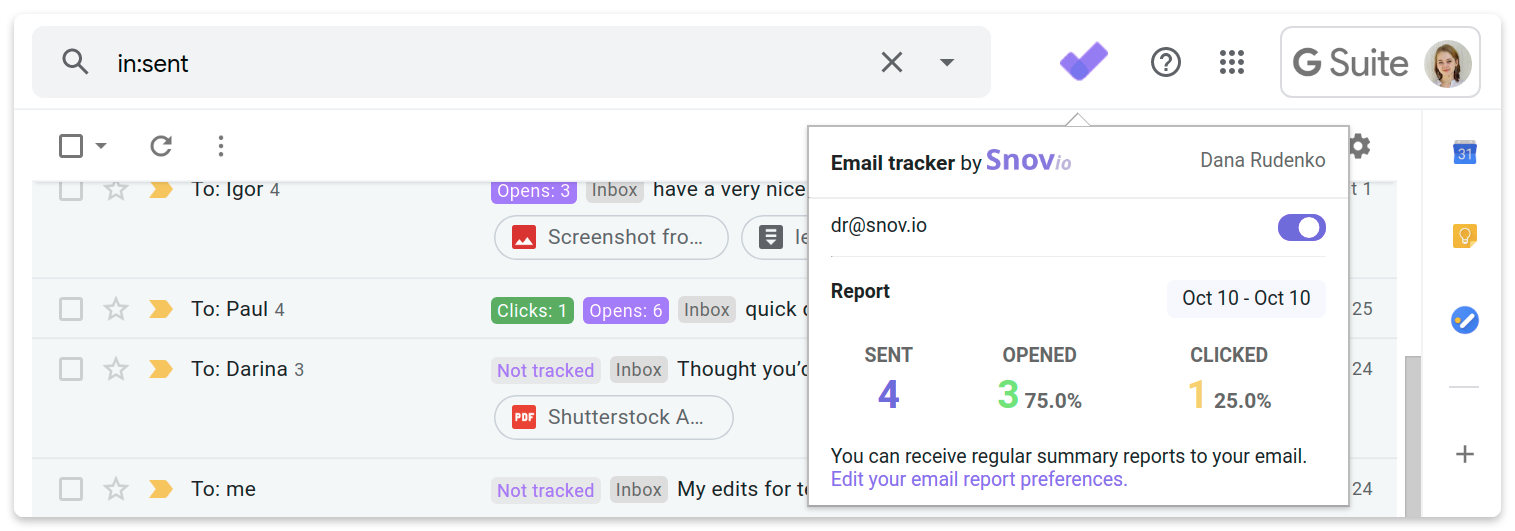
You can also view the email stats right in Gmail. Click the purple checkmark icon and select the date you are interested in:
Track it right!
An email address tracker is a must-have tool for every professional because it truly simplifies marketing and sales processes. With a mailtracker, you are always aware of your lead’s readiness and whether the time for a follow-up email has come.
Happy tracking!


sometimes exact date and time is not shown by clilcking sent mail and email tracker icon (purple checkmark),,,how to solv this?
Hello, Rafat! This doesn’t sound like any known issue we’ve encountered. Please contact our Customer Care team at help@snov.io or via live chat so they can help you! And thank you for letting us know!
is this completely free? I mean it has so many features.
Hi!
Yes, our Email Tracker tool is free 🙂
Absolutely loving it !! Such nice product and it’s free. Kudos to the team 🙂