In Snov.io, you can create new DFY sender accounts or connect your existing accounts from any provider.
Connect existing account in bulk via CSV
Prepare accounts for campaigns
- Add accounts to warm-up
- Check domain health
- Add a custom tracking domain
- Sync accounts to Unibox
- Add account tags
Add an unlimited number of accounts — use them to check inbox placement, run warm-up, launch multichannel campaigns, and sync inboxes to Snov.io.
To get started, go to your Email Accounts dashboard.
Connect existing accounts
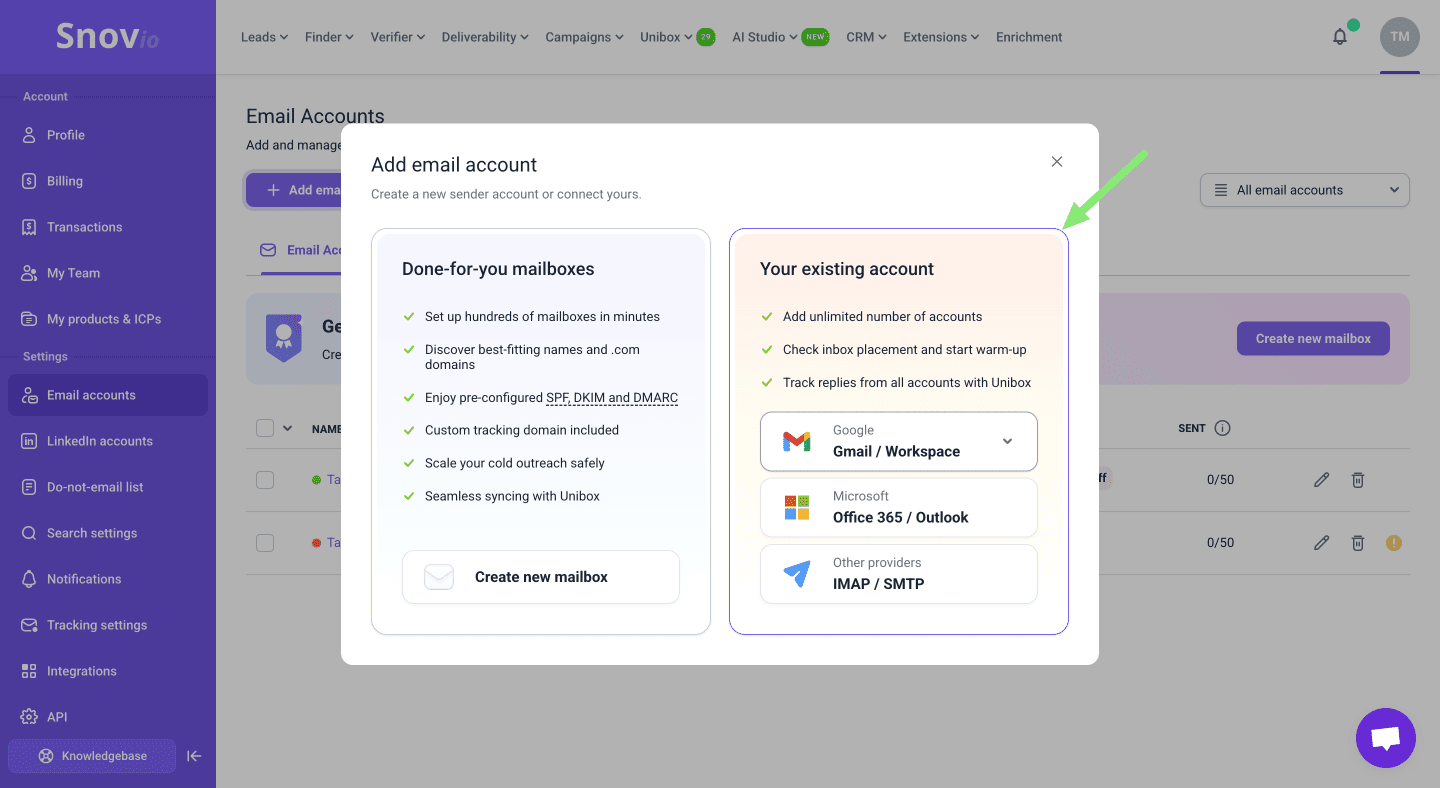
Click Add email account and select your existing provider.
In this account type, Snov.io connects to your email account and sends emails through your provider’s servers.
Add Gmail/Workspace or Microsoft Office accounts via direct sign-in.
Alternatively, use an SMTP/IMAP connection for more advanced settings — for example, to send from another name or use a different IMAP server. For most popular providers, Snov.io will automatically fill in the default settings.
To complete the connection through SMTP, enter your login and password in the corresponding fields.
Snov.io supports all major email services (ESPs). Select Other to add an account from any provider using SMTP settings.
Connect existing account in bulk
To add multiple email sender accounts at once, use the Import from CSV option.
Upload a CSV file with account details and provider settings, and Snov.io will automatically set up the accounts using data from your file.

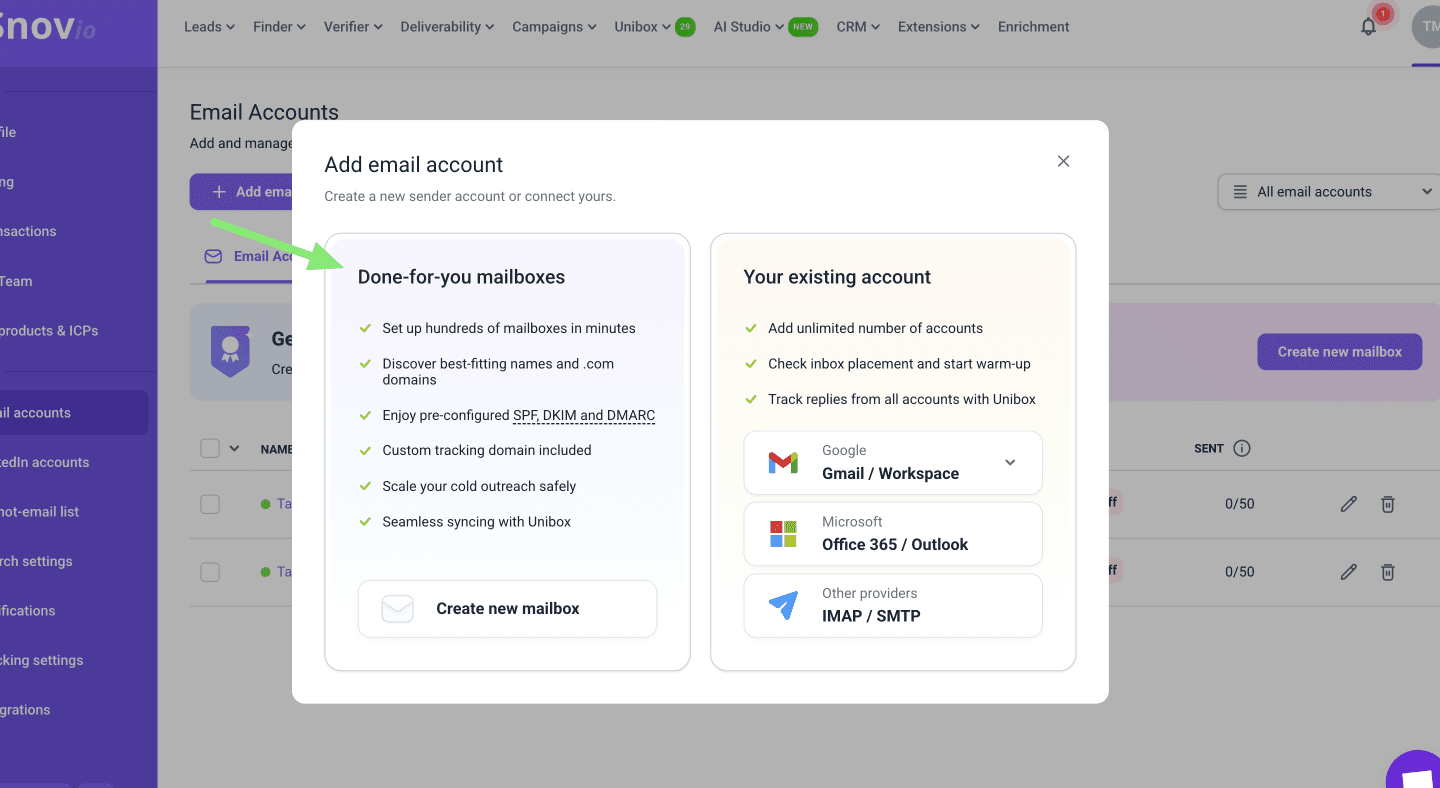
Purchase Done-for-you accounts
Besides connecting your existing accounts, Snov.io also offers done-for-you (DFY) domains and mailboxes.
The DFY service automatically creates new sender accounts from scratch, without any setup required on the provider’s side.
With this option, you can buy domains and create email senders in bulk directly from your dashboard.
Every account comes fully configured with essential deliverability settings — SPF, DKIM, DMARC, and tracking domains.
To get started, open the Email Accounts section.
Click Add email account and choose the Done-for-you mailboxes option.
Read how to set up your cold email system in our guide.
Prepare accounts for campaigns
Warm up your accounts to improve deliverability and build sender reputation with email providers.
Add accounts to warm-up
Start warm-up right after connecting your accounts. Both existing accounts and done-for-you mailboxes need warm-up before campaigns.
You can start warm-up in two ways: automatic (quick launch) or manual configuration with advanced settings.
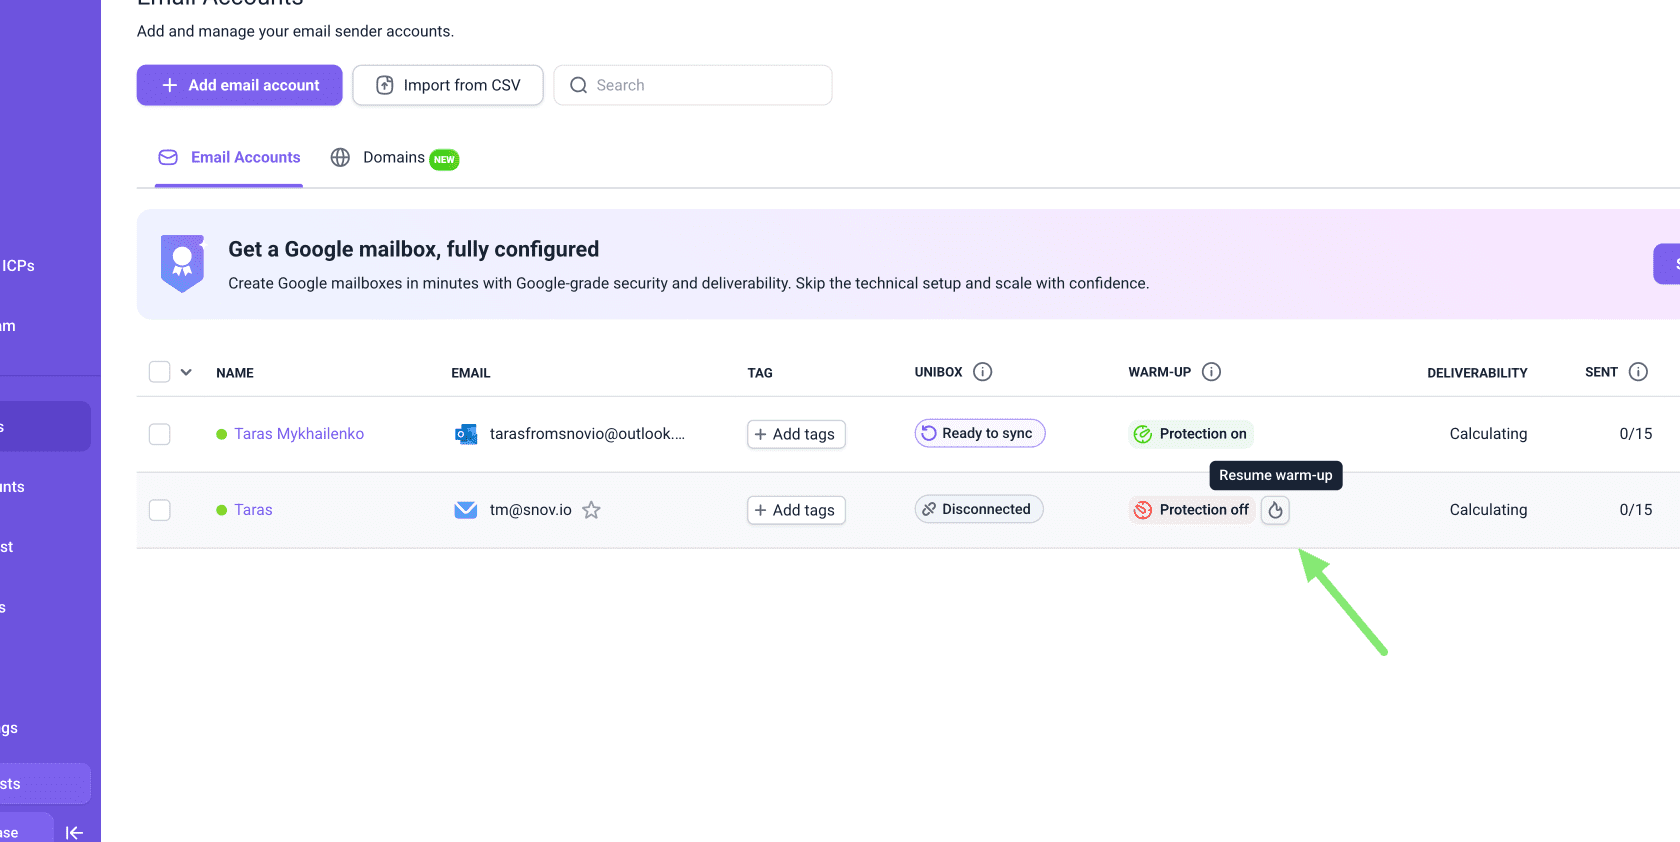
Quick warm-up launch
Use this option to start warm-up in one click. It automatically selects the optimal preset for each account based on recent activity.
- New or low-activity accounts: gradual ramp-up to prepare accounts for campaigns
- Active accounts: fixed daily warm-up to maintain deliverability
Go to Email Accounts and click the Quick launch button under Warm-up.
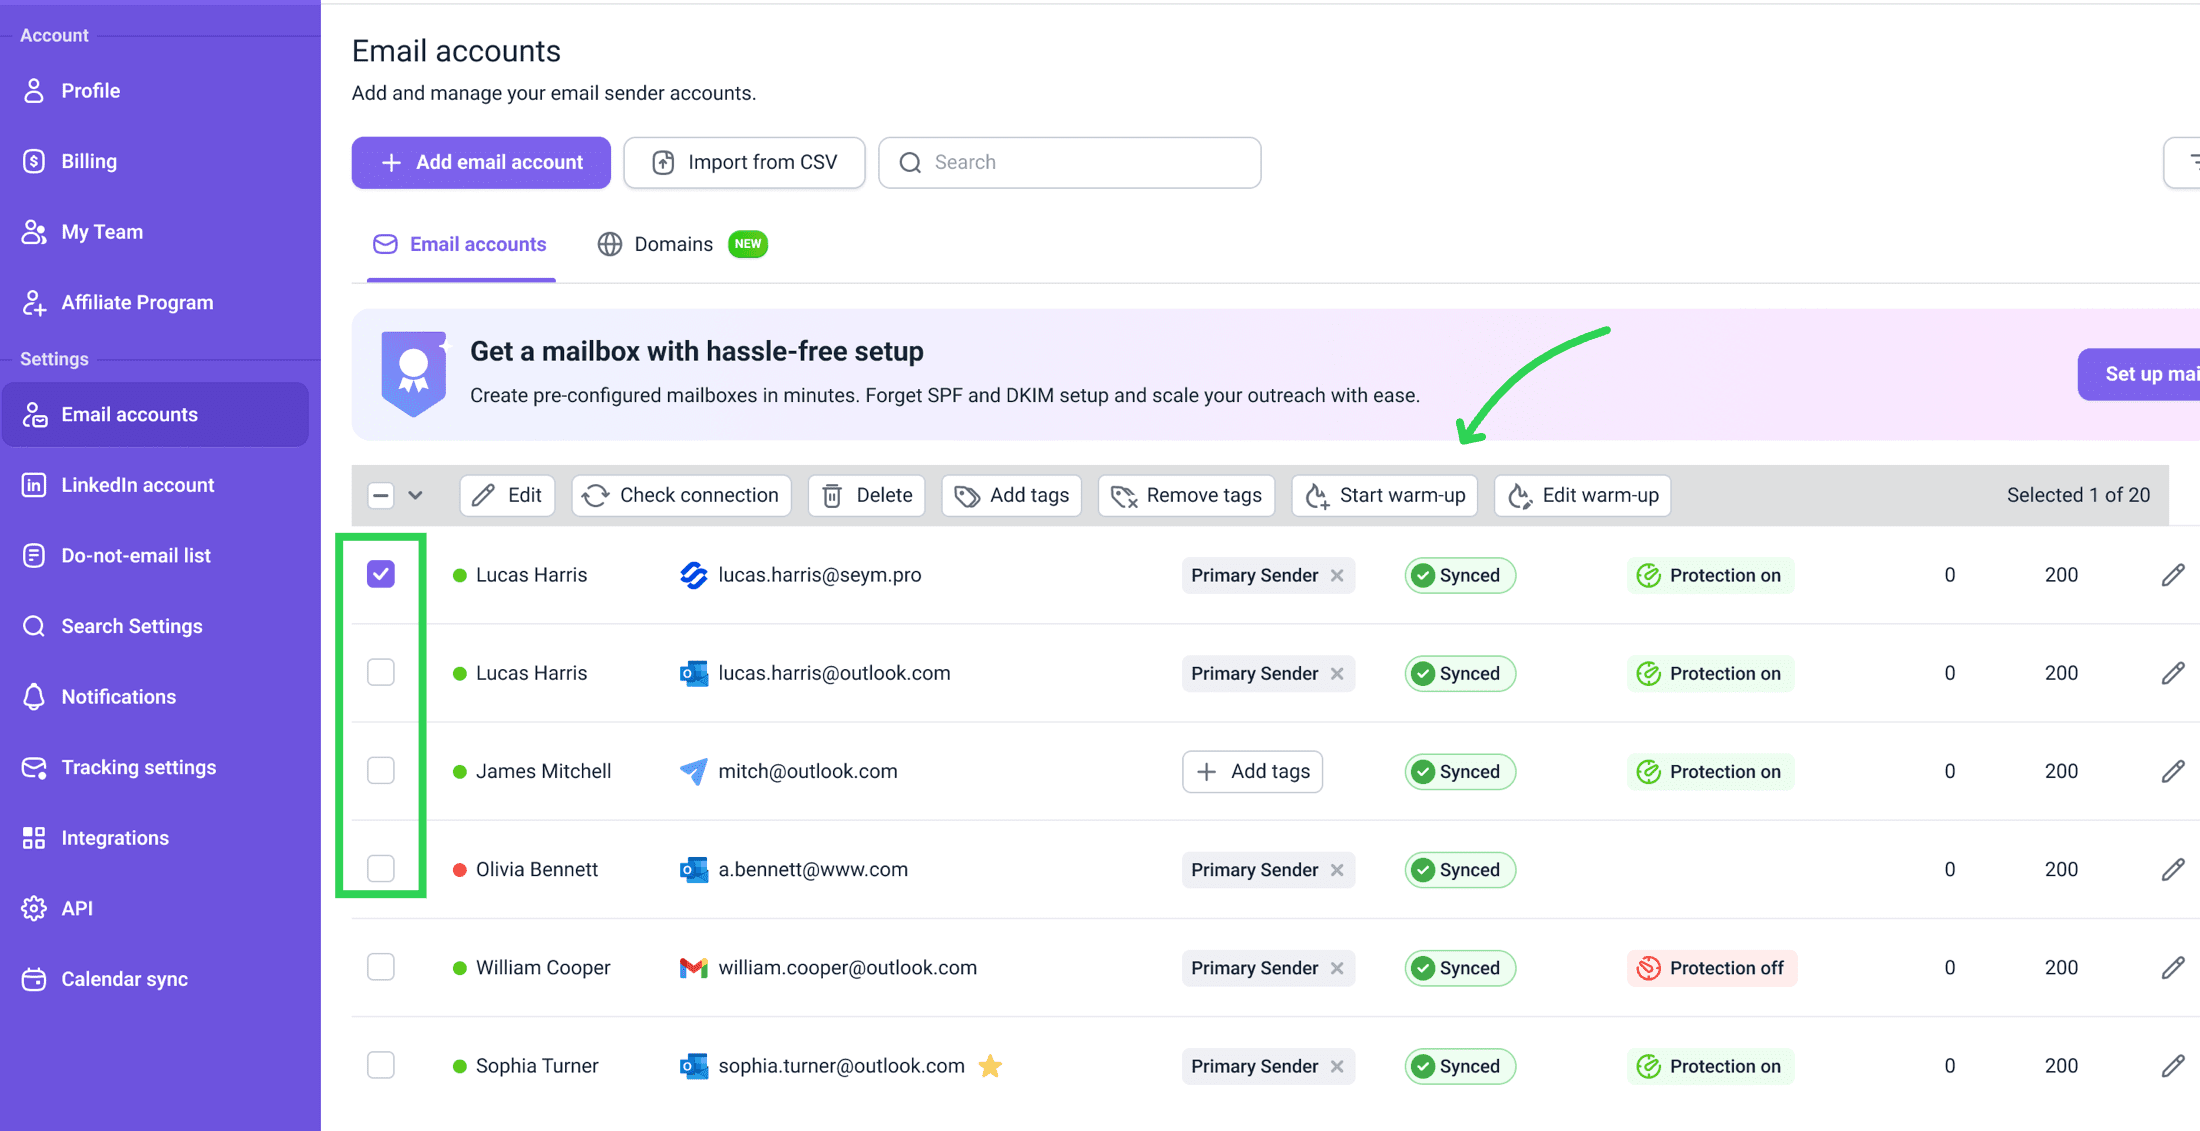
To launch warm-up in bulk:
In Email Accounts list, select accounts with checkboxes on the right, and click Start warm-up in the top panel.
Advanced warm-up setup
Use advanced settings to fine-tune warm-up for your needs: adjust warm-up limits, sending schedule, content, and other useful options:
- Premium sender pool: warm up with business domains only
- Targeted warm-up: improve reputation with Gmail, Outlook or other providers
Go to Email Warm-up to configure and start warm-up manually.
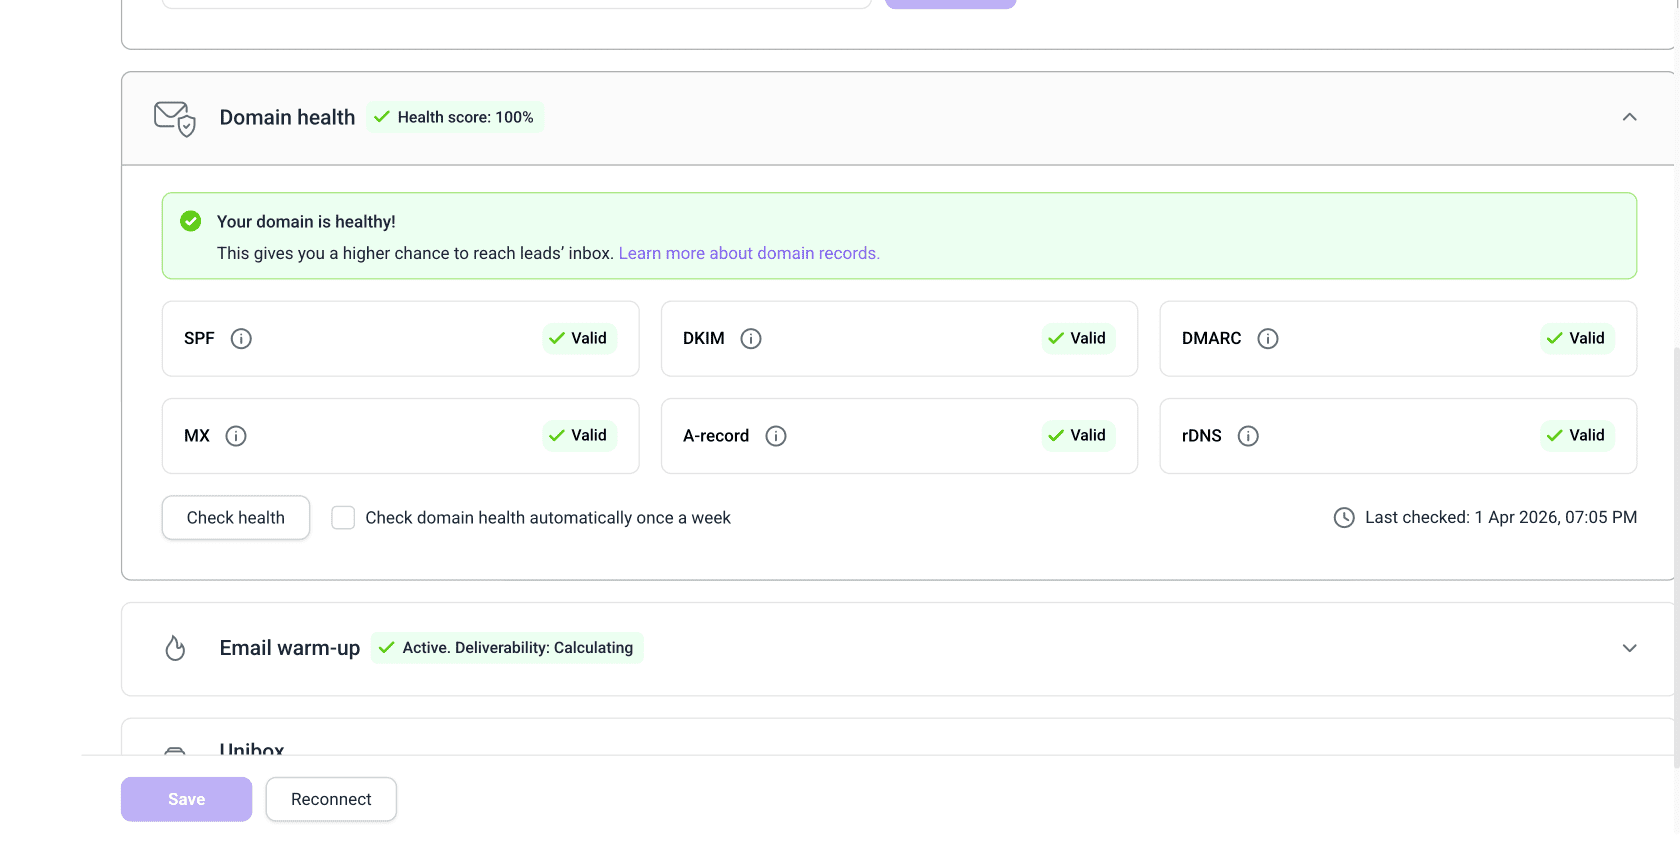
Check domain health
Ensure your domain settings are configured correctly. Missing DNS records (SPF, DKIM, DMARC) can affect deliverability.
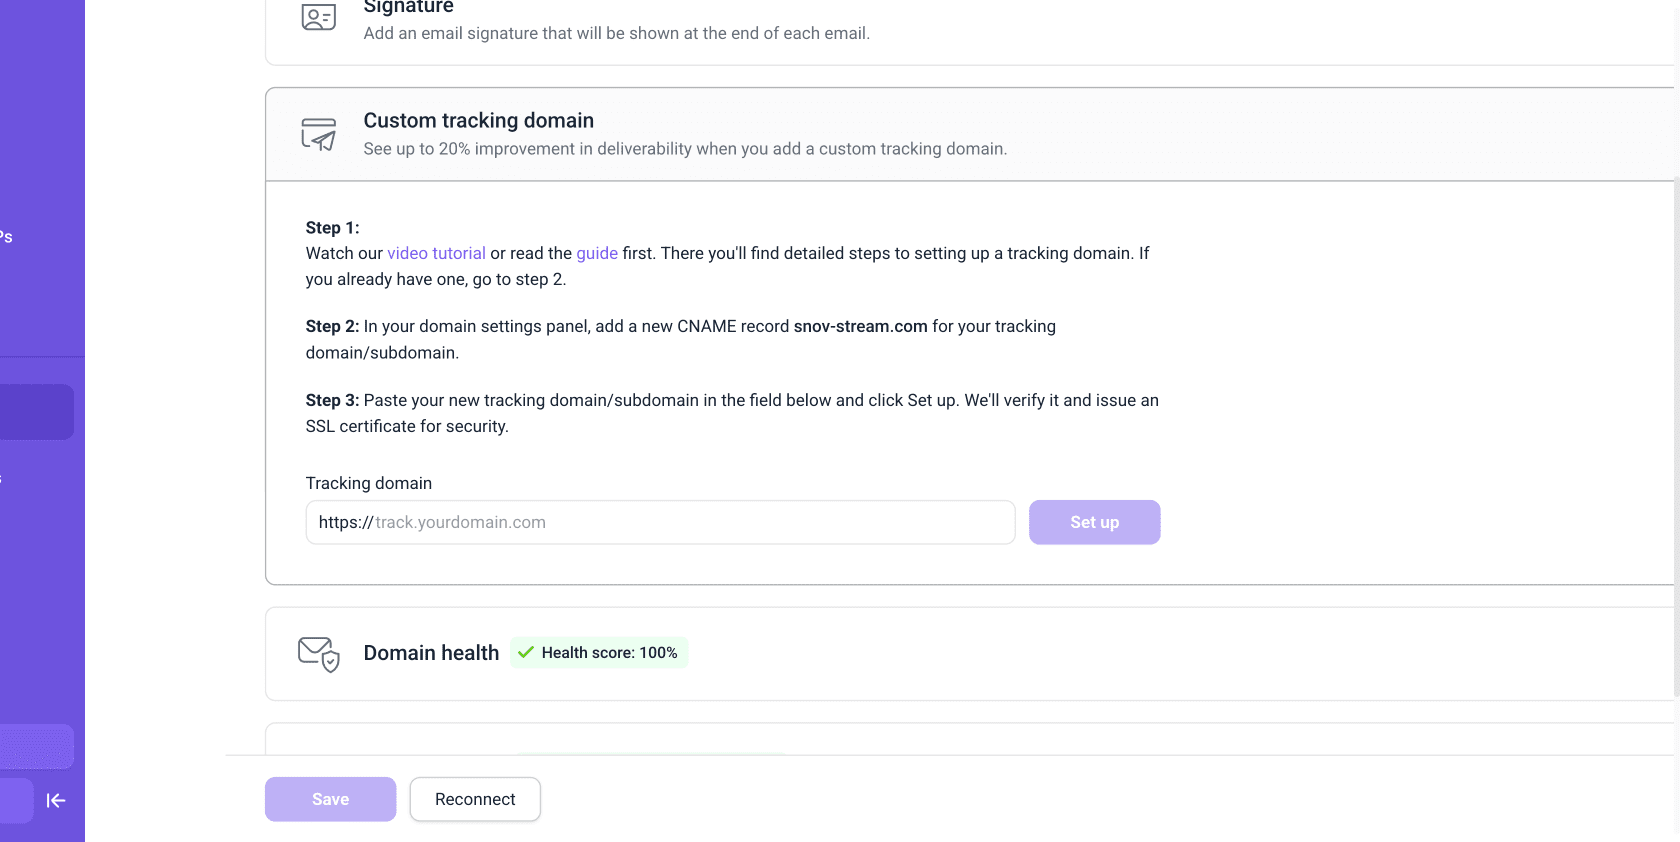
Add a custom tracking domain
If you plan to track opens or clicks, set up a custom tracking domain. This makes tracking safer and reduces the risk that email providers will flag your emails as suspicious.
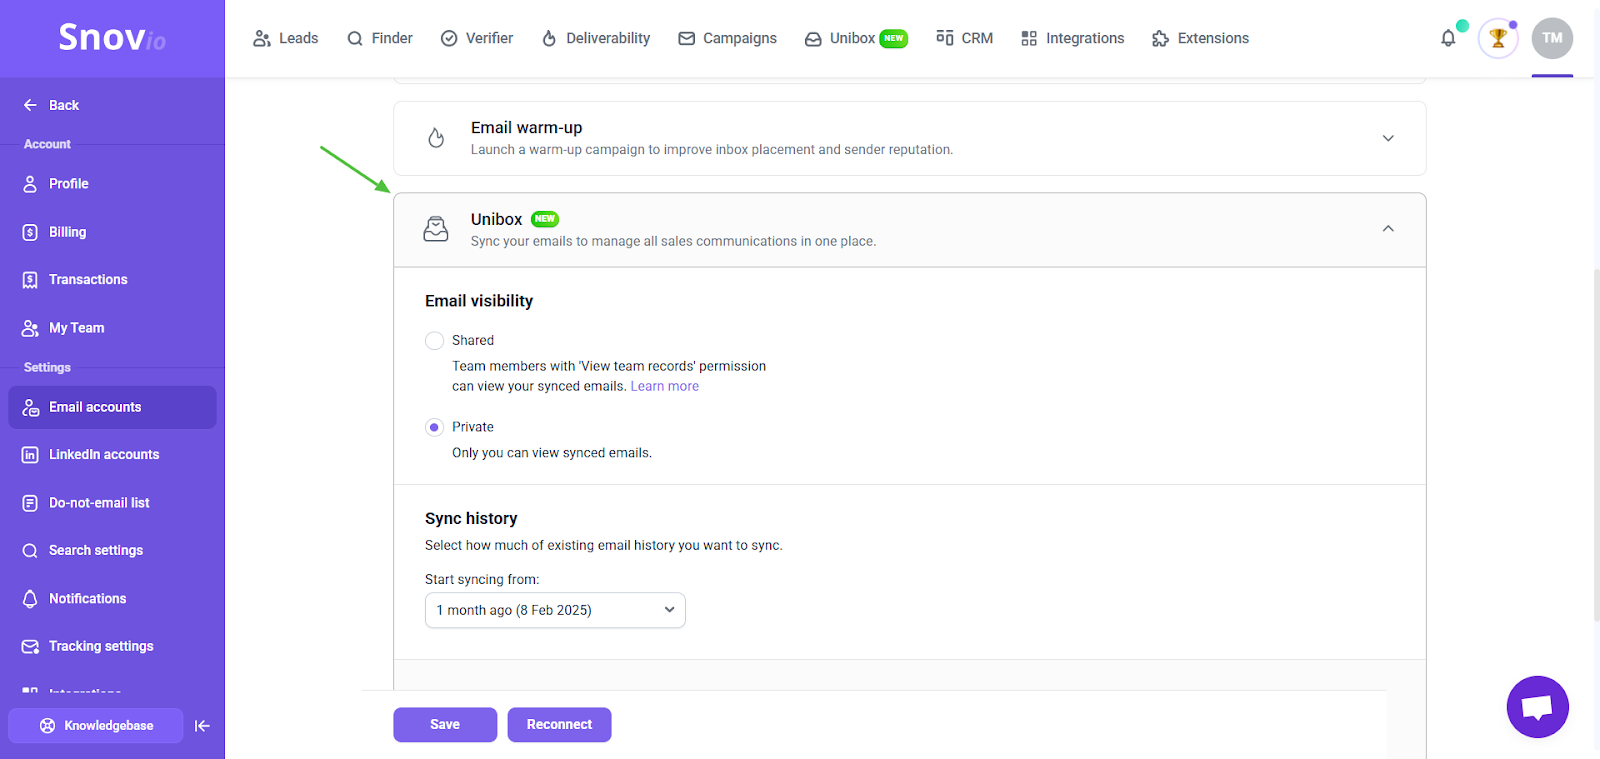
Sync accounts to Unibox
Once you've added your accounts, you can connect them to the built-in Snov.io mailbox and sync all your email activities.
In the Unibox page, manage communication from all your inboxes and process replies from any connected account.
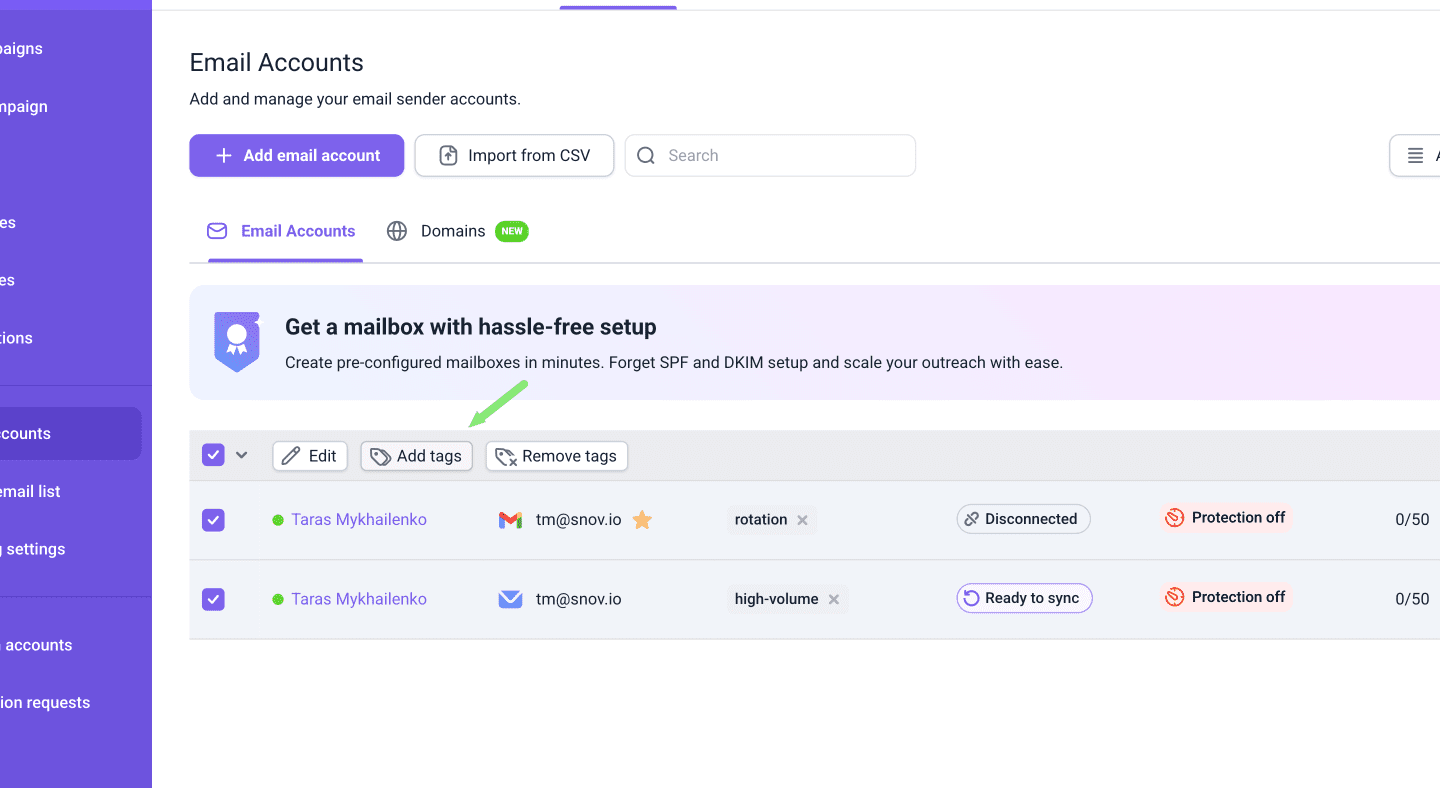
Add account tags
After connecting your accounts, add custom tags to segment them later by any criteria you need.
-
Add tags in the settings of a specific email account
-
Or bulk-add to multiple accounts from the Email Accounts list
Tags make it easier to segment and filter senders, especially when managing large numbers of accounts. Once created, a tag is saved to your tag list and can be reused anytime.
How to use tags (examples)
Use tags to segment and filter by purpose, owner, warm-up status, daily limit, or any other criteria your team needs. Tags are shared across your Team account.
- by domain: Tag accounts linked to the same outreach domain
- by owner: Assign tags to indicate which teammate owns or manages the account.
- by warm-up status: Separate accounts that are still warm-up and those that completed warm-up period
- by sending limit: Tag low-volume and high-volume accounts for easier planning
- by campaign type/client: For agencies, tag accounts used for specific clients or campaigns
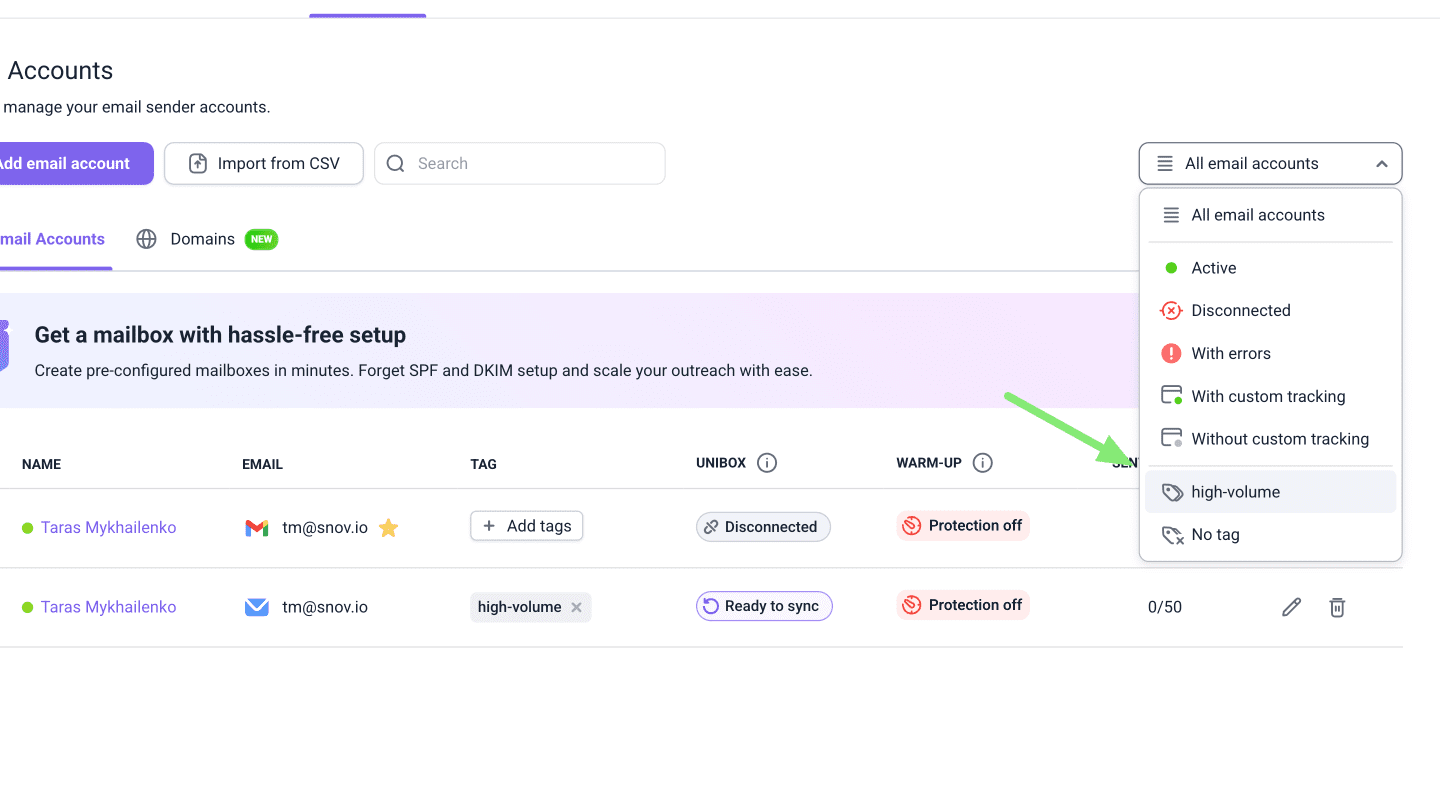
Filter accounts by tags
Once a tag is added, open the filter menu in the top right to display only the accounts with that tag.
After that, you can run quick actions on the selected accounts. To update settings for multiple accounts at once, use the Edit option.
If you have a question that we haven't covered, feel free to reach out to our Customer Care team. You can contact us at help@snov.io or through live chat. We're here to assist you!

Sorry about that 😢
How can we improve it?