In this article, you’ll learn how to create and manage deals in pipelines in Snov.io CRM to stay organized and efficiently track your sales progress.
How to add groups and custom fields to deals
A deal in Snov.io CRM is a sales opportunity represented as a card in your pipeline. It helps you track the progress of a potential customer through different sales stages — from first contact to closing.
Each deal card includes details like:
-
- linked prospects and their contact details
- the value of the deal
- the team member responsible for closing it
- the stage of the deal in your pipeline
- a timeline of interactions with the prospect
- any related tasks, meetings, and notes
Deals are fully customizable. You can add up to 200 custom fields to each deal with any data you need.
How to create a deal
There are multiple ways to create a deal in Snov.io CRM:
-
-
- from the Deals tab
- quick add in the pipeline
- from a Prospects list
-
Creating a deal on Deals page
Click the Create deal button in the toolbar in Snov.io CRM.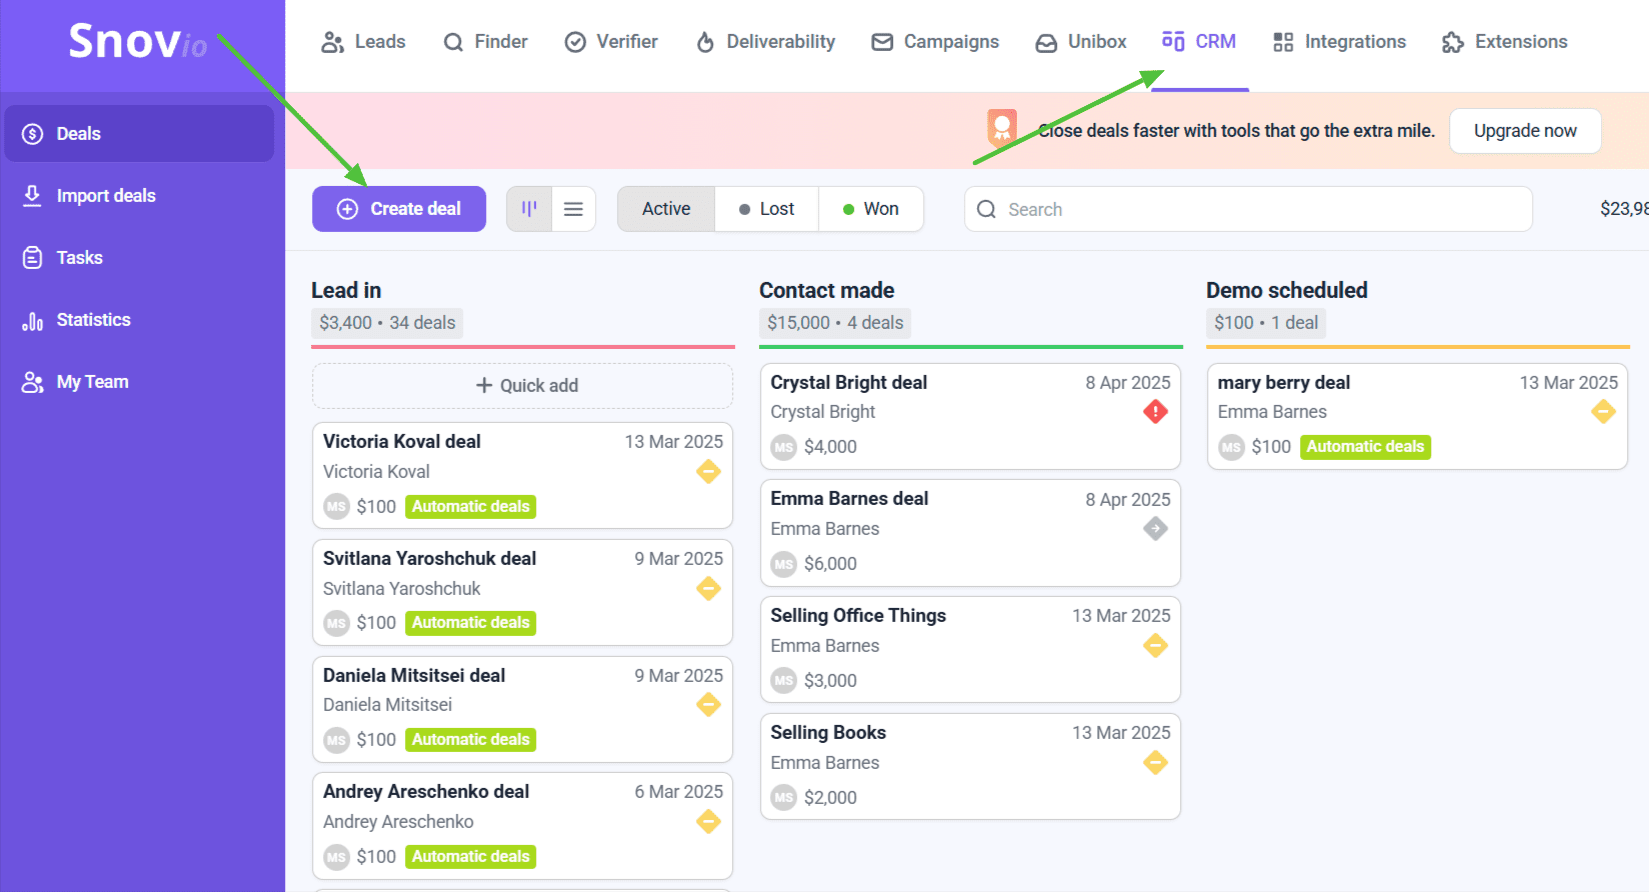 Fill in the deal info:
-
-
- Name your deal
- Add tags (optional) to help organize deals in the pipeline
- Set the responsible person to assign the deal to. The default responsible user is the one who creates the deal
- Set the value — the budget of the deal. The default currency is USD, $ but you can change it in the drop-down in the same line. A note for teams: only the Team leader can update the currency
- Add the prospect or choose one from your existing prospect lists by typing their e-mail address.
-
All the changes are now reflected in the deal card.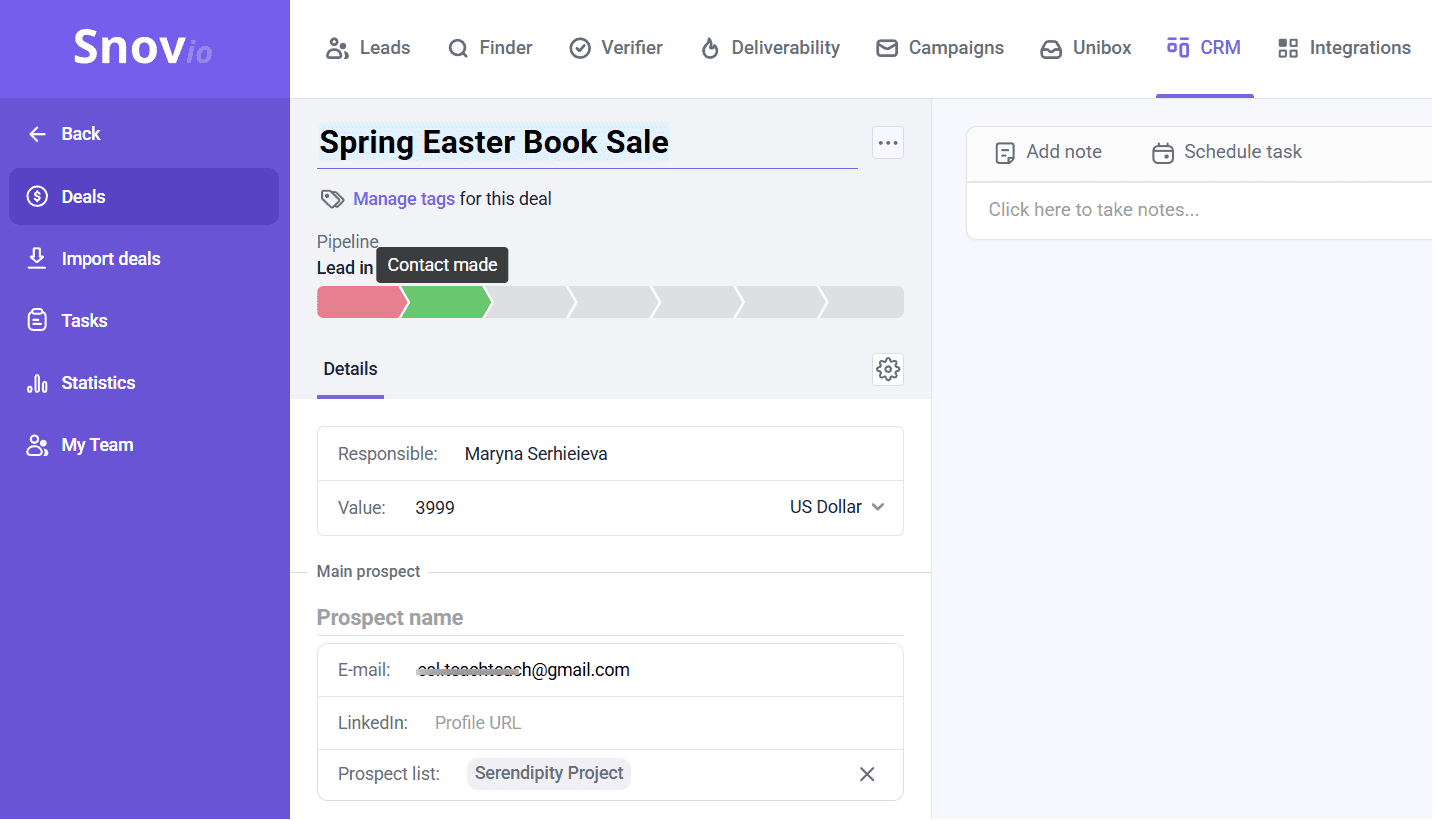 Select the pipeline and stage for this deal.
By default, the deal will be added to the pipeline where it was created. To change the pipeline, click on its name and choose a different one.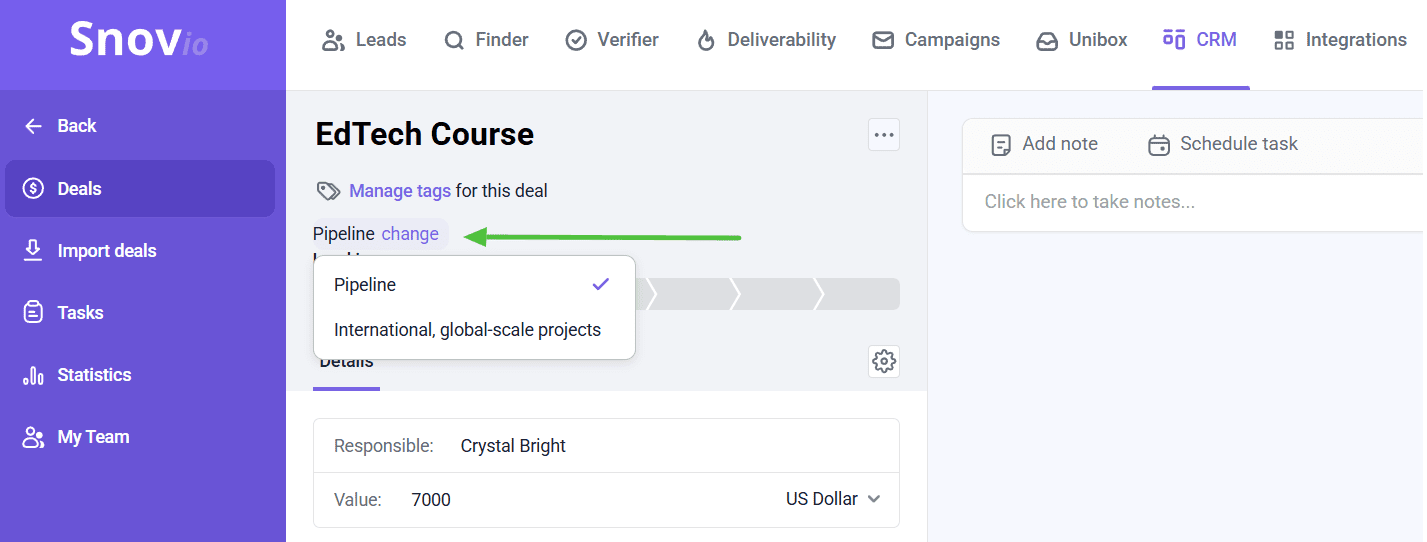 Pipeline stages show your progress toward closing the deal.
Hover over each stage to see its name, then select the one that best reflects the current status of the deal you're creating.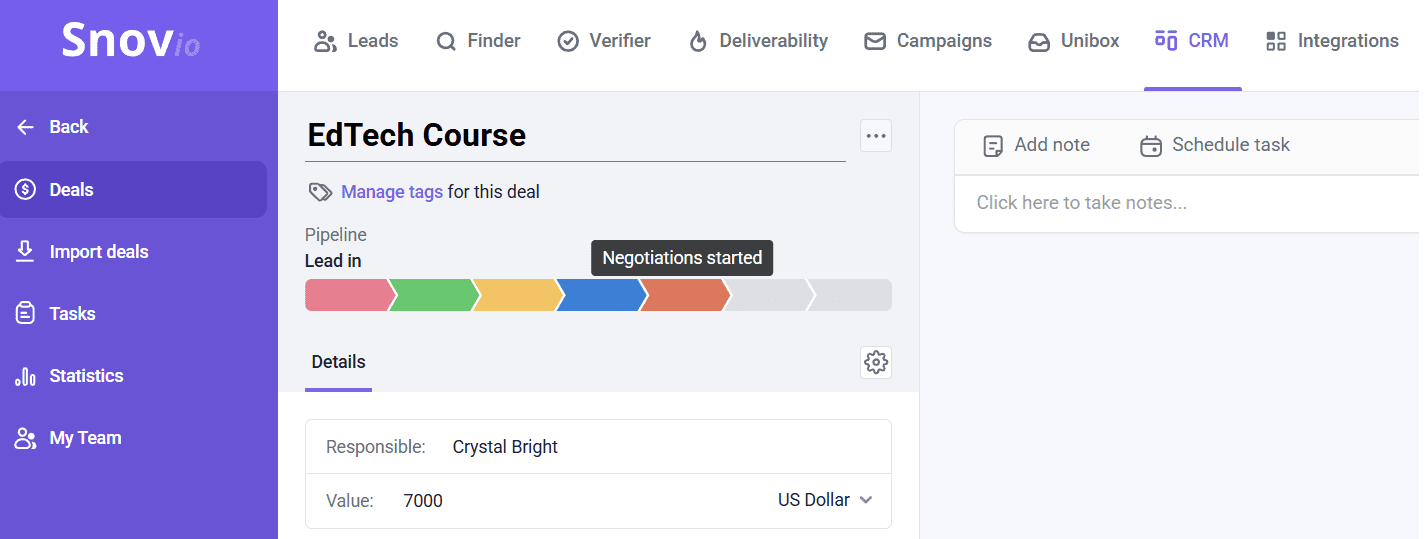 Once you added all the deal information, click Save.
Your new deal will appear in the pipeline. You can update its name, stage, pipeline or any other details at any time.
Creating a deal through Quick add
Go to the Deals page and click the Quick add button. 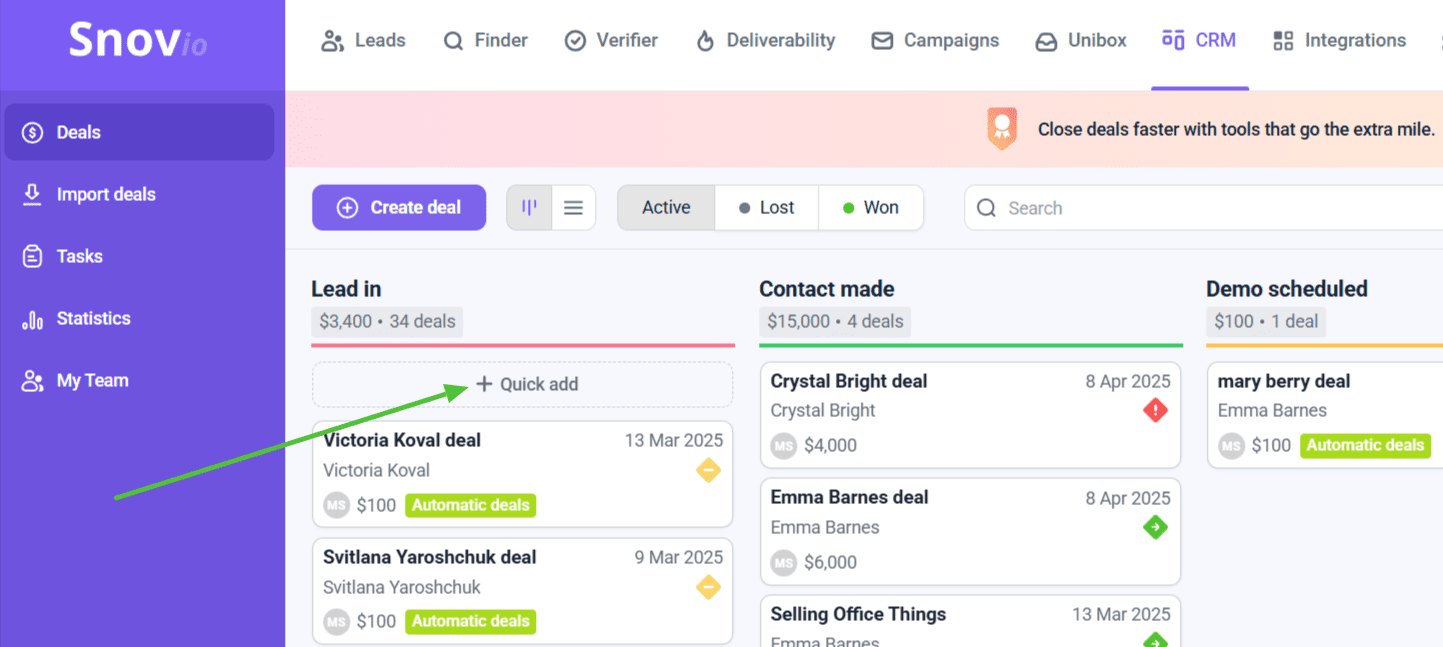 In the deal form, add the following info:
-
-
- deal name (optional): by default, if you leave the name field empty, the deal will be automatically named after the linked prospect — for example, “John Doe deal”
- deal value (optional)
- prospect’s name: if the person is already in your Snov.io list, their info will show up as soon as you type their name
- prospect’s email and list
-
Click Save to reflect the changes. 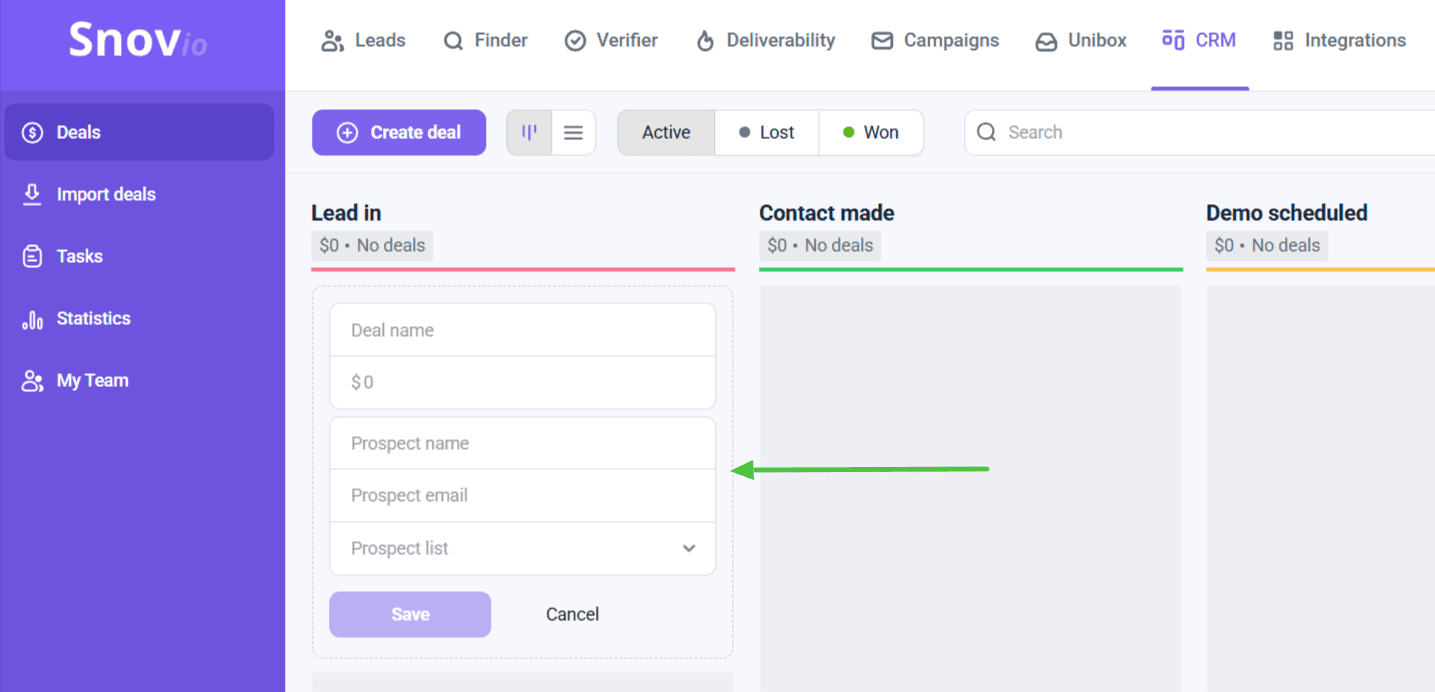 You will now see your new deal in the pipeline.
Creating a deal from a Prospects list
In your Prospect list, select one or more prospects, then click Create deal.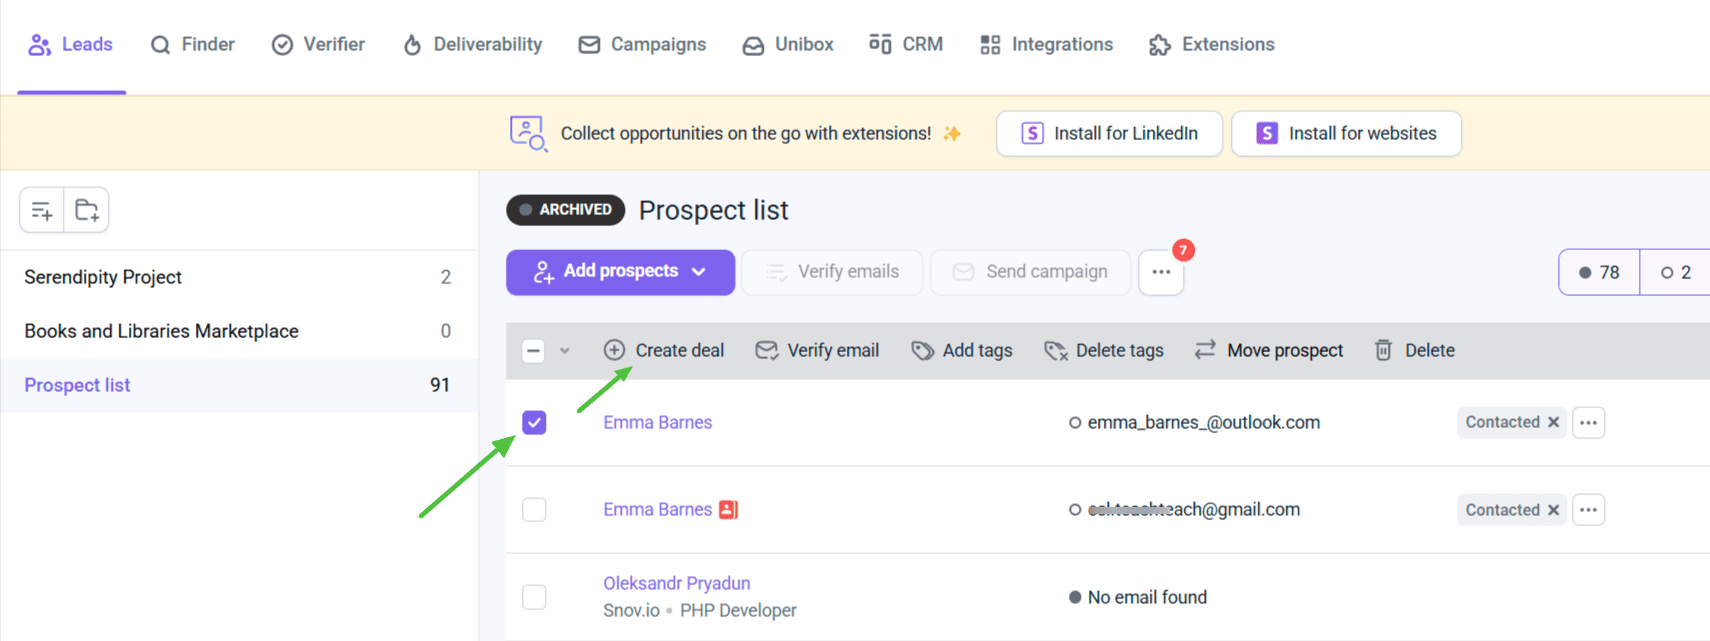 In the pop-up window, select the pipeline and stage for the new deal(s), then click Add.
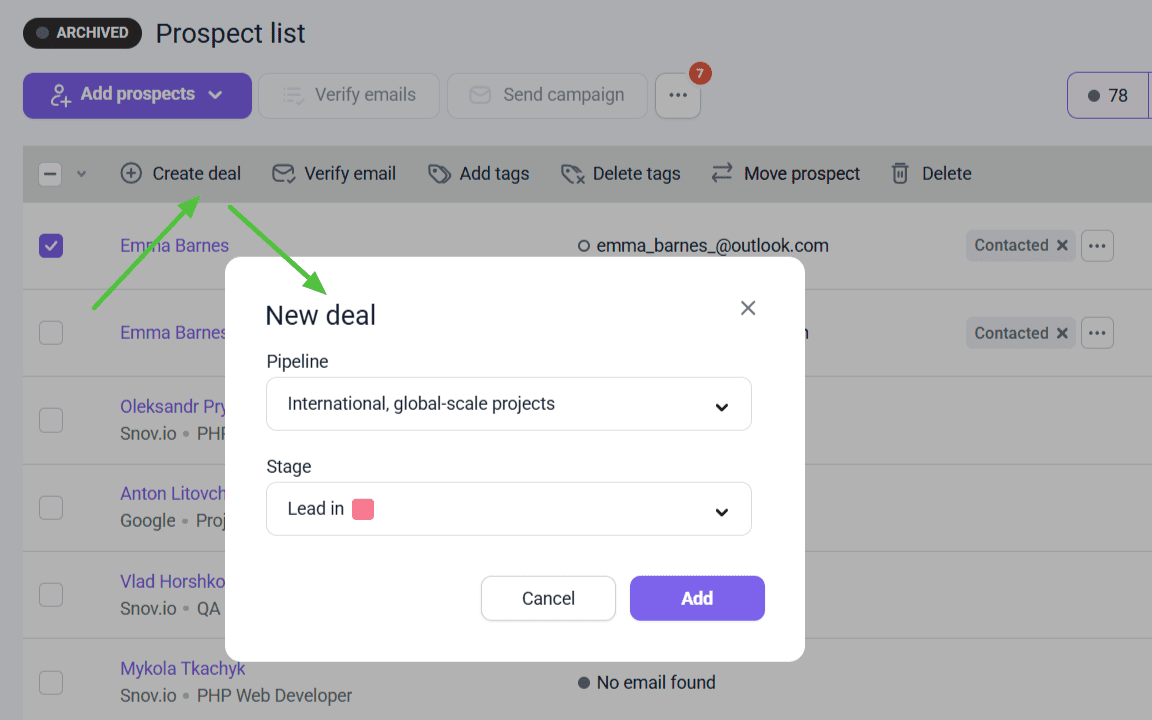 If you select multiple prospects, a separate deal will be created for each one. Each deal will use the prospect’s name automatically and all will share the same pipeline and stage you selected.
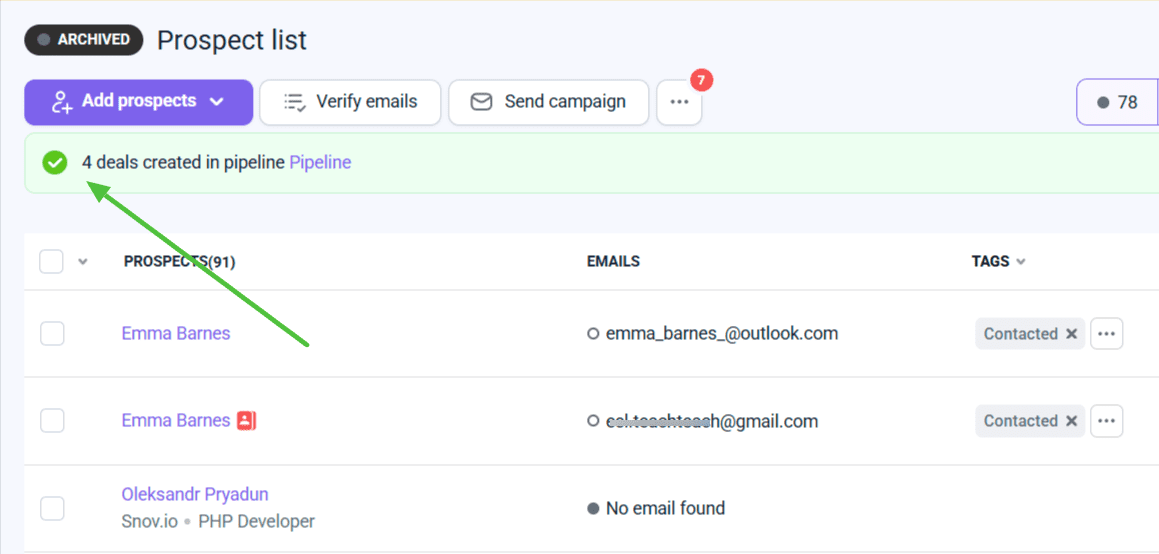 Once the deals are created, you’ll see a link to the selected pipeline. Click it to view your new deals in the Deals tab.
To quickly add new prospects to deals, use the Email Finder to source verified contact information.
Also, run their email through the Email Verifier to ensure it’s valid before assigning a prospect to a deal.
How to manage deals
Organize your workflow by choosing how deals are displayed. You can filter, move or search for deals to manage them easily.
How to change pipeline view
You can view deals as a stage-based pipeline or a simple list. Click the display icon to switch between views.
Pipeline view: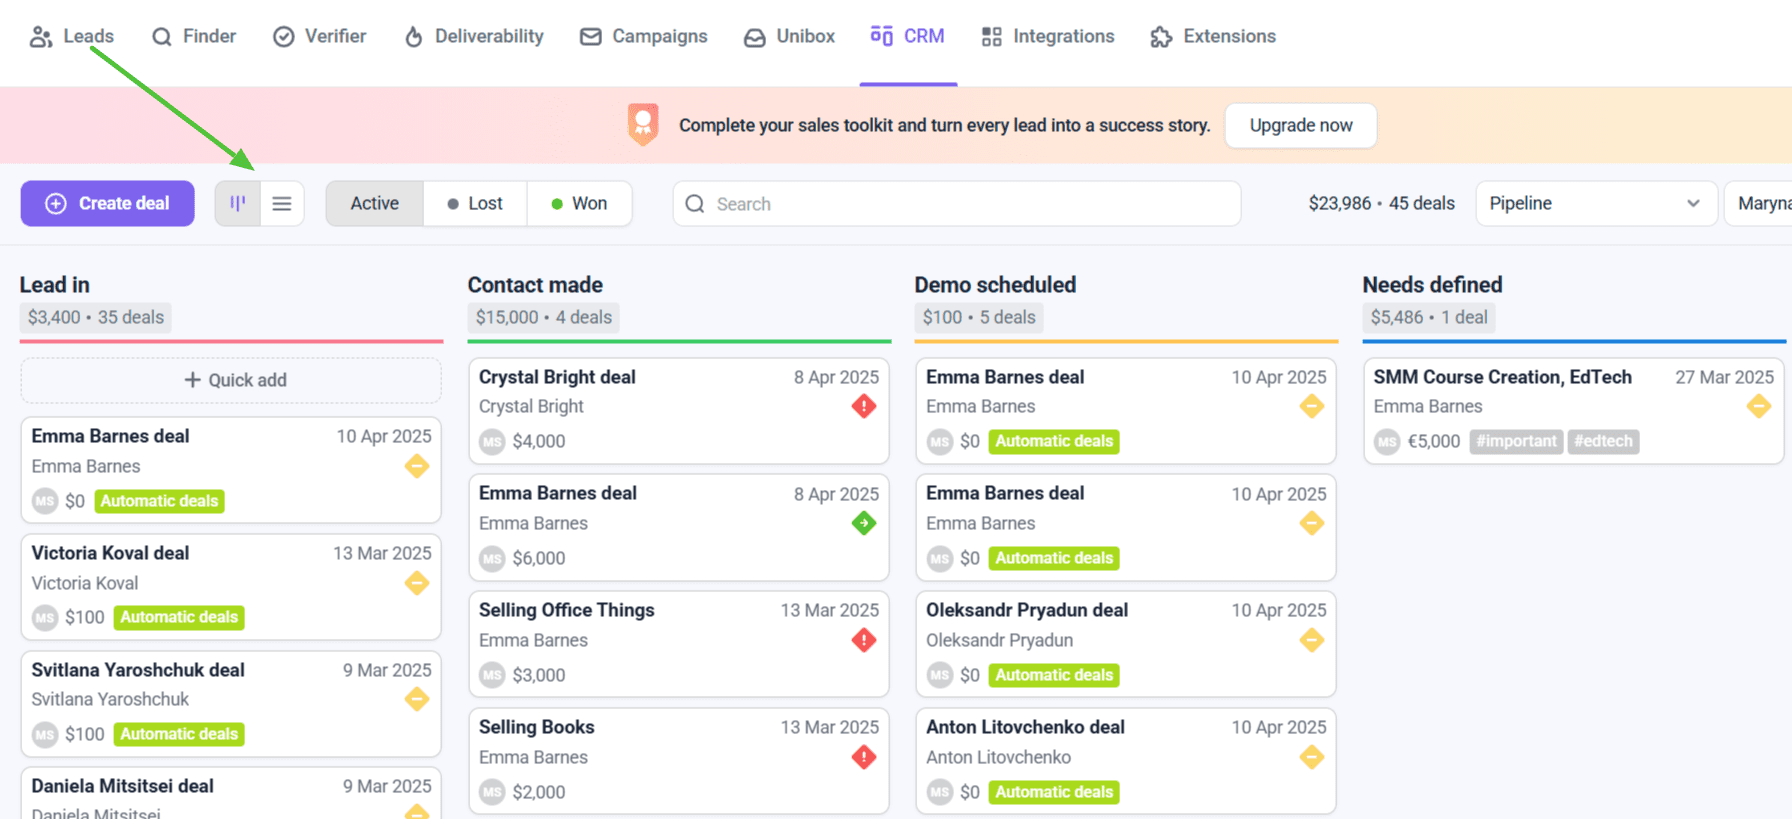 List view:
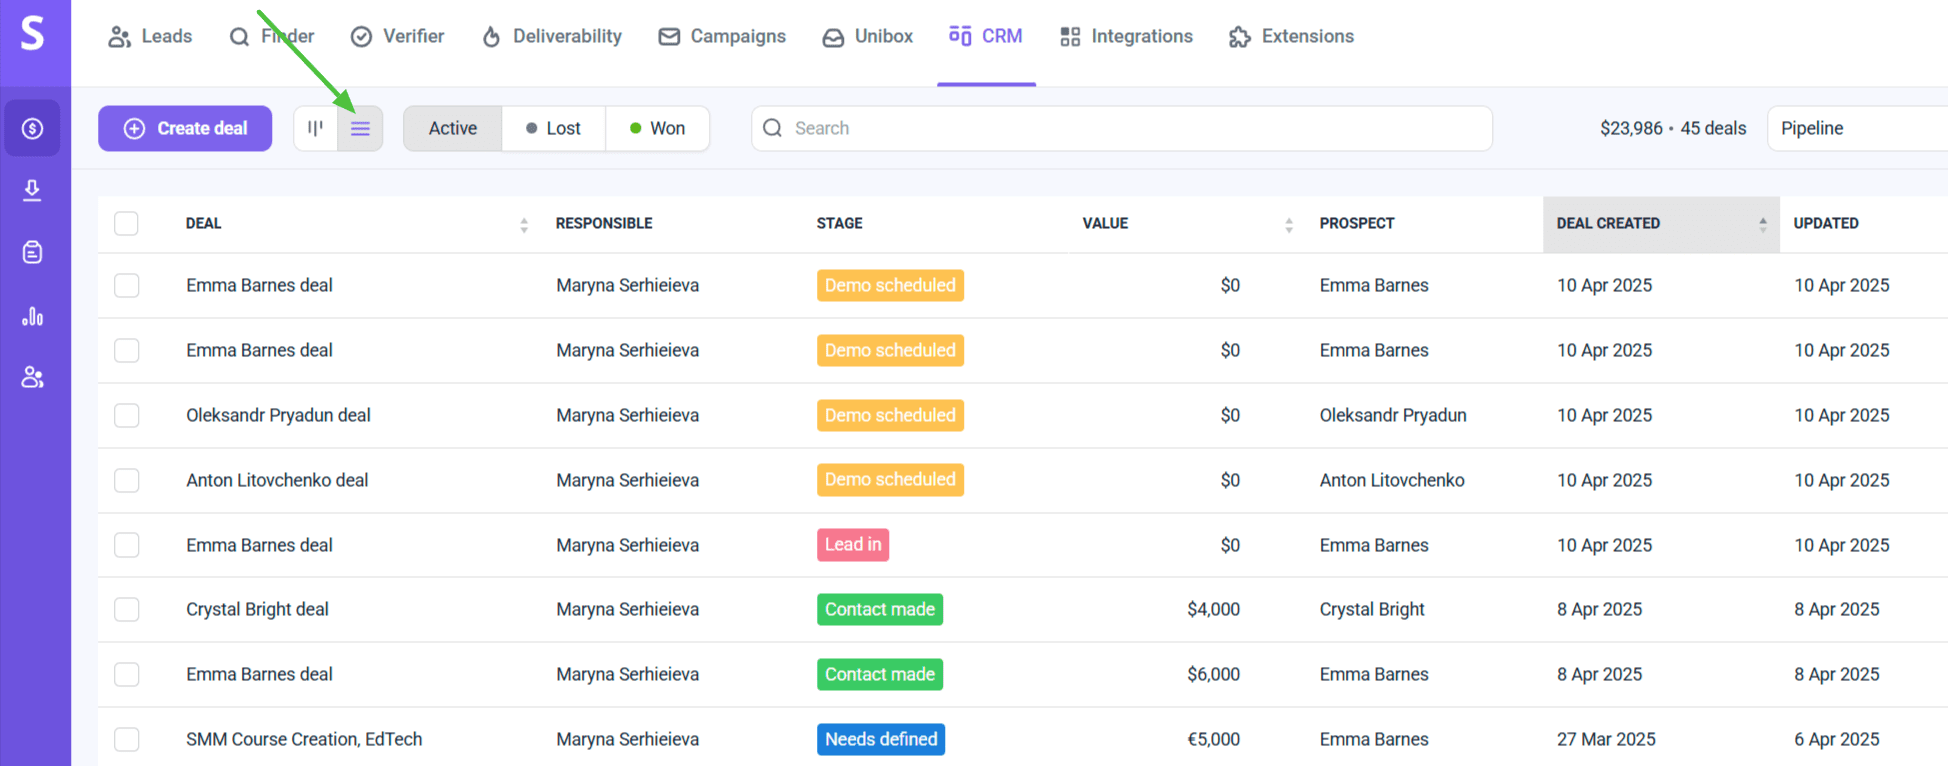
How to move deals in the pipeline
To update a deal’s stage as you progress in closing them, just drag and drop it to the new stage column. It will automatically appear at the top of that stage’s list.
To remove a deal, drag and drop it to the Delete area at the bottom. You can also move it to Lost or Won to mark it as failed or successfully closed.
How to filter deals by status
You can use the status filter to view only active, lost or won deals. By default, you will see only Active deals in your pipeline.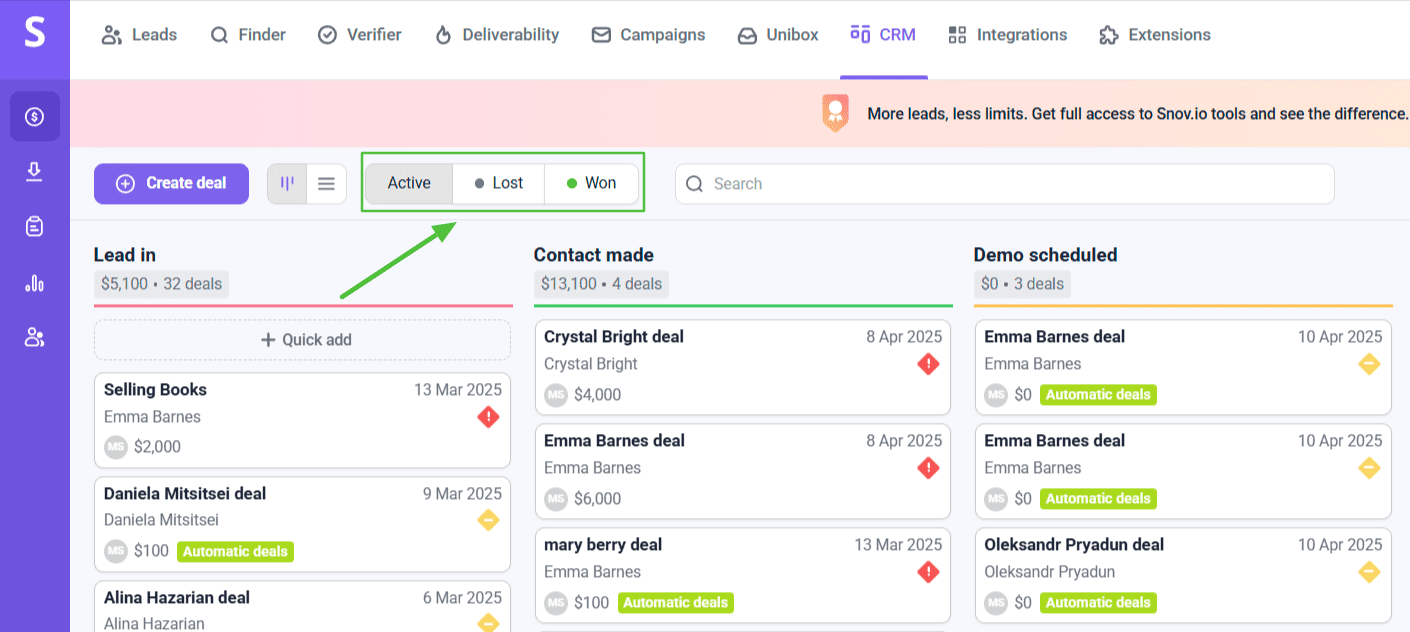
How to find deals in the pipeline
To find a deal, start typing its name in the search bar. The search will look through all pipelines, not just the one you're currently in.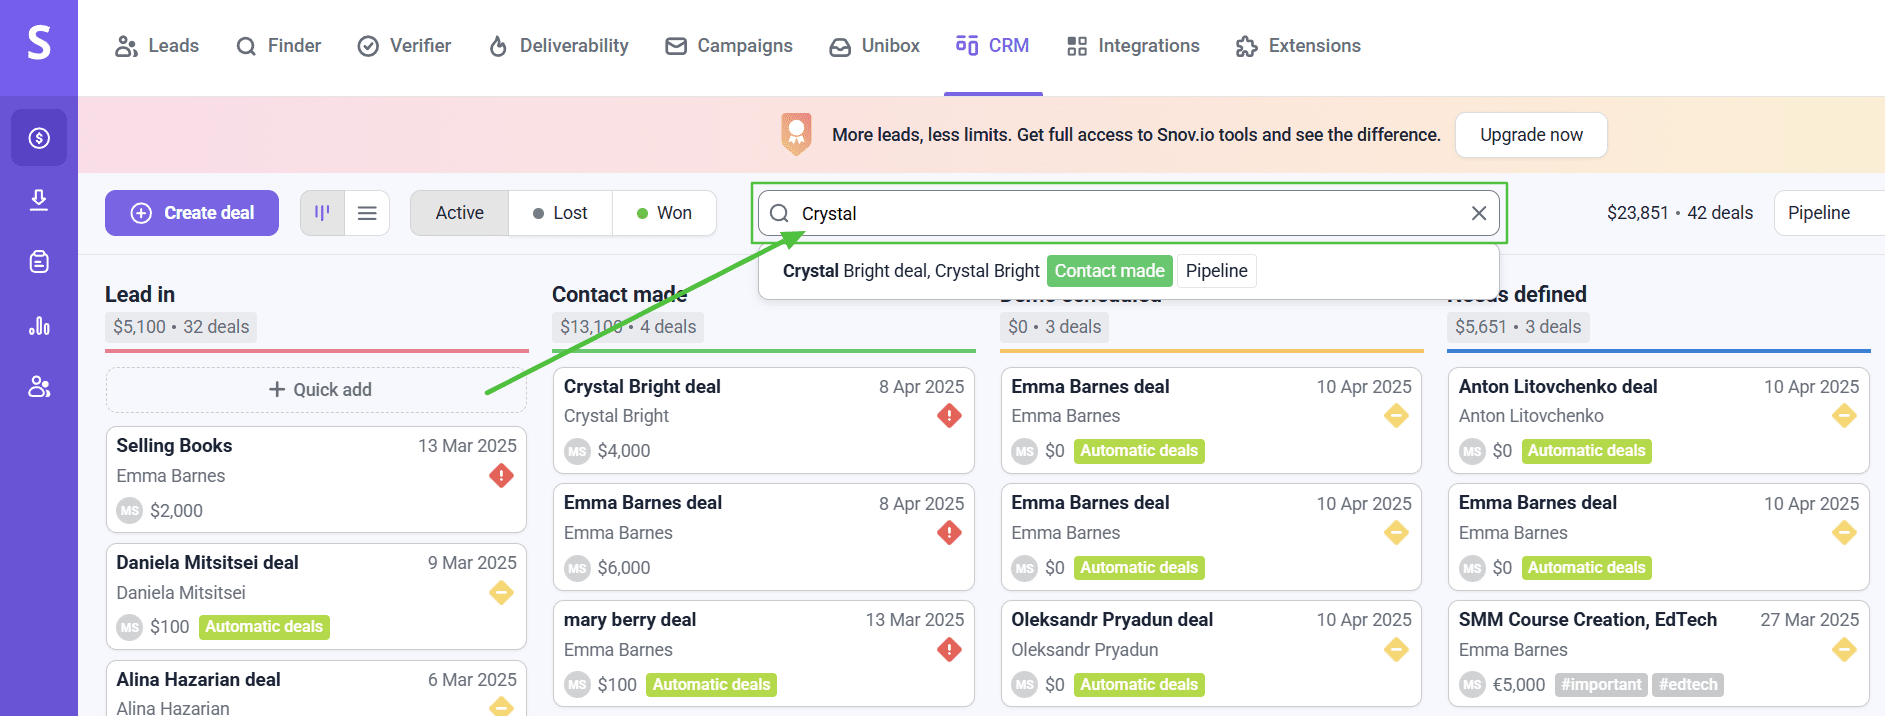
How to add groups and custom fields to deals
To keep your data organized, you can add groups and custom fields to your deal card.
Custom fields let you include extra details like shipping preferences, product weight or addresses. You can then organize these fields into groups based on the type of data.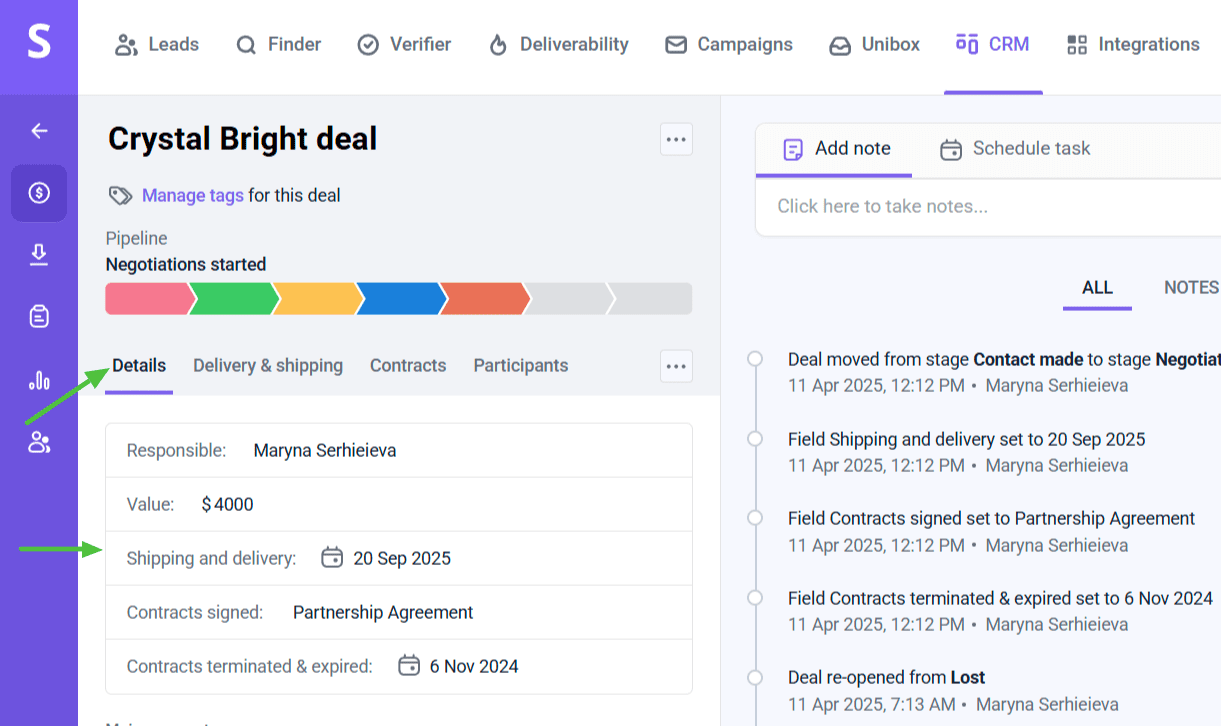 You can add up to 10 field groups and 200 custom fields. Here’s how to do it.
Adding a group
Click the Settings icon under the deal stage to open the deal data grouping and field settings.
Note: If you use teamwork, these settings are accessible only to the team leader. Other team members will not see the settings icon.
To create a new group, click on the + icon next to the default group details.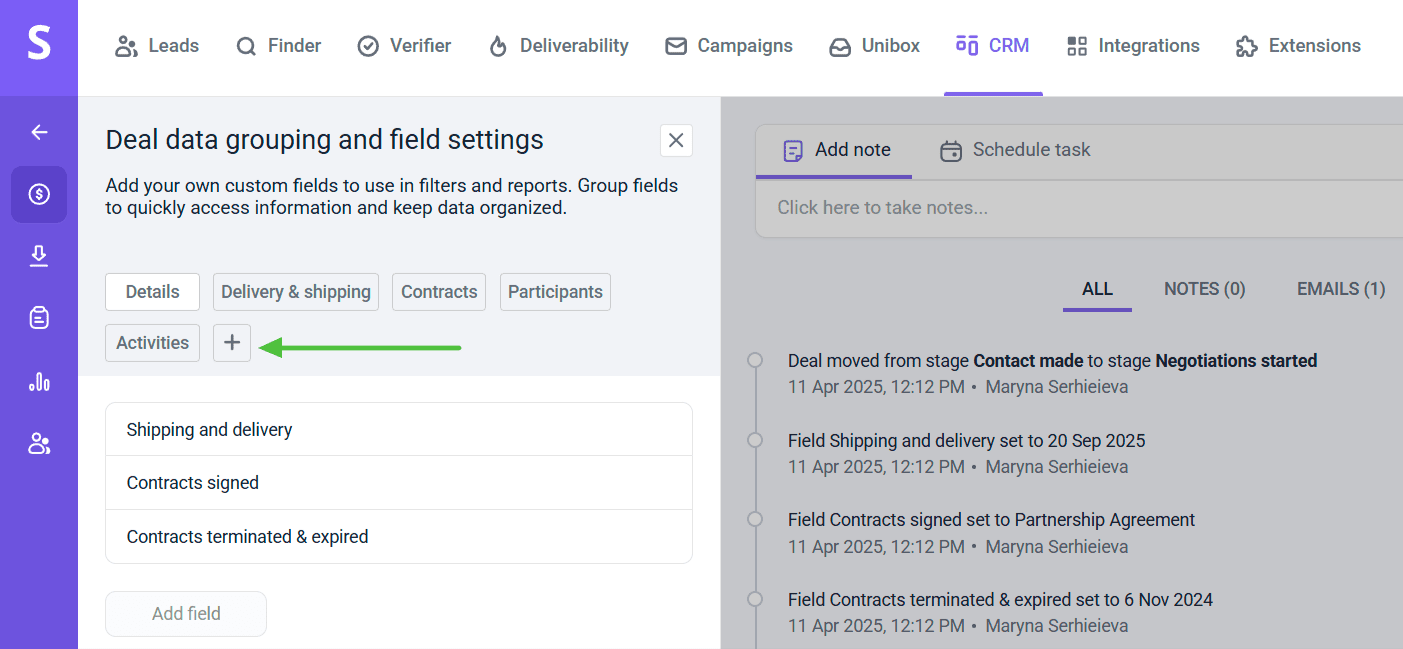 Name your Group and click Add.
 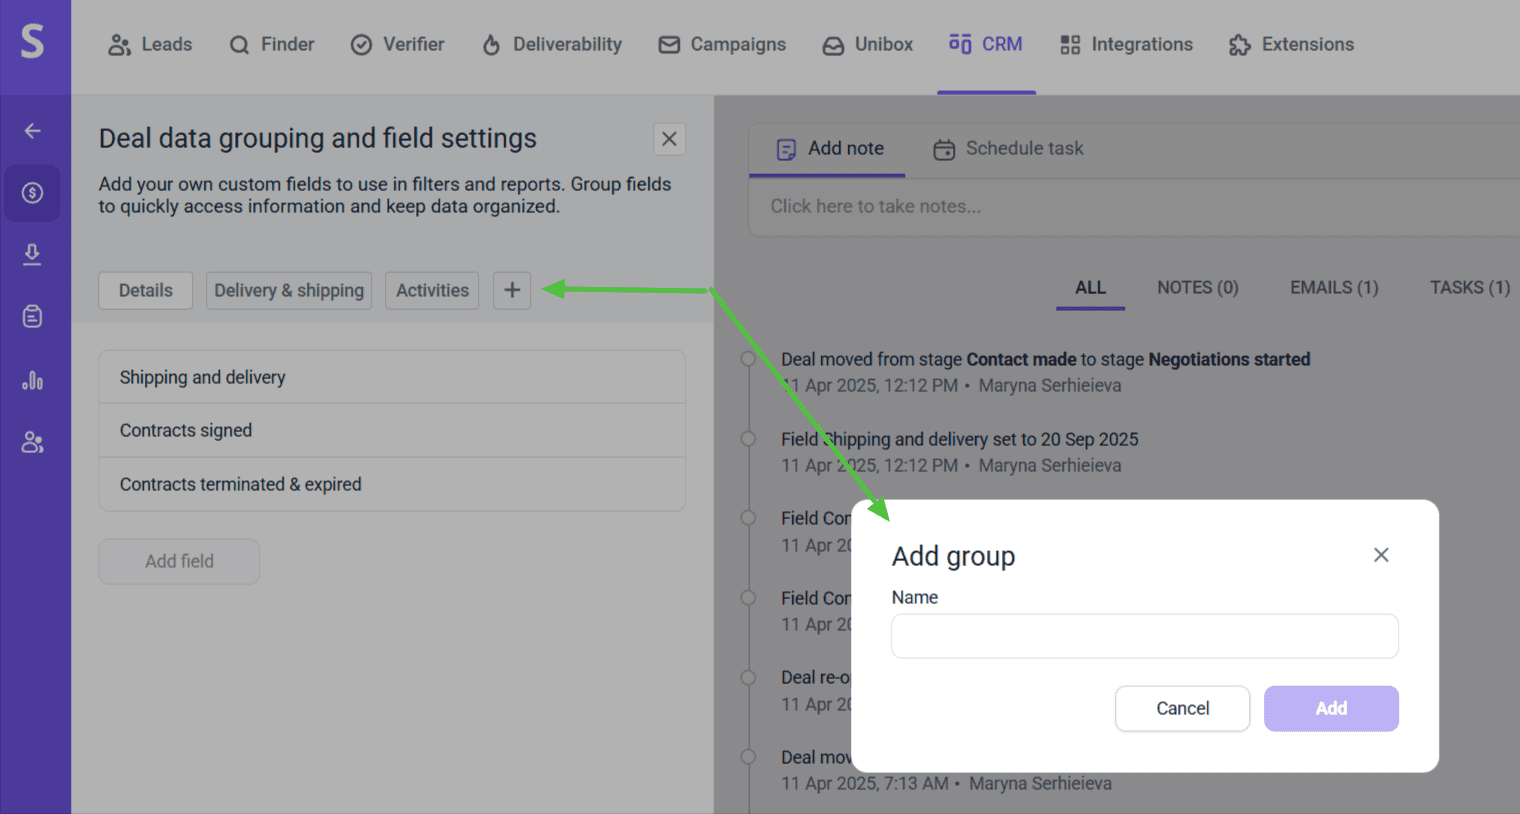 You will now see your new group under the pipeline in the deal.
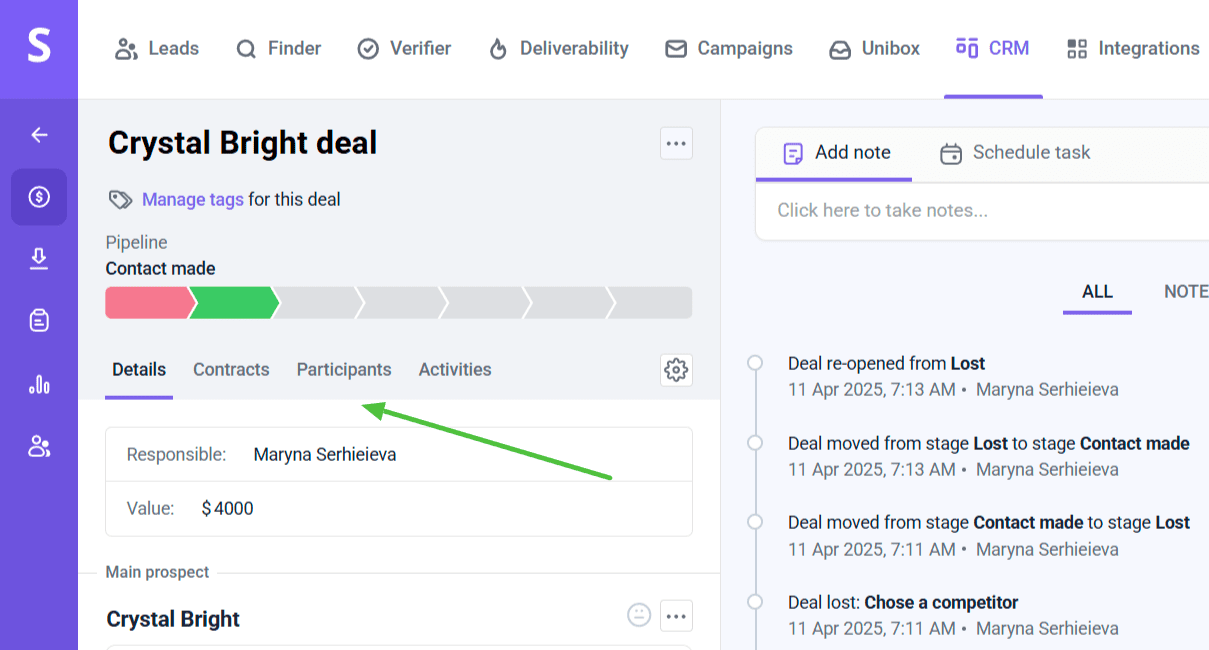
Adding a custom field
To create a custom field, click the Add Field button within the deal data grouping and field settings.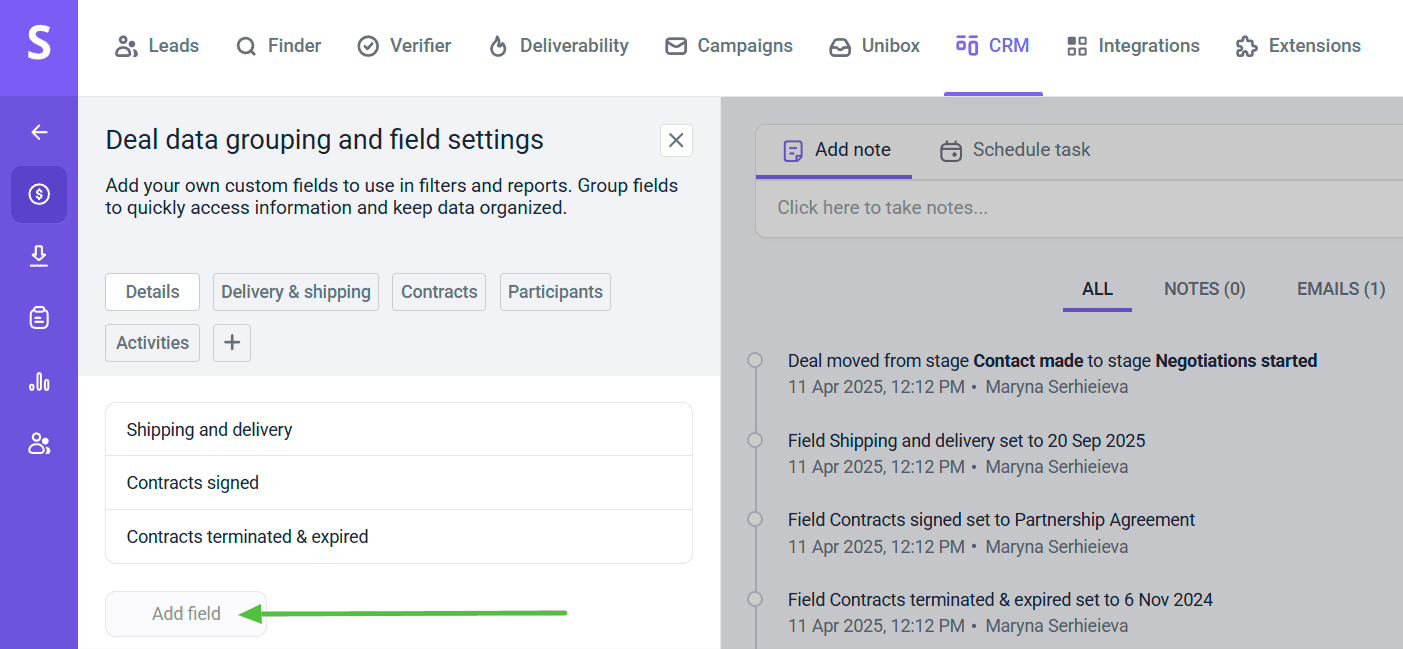 Add the field name and select the field data type — text, number or date. Click Save to add the field.
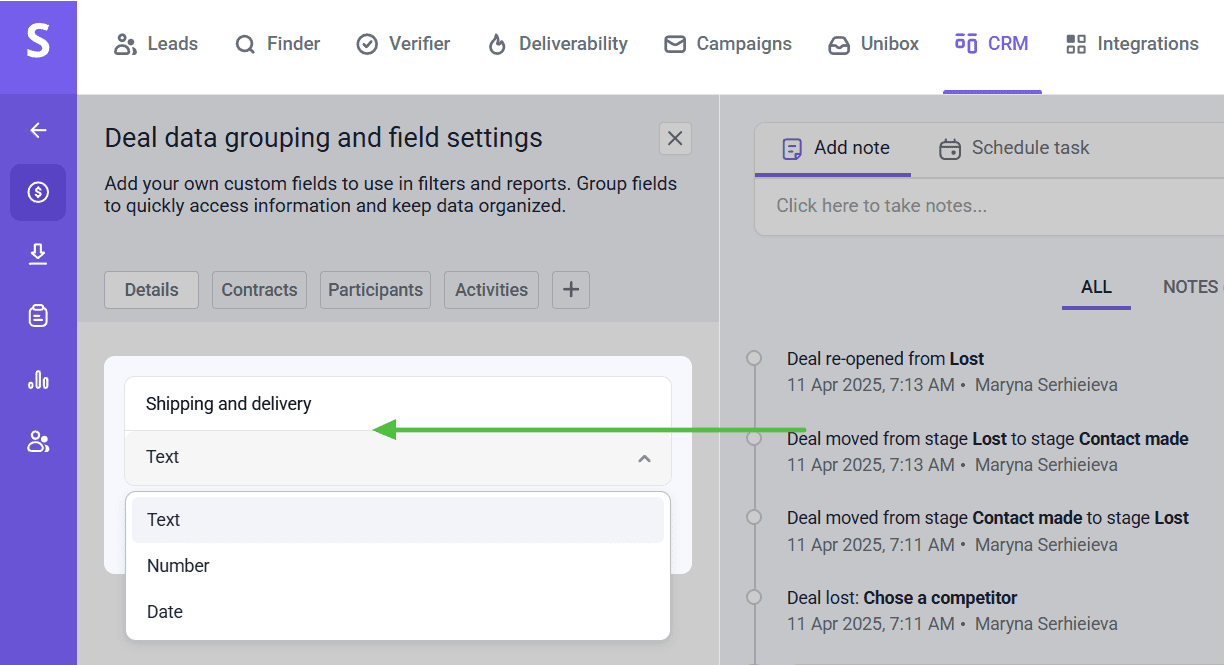 And you're all set! You can now add additional info to the new custom field in your deal card.
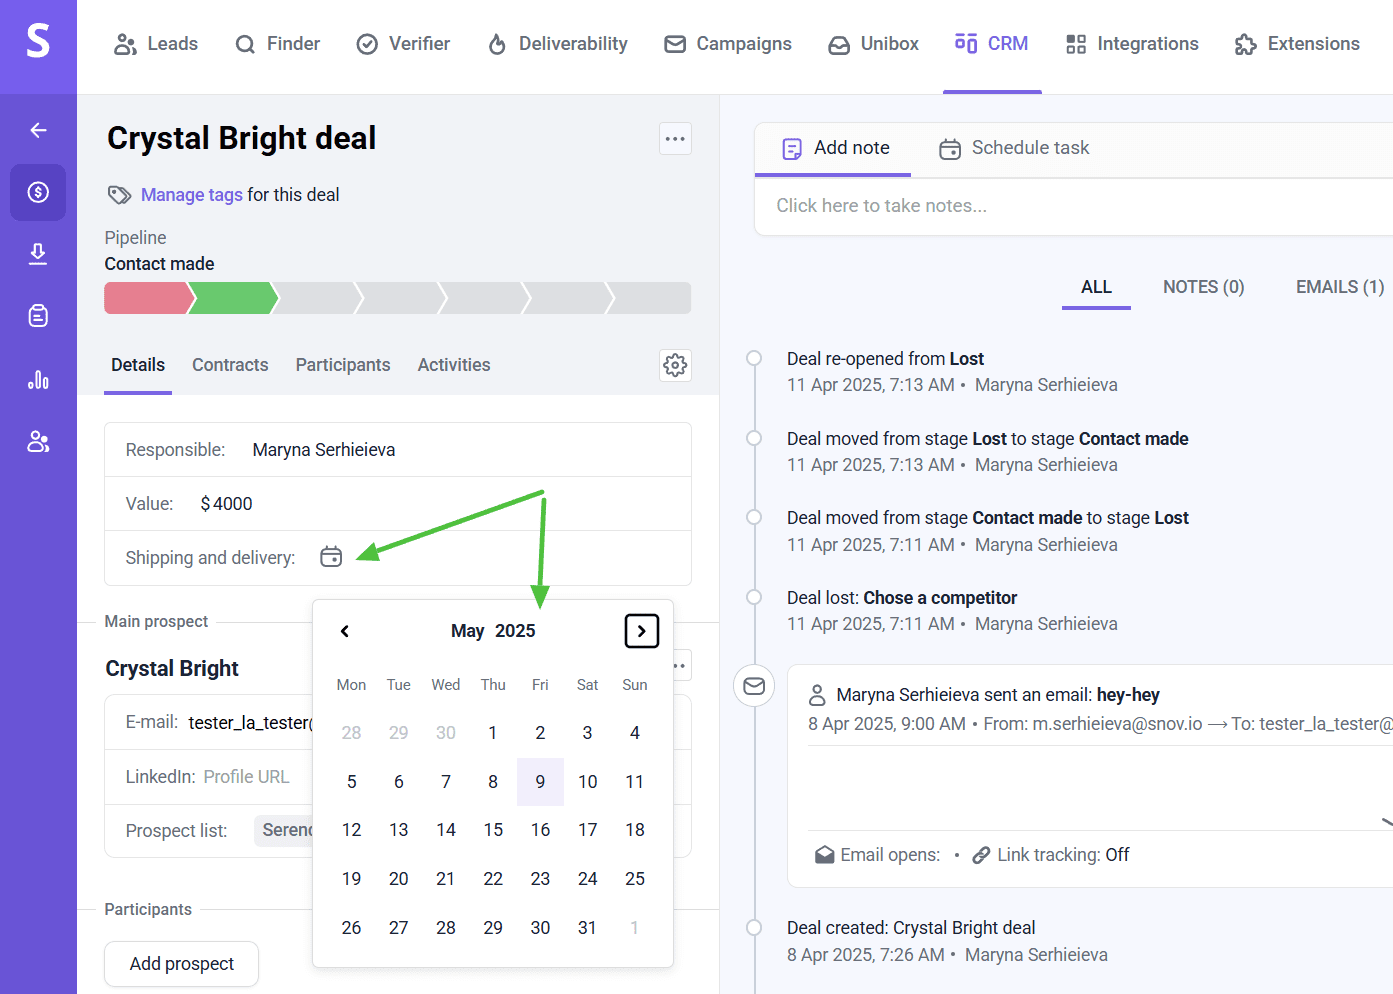 Do not hesitate to contact our Customer Care team at help@snov.io or via live chat if you have any questions about Snov.io CRM. We’re always here to help!


Sorry about that 😢
How can we improve it?