Outline:
It's essential to stay in control of your lead nurturing process to maintain successful sales performance.
With our Tasks management tool, you will organize your workload, stay on top of every deal task, and always know what's coming next.
Here's our guide on how to set up tasks for your deals and never miss another sale.
Creating new tasks
There are a few ways you can schedule new activities and keep track of all upcoming events:
-
from the pipeline view on the Deals page
On your pipeline page, open any deal and go to the Schedule task tab to create a new activity for this deal. After you enter its details and click Save, it will appear in the Tasks tab.
While on the pipeline view, you can track if a deal has an assigned task and its status with colored icons added to every of your deals.
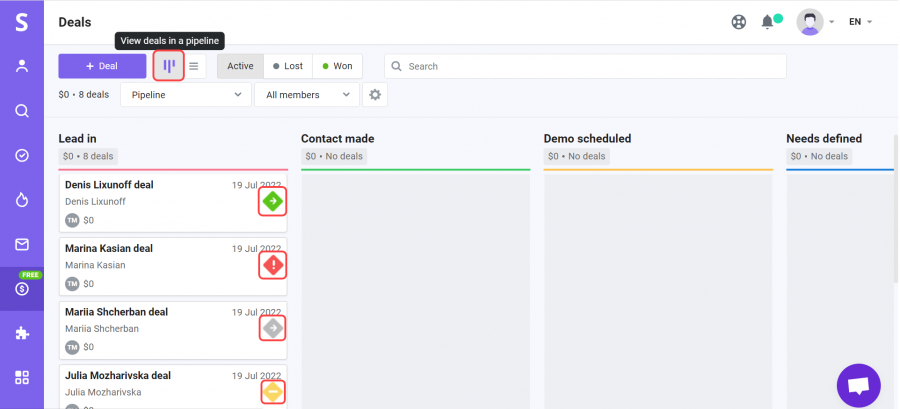
There are 4 task statutes:
- there are no tasks - a yellow rhombus

- there are tasks for today - a green rhombus

- there are upcoming tasks - a gray rhombus

- there are overdue tasks - a red rhombus

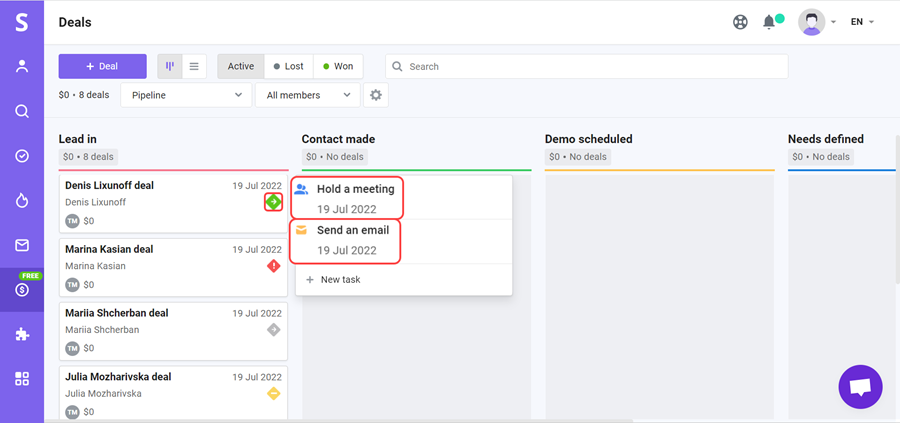
By clicking on the status icon, you can access all tasks related to a deal or create a new task directly from a pipeline.

-
from the List view on the Tasks page
Go to the Tasks page to open the tasks interface.
Note: You can switch between Calendar view and List view while on the Tasks page.
Easily add a new task by clicking ![]() button (1).
button (1).
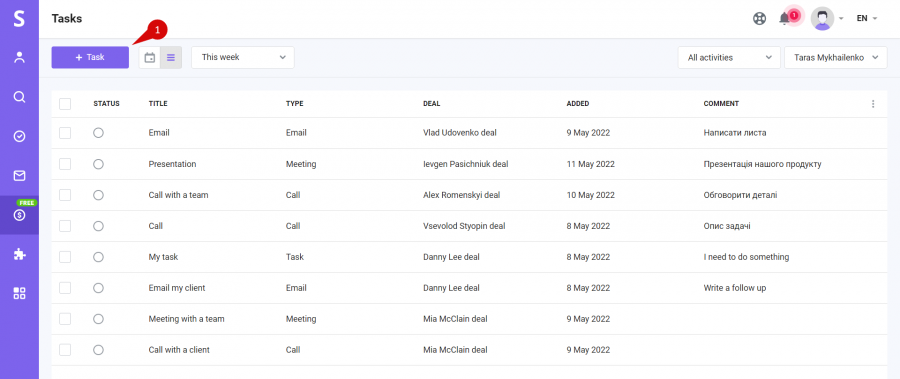
Tip #1: after you enter the task's details and click Save, you'll see the info about your task in customizable columns.
Tip #2: You can quickly edit a task by clicking on its title.
-
from the Calendar view on the Tasks page
Click ![]() button (1) or click on any chosen timeslot (2) in the timetable to quickly create a new task.
button (1) or click on any chosen timeslot (2) in the timetable to quickly create a new task.
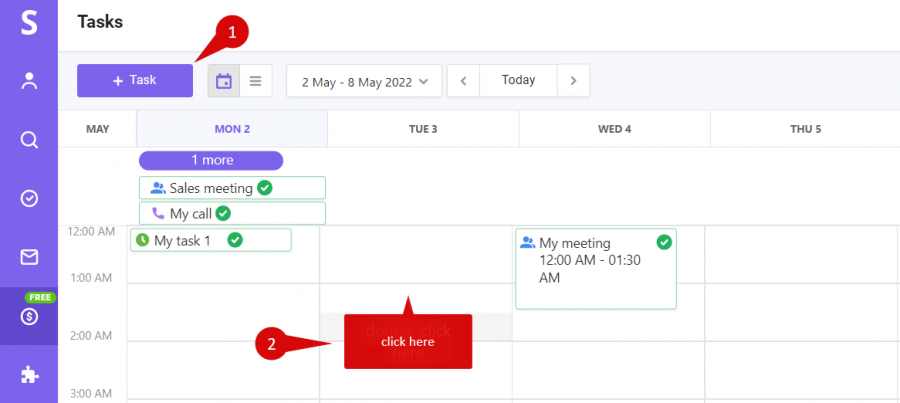
Tip: you can quickly reschedule a newly created task by dragging it into another timeslot.
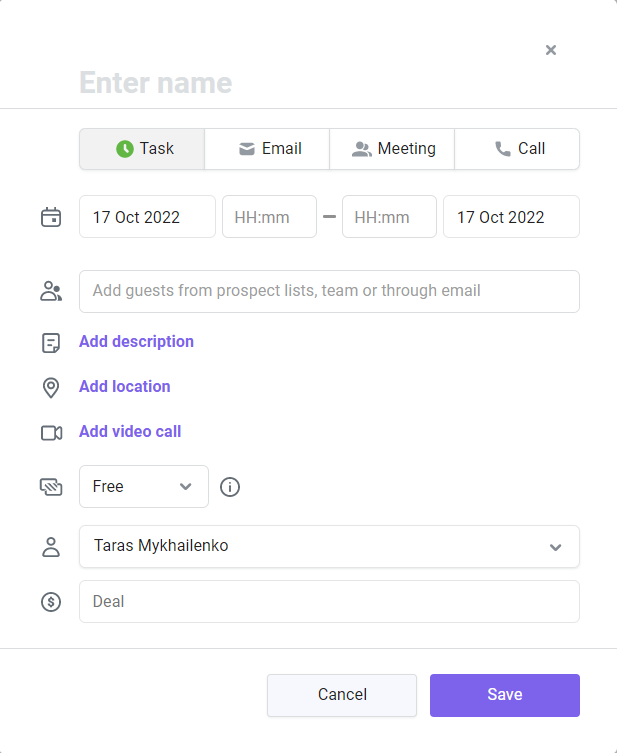
In the Create a new task prompt, fill in the activity's details and click Save.
- Task name - type in a title for your task
- Task type — define a type for your activity (task, email, meeting, or call)
- Task time/date — define start time/date and due time/date to meet your deadlines
- Add guests - type in the email of the person/prospect you want to add as a guest
- Add description — describe your activity to never miss an important detail
- Add location - type in the event's location if necessary
- Add Google Meet meeting - click to generate a link to a Google Meet call
- Choose availability status - set task status to Free to be shown as available or Busy to be shown as unavailable for other tasks at the same time/date
- Responsible team member — set up tasks for yourself or delegate them to others
- Deal — enter your lead's name and choose a deal to link your task to
Filtering your tasks
In both Calendar and List view, you can filter your tasks by:
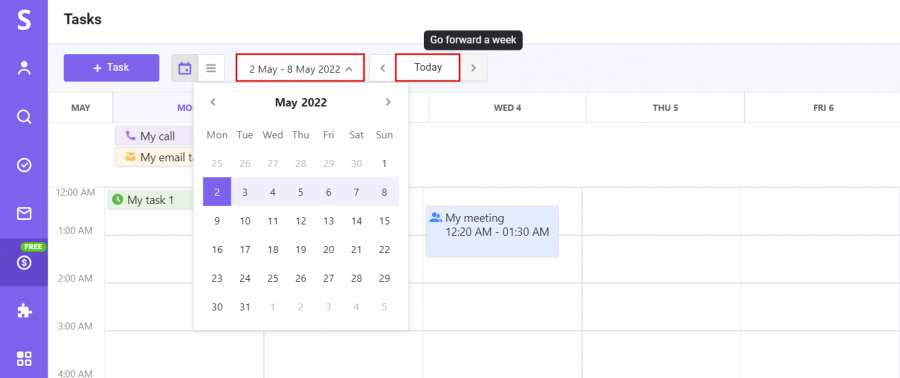
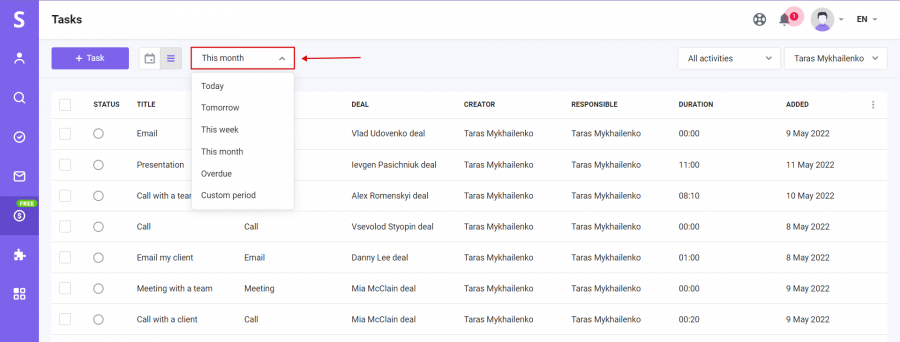
1. Time
- When viewing tasks in a calendar, choose a specific date range or use the single arrows to go one week forward/backward.
- When viewing tasks as a list, select one of the options in the drop-down menu: today, tomorrow, this week, etc.
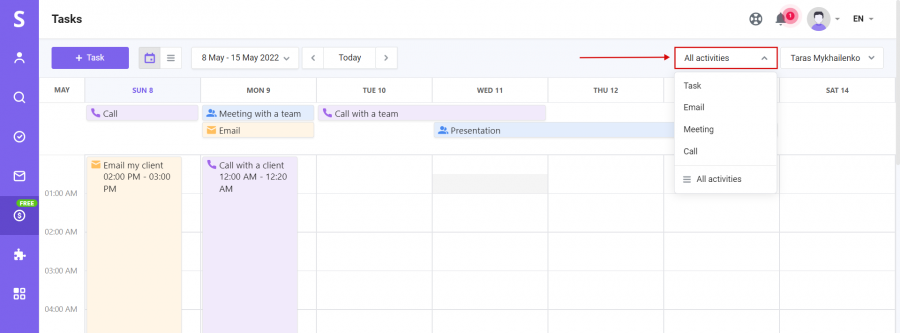
2. Type of activity
Choose a type of activity in the top right corner to see specific tasks you need to complete.
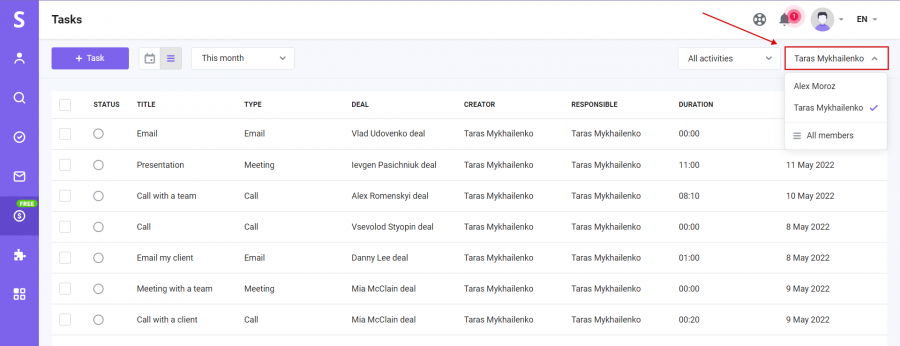
3. Team member
Choose a responsible team member in the top right corner to see their tasks and completion progress.
Completing your tasks
Once you accomplish a task, you can change its status to "Completed" by clicking on the task → Complete.
Tip: methods #1 and #3 allow you to add a comment when completing the task.
Method #1: complete a task in the Calendar view
Click on the task while in the Calendar view on your Tasks page, add a comment if necessary, and click Complete.
Note: you can return a task to an active status by clicking Reopen button.
Method #2: complete a task in the List view
While in the List view on your Tasks page, click on the circle next to a task title to mark it as Completed.
Note: you can return a task to an Active status by clicking on the ticked circle again.
Method #3: complete a task on the deal's page
On your pipeline page, open any deal and go to the Tasks tab. Click on the task, add a comment if necessary, and click Complete.
Note: from the three-dots menu, you can return a task to an Active status by clicking Reopen or complete it by clicking Mark as done.
To get the most out of Tasks, we suggest using our seamless Calendar Sync feature to sync your tasks with Google Calendar. This way, all tasks created in Snov.io CRM will appear in your Google Calendar and vice versa.
Need some guidance? Send us a message in the live chat or at help@snov.io. We're at your service!


Sorry about that 😢
How can we improve it?