In this article, you will find out how to add, edit, and organize custom fields in the prospect profile.
Custom fields can be added to prospect lists to store additional information about your prospects. The information from custom fields can be used to personalize campaigns.
Every prospect's profile has a set of default fields: First Name, Last Name, Email, LinkedIn URL, HQ Phone, Industry, Country, Location, Company, Job Position, Website.
Any additional fields added to a prospect's profile are called custom fields.
Creating custom fields
There are two methods of adding custom data fields to your prospects in Snov.io.
From a prospect list view
- Open a prospect list page
- Click Manage custom fields and data tabs icon on the toolbar at the top.
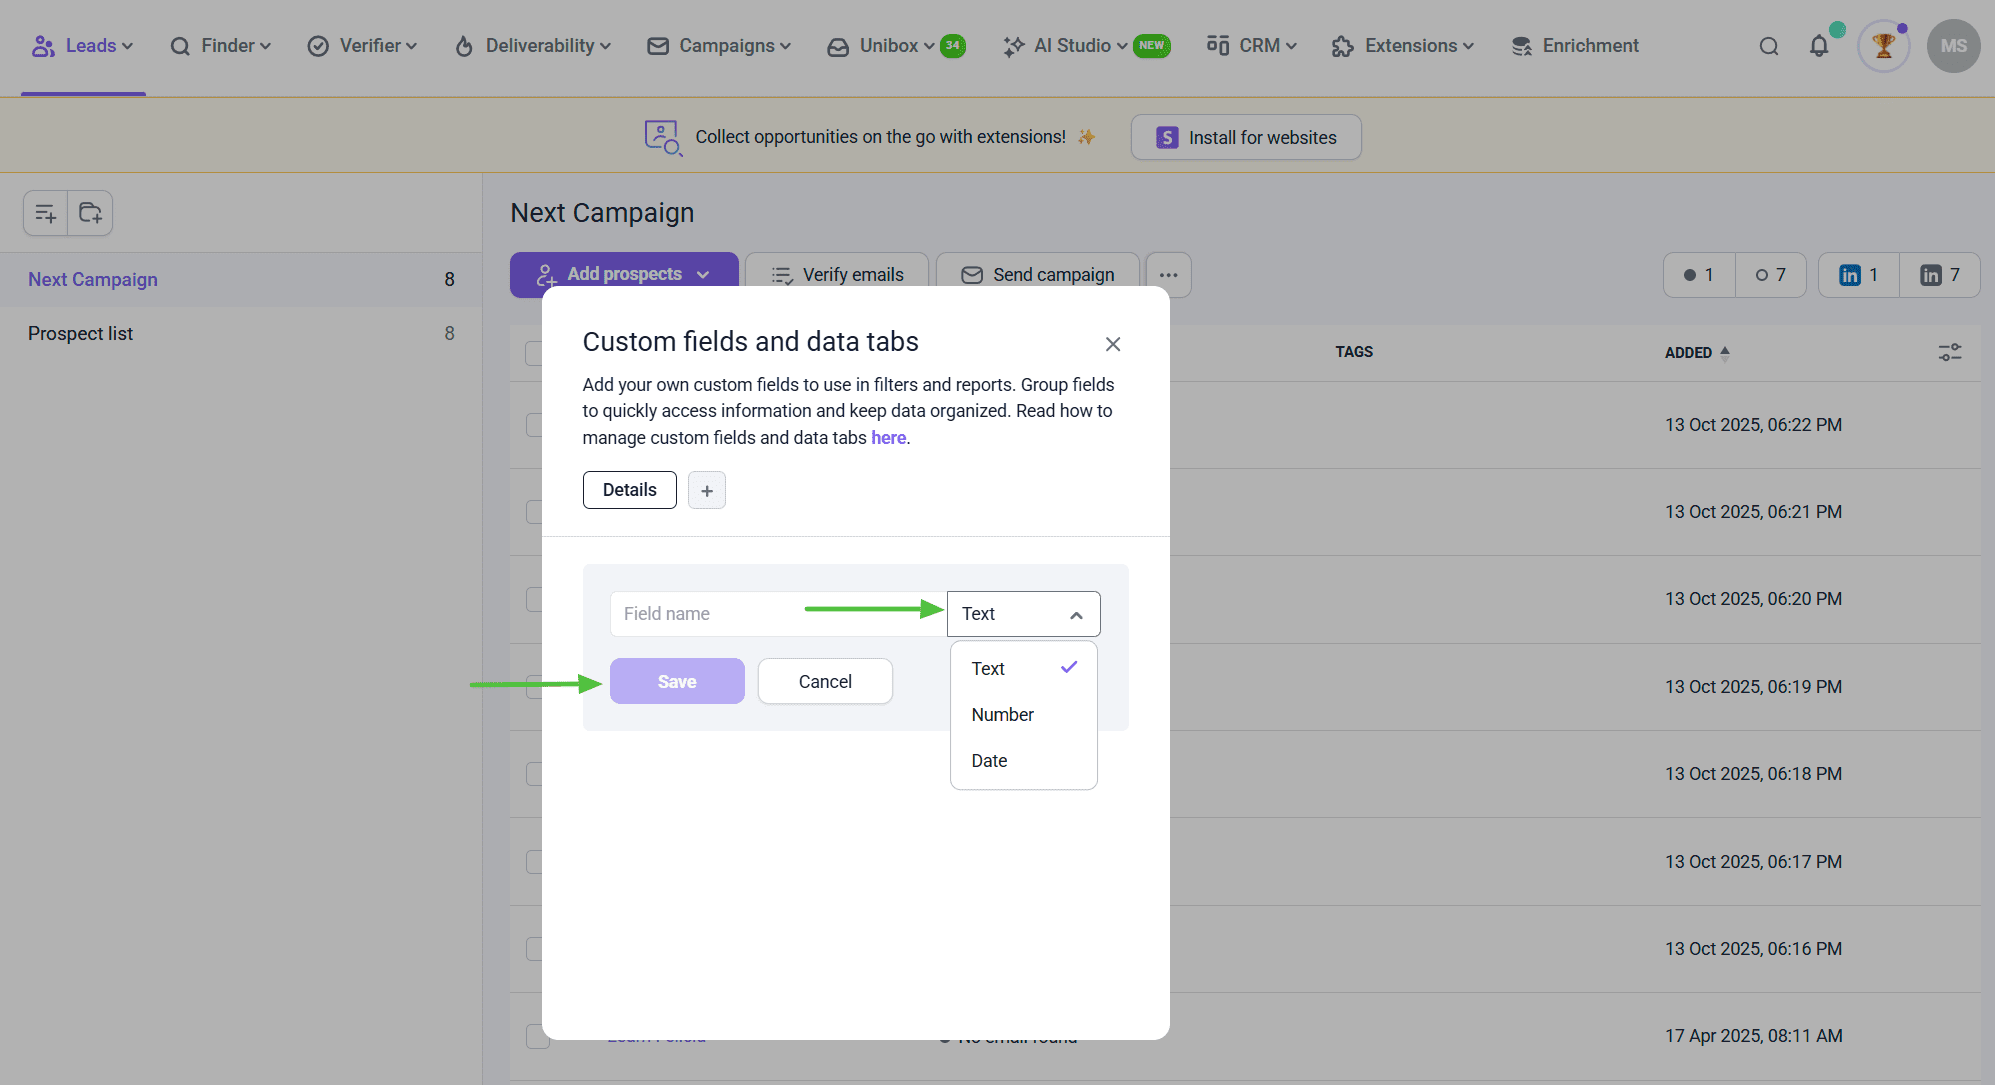
A pop-up window will open where you can add new custom fields or manage the ones you have already added.
To create a new custom field:
- Click +Add field ( this button will appear if you have at least one custom field)
- Type in a Field name
- Choose data type: Text for text, Number for numerical values, Date for date formats
- Click Save
Note: For easier mapping during import, name your custom fields the same as data columns in your prospect sheet.
From a prospect's profile page
To open a prospect's profile:
- Click the prospect's name in your Prospects list.
The prospect profile page shows everything you need to know about a prospect in one place. From a prospect's page, you can view their activity timeline, view the list of deals, see the emails and sequences they get, and edit their details.
Read more about managing the prospect's profile here ⇒
For the purpose of this tutorial, let’s take a look at adding custom fields from a prospect’s profile.
- Click the
 (Settings) icon in any profile to open Custom fields menu
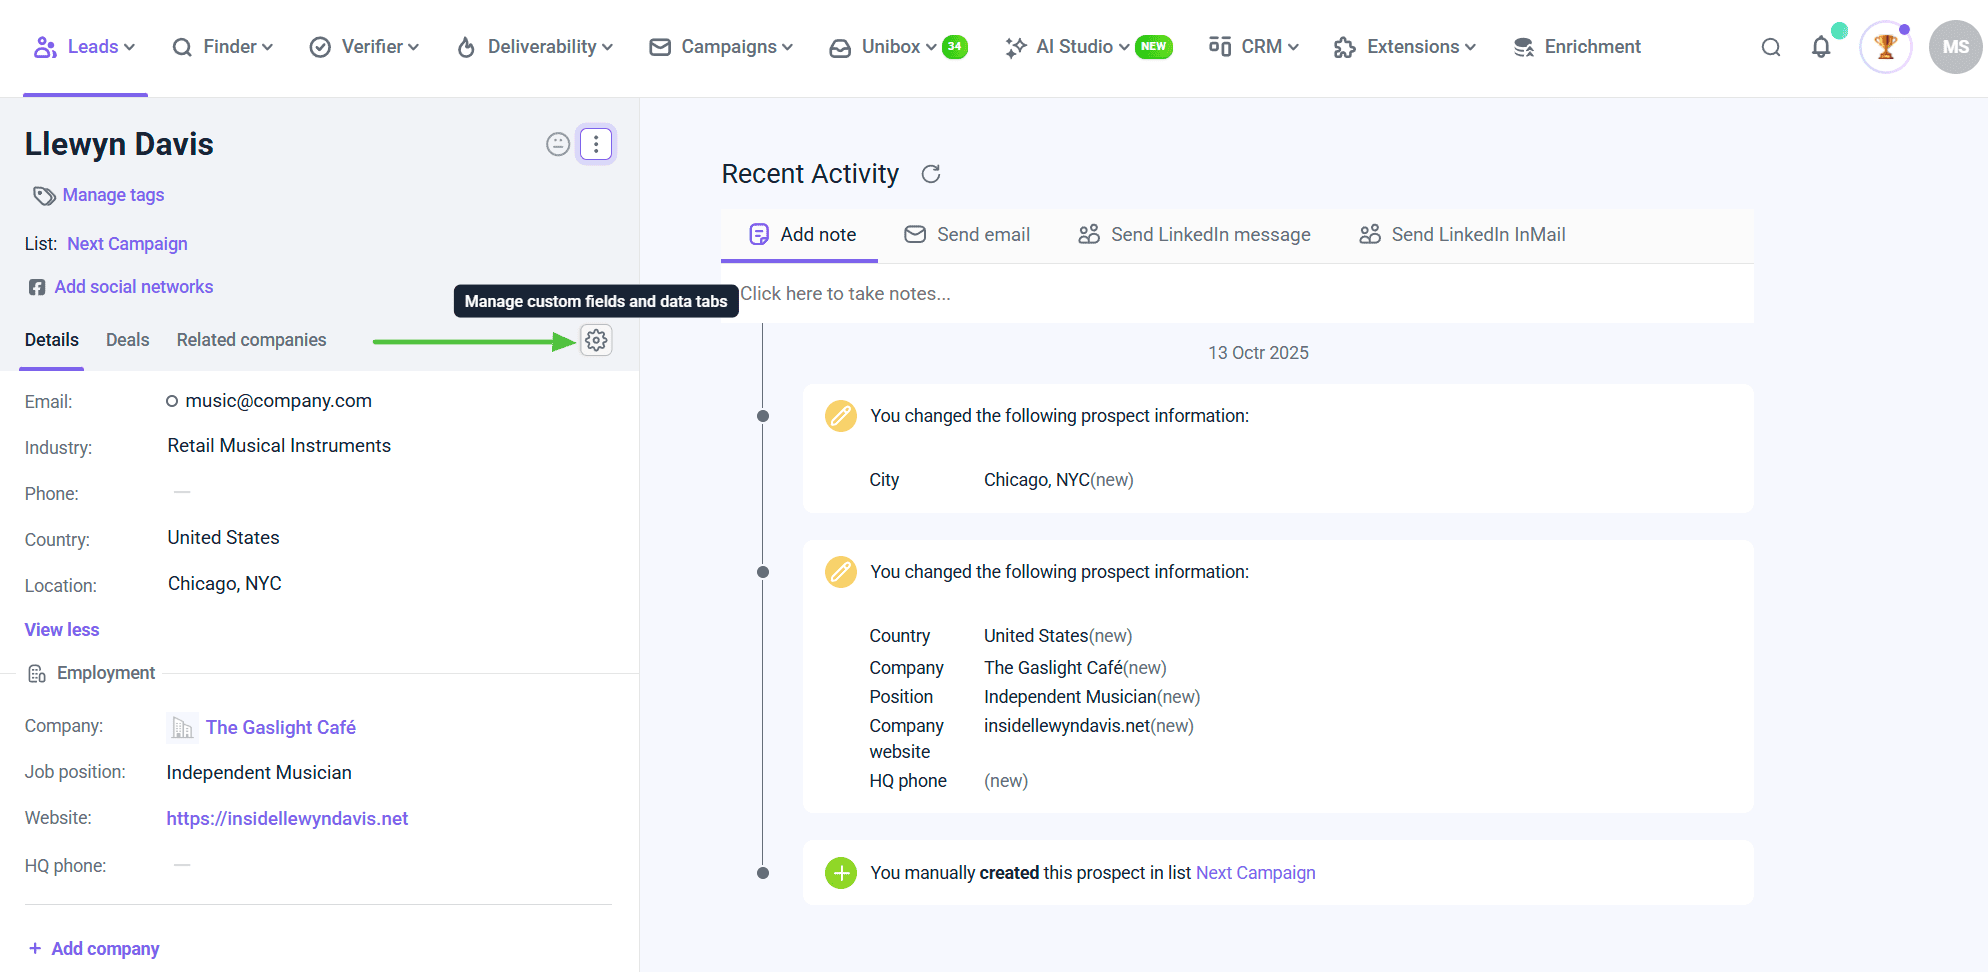
- Click +Add field
- Type a field's name
- Select data type: Text for text, Number for numerical values, Date for date formats
- Click Save

Note: When a custom field is added to one prospect profile, the same field will be added to all lists and prospects.
Organize custom fields to data tabs
Data tabs panel lets you create additional groups to categorize fields based on their content and purpose.
For example, you can create a group with fields that cover prospect interests to quickly access required information.
By default, all custom fields are grouped into the Details data tab.
So, when you create a new custom field, it is automatically placed in that tab.
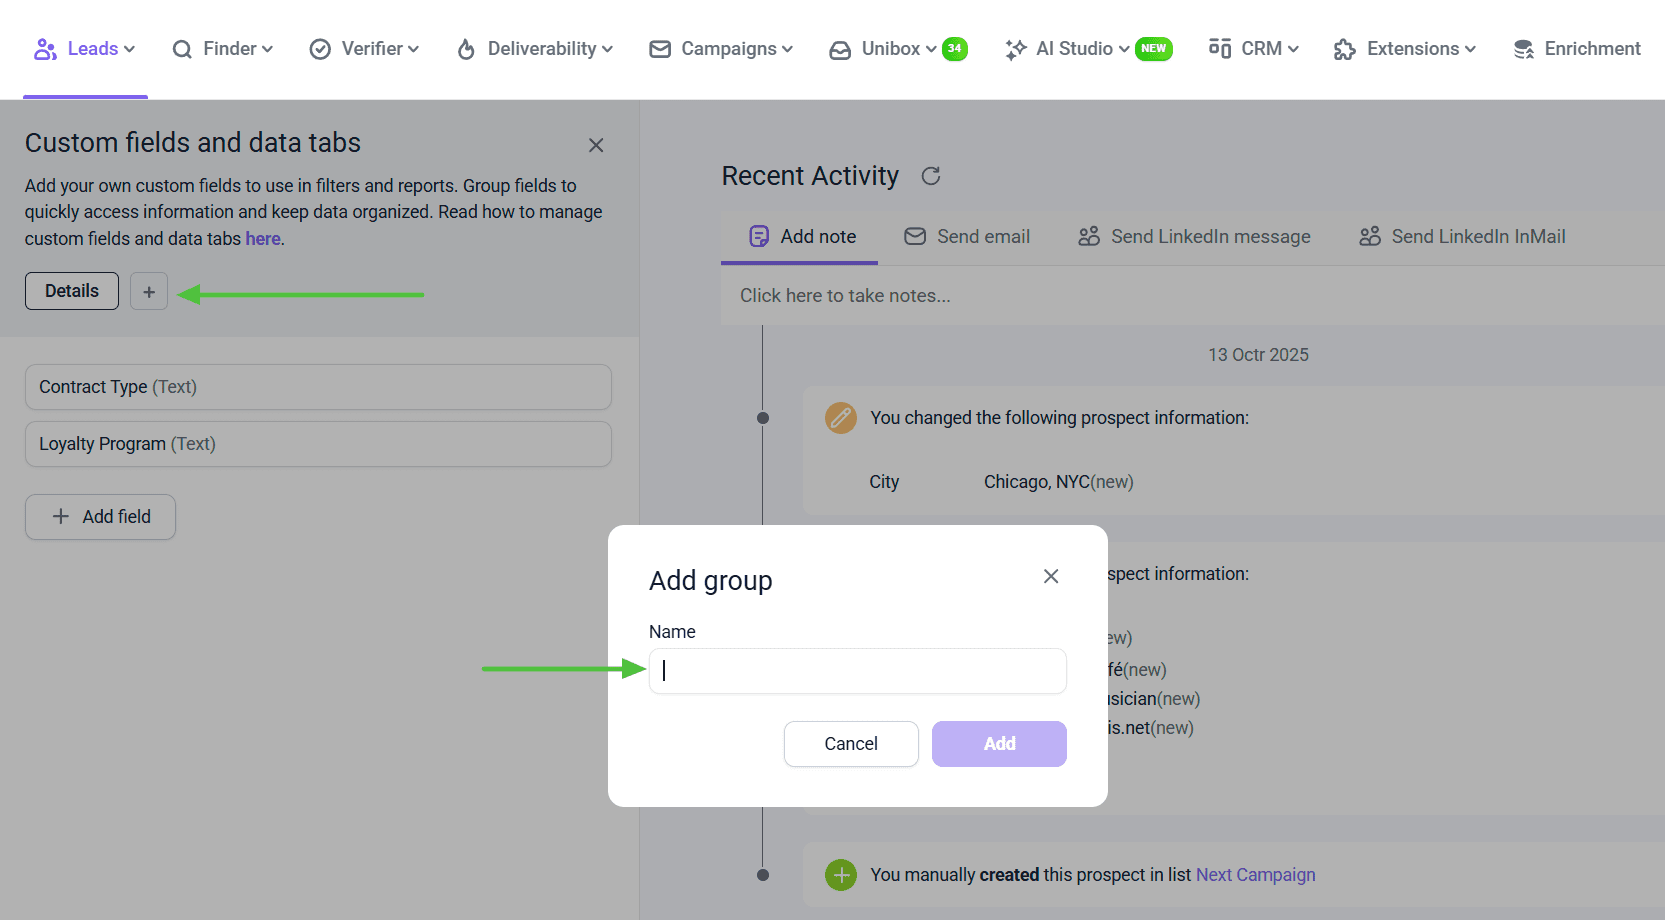
To create a new group:
- Click +Add group icon on the Custom fields menu
- Enter a group's name
- Click the Add button
Open the tab and add fields to organize them here in this group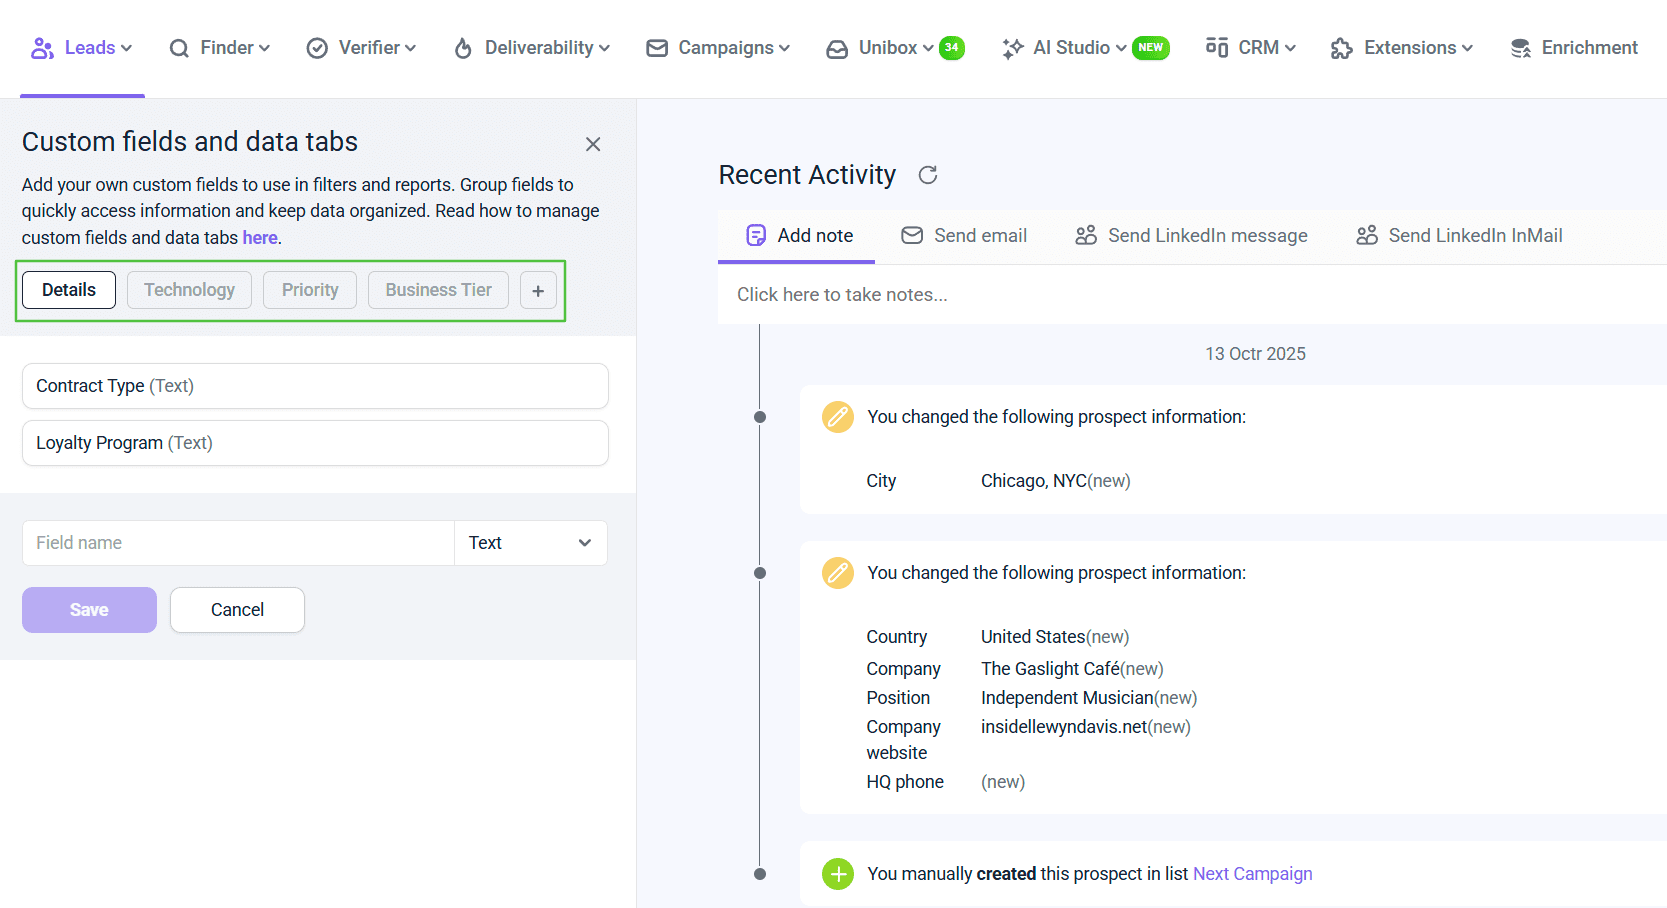
Custom fields added within a tab will be grouped together in that tab when viewing a prospect’s profile.
To delete a group:
- Hover the mouse over a tab click the trash icon.
Note: Deleting data tabs does not delete custom fields that are grouped within them. The fields from a deleted group are moved to the default Details tab.
How to add data to custom fields
After creating custom fields, there are two ways to fill in their values:
Add data to custom fields manually
You can add or edit a custom field value manually when editing a prospect profile.
Go back to a prospect's profile view from the Custom fields menu(click ![]() icon at the top) menu or open it from the list view.
icon at the top) menu or open it from the list view.
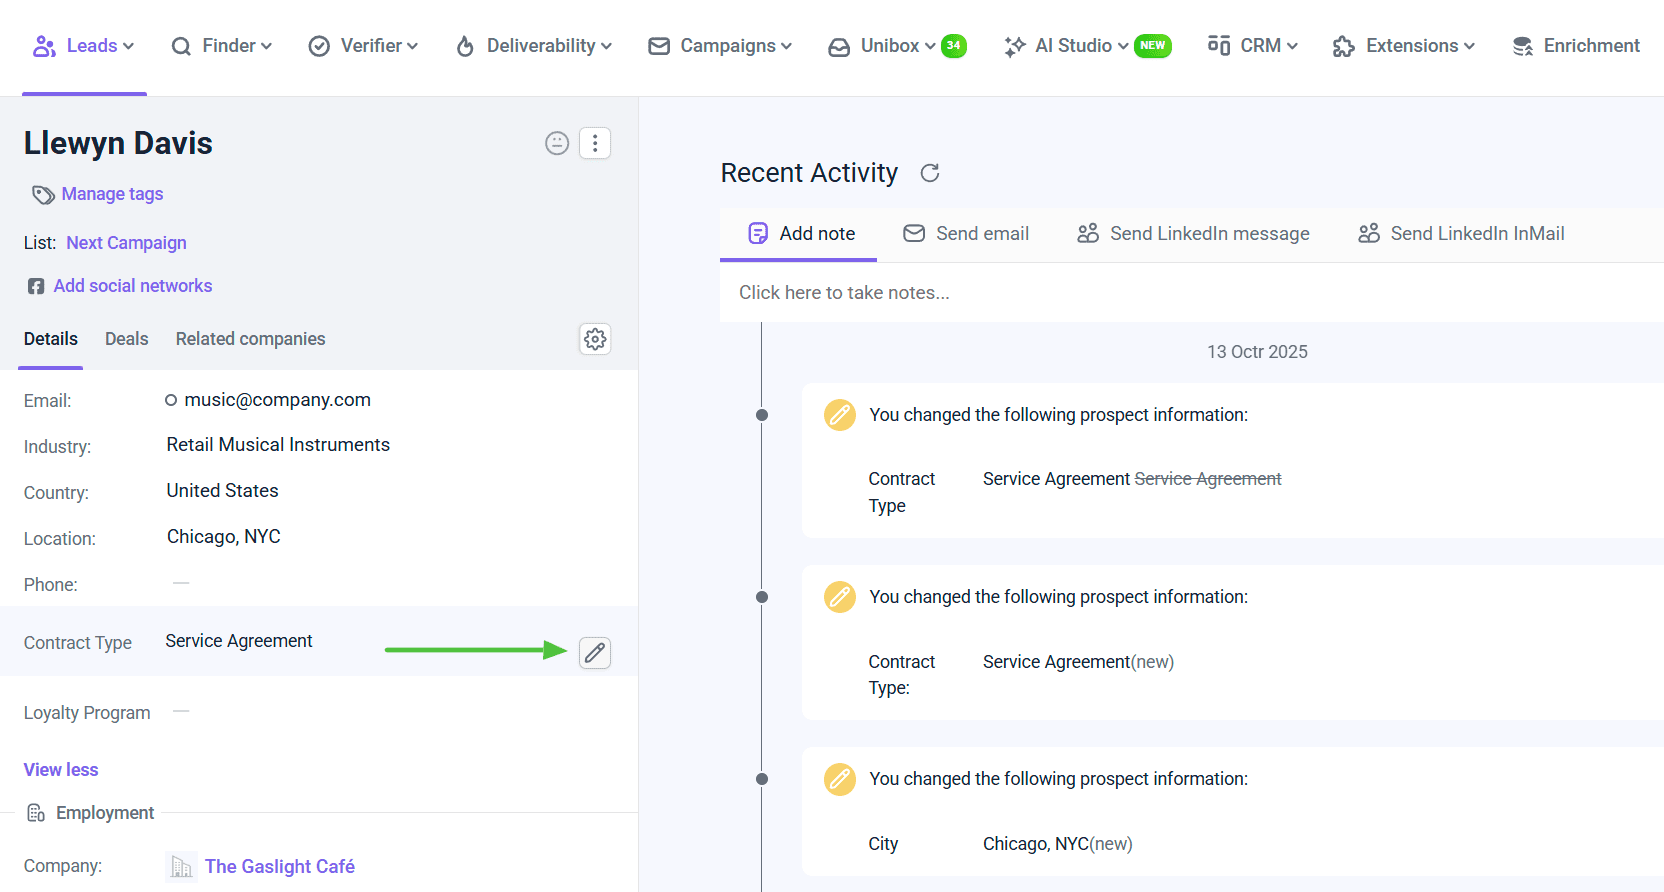
- Find a field on the details panel
- Hover a cursor over it and click Edit icon
- Type in a value and press Enter
Note: It is only this prospect that will be updated when you add a custom field value manually to one prospect profile.
Add data to custom fields in bulk via import
If you have any relevant information about your leads, you can use it to personalize your campaigns.
Add this information to a separate column in your CSV file. Each prospect in the file should have their own row with the custom data in that column.
Using the file import, you can add this data in bulk to all prospects in your list. To set up the import, go to your Prospects page and choose Import from file option. During the import, create new custom fields in Snov.io for the data from your file. Click on Add custom field and select the Prospect type.
To upload data correctly, map the custom fields to the corresponding columns in your file. You can do this by dragging the prospect fields to the appropriate headers in the import settings.
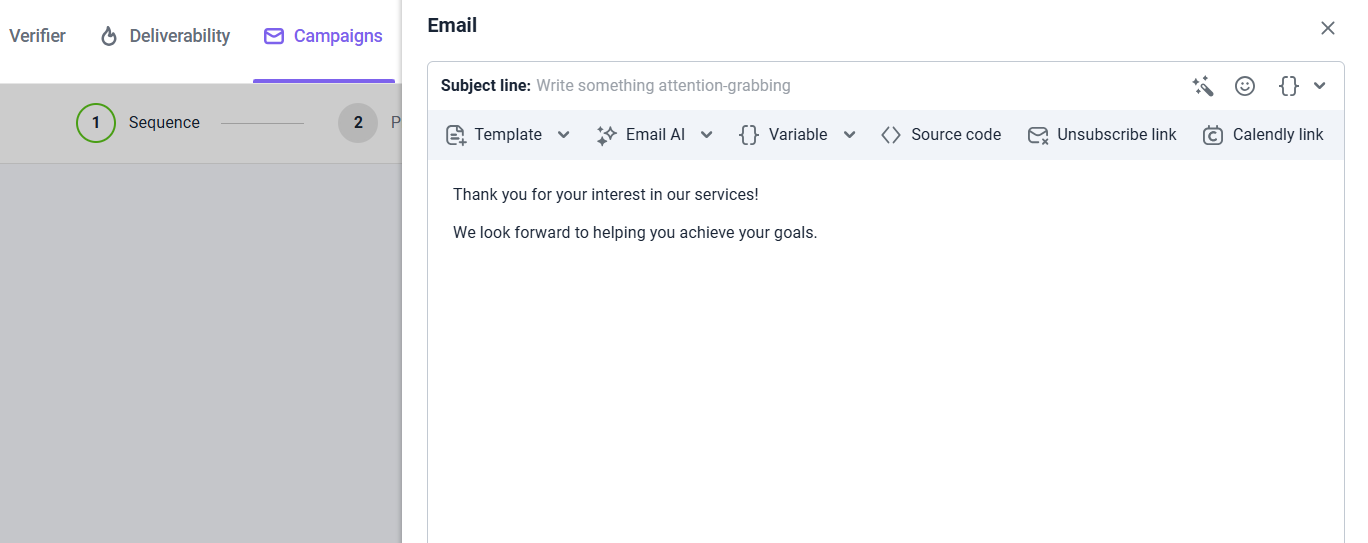
The value (content) of the custom field can contain up to 65,000 characters. If you want to add a text with line breaks, use the HTML element <br> where you want to create a line break (add the next sentence from the new paragraph). For example:
"Thank you for your interest in our services!<br><br>We look forward to helping you achieve your goals."
 Field mapping means that data from that columns in your file will be uploaded to the appropriate fields in the prospect profiles.
Note: You can create up to 30 custom fields. For each custom field, Snov.io will generate variables (placeholders) that you can later insert to campaigns.
If the field name is "Personalization", Snov.io will automatically create a variable {{personalization}}. This variable can be inserted into your emails and LinkedIn messages.
When adding content in the campaign editor, you'll have access to the variable list.

Add custom variables to campaigns
Variables are placeholders that will be automatically replaced with information from the corresponding field in the prospect’s profile. You can add variables anywhere in the email/message body or a subject line.
Remember, to make custom variables work, the corresponding fields in the prospect profile should contain data.
To add a variable, choose the Variable menu on the toolbar in the campaign editor. This menu includes corresponding variables for all the default and custom prospect fields.
Read how to add variables to your email content.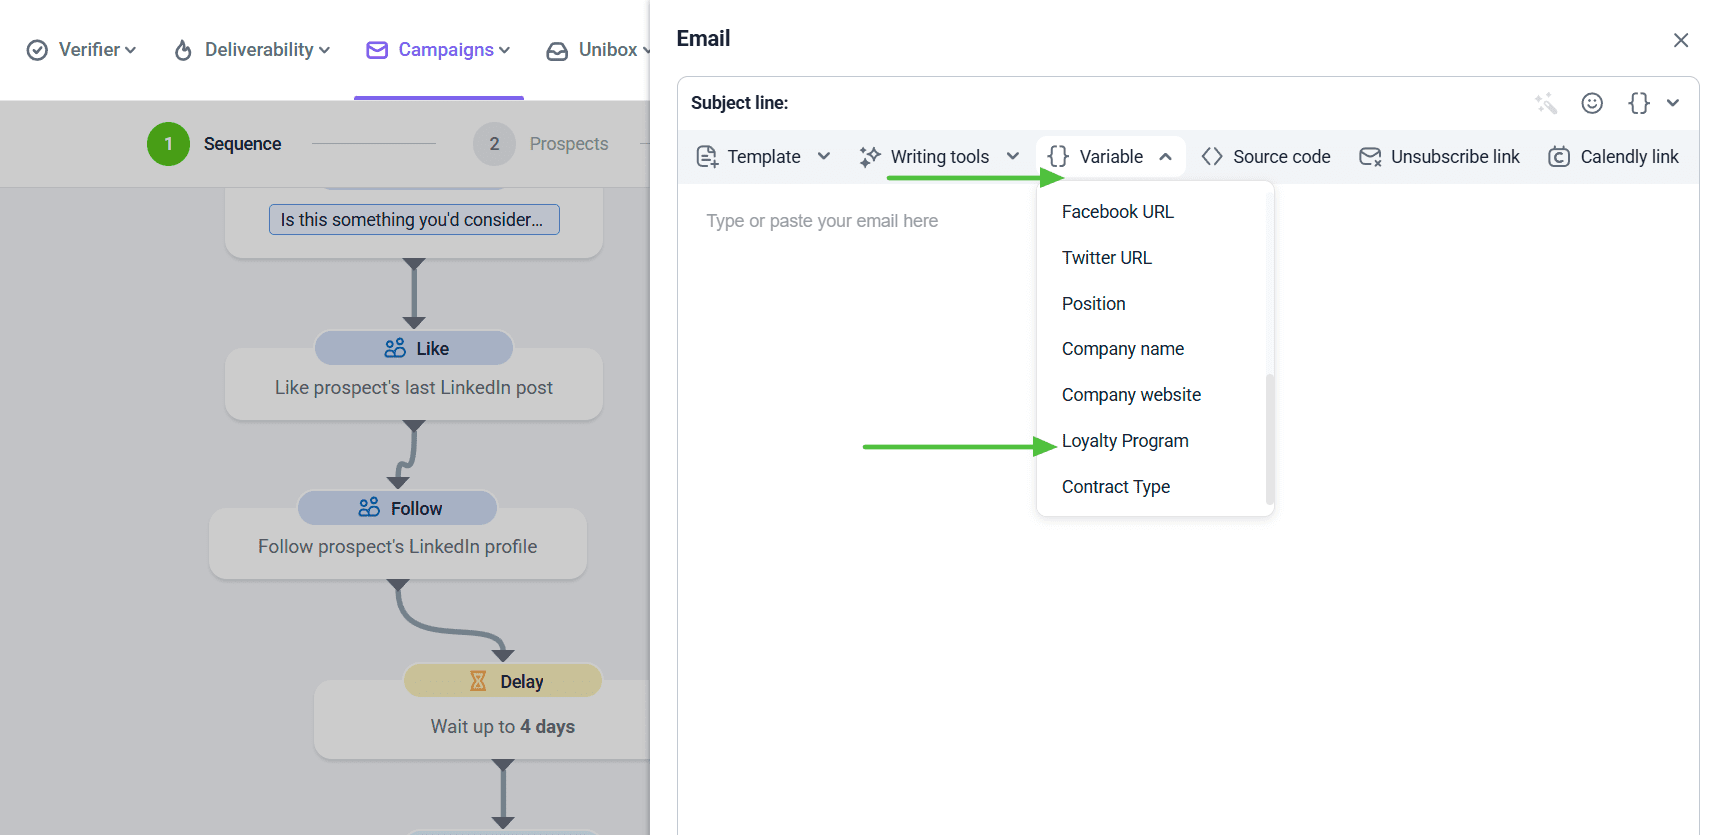
Edit custom fields
After a custom field has been created, you can modify its name on the Custom fields menu and its value on the prospect’s profile page.
Note: You can't change the data type of the existing field.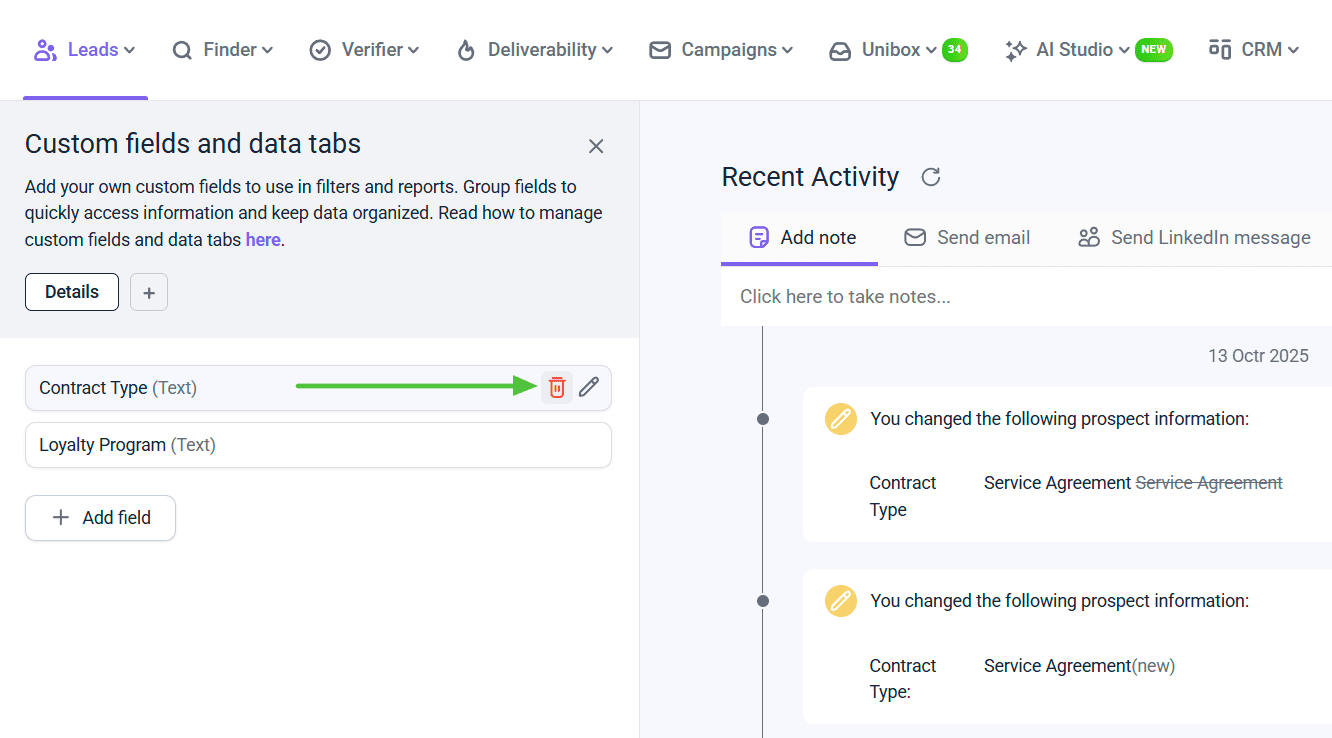
Delete custom fields
When you decide that a custom field is no longer needed or you hit the maximum limit of 30 custom fields, you can delete the field from the Custom fields menu.
To delete a custom field:
- Open Custom fields page
- Click trash icon next to a field you want to delete
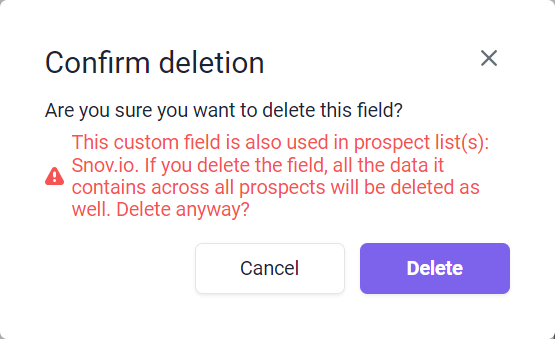
- Click Delete to confirm deletion
Important: Be careful when deleting custom fields. You’ll get an alert saying that you’re attempting to delete a custom field with data.
If the field is deleted, the data associated with it will also be permanently deleted across all your prospects and lists. Email variables (so called placeholders) will no longer be able to use custom field data.
View all custom fields
All the custom fields created in your lists are visible on the Custom fields page.
Select the group (tab) that you are interested in, and it will show a list of the custom fields added to that group.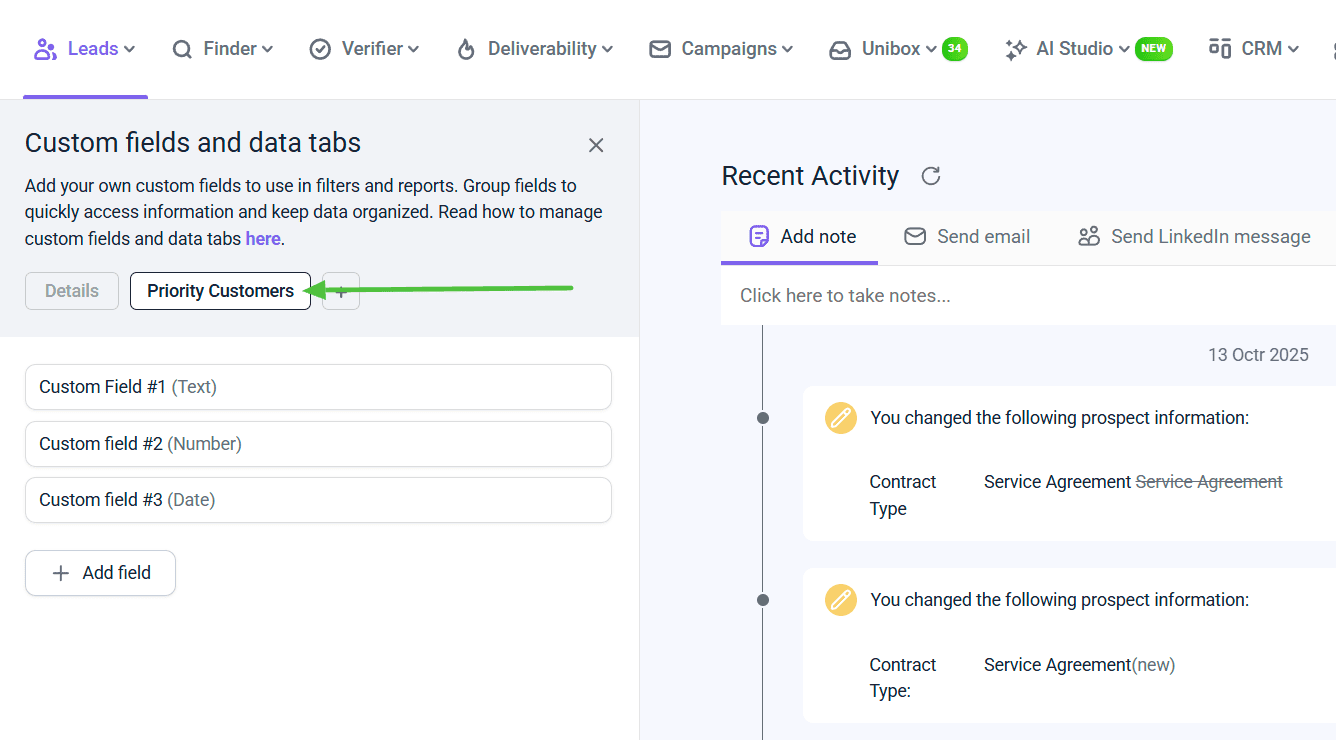
FAQs and tips
Here are some notes to keep in mind as you work with custom fields:
1. What happens when I add a custom field manually?
When you add, edit or delete a custom field value for a single prospect, it is only this prospect that will be updated.
2. What if I add a custom field to one prospect profile?
When you add or delete custom fields, they are updated across all your lists and prospects.
3. How many custom fields can I add in total?
You can add up to 30 custom fields.
4. Is there a character limit for the value of the custom field?
The value (content) of the custom field can contain up to 65,000 characters. The title of a custom field can contain up to 255 characters.
5. What if I delete a custom field connected to a variable used in a campaign?
Be careful when deleting custom fields as their data is used in email variables. Make sure to remove associated variables from email campaigns after deleting a field.


Sorry about that 😢
How can we improve it?