By default, every LinkedIn account you connect to Snov.io runs through a built-in proxy. This guide shows how to use your own proxy server instead, and how to update your proxy location when you travel.

Before you start. To use a custom proxy, make sure you have:
- 1) A connected LinkedIn account. See this guide to connect one.
- 2) A proxy server from your provider. You need its host, port, username and password.
Set up a custom proxy
To have full control over your settings, you can add your own proxy server to your LinkedIn account.
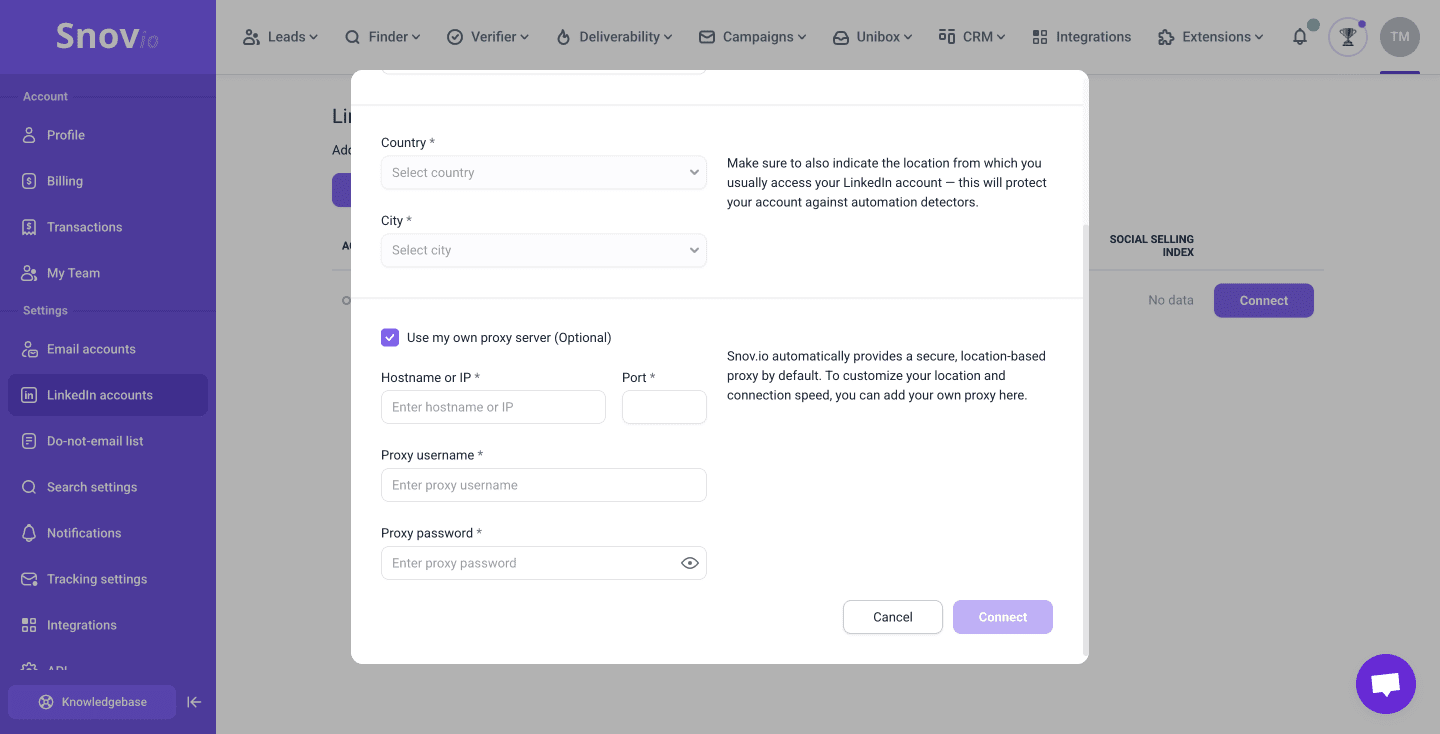
Toggle the option "Use my own proxy server".
Enter the host, port, username and password provided by your proxy service. You can find this information in your proxy provider account (where you purchased the proxy server).
After entering all the required details, click Connect. If the connection is successful, your automation will run through the proxy you provided instead of the default one.

Update your proxy location
This step is for when your outreach is already active.
To avoid detection, your proxy location should always match the location from which you’re logging into LinkedIn. LinkedIn may flag your actions as suspicious if they don't match.
When to update your LinkedIn proxy
If you travel for work while a Snov.io campaign is running, update your proxy so your automation also matches your current location. Active campaigns will adjust automatically and continue without interruption.
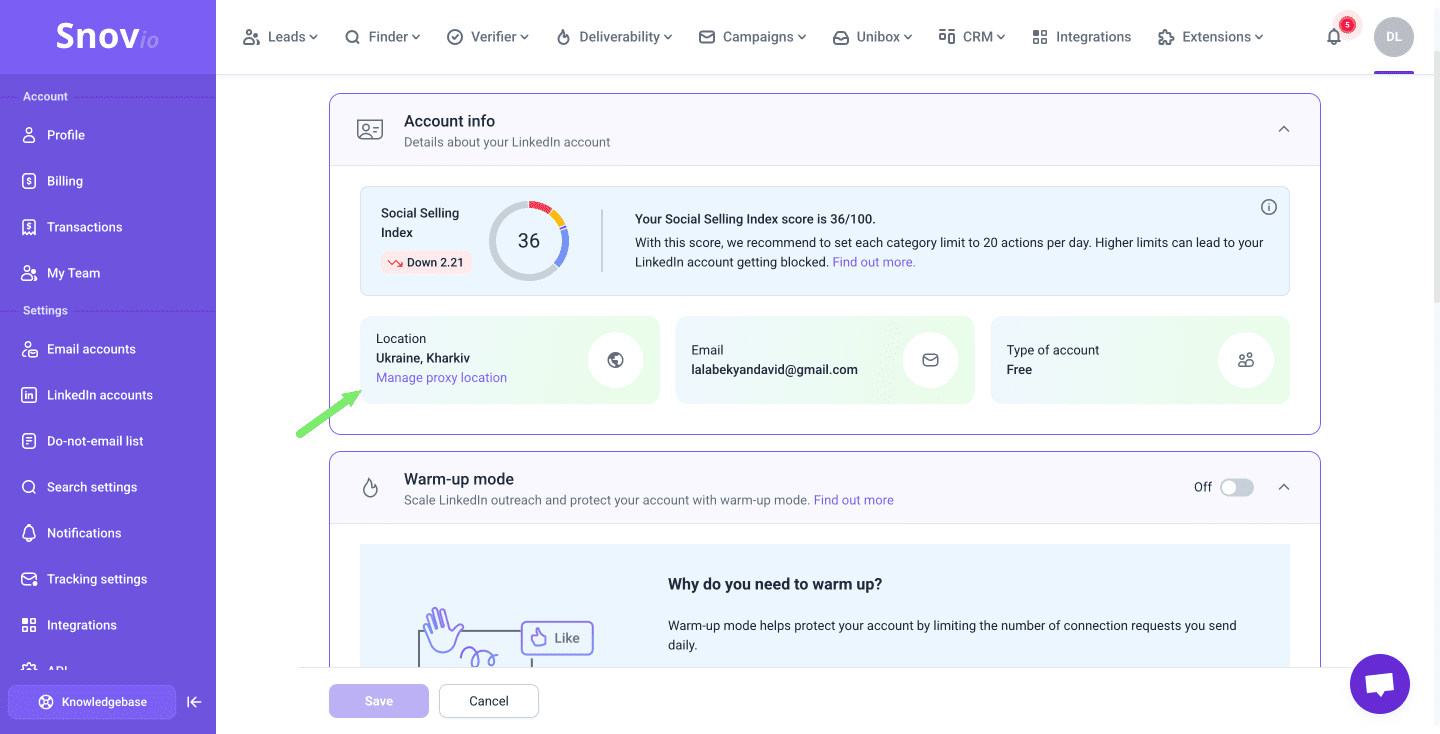
Go to LinkedIn accounts. Click Manage proxy location in the settings of the account you want to adjust.
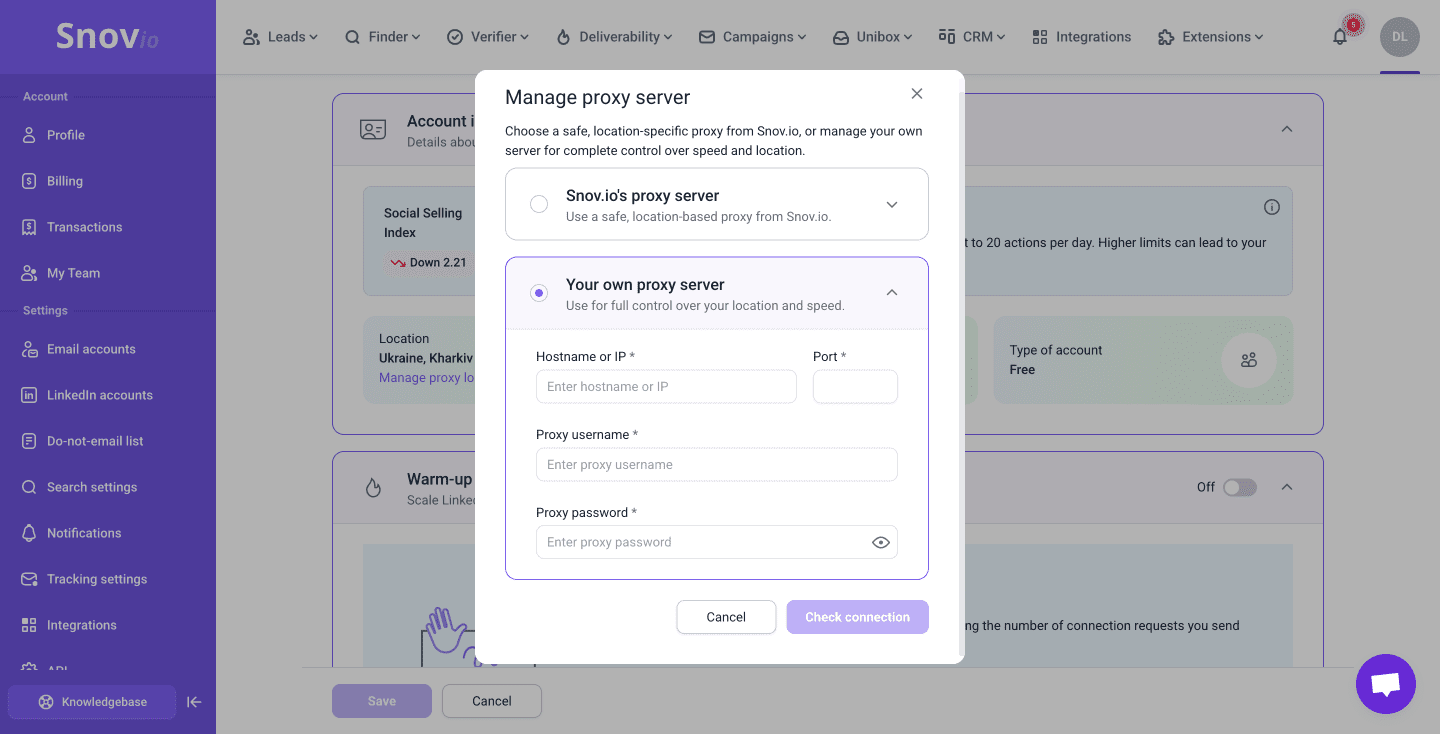
Change location in your own proxy
You can change your custom proxy settings as often as needed.
Click Check connection to confirm the new proxy works, then Save to apply the changes.
Once the connection is successful, your automation will run through the updated proxy location.
Change location in Snov.io default proxy
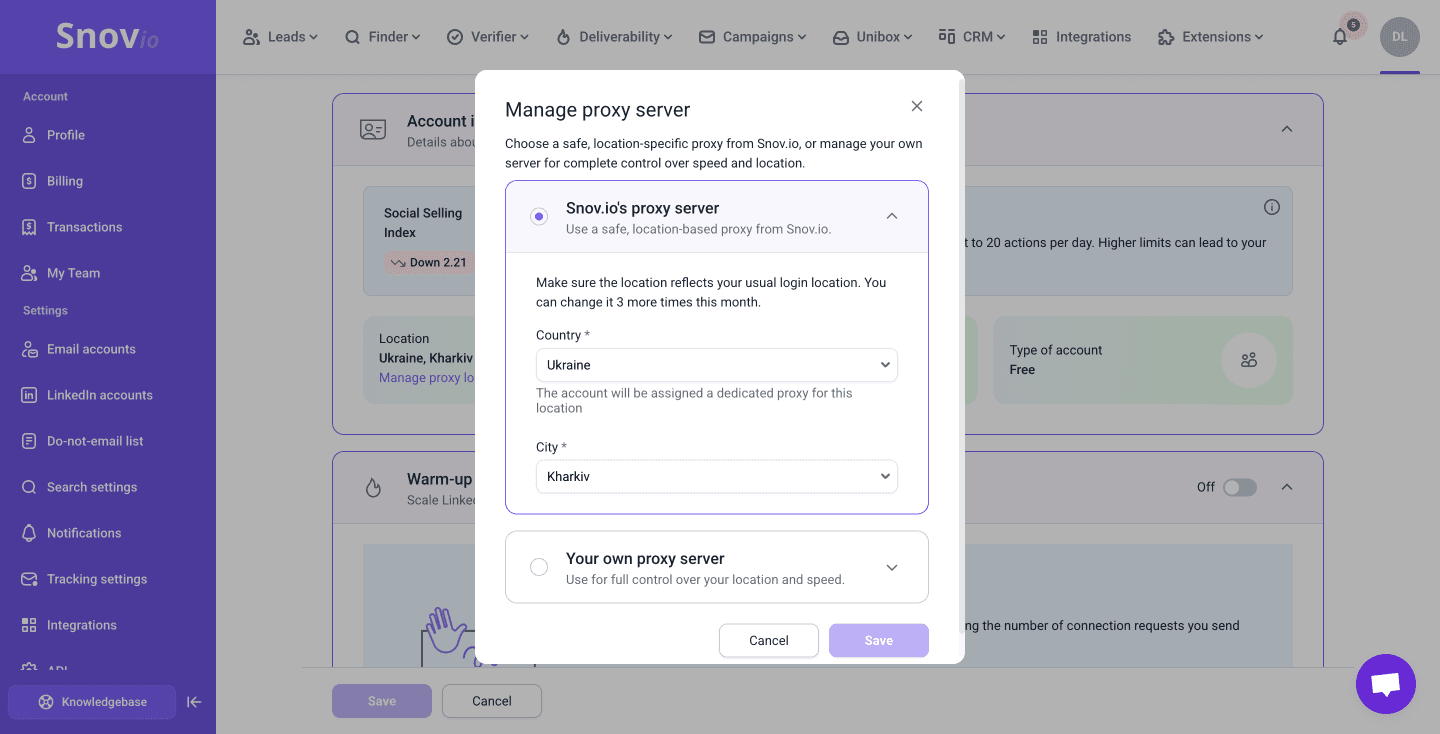
If your current location differs from the one you selected at first connection, update your proxy settings in Snov.io’s built-in proxy.

To update Snovio's proxy settings, go to LinkedIn accounts and click Manage proxy location.
Select a new country/city and save your settings. Snov.io will assign a new location-specific IP address, and your campaigns will continue to run from the correct region.
What's next?
To scale your outreach with several accounts and safe limits, read how to scale LinkedIn outreach safely.


Sorry about that 😢
How can we improve it?