This guide shows you how to create and apply sending schedules for cold email automation, LinkedIn automation, and email warm-ups.
Timing is important for improving engagement with your emails and ensuring you reach recipients at the right time.
When you set up a campaign or add your mailbox to a warm-up, you can choose a schedule to decide when the campaign will be active. This allows you to specify the days and hours for sending emails and performing LinkedIn actions.
- Create new schedules
- Edit or delete existing schedules
- Add schedule to a new campaign
- Change schedule in active campaigns
- Check campaign schedule
- Add schedule to a warm-up
- FAQs and recommendations
Create new schedules
You can create and edit schedules for campaigns on the Schedules page.
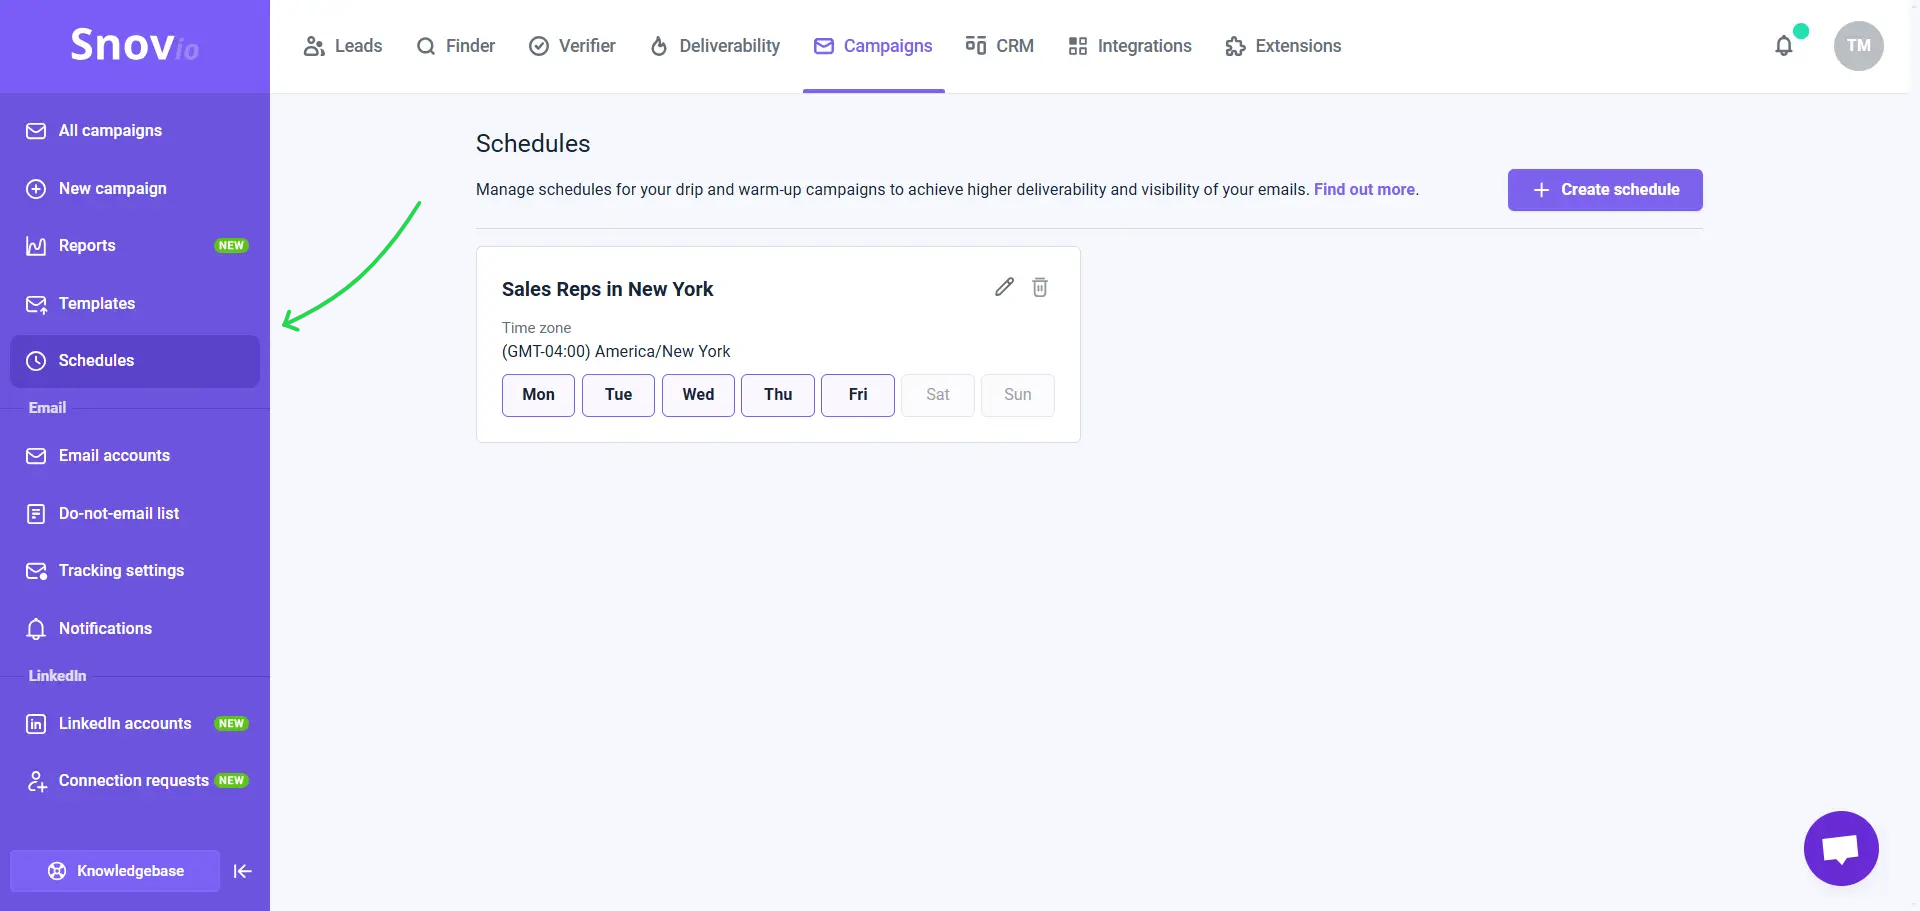
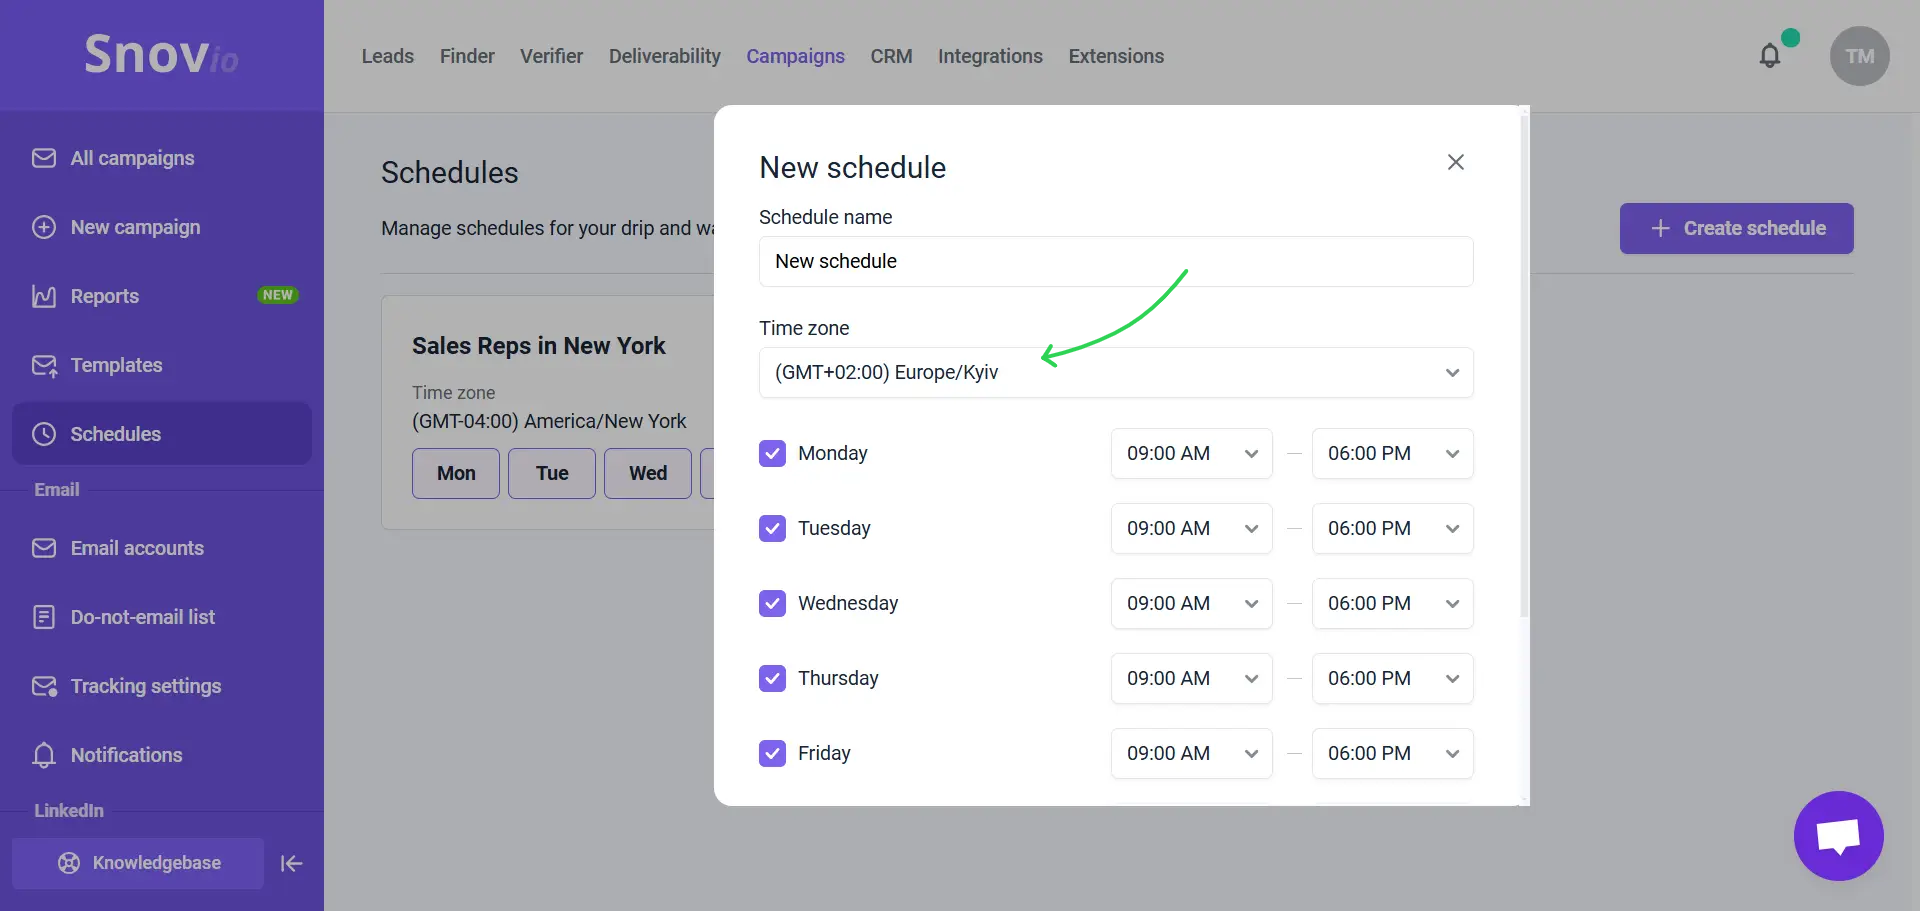
To create a new schedule, click +Create schedule button and choose schedule parameters in the pop-up window.
-
Time zone: Select a time zone that matches the location of your recipients.
-
Days/Hours: Choose the days of the week and the specific hours when your campaign will be active.
We recommend using schedules consistent with your recipient's working hours for better engagement.
Edit or delete existing schedules
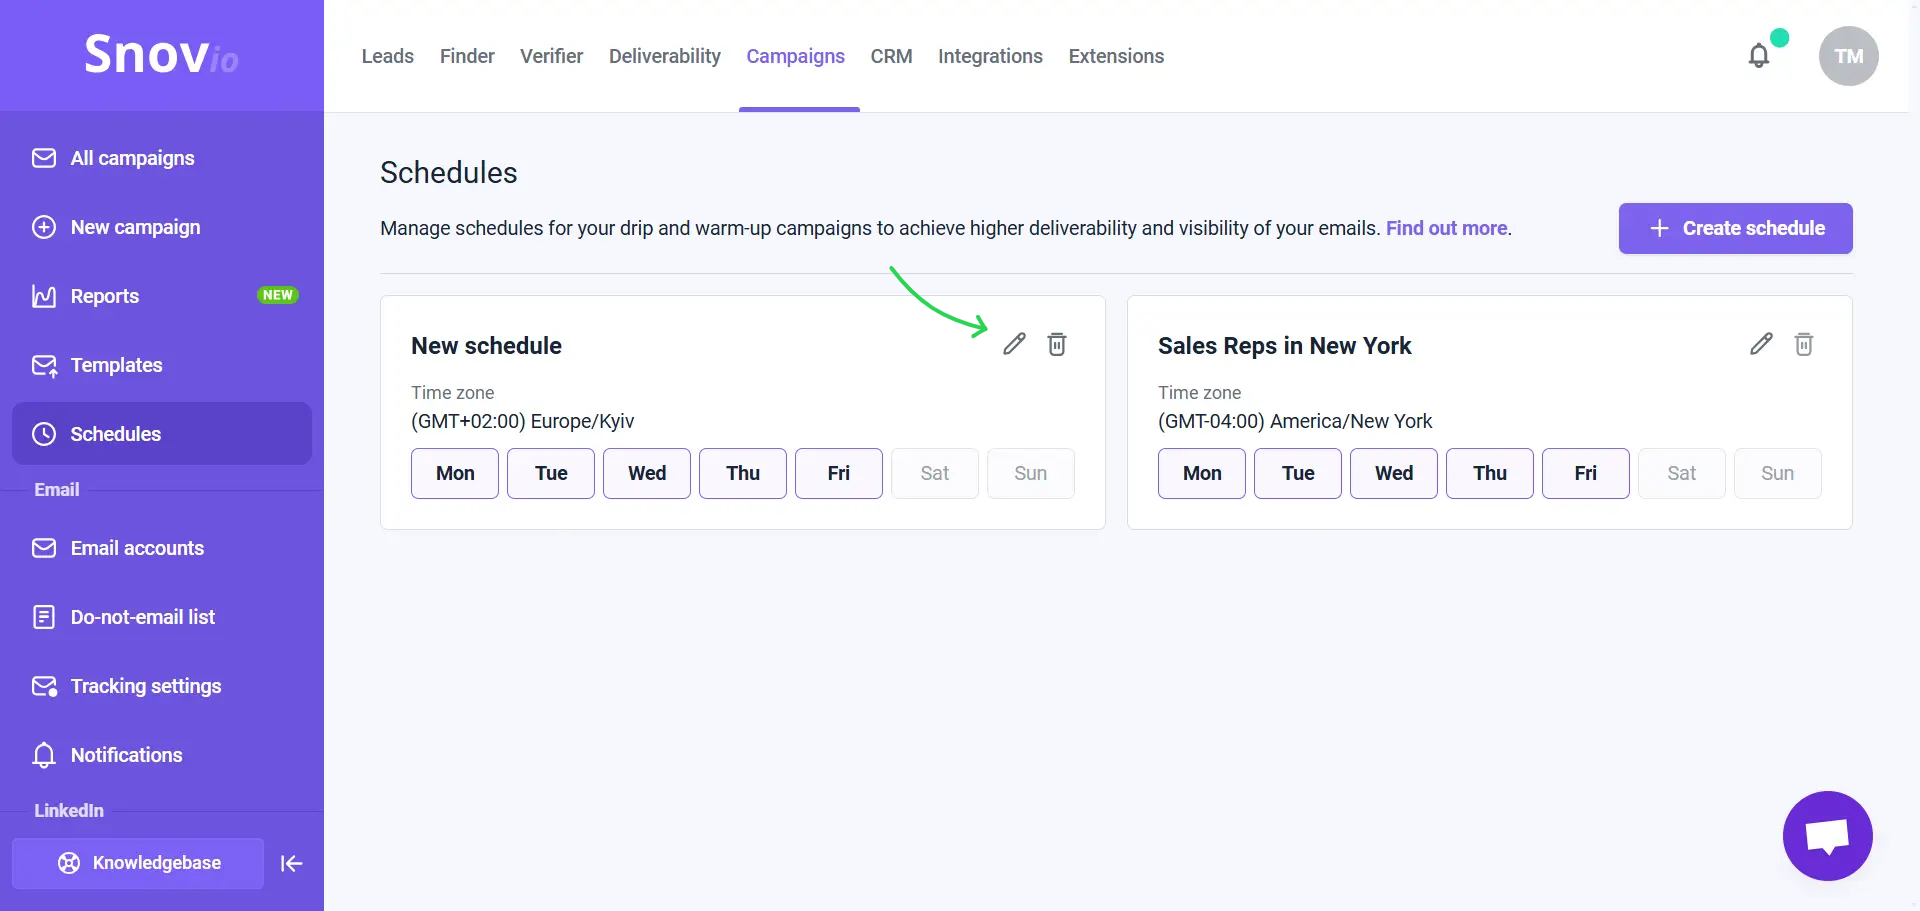
You can change the settings of an existing schedule if you need to. To do this, click the edit icon and update the details.
If the schedule is used in other campaigns, any changes you make will also apply to those campaigns, and they will follow the updated schedule.
To delete a schedule, click the delete icon next to it. You can't delete a schedule that is being used in at least one campaign.
Add schedule to a new campaign
When creating a campaign, add a schedule for it. You can add a schedule to all types of campaigns: email-only, LinkedIn-only, or multichannel campaigns that use both channels.
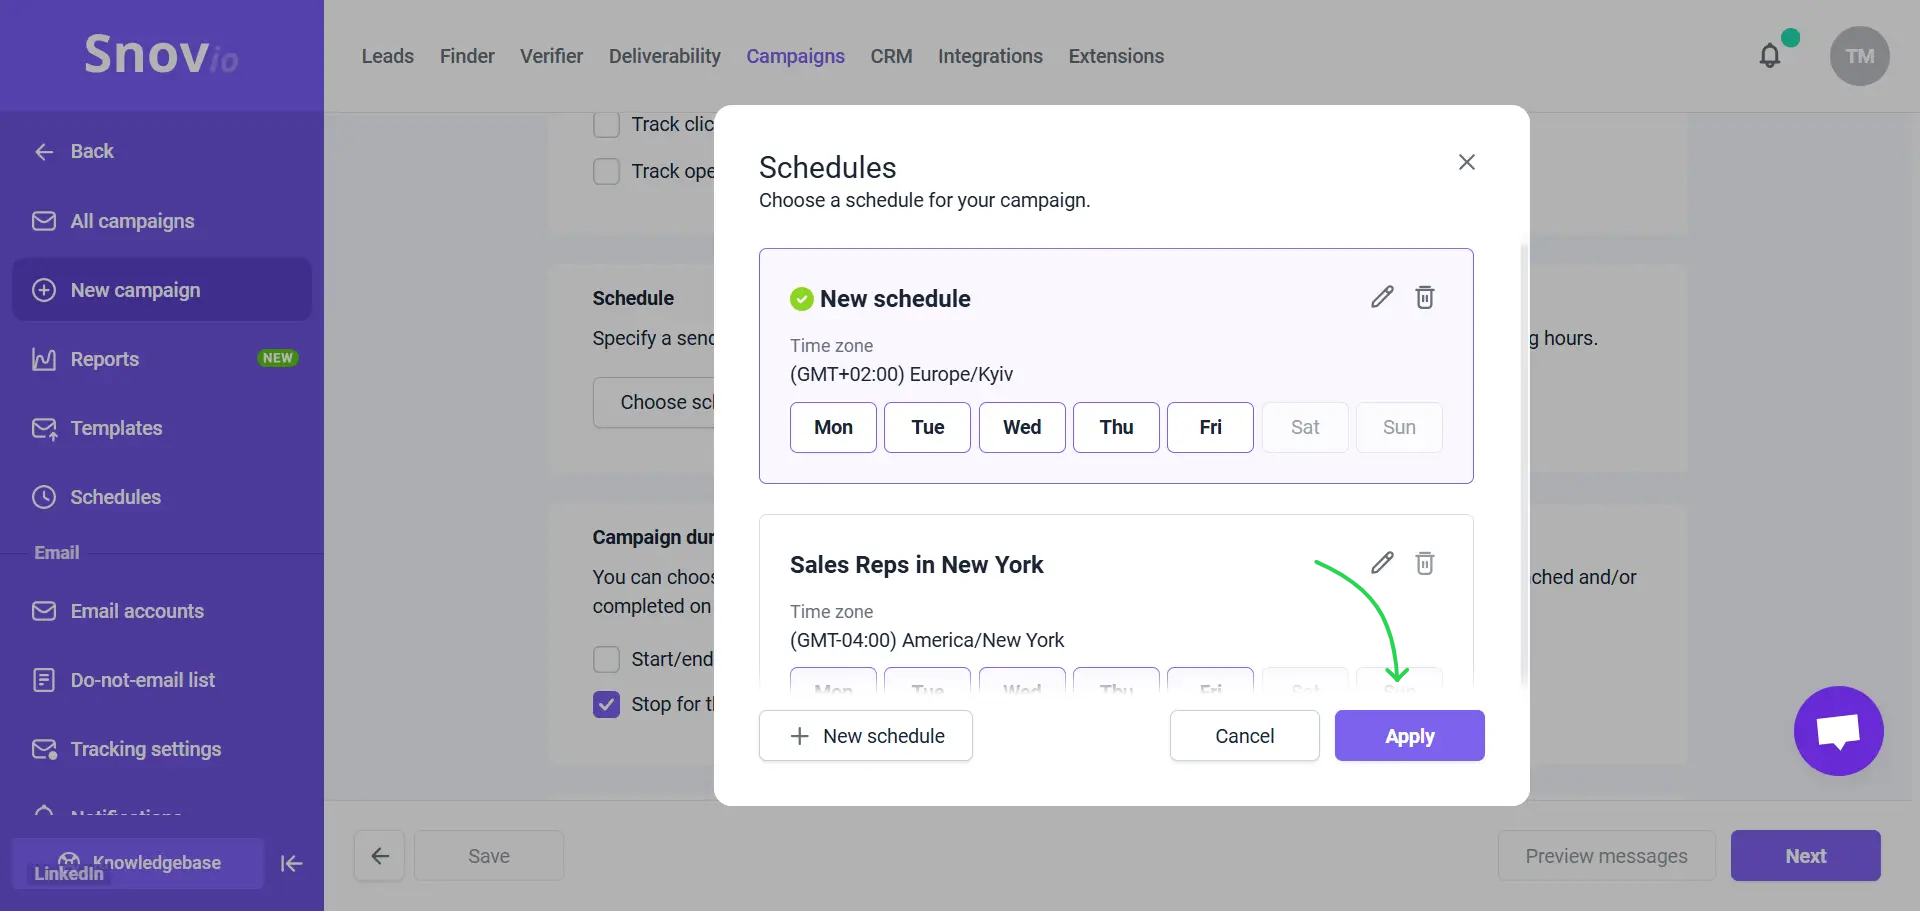
To add schedule, go to the Sending options step in the campaign editor and find Schedule section.
Click Choose schedule. The menu will include the schedules you created earlier. Select the required one and click Apply.
Change schedule for active campaigns
If your campaign already has a schedule and you want to adjust it or apply a new one, you can do this in editing mode. Click Edit in the campaign menu to access the campaign settings.
Then, go to the Sending options step in the campaign editor and find the Schedule section.
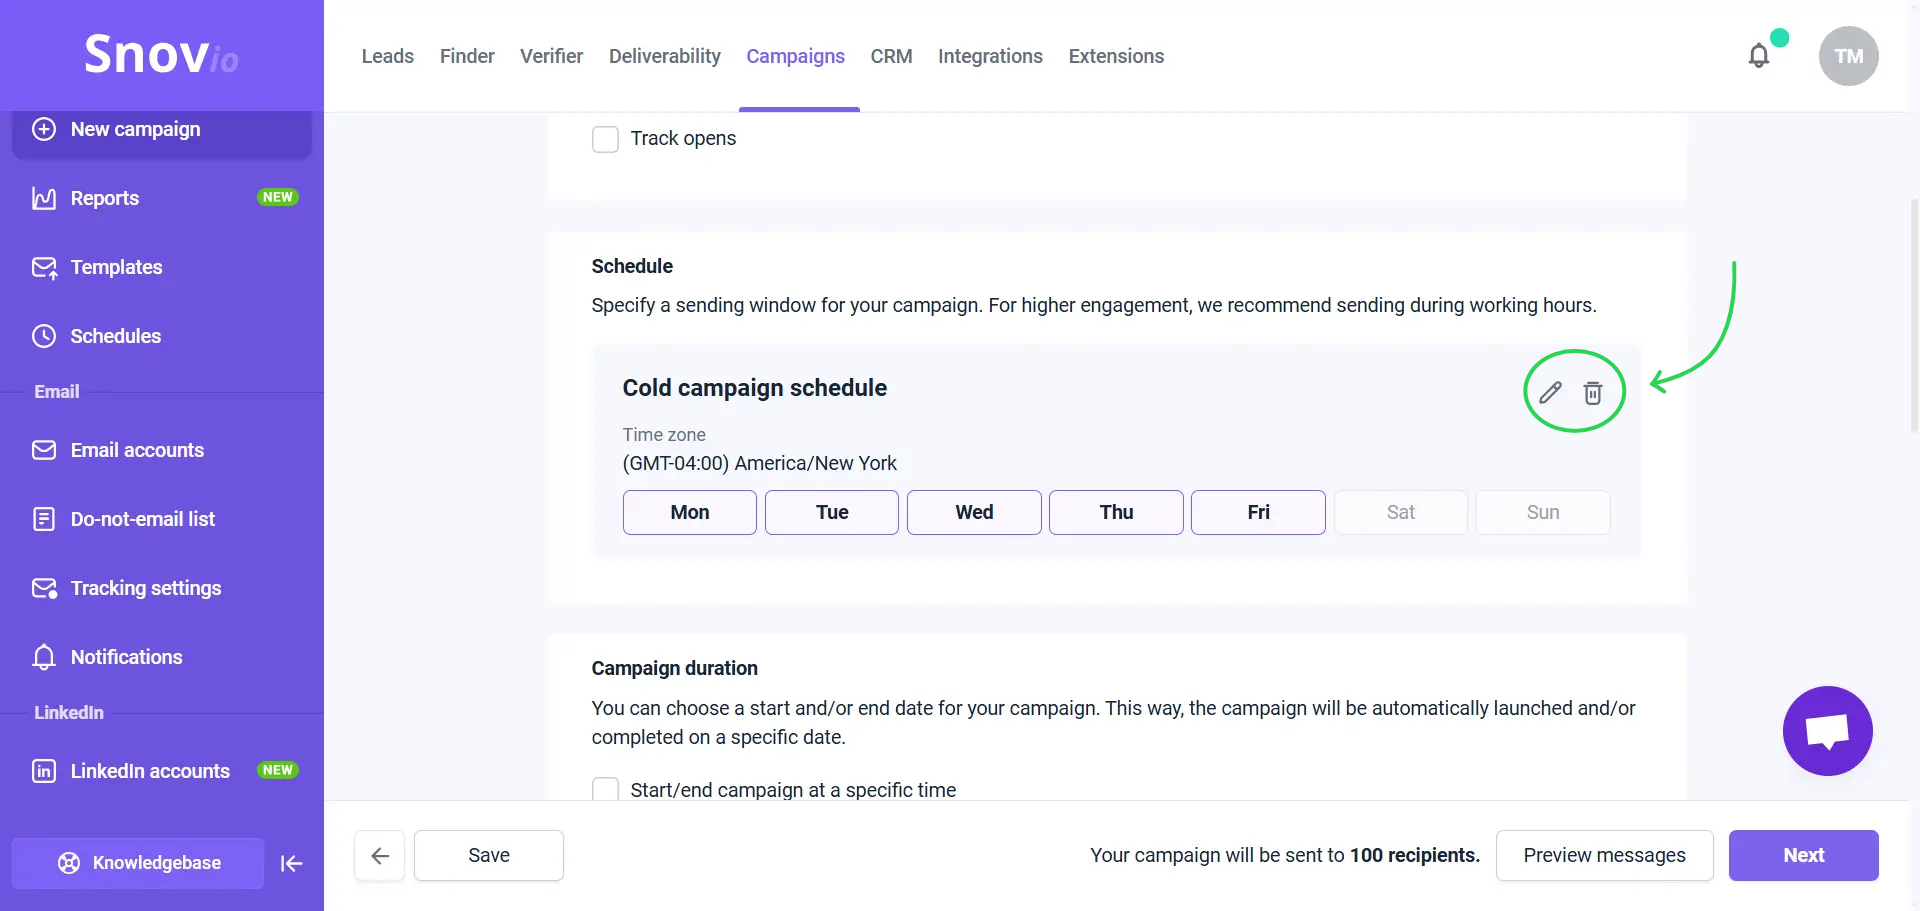
From here, you have two options.
Edit current schedule:
If you know this schedule is only used in this campaign, you can adjust the timing. Click the Edit icon to make changes to the current schedule.
Create new schedule:
If you want to apply a new schedule, you can remove the current one and add a different one. Click the Delete icon to remove the existing schedule.
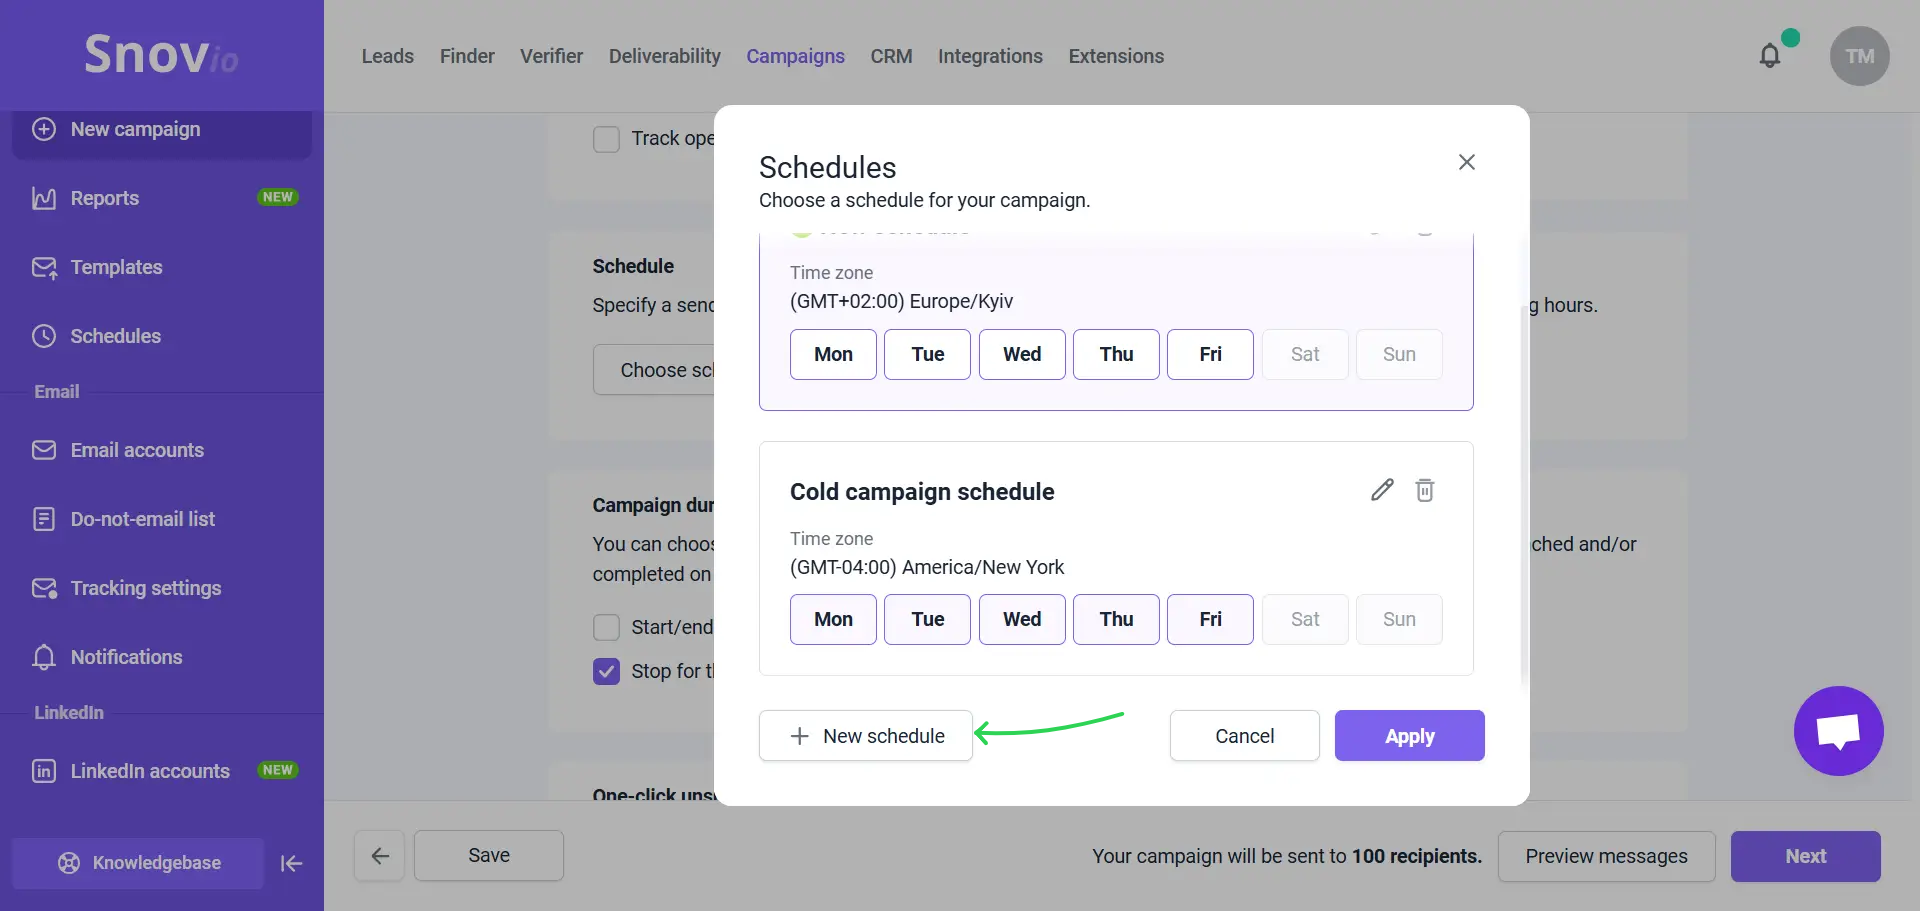
Then, click Choose schedule. In the pop-up window, select a schedule from the list or click New schedule to create a completely new schedule for this campaign.
Check campaign schedule
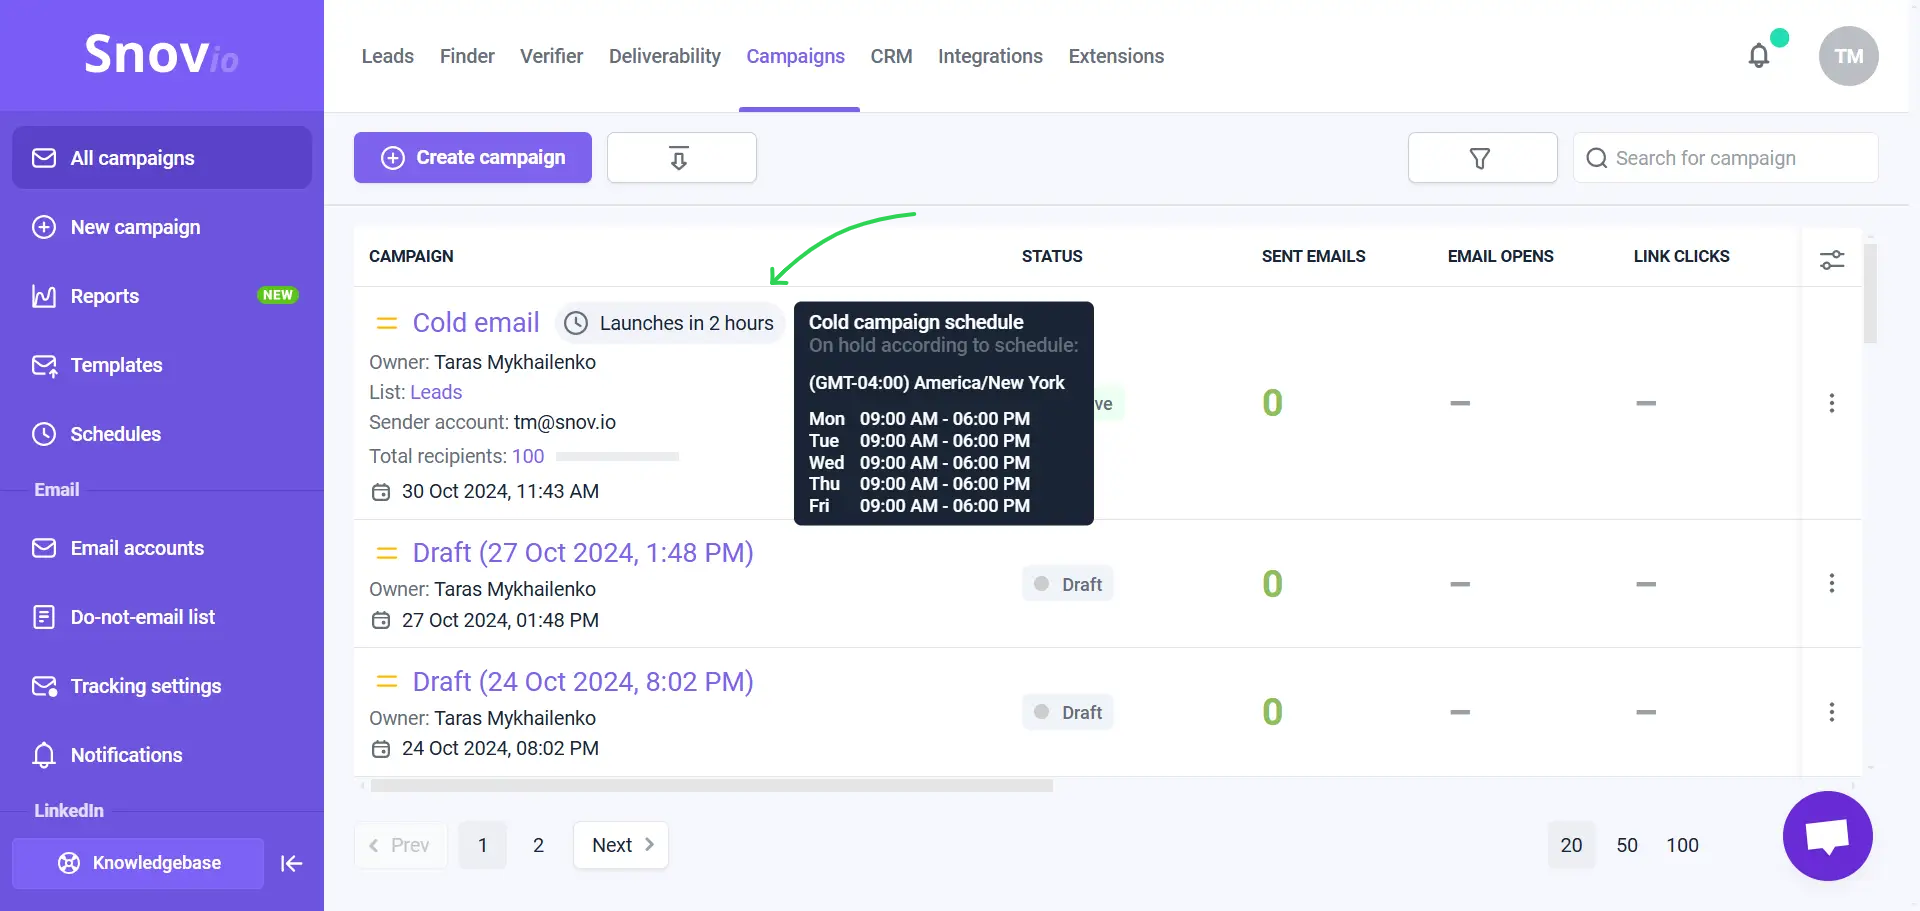
Scheduled campaigns show a clock icon next to their title—hover over it to view details.
Active campaigns will be on hold during times outside the allowed schedule. In the campaign details, you’ll see the message "On hold according to schedule."
A scheduled campaign will only be active during the times you set, sending emails or performing LinkedIn actions. Outside of those times, it will be on hold.
Add schedule to warm-up
When adding email accounts to warm-up, you can also set a schedule to determine when the warm-up will be active.
In the warm-up settings tab, find the Schedule section click Choose a schedule. You will see a list of schedules you created earlier. Select the desired schedule and click Apply, or create a new schedule specifically for the warm-up.
If you start the warm-up without a schedule, it will run throughout the day at a natural pace, with intervals between emails.
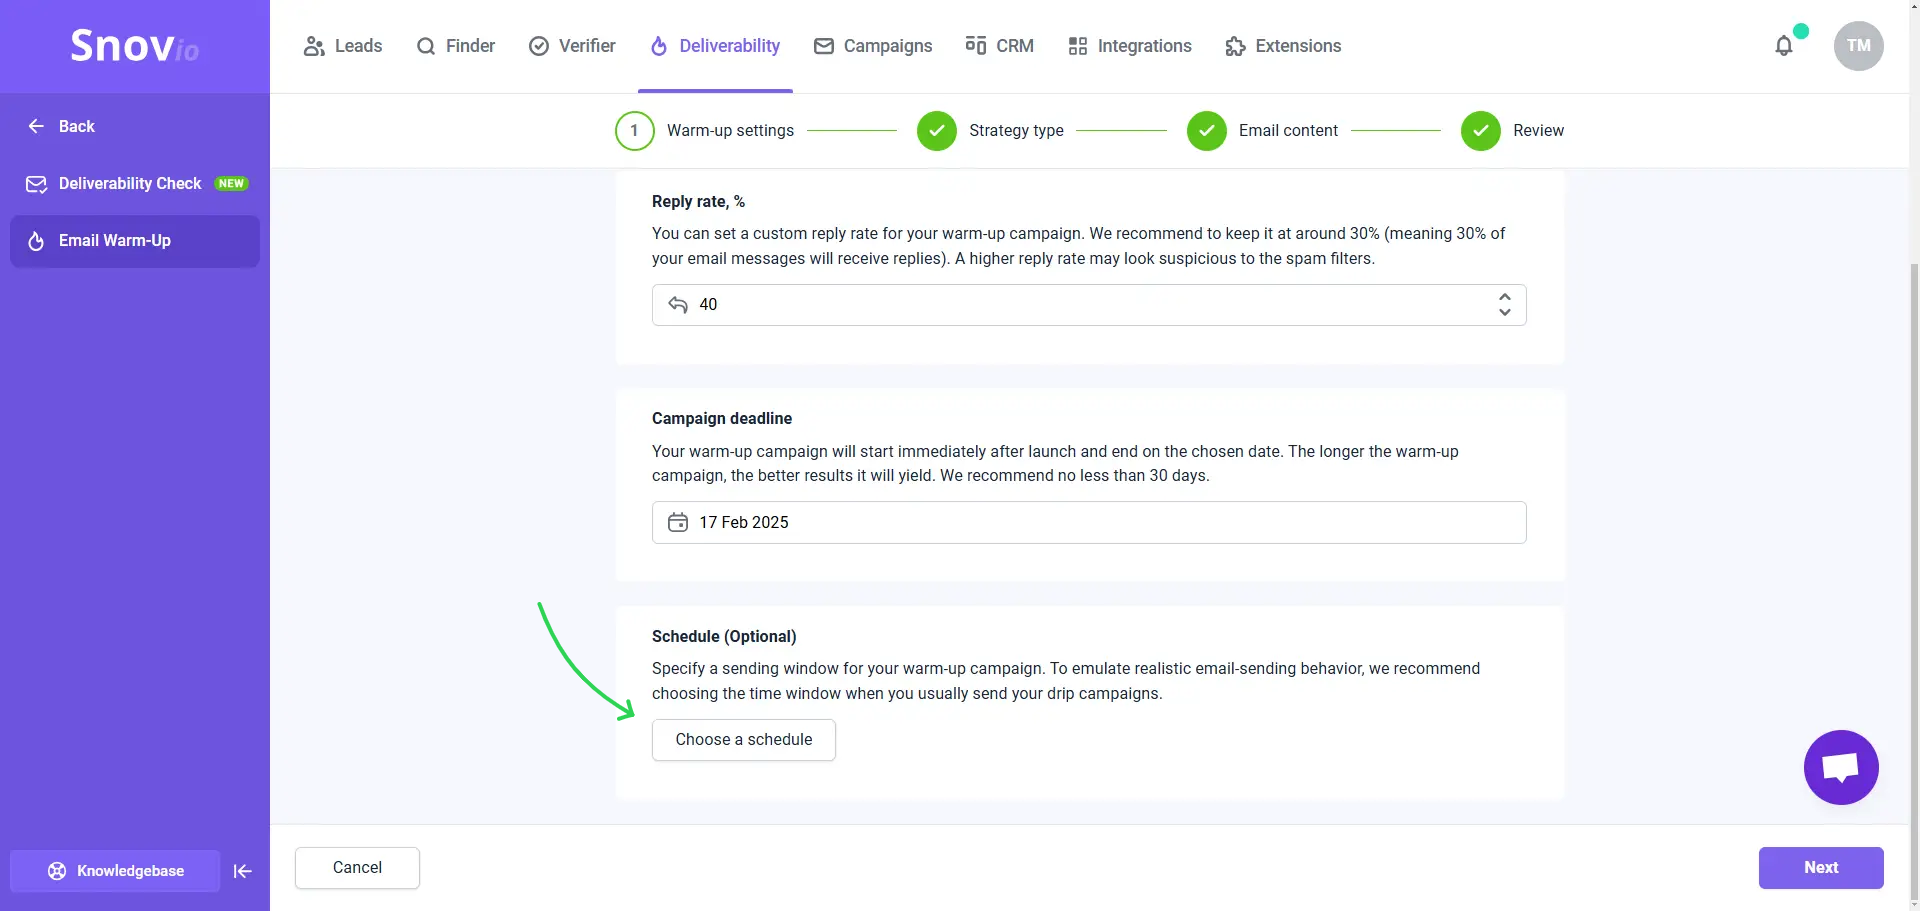
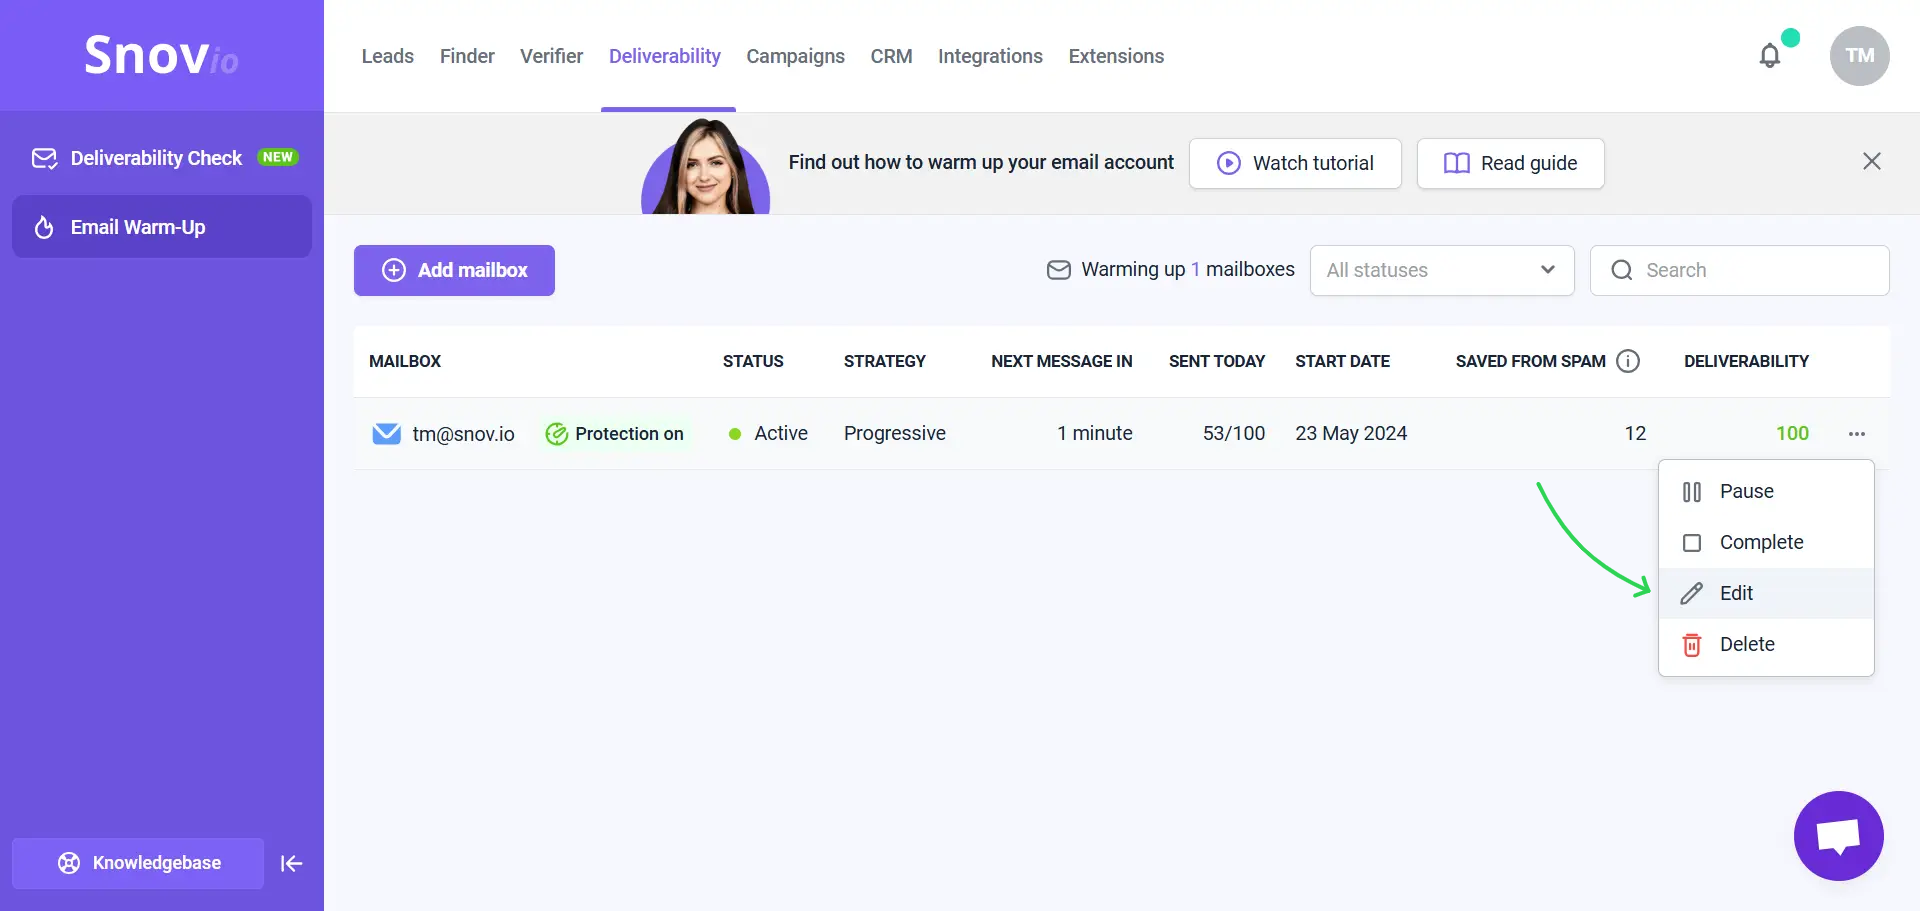
To add or change a schedule for an already active warm-up, go to the Email warm-up page and click Edit in the menu to open warm-up settings.
FAQs and recommendations
1. Can I use the same schedules for campaigns and warm-up?
Yes, it’s even better if you choose a warm-up schedule that matches your usual email sending times for real campaigns. Regular activity on your email account makes the warm-up more effective.
2. How to schedule campaigns to avoid exceeding daily sending limit?
When using the same schedule, be careful not to exceed the daily sending limit for your account.
Warm-up emails do not count towards the total sent in your email account settings. This total only includes emails from active campaigns and any test emails you send from those campaigns.
However, warm-up emails do count towards the limits set by your email service provider. To avoid exceeding your email account’s limit, consider it in when setting limits for both campaigns and warm-up.
3. How to schedule campaigns to achieve best results?
We recommend scheduling your sending hours to align with your recipients' working hours to ensure that your emails and LinkedIn activity get noticed.
To protect your sender reputation, it's helpful to run a warm-up alongside your campaign. You can use the same schedule to keep the warm-up active while your campaign is running. This helps compensate the negative impact of sending cold emails, such as being marked as spam.
Have more questions? Feel free to contact our support team via live chat or at help@snov.io.


Sorry about that 😢
How can we improve it?