To prevent specific prospects or companies from receiving your campaigns, you can create lists of blocked contacts.
The Do-not-contact lists allow you to exclude specific prospects by their email address or entire companies by their domain.
Contacts on this list will not receive your campaigns, even if they are accidentally added to your prospect list.
Why use Do-not-contact lists:
1. Block unwanted contacts: Add prospects or companies that your business should not contact.
2. Keep your campaigns compliant: Avoid contacting recipients who have requested removal.
3. Block bounced email addresses: Stop sending emails to addresses that have received a delivery error.
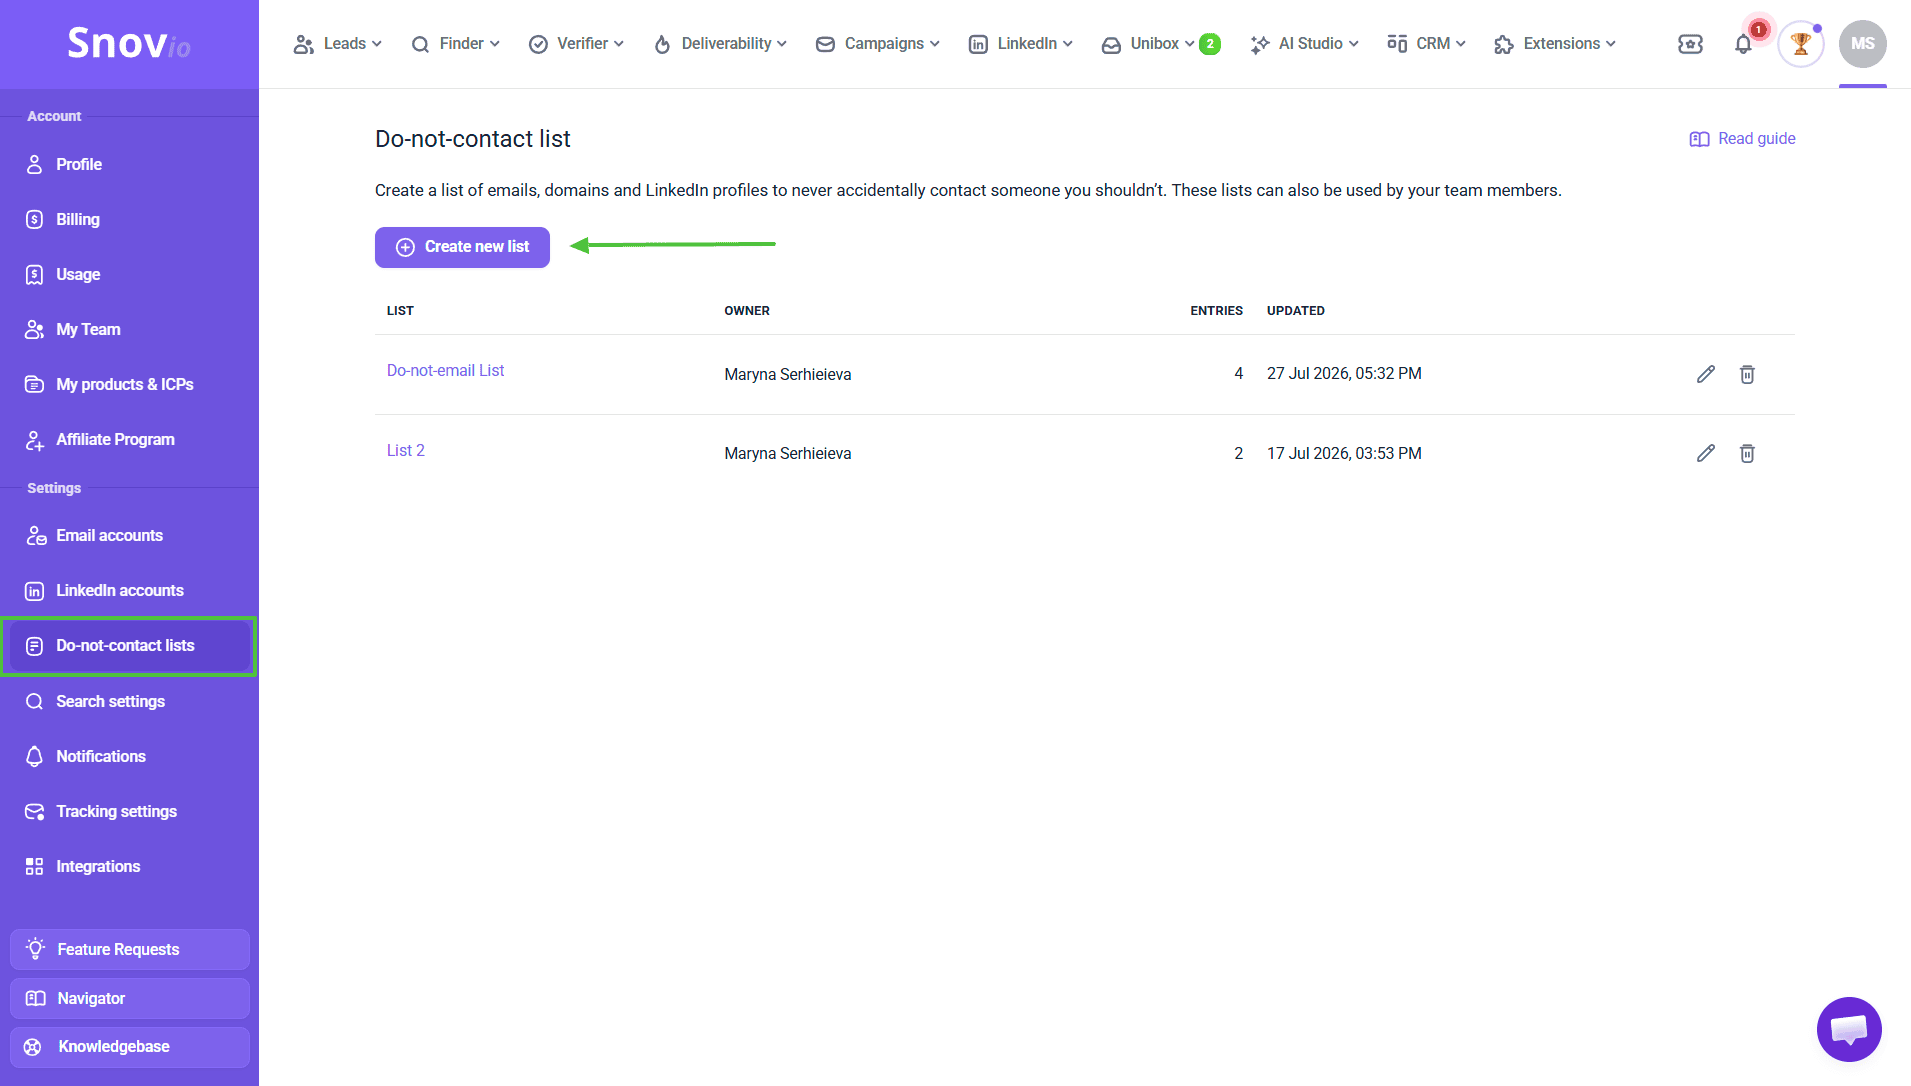
Step 1: Create a do-not-contact list
In your Account settings, go to the Do-not-contact lists tab. Click the + Create new list button, then enter a name for your list.
You can create up to 200 lists in your account. This is helpful if you run many campaigns in Snovio or have a team account. Create separate lists for different campaign types, team members, or the accounts you manage.
Step 2: Add contacts to the list
Click on the list name or the Edit icon on the right to open it. You can add new contacts either manually or in bulk by uploading a file.
Prospects whose contact information includes any of the following—email or domain added to the list—will be excluded from campaigns where you apply this list. This includes email-only sequences, sequences with only LinkedIn actions, and multichannel campaigns.
Here are the types of entries supported in the lists:
Email addresses
Add email addresses of specific prospects who shouldn't be contacted.
Only the email addresses you add will be excluded from campaigns. If a prospect has multiple email addresses in their profile, make sure to add each one to the list. Email addresses should be in the correct format: email@example.com.
Domains
To avoid contacting prospects from a specific company, add the company’s domain address (website). All prospects with email addresses under that domain will be excluded from campaigns.
If you add email domains gmail.com or yahoo.com to the list, it will mean that all prospects with those domains in their email address will not receive your campaign. Domains should be in the correct format: domain.com. The domain will still be accepted if you add it as https://domain.com.
How to add contacts manually
To add new entries to the list manually, type each email address and domain into the field one by one, separating them with commas. Then click Add to save changes.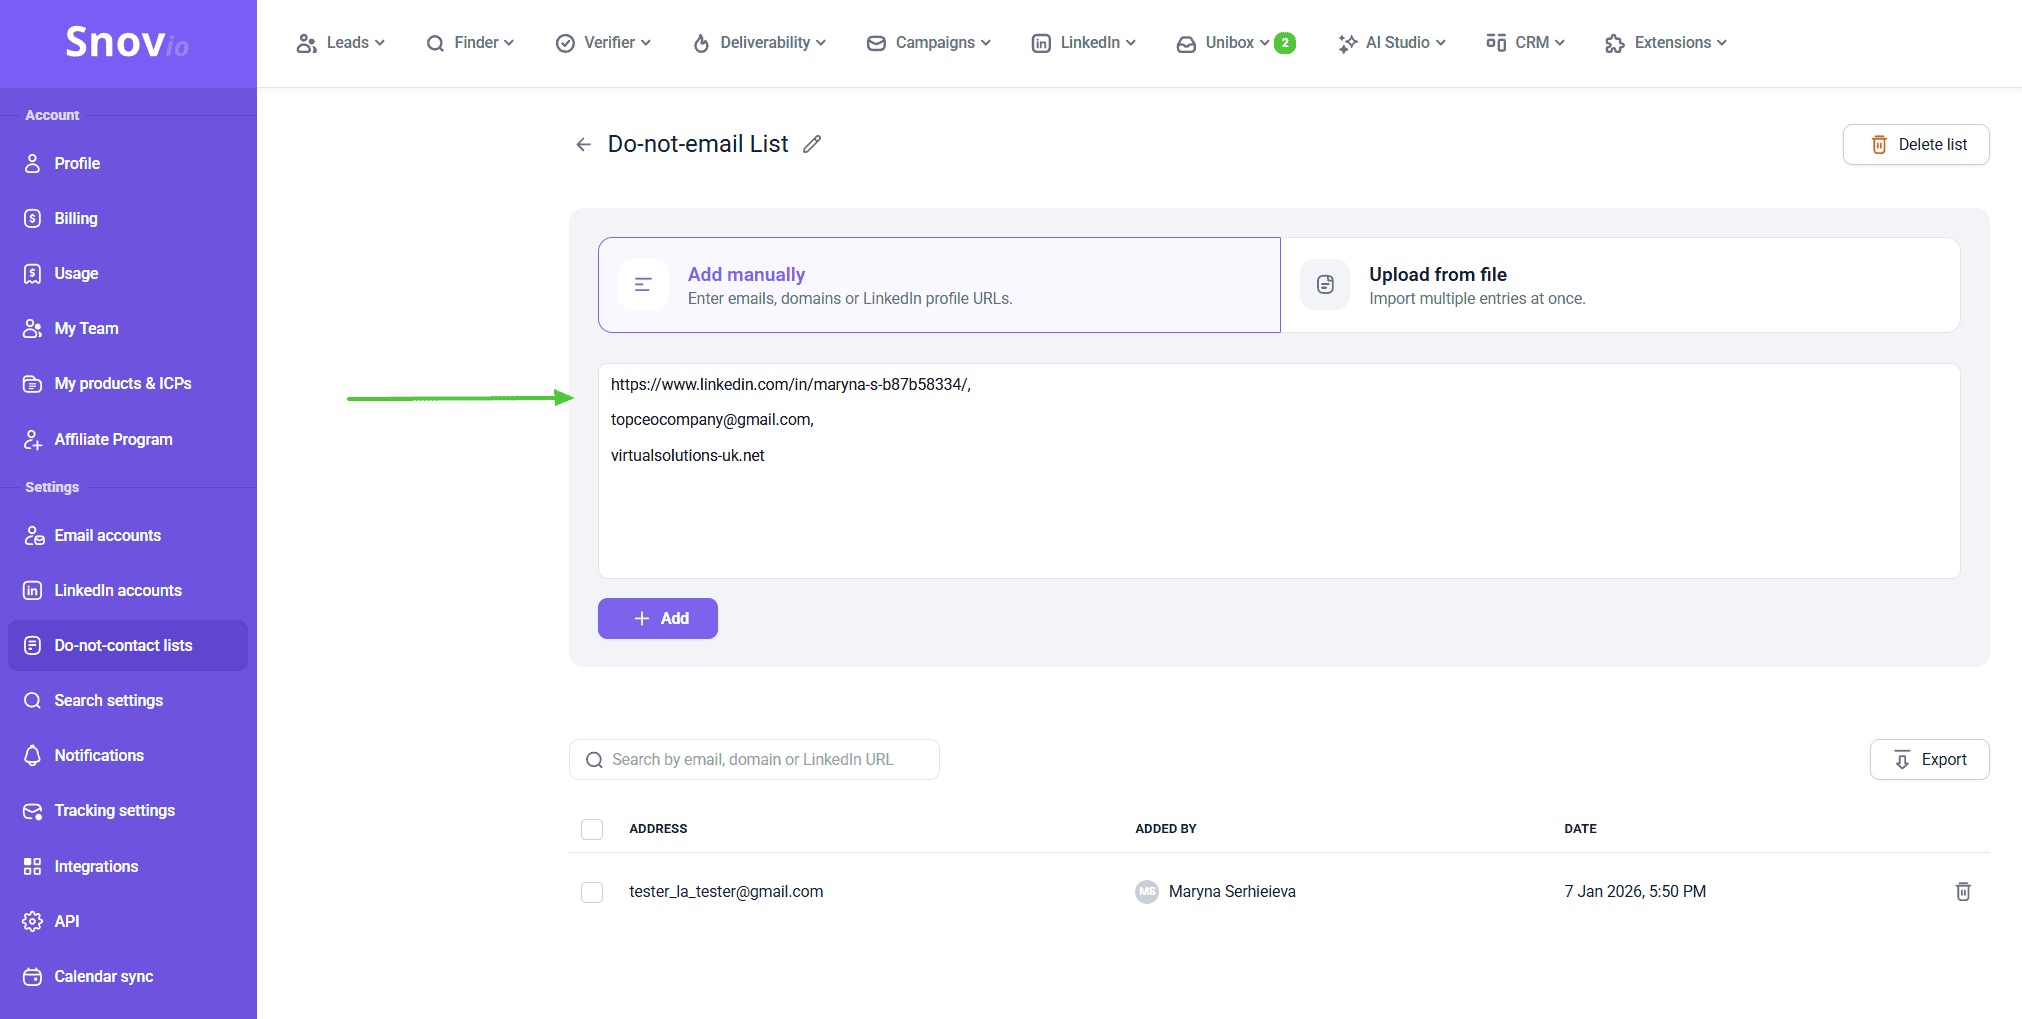
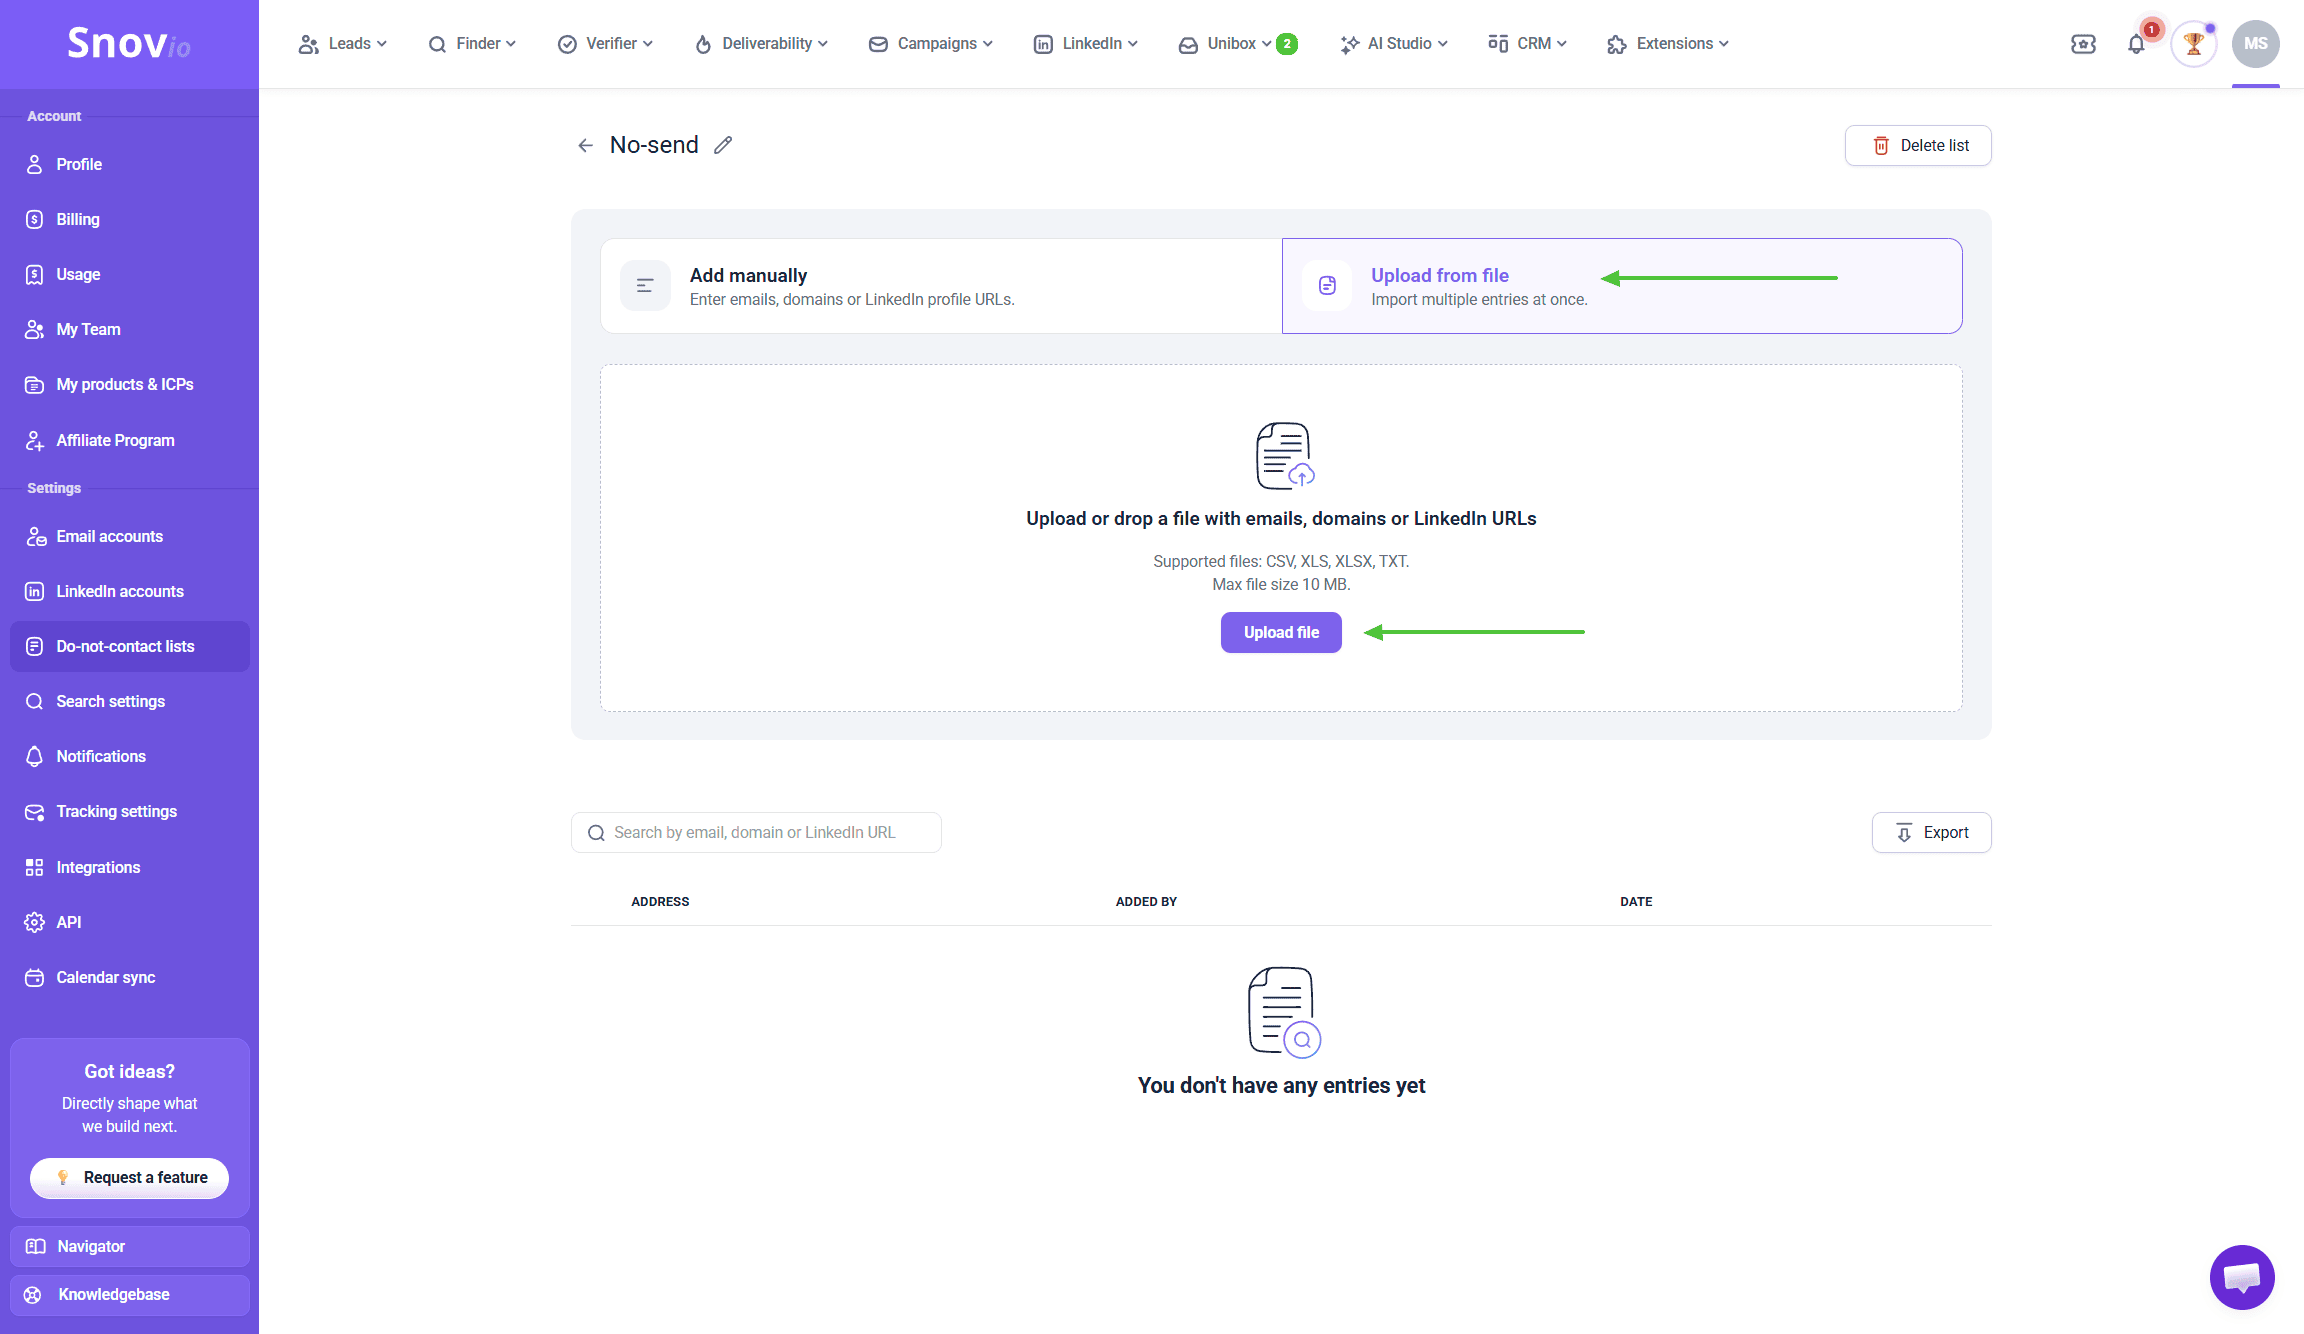
How to add contacts in bulk
You can also upload a file containing the contacts you want to add. Click Upload file and select the appropriate file from your computer.
If you have a list in Google Sheets or another online service, download it to your computer as a file first.
Note: The uploaded file must not exceed 10 MB in size. Each entry (email address or domain) should be on a separate line in the spreadsheet. Supported file formats are: CSV, XLS, XLSX, and TXT.
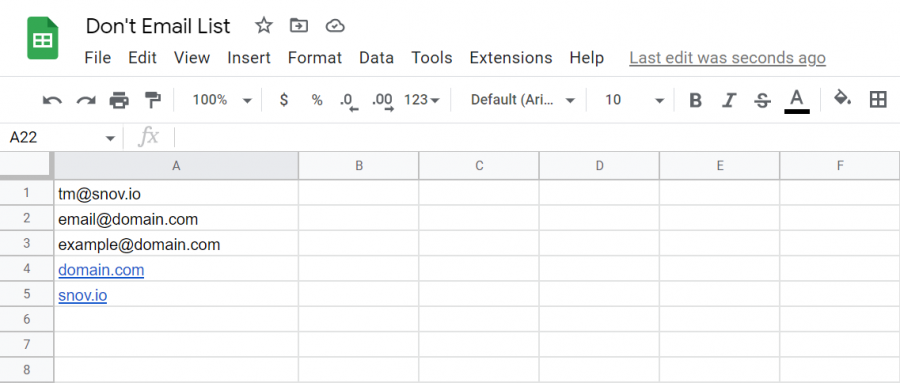
 Here’s an example of the correct file formatting:
To add correctly formatted contacts from your uploaded file, click Add valid entries.
Contacts with incorrect format are not added to the list. As we process your file, the invalid entries will be skipped—download the file with the errors and make sure to review them.
Adding contacts to the list doesn’t mean they are automatically blocked. You need to apply the do-not-contact list itself in the campaign settings for it to take effect.
Step 3: Add Do-not-contact list to campaign
You can add the required list in the Prospects step of the campaign settings while setting up your campaign.
The do-not-contact list is a required parameter for every new campaign; you cannot start a campaign without it. If you don't need to block any contacts, create and add an empty list.
It can only be added before the campaign launches and cannot be added or changed once the campaign is active.
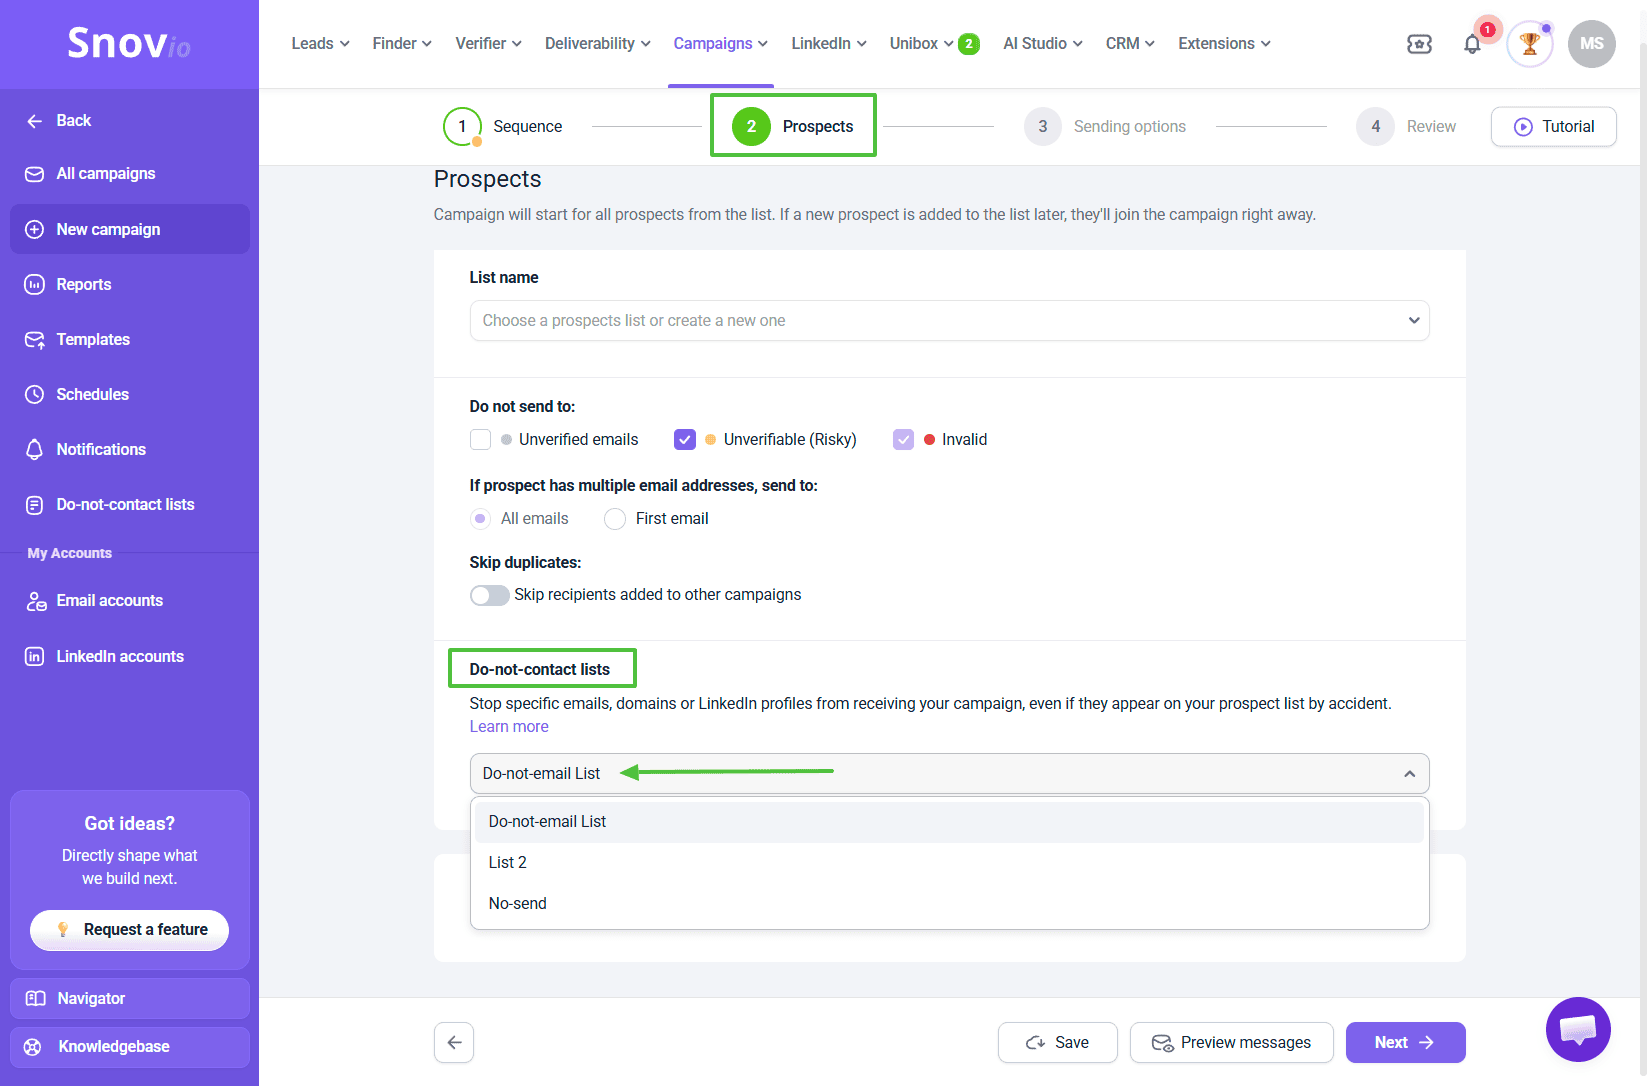
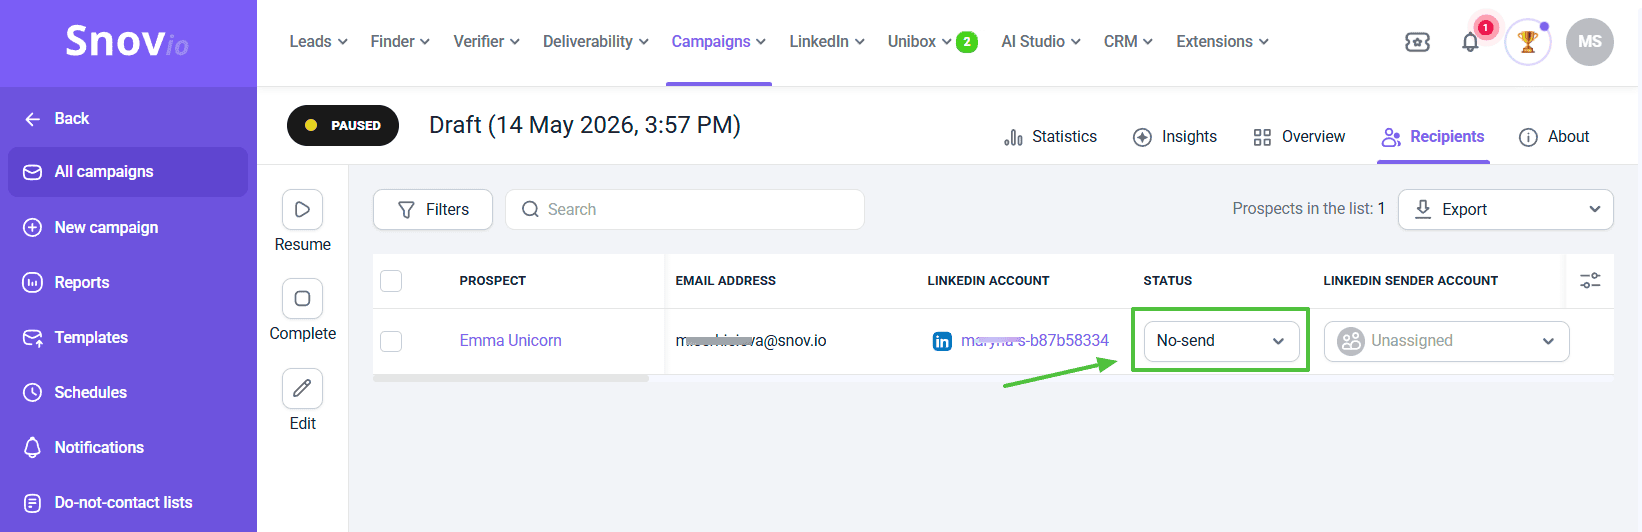
Contacts from the selected list will not participate in the sequence and will automatically receive a No-send status.
 In the Recipients tab of your campaign, you can add recipients who have requested removal from campaigns or those with a Bounced status (indicating they received a delivery error). Select the recipient and click the option in the quick action panel.
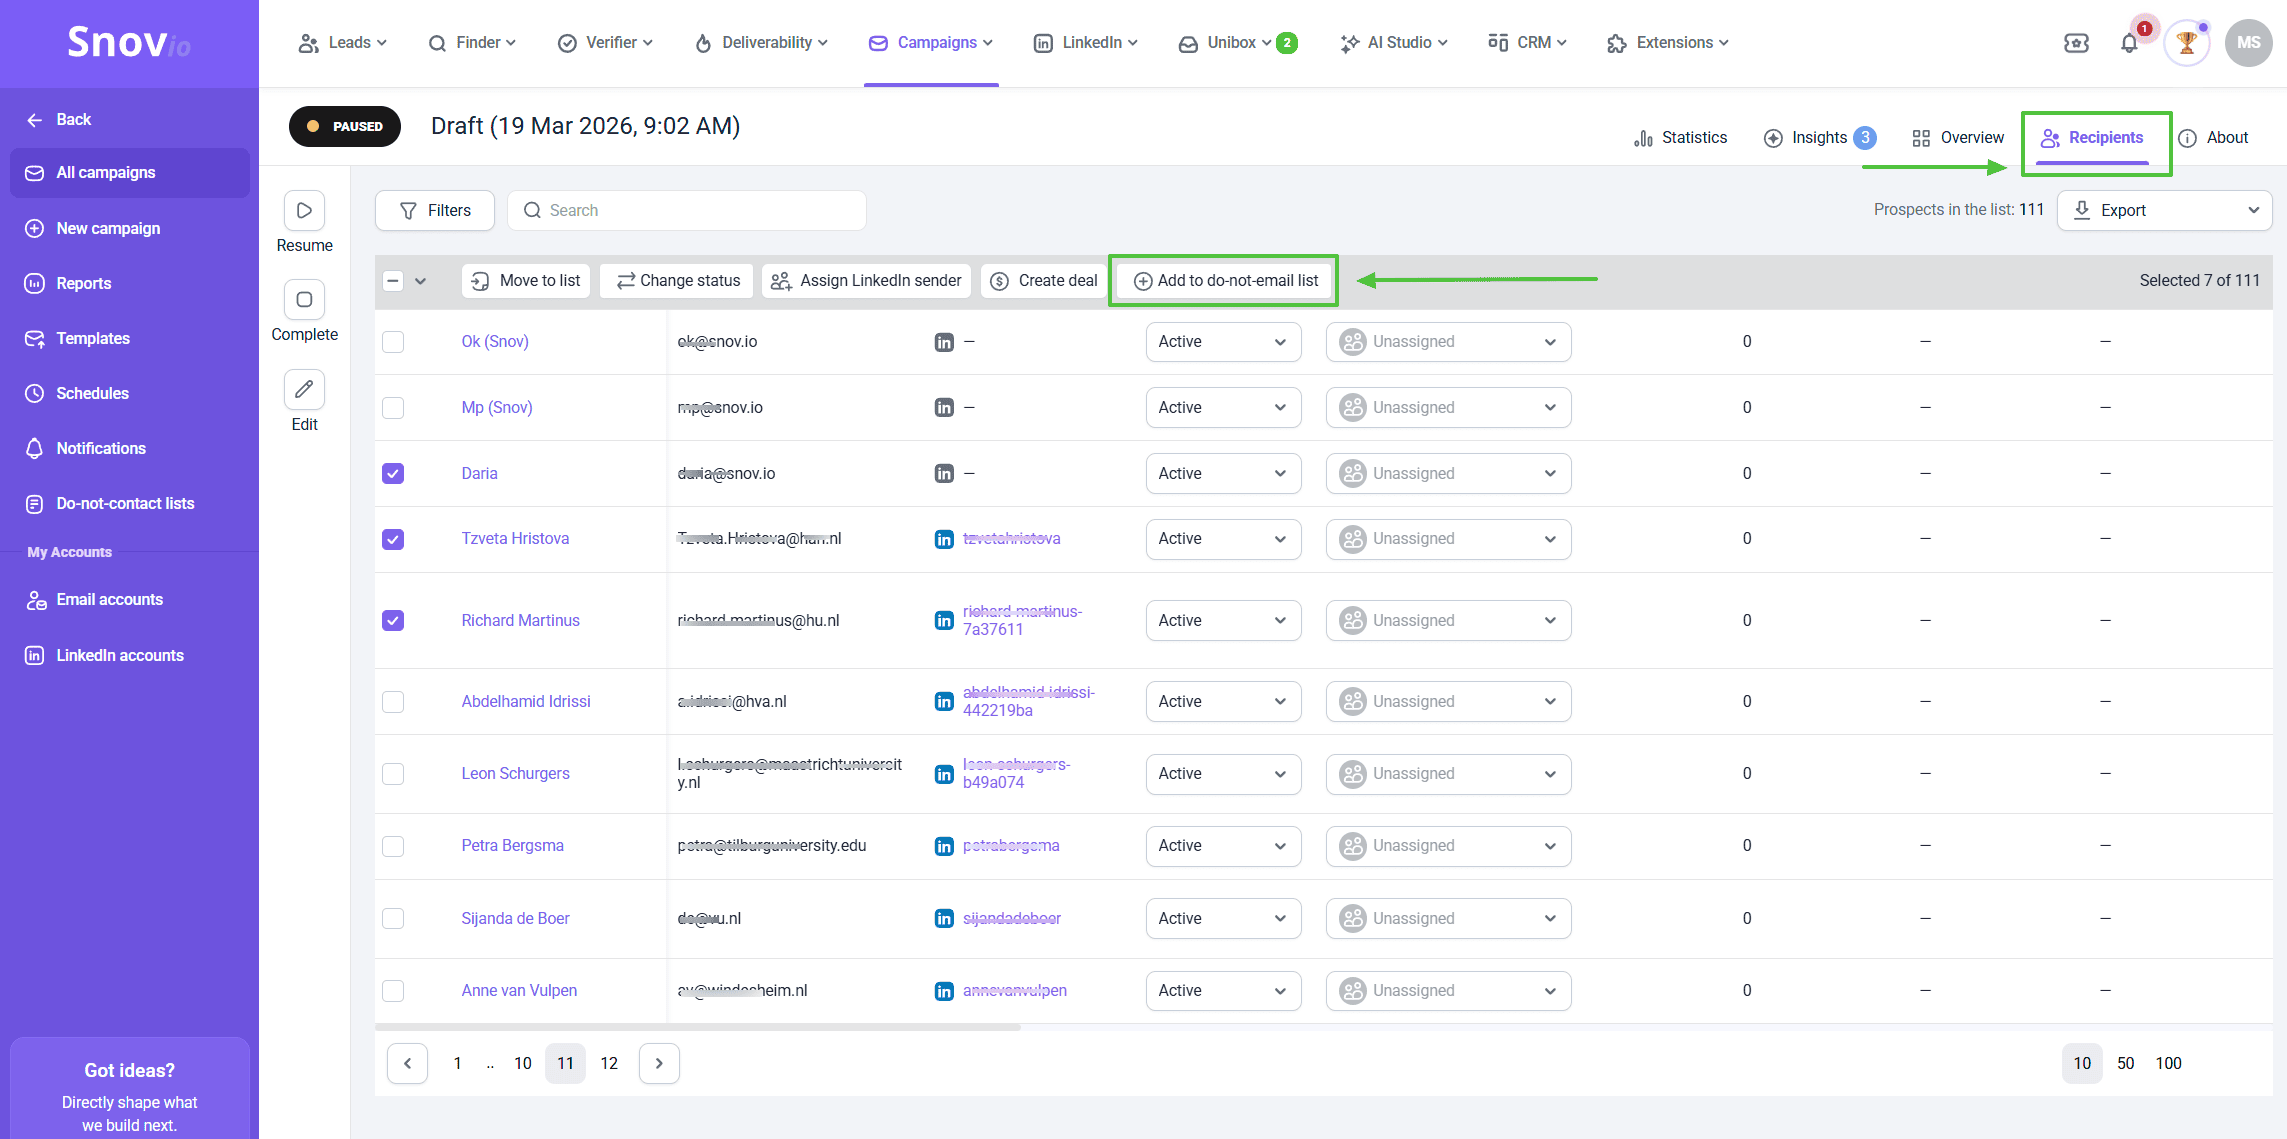
Using Do-not-contact lists in Team
Lists created by the team leader can be used in campaigns by team members. Team members with the appropriate permissions can also use lists created by other team members.
If you're a team leader, set member permissions for your team in the Team settings.
To allow team members to access the lists, set their permission to View team records.
Team members can access the lists but can only make changes (add or remove lists and contacts) to their own lists. Team leaders do not have these limitations.
If you have a question that wasn't answered here, don't hesitate to contact our Customer Care team. You can reach them at help@snov.io or through live support chat.

Sorry about that 😢
How can we improve it?