The Database Search tool provides you with access to Snov.io's database of prospects and companies.
You can find pre-verified leads based on your ICP (ideal customer profile) and use various search filters to get results that match your specific criteria.
The prospects you get from the database have verified email addresses and LinkedIn profile URLs, making them ready for engagement through the LinkedIn automation tool.
Before starting your database searches, define your ICP (ideal customer profile). If you're unsure where to begin, refer to this guide. The ICP outlines the characteristics of someone who would benefit most from your offer.
After researching your potential customers, you should have an ICP template similar to this: United States/Computer Software/51-200/Data Analyst. Use these parameters as search filters.
Now, here's how to set up a database search:
Step 1: Apply search filters
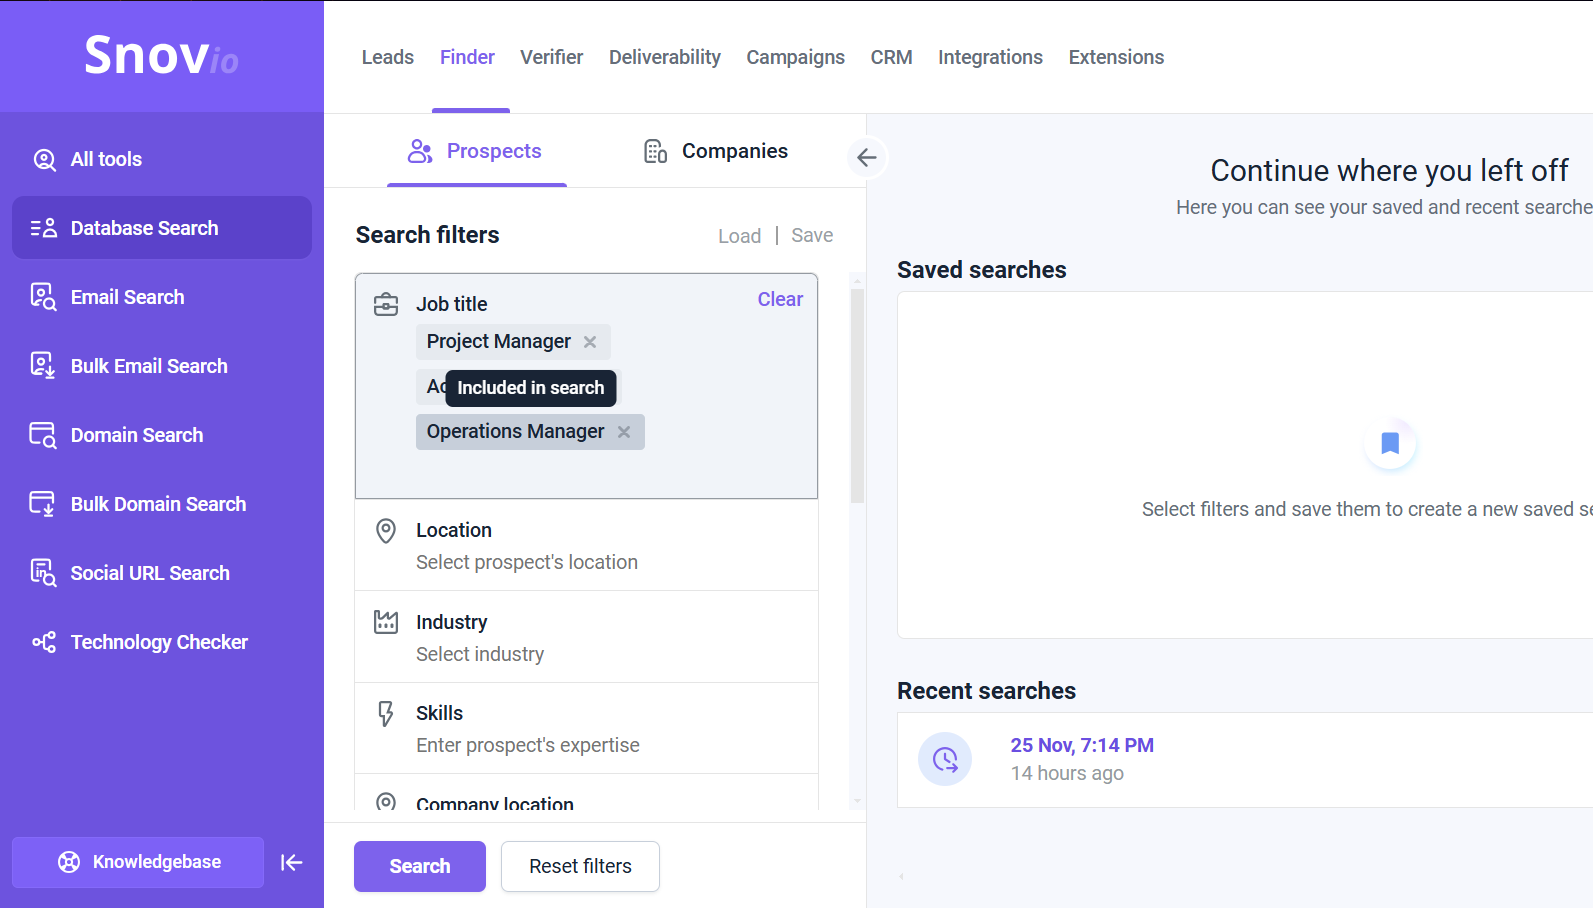
Go to the Database Search page. You can find it in the Finder section at the top menu. To search for prospect profiles, set up the search on the Prospects tab. Switch to Companies tab to search for company profiles.
Add filters for your search. Search filters for prospects include personal information (job title, skills, location) and company information (industry, company size, revenue).
There are 2 types of filter parameters:
- Include: means that selected keywords will be included in search results
- Exclude: means that selected keywords will be ignored in search results
You can add up to 10 parameters to each filter to refine your search results. For example, include up to 10 job titles in the job title filter. This is useful for targeting multiple criteria or adding similar keywords for the same role.
Once you've applied the filters, click the Search button.
Step 2: Select and add prospects to your list
When the search is complete, you'll see the Prospects found number at the top left, which means the total number of prospects available for your search filters.
Search results preview includes the prospect's name, job title, and company. The email addresses are not yet available until you add prospects to your list.
There are a few flexible options to save the search results, including adding prospects to your list in bulk.
1) Save selected:
While reviewing the search results, manually select the required prospects (using the checkboxes on the right). Then, click Add to list to start email search and save prospects to your list.
Use the Unselect all option to clear your selection in one click and start again if needed.
2) All on page (save 50 prospects at once):
Use the All on page option to select and save all prospects from the currently active page (50 prospects per page). To open the next page of prospects, click Next at the bottom.
3) All search results (save all prospects at once):
Use this option to select all prospects found in the current search. Then, click Add to list at the top to save the results to your list in bulk.
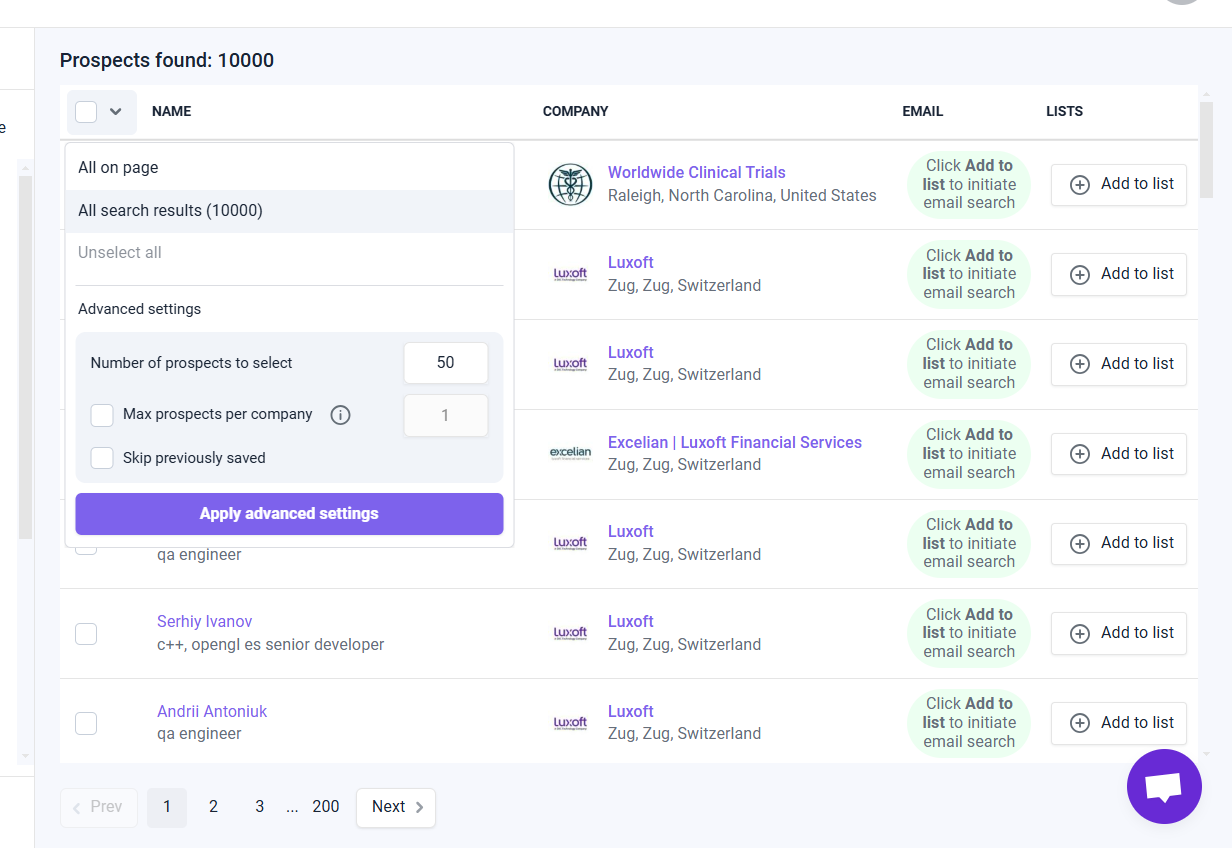
To add prospects in bulk, click the checkbox in the top-right corner and choose "All on page" or "All search results."
The bulk-saving of all results and advanced settings are available on premium plans (Pro 5K or higher). Upgrade your plan in the billing settings to get access.
Advanced search settings
The bulk options menu also includes settings to customize the total number of prospects you save from the search results.
Note: The advanced settings apply only to the current search results. Don’t forget to adjust them as needed in future searches.
- Number of prospects to select (select exact number of prospects)
Set the number of prospects you want to save from the current search. Use this option when you know exactly how many prospects you need based on your filters.
- Max prospects per company
Set the maximum number of prospects you want to save from one company within the current search. This limit may be useful to save a specific number of prospects you plan to contact from each company and avoid saving more than required.
- Skip previously saved
Enable this option to avoid saving prospects you’ve already added in previous searches. This helps prevent duplicate prospects from appearing in your lists.
Note about alternative emails:
In rare cases, you may notice that the domain in a prospect's email address is different from the company name in the search results.
Here’s why: If no valid email is available for the current company, we’ll search for an alternative email address from the prospect’s employment history.
This email still belongs to the same prospect but is associated with their previous company. You will be charged for adding alternative emails only if their status is valid (green) or unknown (yellow).
Saved and recent searches
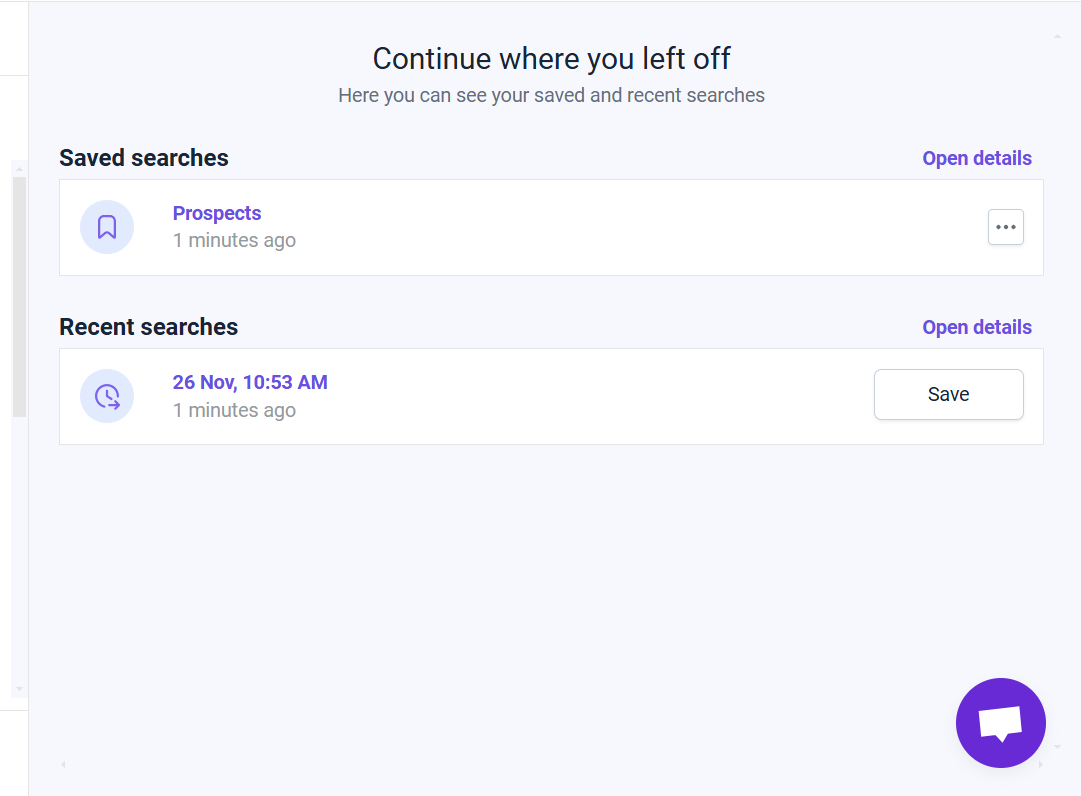
Your previous searches are saved in the Recent searches section on the right. You can also Save these recent searches if you need to repeat them with the same parameters later.
Under Saved searches, click any entry to view its details and apply the saved filters to a new search. This makes it easy to quickly set up a search using the same filters and save more prospects that match those criteria.
FAQs
1. How much credits does it cost to use Database Search?
Using the search function to check the number of prospects available for specific search filters is free. It costs 1 credit to add a prospect to your list if their email is green (valid) or yellow (unknown). Searching and saving companies is free. However, viewing a company profile and its available contact information costs 1 credit.
You won’t be charged for prospects without email addresses or for duplicates that you have already saved.
2. Are the prospects in your database up-to-date?
Our goal is to provide you with the most relevant prospect information and accurate email addresses. We update email verification statuses for older records to ensure they are valid when you add them to your list.
3. Are there any limits on how many prospects I can find and save?
On a free Trial plan, a single search can provide up to 50 prospects or companies. On premium plans, a single search can provide up to 10,000 prospects or 5,000 companies. The number of prospects you can add to your lists depends on your plan and available credit quota. Adding one prospect costs one credit.
If you have a question that we haven't covered, feel free to reach out to our Customer Care team. You can contact us at help@snov.io or through live chat. We're here to assist you!


Sorry about that 😢
How can we improve it?