This article shows you how to enable browser notifications for prospect actions in your email and LinkedIn campaigns.
Why set up notifications:
You’ll receive real-time alerts whenever there’s engagement from prospects in your campaigns. This way, you can follow up while you still have their attention and keep the conversation going.
To set them up, go to your account settings and select Notifications from the left menu.
Choose notification triggers
In the settings, select which actions will trigger notifications. Every time a selected action happens in any of your active campaigns, you’ll receive a notification.
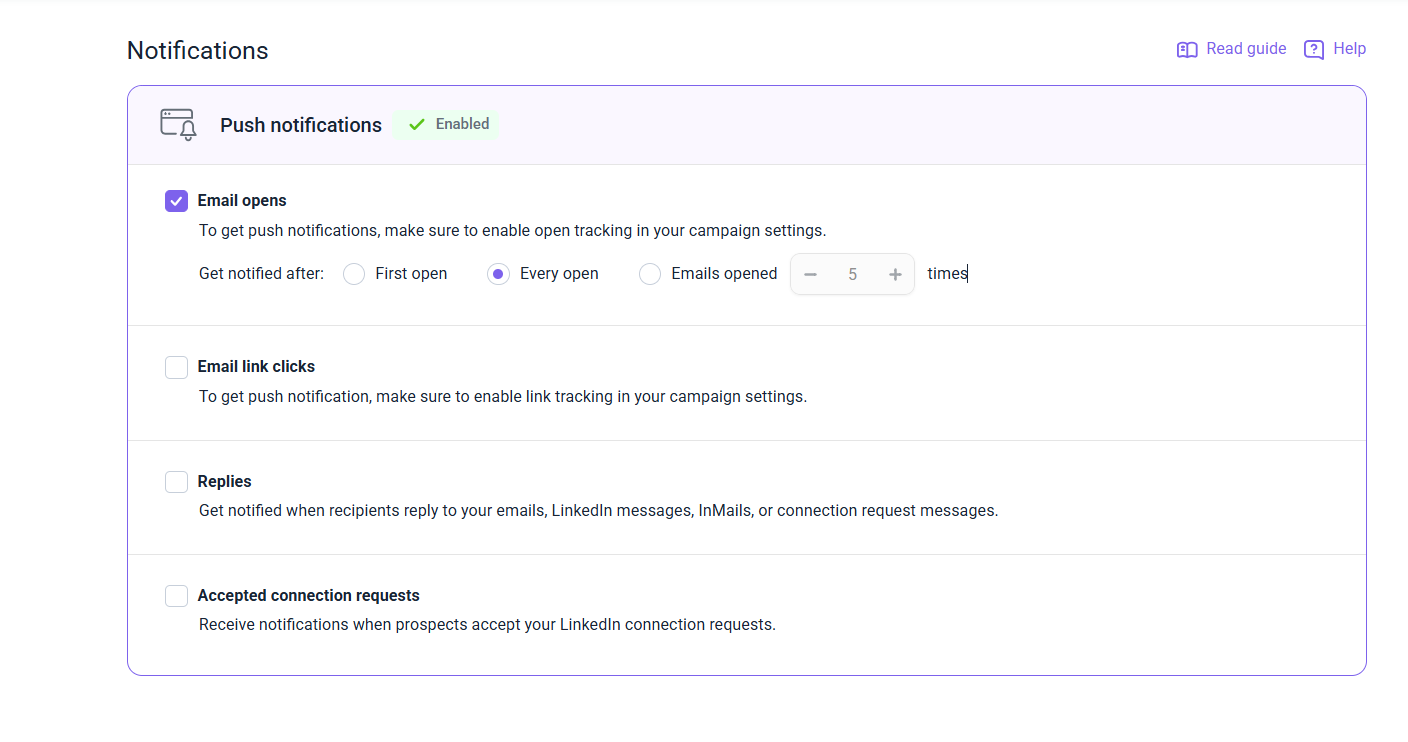
1) Email opens
Choose this trigger to get notifications when recipients open any of your emails.
For email opens, choose when you’d like to be notified about:
- After first open: Get a notification when a recipient opens your email for the first time.
- After every open: Get a notification each time the recipient opens your email.
- After emails opened: Set the number of times a prospect needs to open an email before you receive a notification.
For example, if you set it to 5, you’ll start receiving notifications only after the recipient has opened your campaign emails five times.
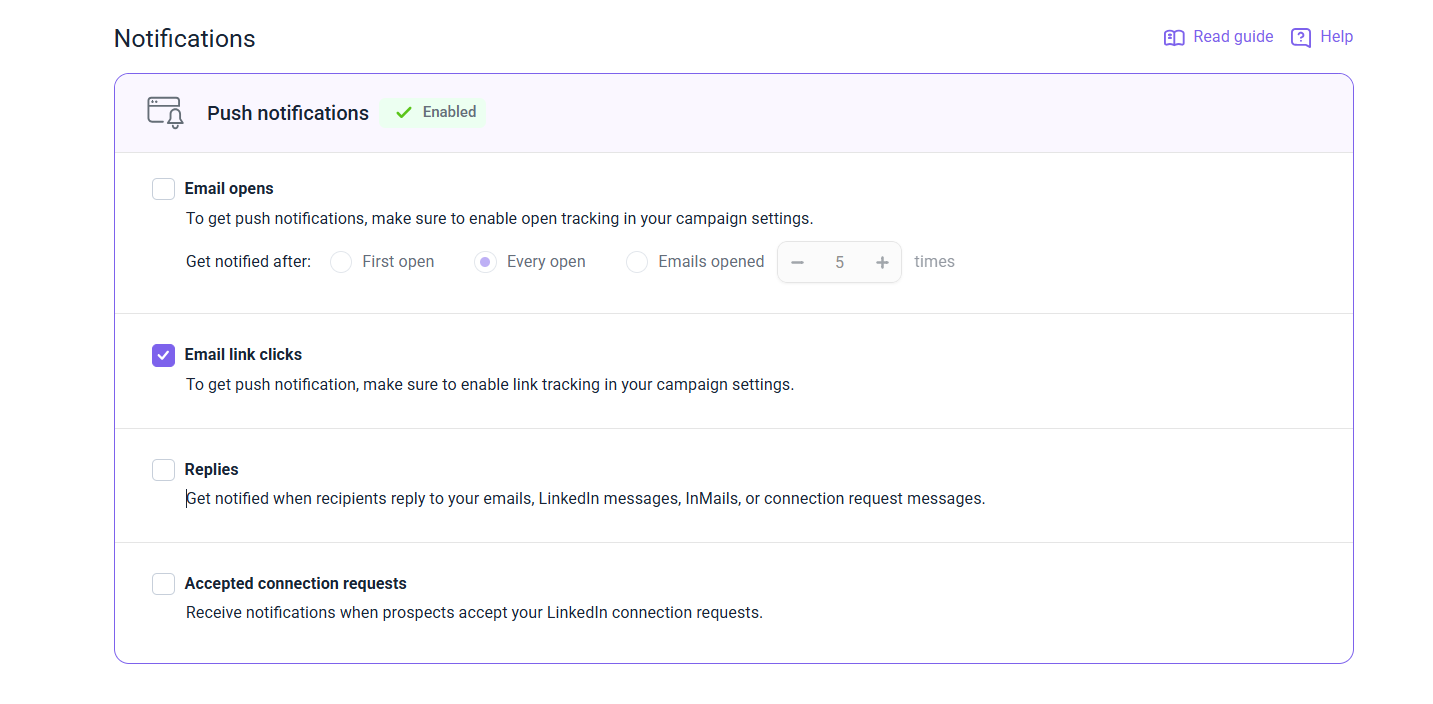
2) Link clicks in emails
Choose this trigger to get notifications when recipients click a link in any of your emails.
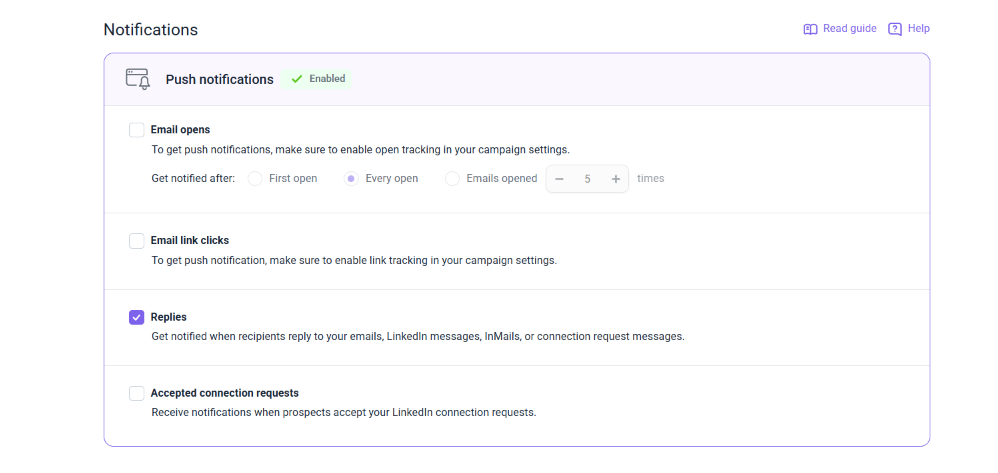
3) Replies (email + LinkedIn)
Choose this trigger to get notifications when recipients reply in any of your active campaigns. This includes replies to emails and LinkedIn messages, such as regular messages, InMails, and connection requests.
To receive notifications for LinkedIn replies, your sequence must include a Message action.
Email reply tracking is enabled by default, but if your email account has IMAP errors, replies can't be tracked. To receive notifications, ensure your IMAP connection is active.
4) Accepted connection requests (on LinkedIn)
Choose this trigger to get notifications whenever a prospect accepts your LinkedIn connection request.
For this notification to work, your campaign sequence must include a Send connection request action.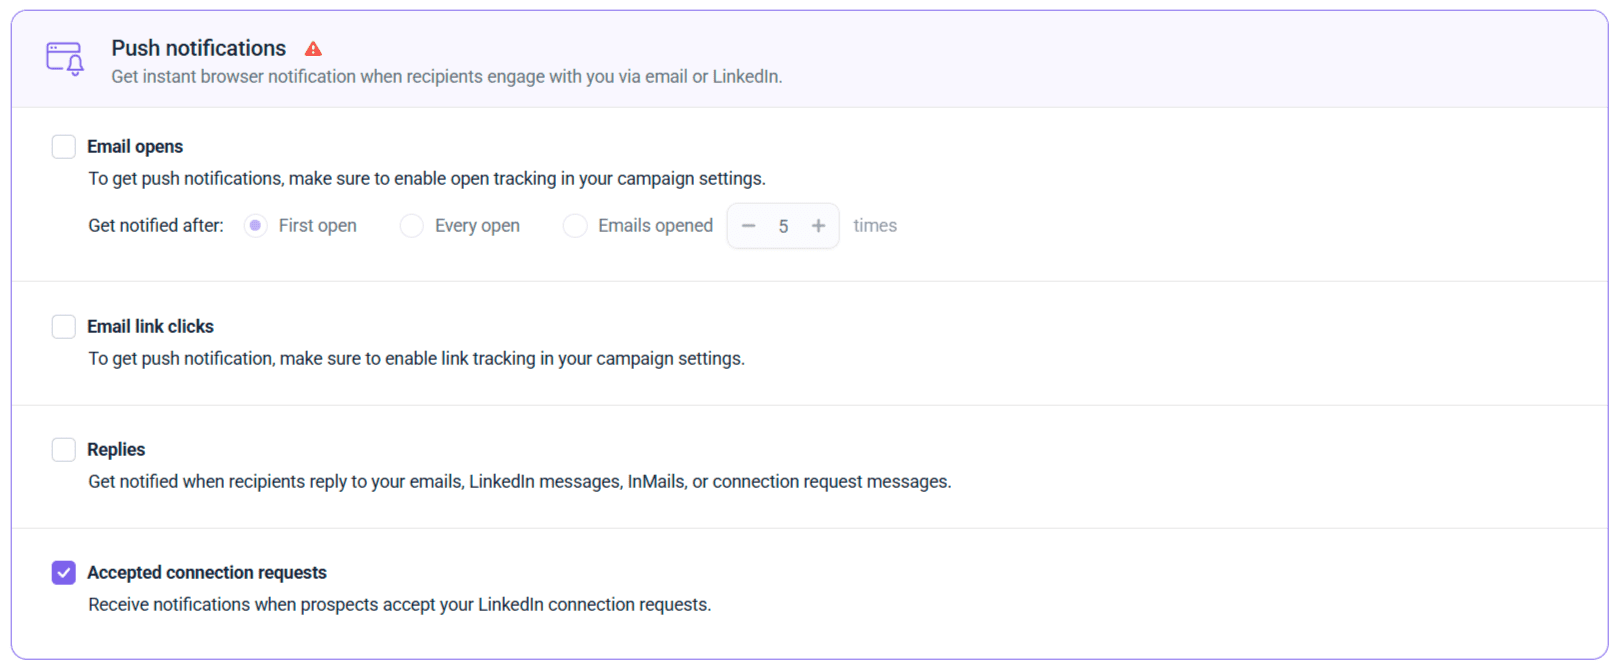
Allow notifications in your browser
Click Save at the bottom to apply your settings. Then, make sure to allow Snov.io to send notifications in your browser to complete the setup.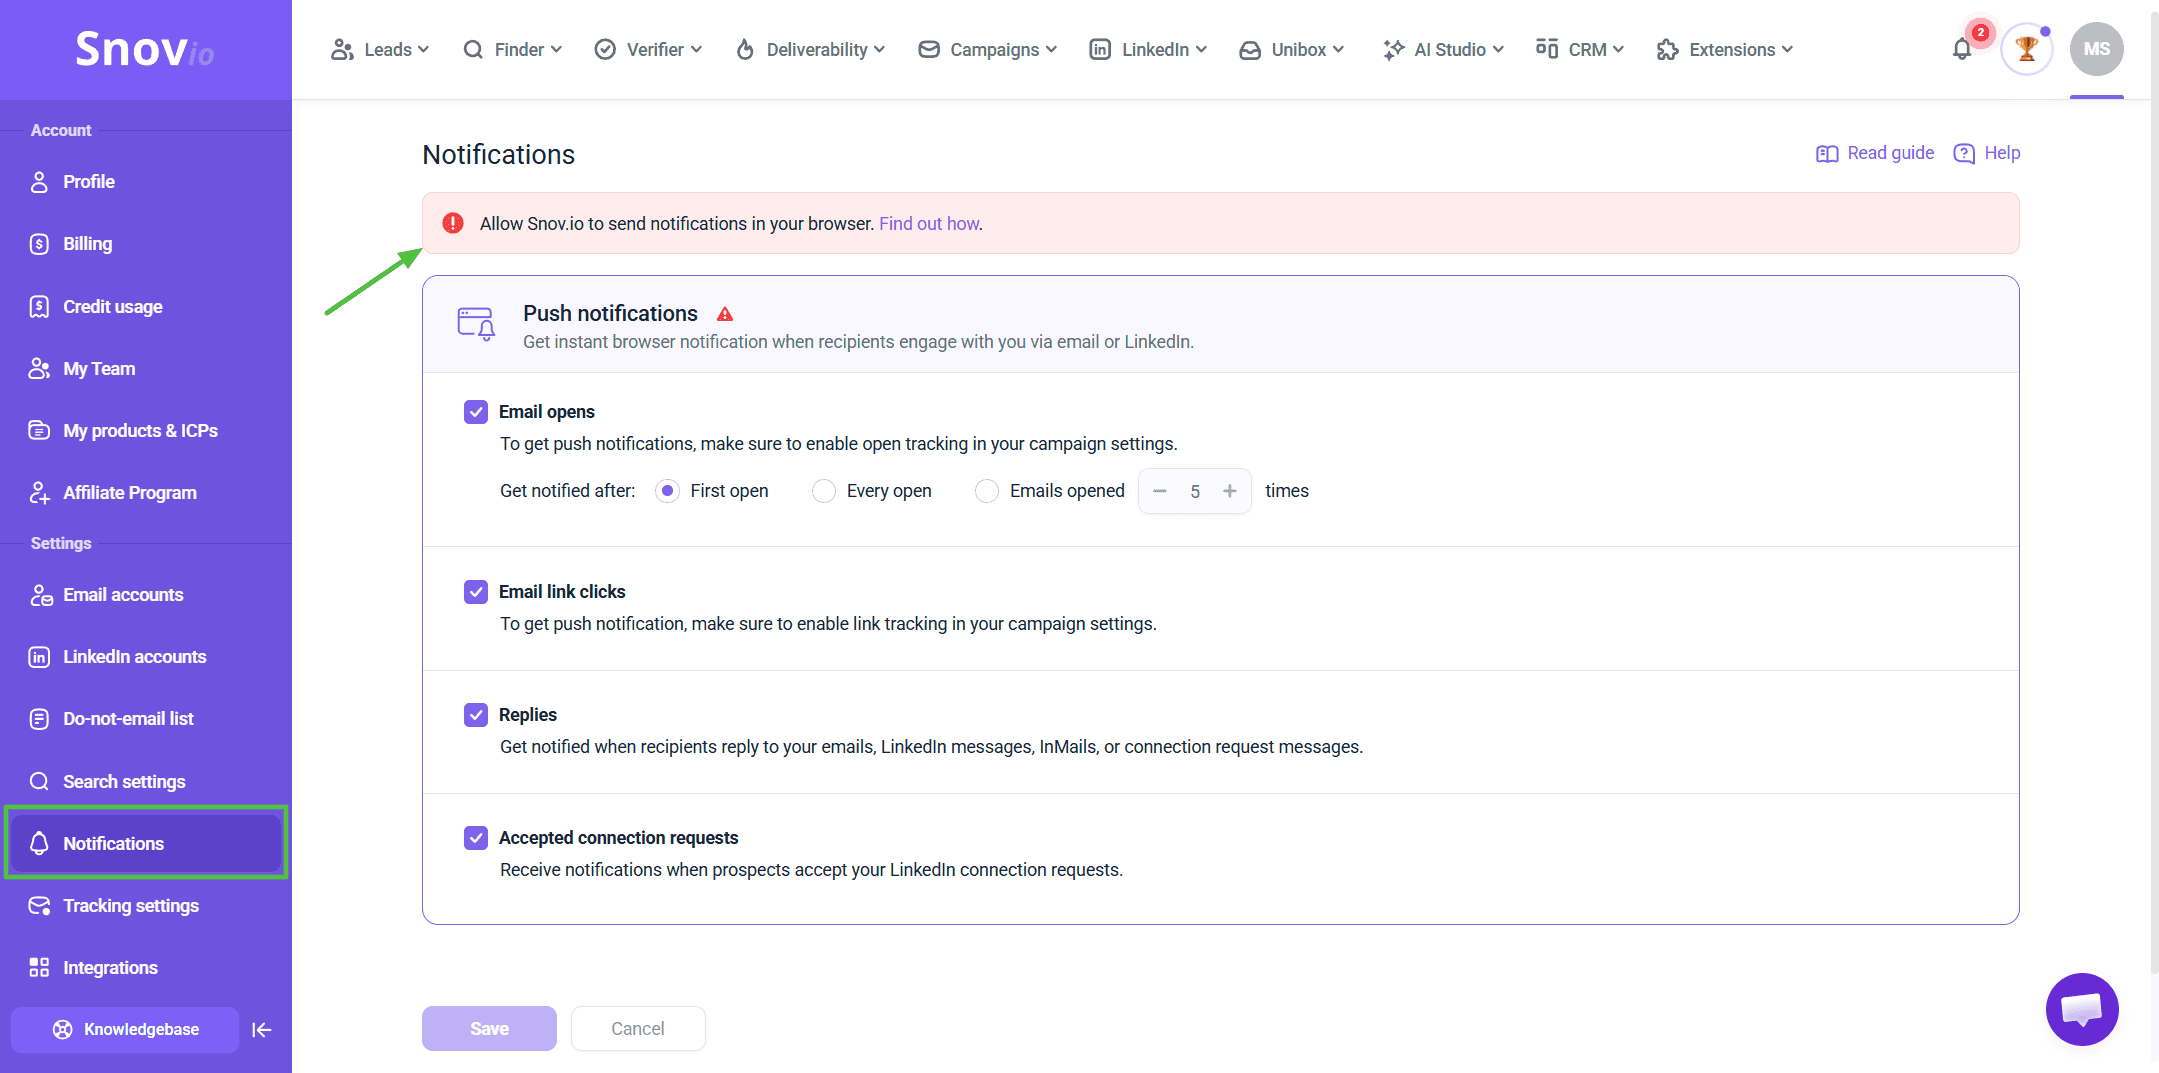 If a window pops up in your browser asking for permission to show notifications, allow it. If not, you may need to enable notifications in your browser settings.
For a quick way to do this, click the icon in the address bar at the top right. This will open the site settings — switch the toggle next to Notifications to enable permission. To apply updated settings, reload the browser page.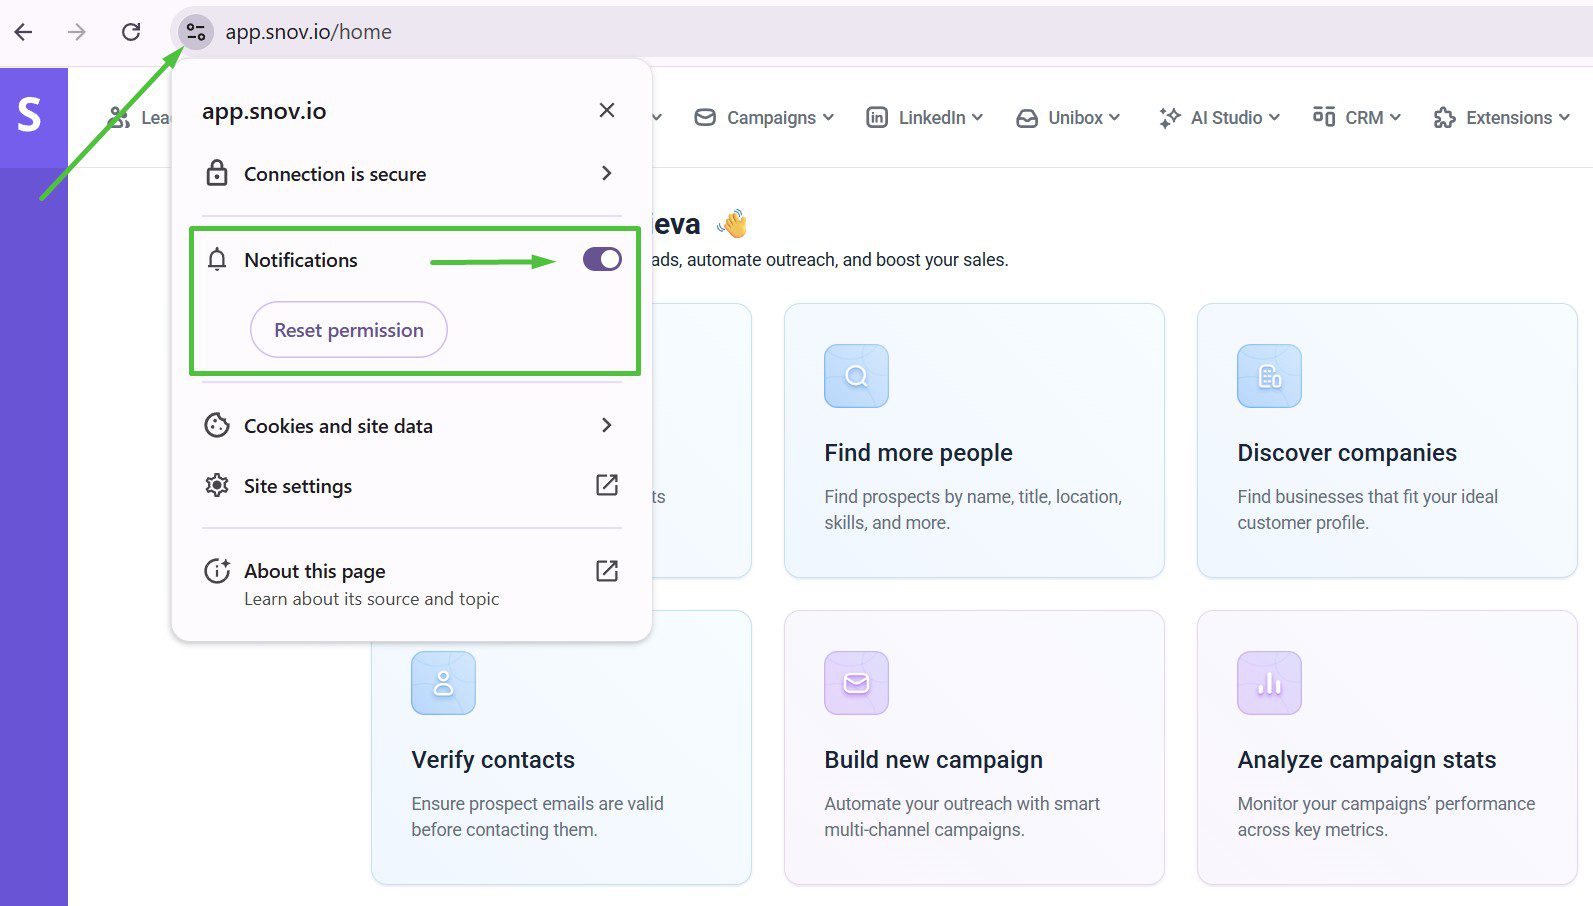
Get notified when leads engage
Once you’ve allowed notifications, you’ll see Enabled displayed at the top of the page, confirming that everything is set up correctly.
You’ll get instant notifications in your Chrome browser whenever recipients take actions that match your settings. These notifications will appear even if the Snov.io window isn’t active.
Now, just wait for your recipients to engage. When a notification pops up, click it to view the details in your Snov.io account.
Not receiving notifications? Check troubleshooting steps here.

If you feel that this article doesn't address your question, please don't hesitate to reach out to our support via help@snov.io or live chat.

Sorry about that 😢
How can we improve it?