In this article, you'll learn how to track clicks on links in your emails, how link tracking works, and how click rates are calculated.
Link tracking is a premium feature not included in the free trial plan. Upgrade to any paid plan to track clicks and monitor engagement in your campaigns. You'll be able to see click statistics and create personalized follow-ups for prospects who click links in your emails.
By tracking links in your emails, you can see which prospects clicked and how many times. This also gives you access to the click rate, a key engagement metric that helps measure the effectiveness of your campaigns.
- How does link tracking work
- How to enable the link tracking option
- How to add tracked links to your email
- How click rates are calculated
- How to monitor your click rate
- How link tracking could harm email deliverability
How link tracking works
We add a tracking snippet that redirects to our tracking domain to your original link in order to track clicks. A tracking snippet is necessary to track a click and include it in your campaign statistics.
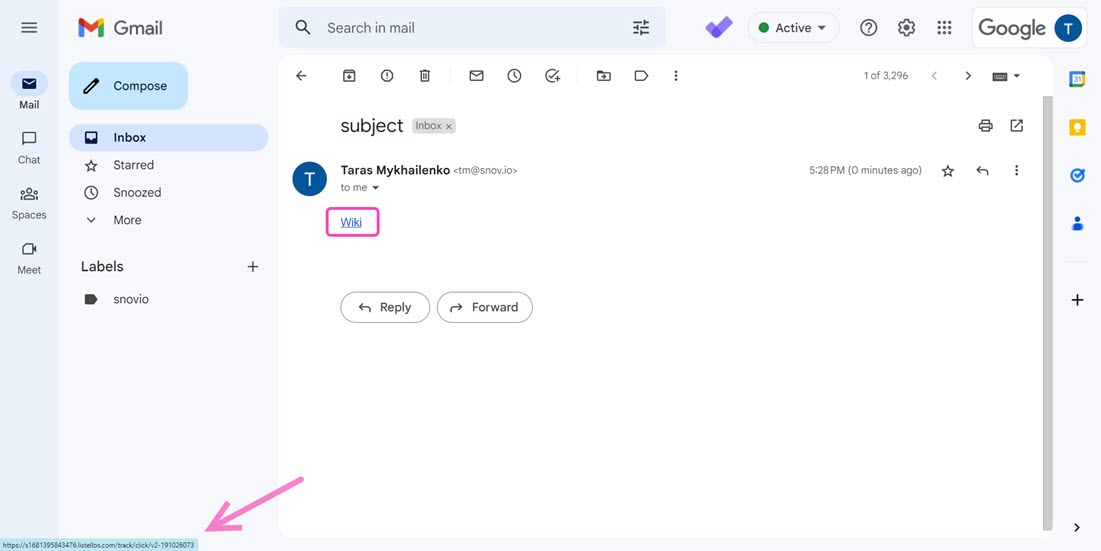
Enabling link tracking changes the appearance of the original link by adding a tracking snippet. The tracking snippet will have a format such as https://s1681395843476.com/track/click/v2-191026073.
When recipients click on a link, we register that click on our server and then immediately redirect them to the intended web address.
Generally, the recipient is hardly aware that the link is being tracked. However, if they hover over the link before clicking it, they can see a tracking snippet URL in the bottom left corner.
How to enable the link tracking option
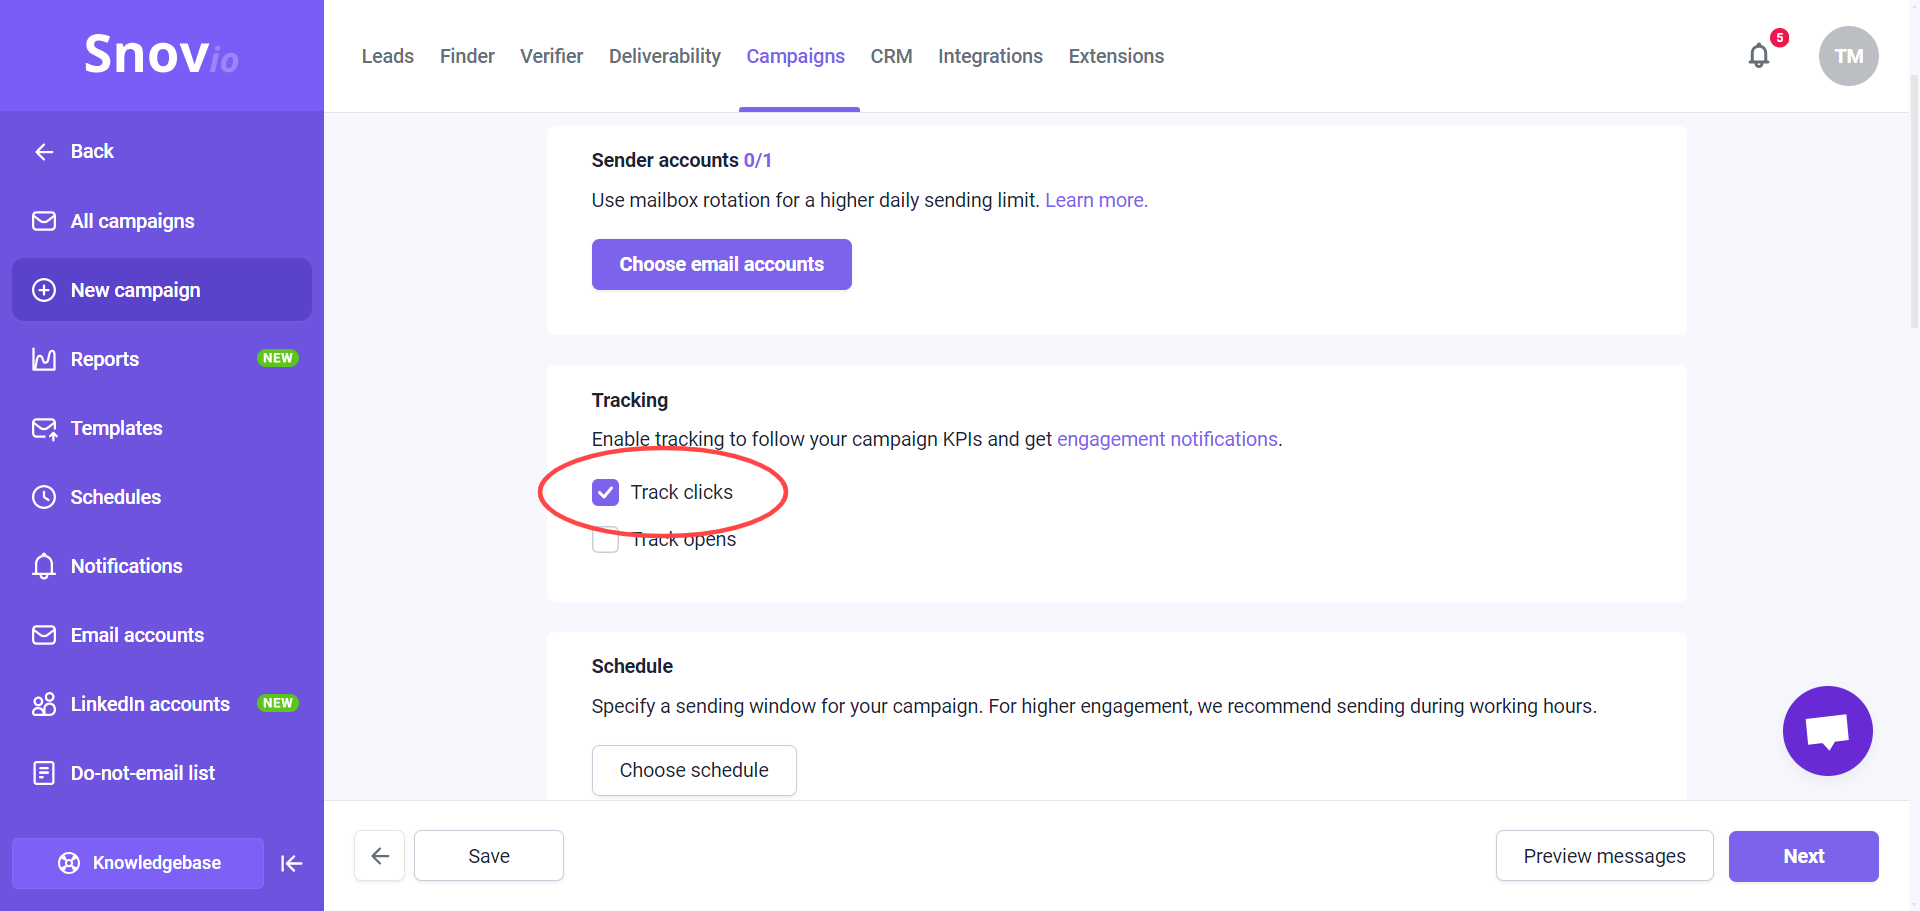
Link tracking is disabled by default in all email campaigns. To track the click rate, you can enable it in the tracking settings when setting up a new campaign or by editing your ongoing campaign.
To enable link tracking:
In our campaign editor's Sending options step, locate the Tracking section and enable Track clicks option by checking the box.
How to add tracked links to your email
Tracked links can hurt your deliverability because spam filters notice when the link name and content don't match.
When including a tracked link in your email, it's important to anchor it to a text phrase. For example, instead of using direct links like https://snov.io/blog/, provide descriptive names like "Click this link" or "Check out our blog".
To add a tracked link:
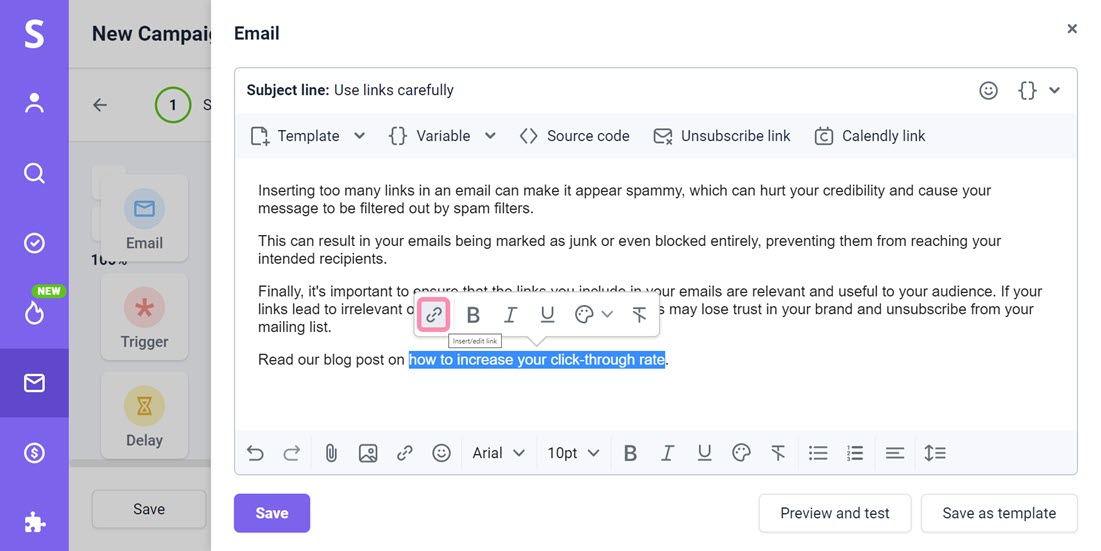
Highlight the part of the text in the email editor where you would like to insert a link.
Click "Insert/edit link" on the toolbar below.
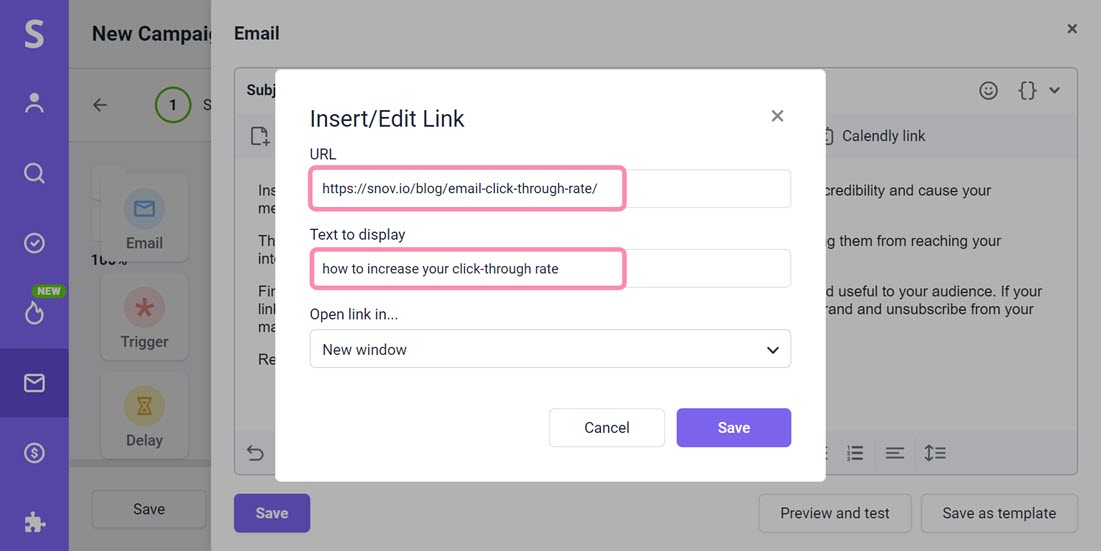
Insert the URL of the page that you want your recipients to visit.
Click the Save button.
How click rates are calculated
To determine the click rate for an email campaign, the number of unique clicks (A) is divided by the number of emails delivered: emails sent (B) minus emails bounced (C).
For example, if your campaign delivered 200 emails and there were 30 unique clicks, then the click rate would be 30 divided by 200 multiplied by 100%, which equals 15%.
To put it another way, the click rate is the percentage of recipients that have clicked at least one link in your campaign.
How to monitor your click rate
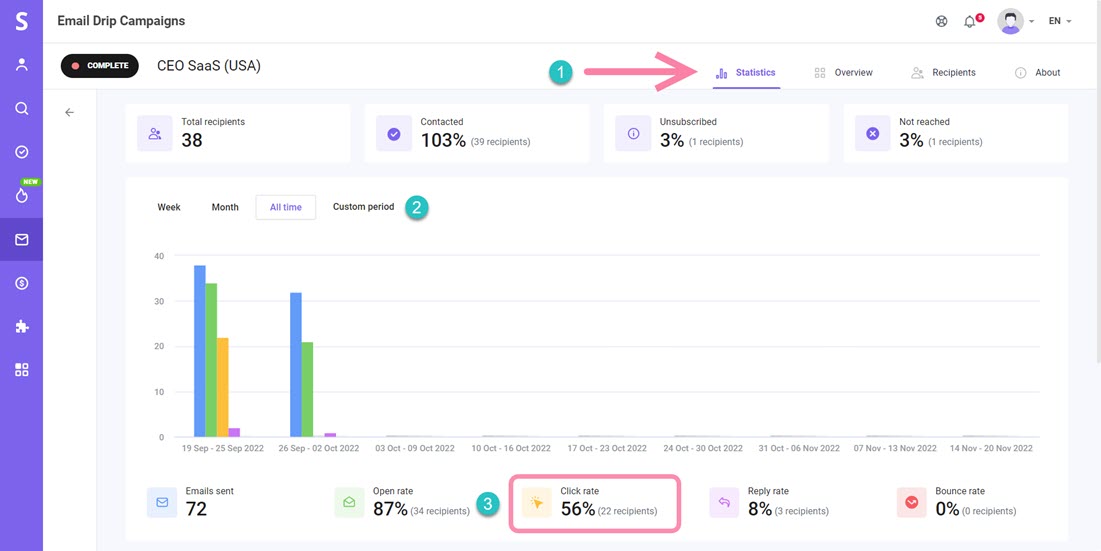
You can view the statistics report for your campaign to monitor the overall click rate.
- Select a campaign from your Campaign Overview page.
- Open the Statistics tab on the campaign's dashboard.
- Select the time period for which you would like to display statistics.
Check the Click rate below, which displays the percentage and the number of recipients who have clicked at least one link in any email sent during the selected period.
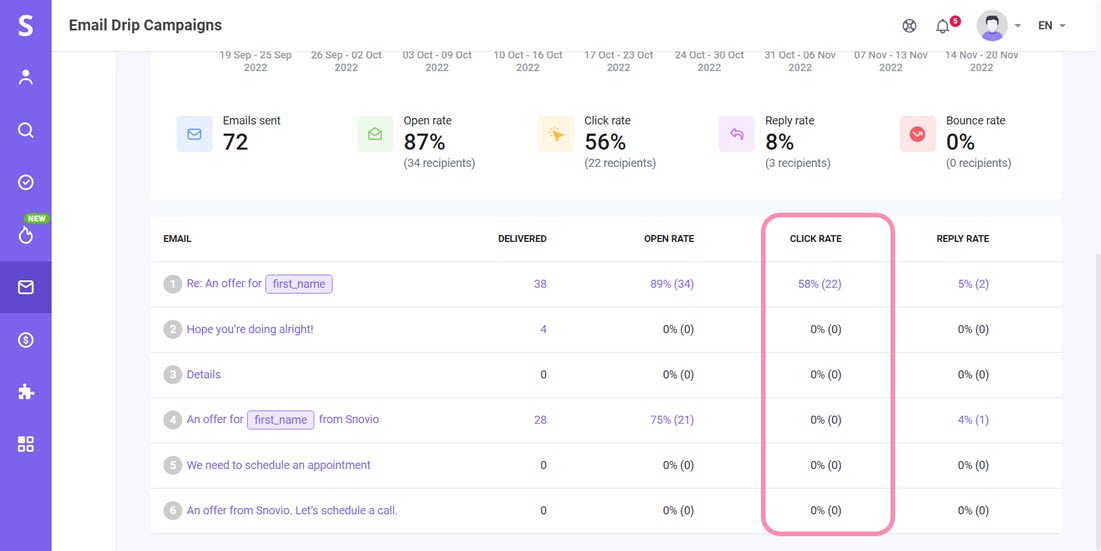
If you want to view the click rate statistics for a particular email in your sequence, scroll down on the Statistics page.
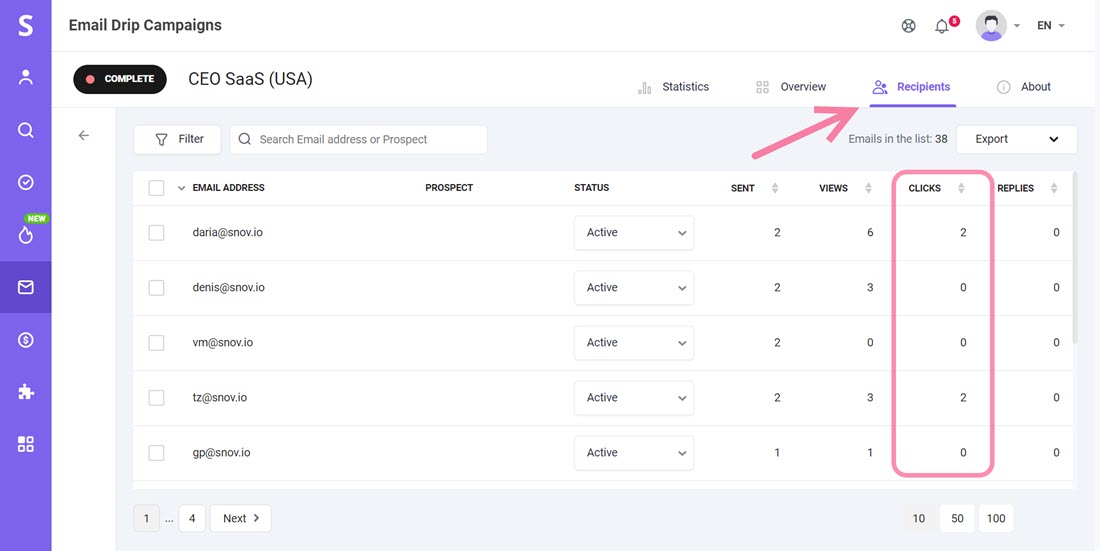
When a recipient clicks on a link in your email, this action is logged into Clicks count on the Recipients tab of your campaign and also displayed in the Recent Activity timeline in the prospect's profile, to let you to track their engagement.
If you want to analyze the performance of particular campaigns, you can compare their reports.
How to export campaign reports ⇒
You can also segment the list of recipients who have clicked on links and export it as a separate file.
How to filter recipients based on their engagement ⇒
How link tracking could harm email deliverability
In some cases, the use of tracked links in your email may trigger spam filters because the URL address of the link does not match its name.
If you are already struggling with high bounce rates, avoid using link tracking for some time. Using your custom tracking domain instead of our default tracking snippets will help reduce the negative impact slightly and improve your deliverability while using link tracking.
Learn how to set up your Custom Tracking Domain here⇒.
FAQs
Here are some frequently asked questions about click rates, along with their answers.
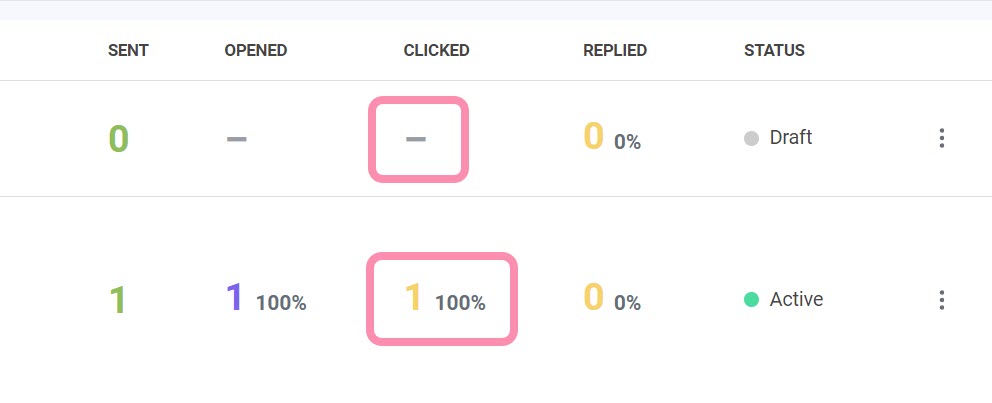
1) How can I know if the link tracking is on or off in my ongoing campaign?
If link tracking is enabled, you will see a number and a percentage in the statistics preview on your campaign list.
If it's disabled, you will see a dash.
2) If the statistics show that a recipient has clicked on a link multiple times, how can I be sure it's accurate?
If your recipient manually forwards the email to a teammate, any subsequent clicks by those additional recipients will be added to the click count for the original recipient.
3) Why is my click rate so low? How can I improve it?
Read our blog post for tips on how to increase your click-through rate.
What's next:
By adding click tracking as a condition in a trigger element, you can build a campaign sequence based on your prospects' engagement level and send more personalized messages to those who clicked on a link in your email. To learn more, read this guide.
If you need assistance with something that we haven't covered in this article, please contact us at help@snov.io or through our live support chat.


Sorry about that 😢
How can we improve it?