This guide provides practical tips on creating email content that is relevant for your prospects and follows best practices for email deliverability.
Step 1: Add email content to campaign -->
Step 2: Add email components -->
Step 3: Preview and test email -->
Effective email content is crucial for your campaign's success. To land in the primary inbox and get more positive responses, your emails should follow best practices and be relevant to your recipients.
In Snov.io’s email editor, you can craft personalized emails with all the necessary components: text, images, links, variables, etc.
To create email content in Snov.io:
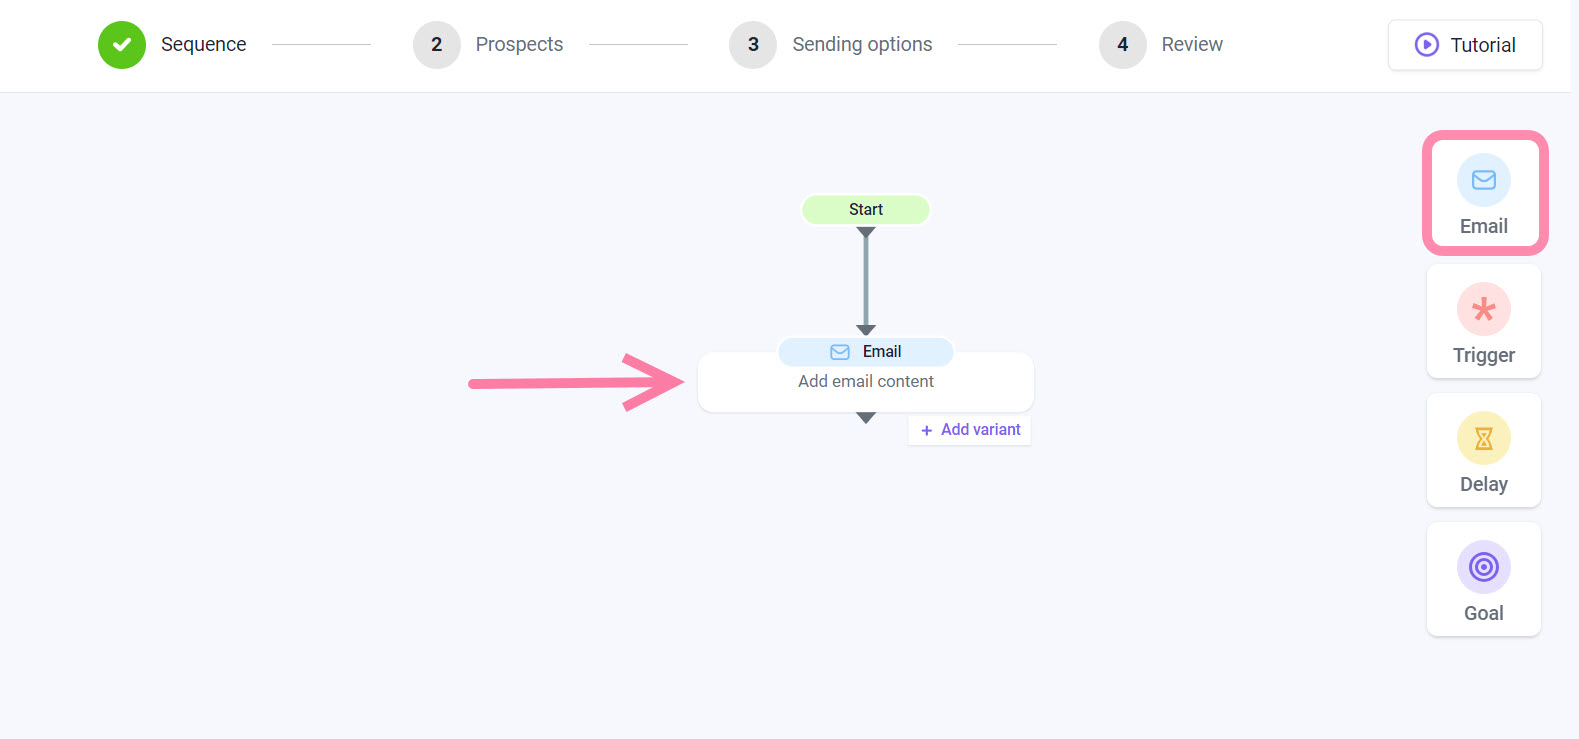
In the Sequence step of the campaign builder, find the Email element in the right-side menu.
Drag and drop it into the sequence field or click to place it directly. After that, click on it (where it says Add email content) to open the email editor.
How to add email components for higher engagement
Every part of an email plays a crucial role in making it effective. Now, let's dive into tips and insights for each component.
1) Add subject line
A subject line is what helps your email be noticed and opened. Don’t make it long or sound like a sales pitch; it should be short and clear, ensuring it is fully visible in email previews, especially on mobile devices.
Highlight the email's purpose in it, so your subject line immediately draws interest. Always include {{first_name}} or {{company_name}} variables – your leads are more likely to notice emails that are addressed to them.
2) Add personalization
Personalized emails have a higher chance of landing into the primary inbox and getting a response. The minimum you should always do is incorporate {{first_name}} or {{company_name}} variables throughout the email content.
The best personalization means the email is focused on your lead -- show that you care about them and have done your research. When you get more specific, addressing leads' pain points and finding common ground in your emails, it makes your message more relevant.
Read more tips on how to personalize content to get more replies -->
Dynamic variables:
Dynamic variables automatically change the email content based on conditions you choose. The condition could be the recipient's position or other information from their profile. For every condition, you can add a specific, personalized piece of text.
Learn more on how to add dynamic content →
Spintax:
Add variables that randomize words or phrases and automatically create email variations. It helps sending unique emails in bulk for better deliverability.
Learn more about using Spintax in your email content →
Regular email variables:
In Snov.io campaigns, you can use your lead data to personalize your emails automatically. This is done by uploading lead details into custom data fields you can create during list import or manually.
Snov.io will automatically generate variables for these fields, which you can insert into your emails. These variables will be replaced with lead details or custom text specific to each recipient once the email is sent.
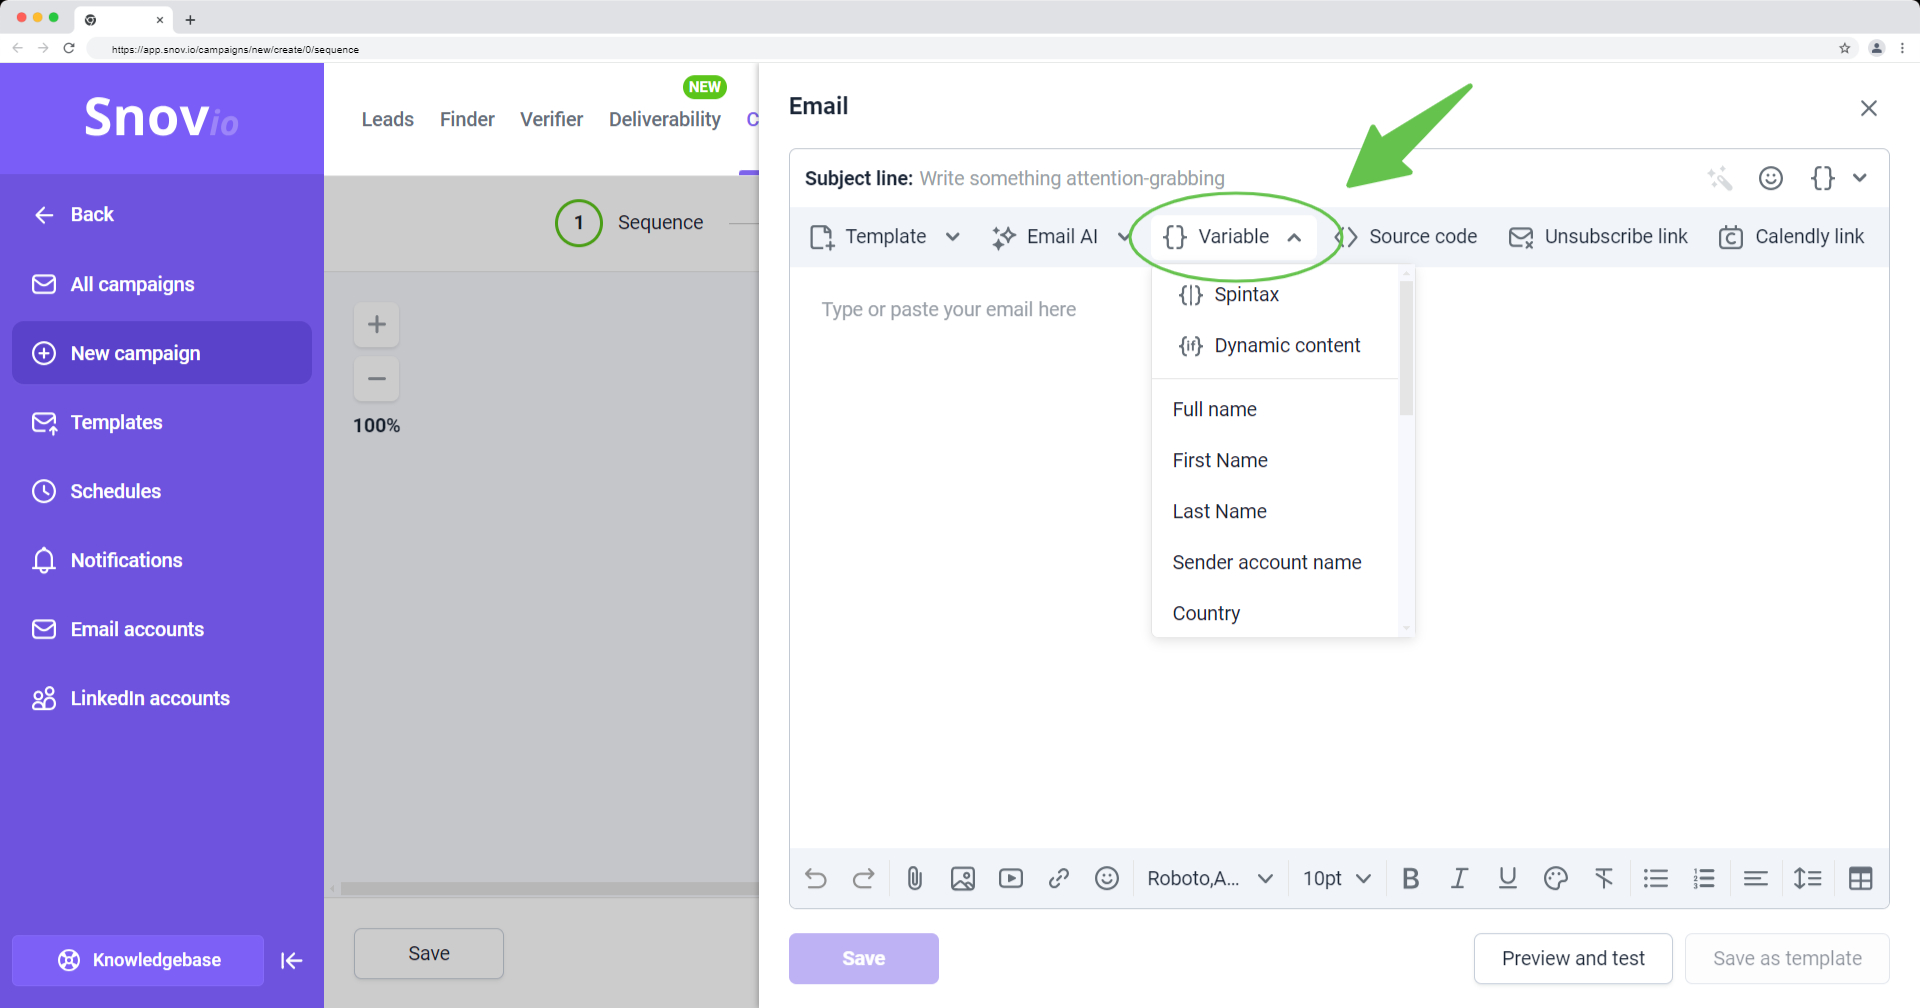
To add a variable to email content:
Click on Variable in the toolbar, then select the specific variable you need from the dropdown menu.
3) Add links
Don’t add more than two or three links to prevent your email from being flagged as promotional or spam.
Only add a link if it serves a purpose and provides direction for the next step – as a call-to-action at the end of the email.
Using tracked links comes with deliverability risks. The only secure method for link tracking is with a custom tracking domain -->
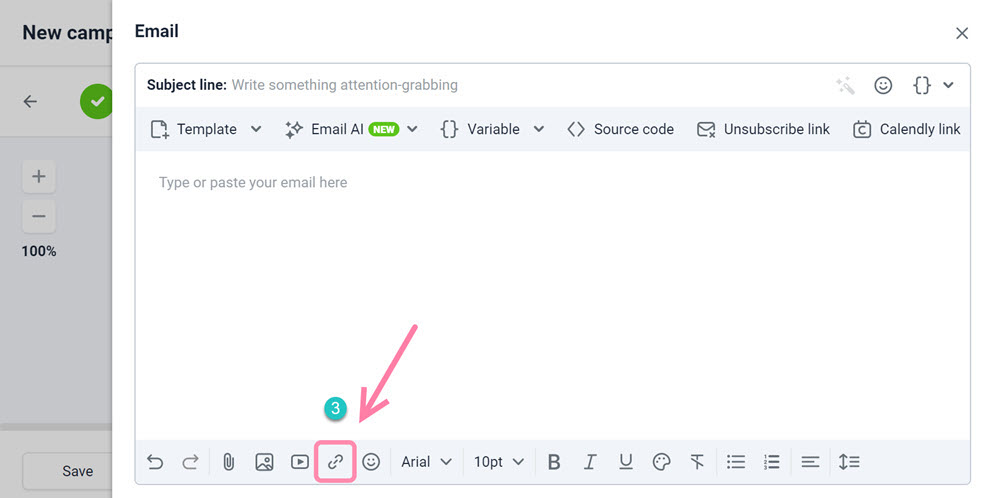
Pasting a link directly into the email editor won't track it. Use the Insert link option on the toolbar to add a link.
Remember: the Unsubscribe link also counts as a link.
4) Add an unsubscribe link
Having an unsubscribe link in your email is a must – it’s a requirement for all email senders.
If it’s difficult for your recipients to unsubscribe, they’re more likely to mark your emails as spam.
Make sure the link is visible and the opt-out process is easy to complete. It will help decrease the spam complaint rate.
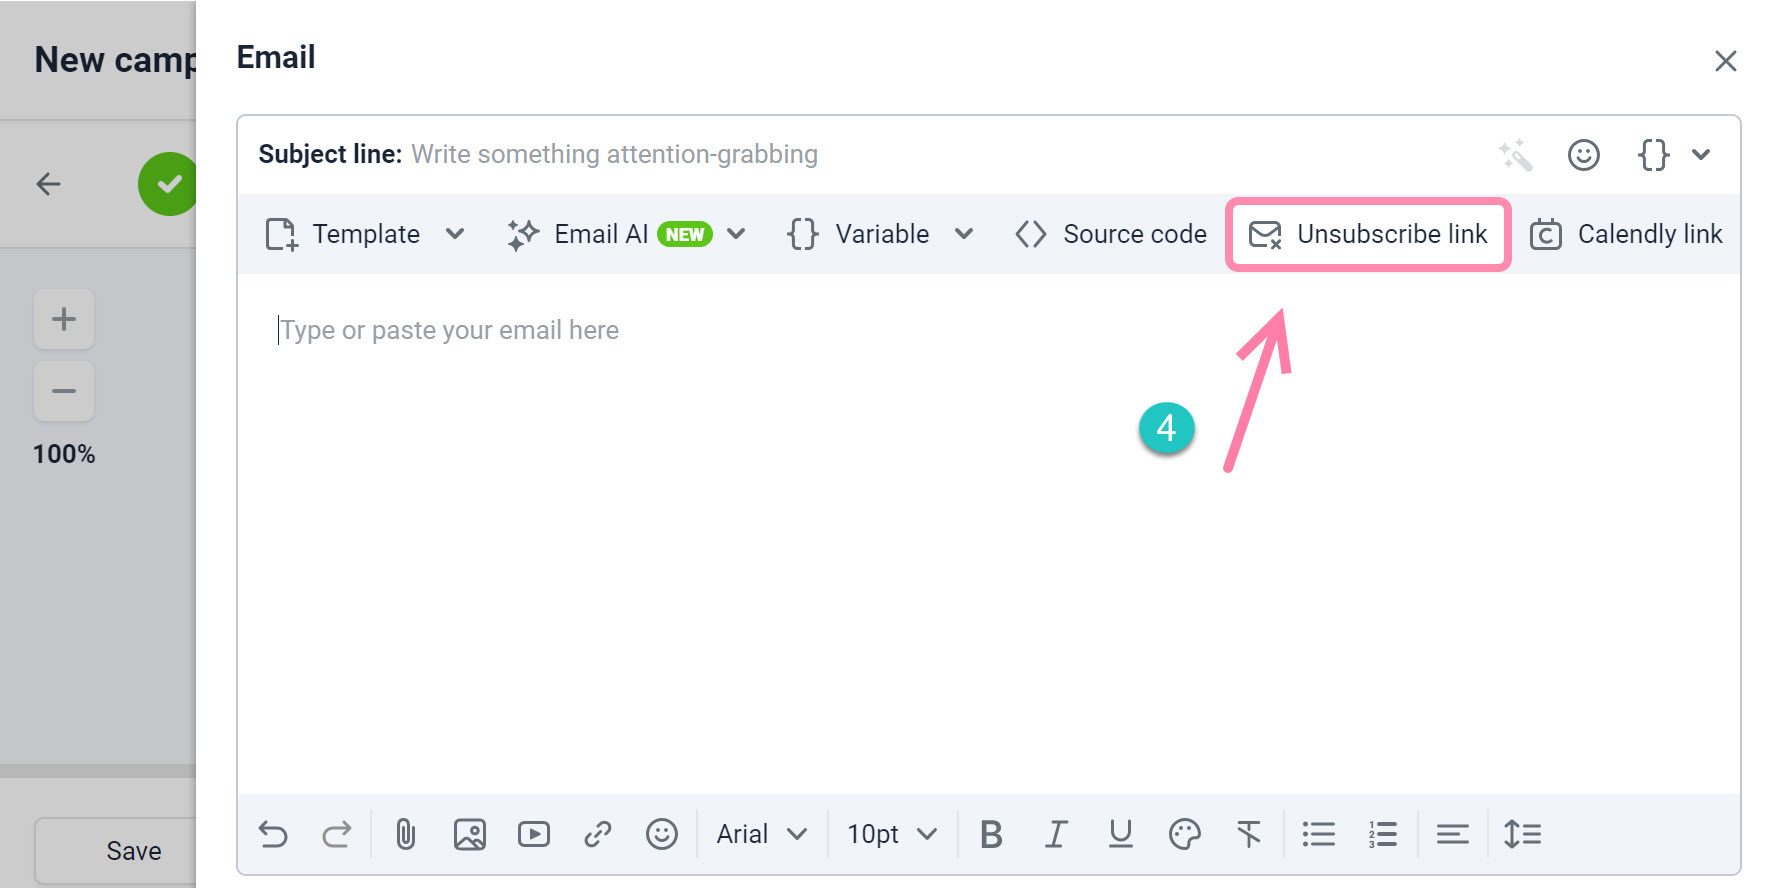
Click the Unsubscribe link icon on the toolbar to add it.
Learn how to add the link to your email signature -->
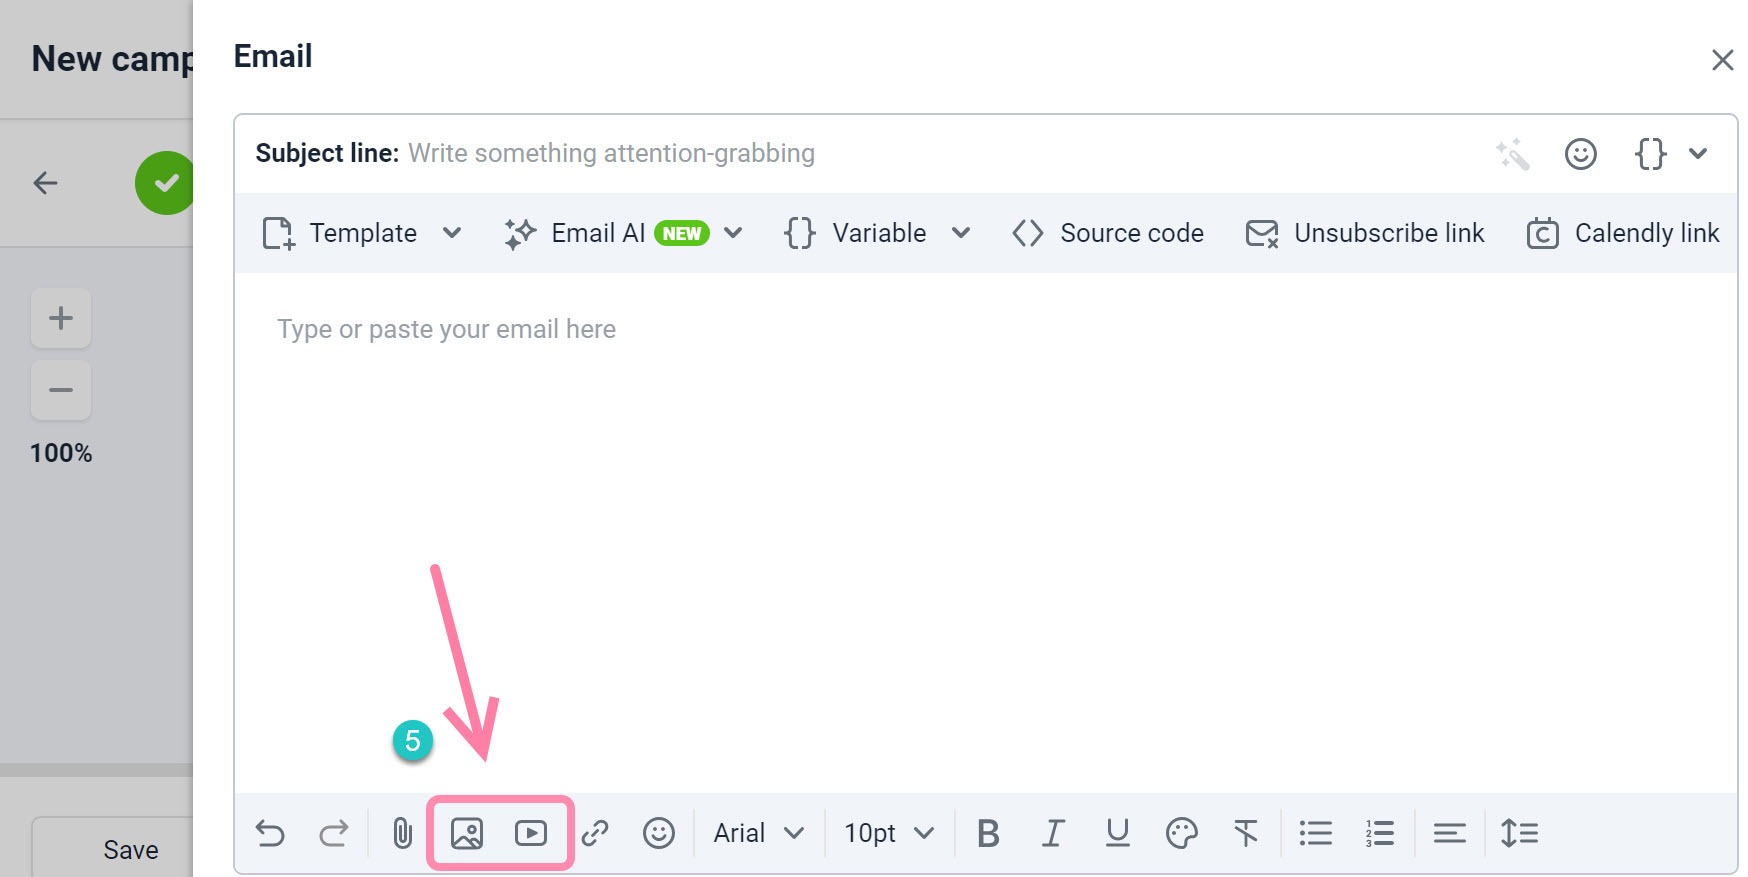
5) Add media: images/ Youtube videos
Adding images and videos to your email can help convey an important point visually.
For better deliverability, limit the use of graphic elements —1-2 images or 1 embed video won't affect it.
Always check the image file size and compress it to 50-100 KB for faster email loading on the recipient's end.
To add an image or a video:
Click the required icon on the toolbar: Upload image or Add Youtube video.
Supported image formats are JPG, PNG, GIF. When adding a video, paste the link from YouTube into the pop-up window after clicking the icon on the toolbar.
Don’t add GIFs to avoid deliverability risks — they can trigger spam filters due to their larger file sizes.
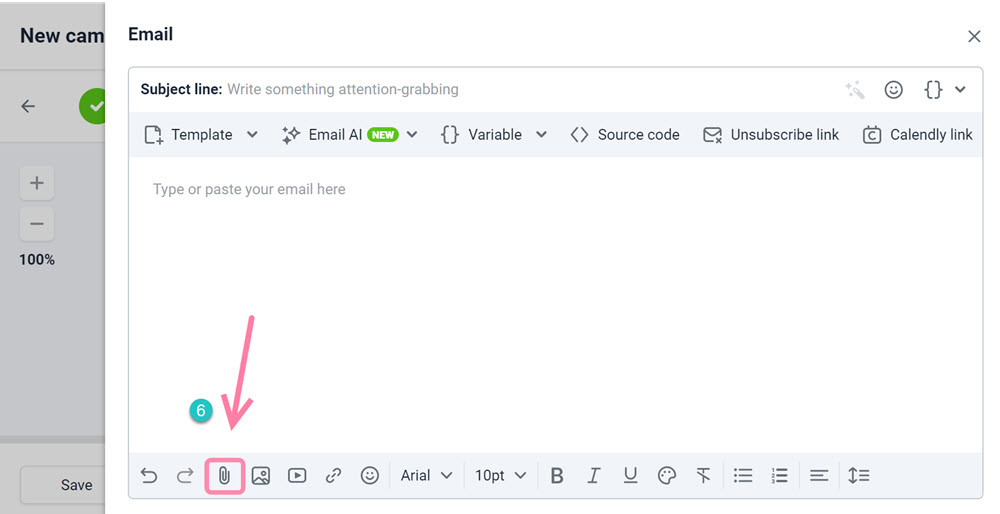
6) Add attachments
Adding attachments carries deliverability risks – avoid attaching files in your opening emails.
Use this option only when necessary to share documents or presentations with prospects you have already communicated with.
To add an attachment:
Click the Upload file icon on the email editor toolbar.
You can upload TXT, DOC, CSV, XLS, PDF, PPTX file formats. The size of all attached files must not exceed 6 MB.
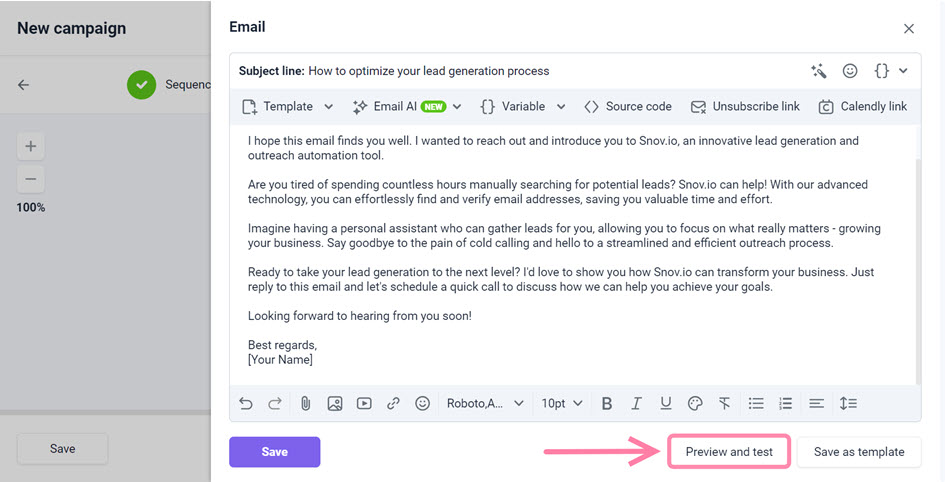
Preview and test email
Once your email is ready, use preview mode to ensure personalization displays correctly.
Click Preview email and test at the bottom.
Alternative ways to add email content
There are few additional options to add your email's content in the email editor.
1) Use Email AI assistant
The email editor's coolest feature is a built-in Email AI writing assistant.
It helps create email drafts from scratch based on the email's purpose and improve your existing drafts.
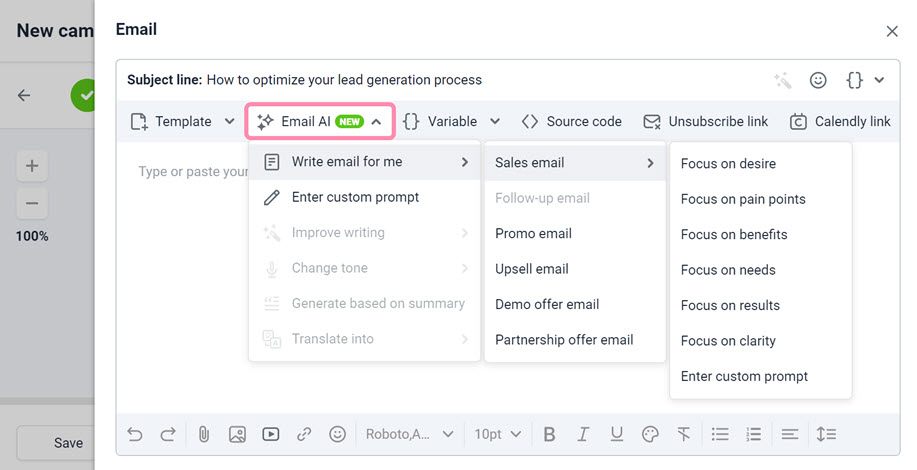
Read how to write emails with AI-powered assistant →
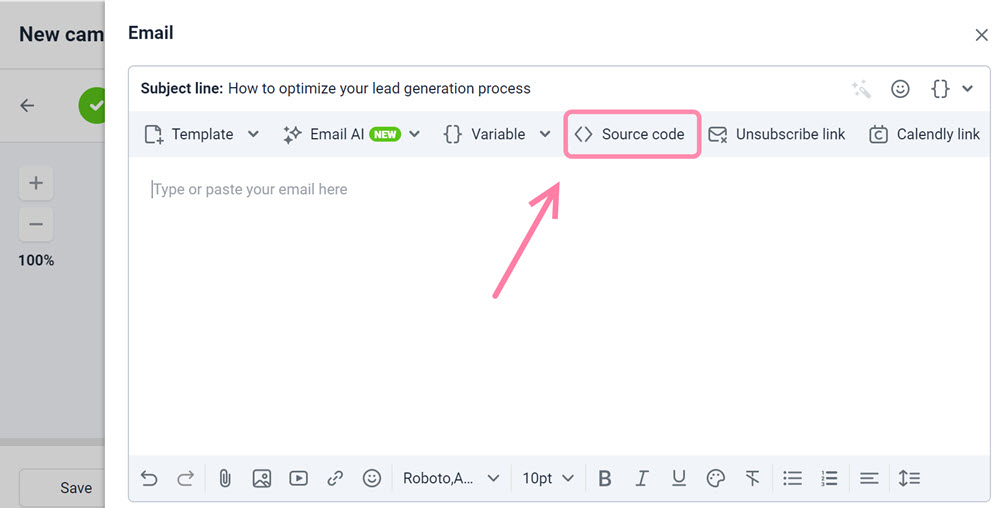
2) Insert HTML template
If you've got an email template made in the HTML email creator, you can put the code into Snov.io's email editor.
To add an HTML email:
Click the Source code icon on the toolbar.
3) A/B testing variants
Use A/B testing to try out different versions of an email and see which one works best.
To add an email variant (up to 15):
Click + Add variant under the Email element.
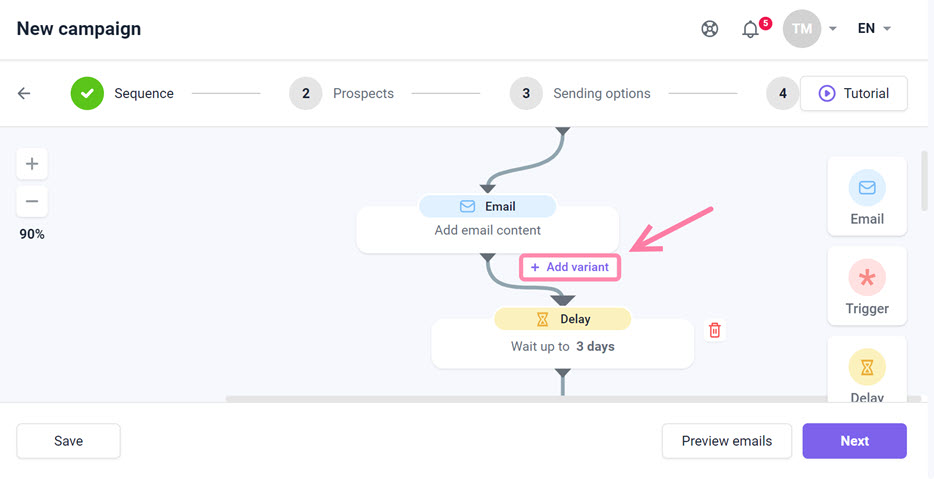
Learn more about how to send A/B testing campaigns.
After adding the email content of the opening email, add follow ups to your sequence.
If you have a question that we haven't covered, feel free to reach out to our Customer Care team. You can contact us at help@snov.io or through live chat.


Sorry about that 😢
How can we improve it?