Through this guide, you’ll find out how to integrate SendPulse SMTP with your Snov.io account to send email and warm-up campaigns.
Snov.io uses your email account provider’s servers for sending email campaigns and warming up your mailbox.
You can connect your own email and create a new sender to use in your campaigns, granting Snov.io permission to send emails on your behalf.
We support all major email service providers, including SendPulse.
Before we start:
You need to have a sender address added in your SendPulse account before connecting it to Snov.io.
Follow the provider’s tutorial to add a sender address. If you already have the required set up, we’ll explain how to integrate it with Snov.io.
Here’s how to set up an email integration with SendPulse:
 Find SMTP settings in your SendPulse account
After adding a sender, Sendpulse will create your personal SMTP credentials.
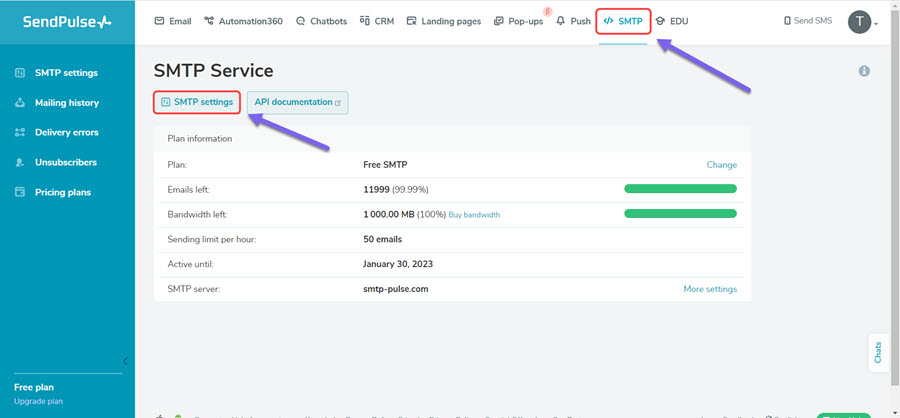
- Go to your SendPulse account
- Find SMTP tab on the top menu
- Open SMTP settings page
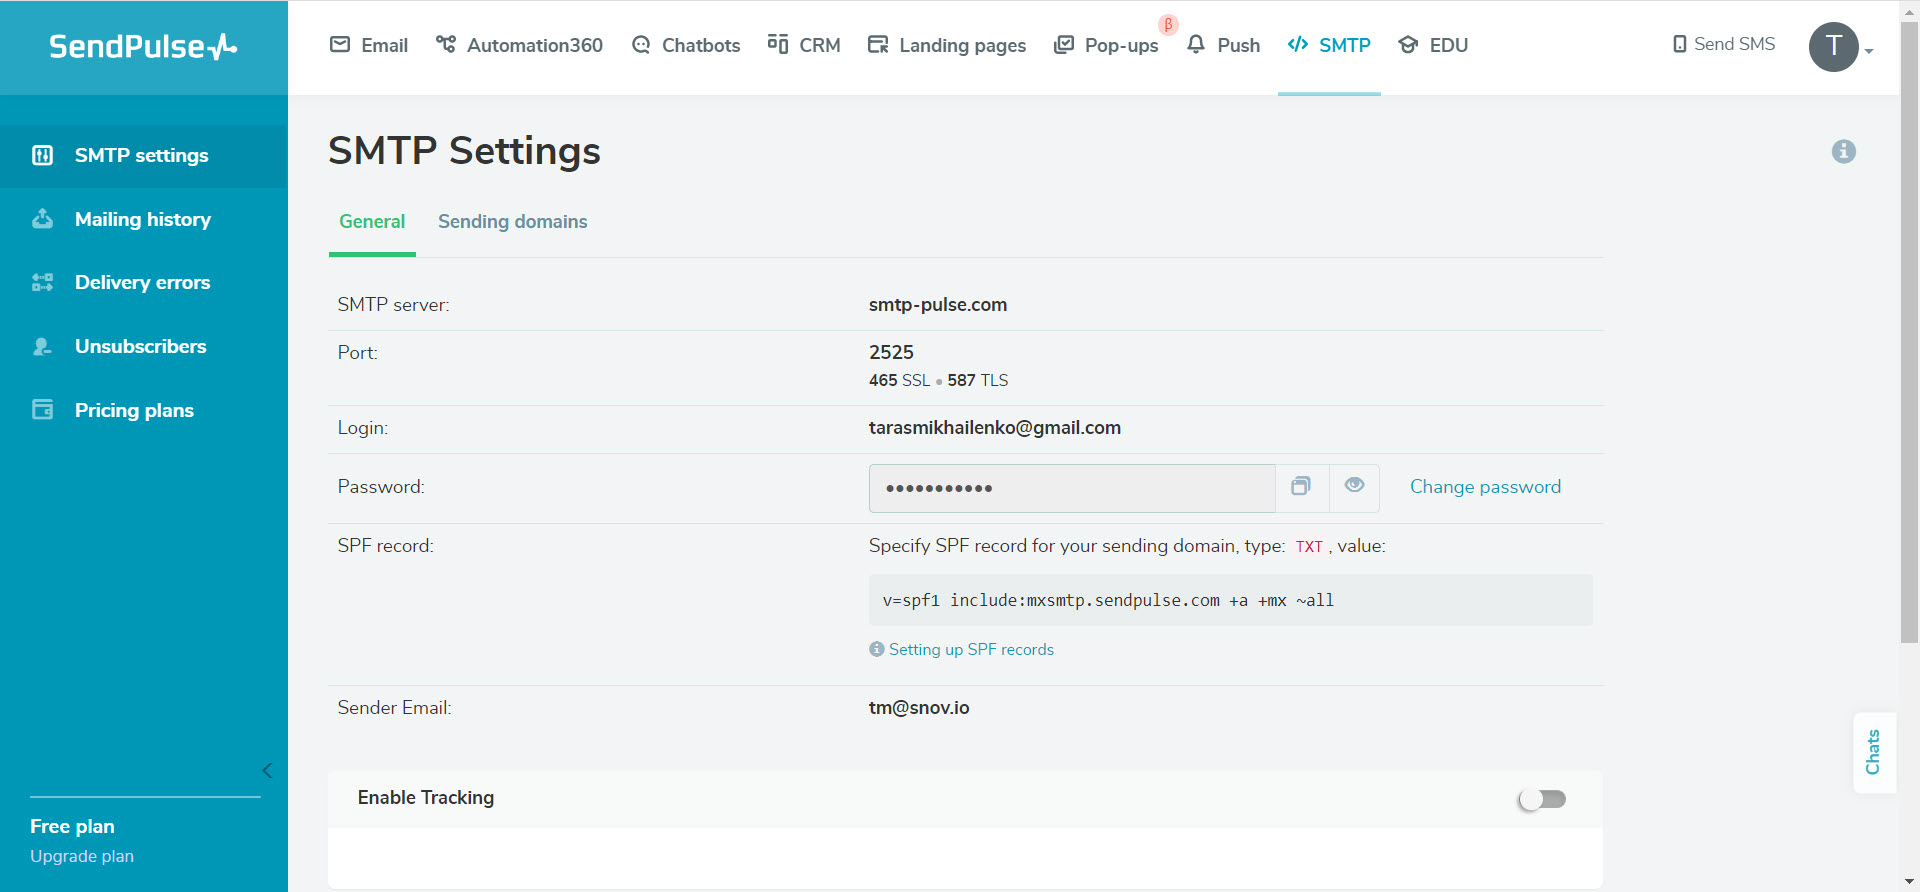
We’ll use the settings listed on this page to set up an email account in Snov.io. Don’t close this page yet as we proceed to the next step.
 Set up an SMTP account in Snov.io
After getting your SMTP settings, go to your Snov.io account and configure a new email account.
- Open Email Accounts tab
- Click the Add email address button
- Choose SMTP type
- Transfer the SendPulse settings to your Snov.io email settings page as follows:
SMTP server: smtp-pulse.com → SMTP Host
Port: 465 for SSL → SMTP Port
Login: your SendPulse login email → Username
Password: your SendPulse password → Password
- Click the Save Settings button.
If the SMTP connection was established, you'll get a Success status.
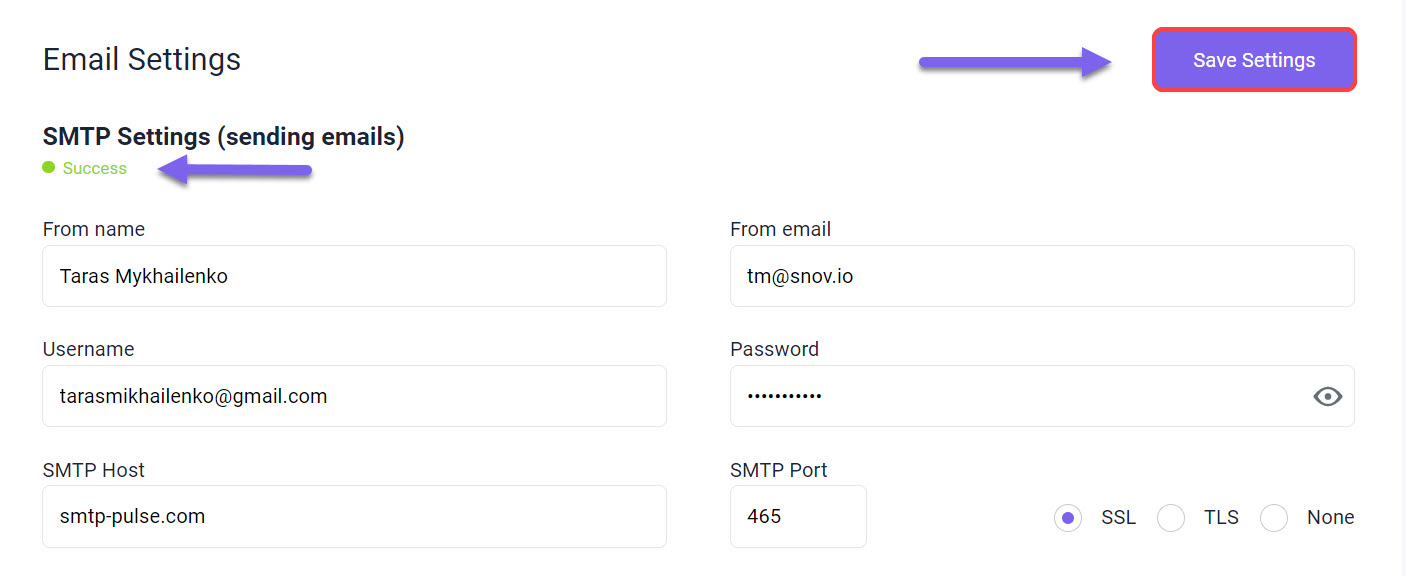
The rest of the sending email settings are pre-filled to the defaults. Adjust Messages per day and Delay between emails as necessary.
 Add IMAP settings
Since SendPulse is exclusively an email sending service and doesn't provide IMAP settings for receiving emails, you may need to connect another IMAP server for a complete email account set up.
![]() IMAP connection is required for reply tracking in email campaigns.
IMAP connection is required for reply tracking in email campaigns.
Your IMAP details should refer to the mailbox where you receive your email campaign responses.
For example, if it’s Gmail, you’ll need to enter the credentials of this Gmail inbox to the IMAP settings in Snov.io.
Before we proceed:
For a Gmail / Google Workspace inbox, you’ll need to create an App Password to authenticate IMAP connection.
Follow the instructions to create an App password in Gmail here.
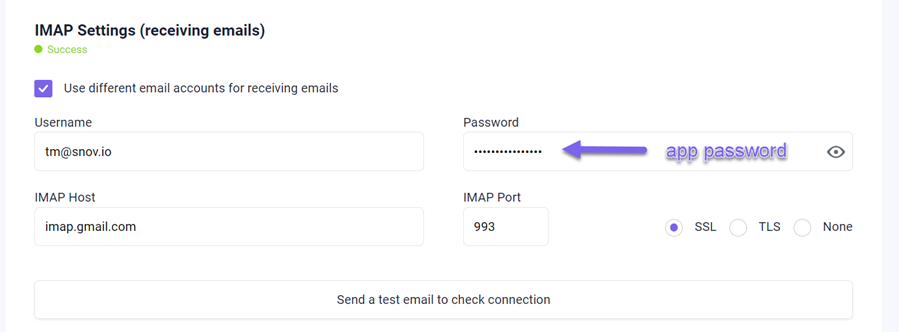
To add IMAP settings to your email account:
- Go back to the Email Settings page
- Under IMAP settings, enable the option Use different email accounts for receiving emails
- Fill in your IMAP credentials as follows for a Gmail inbox:
Username: your Gmail inbox address where the replies from your recipients land
Password: the App password generated in Gmail for Snov.io
IMAP Host: imap.gmail.com
IMAP Port: 993 SSL
- Click the Save Settings button.
If the IMAP connection was established, you'll get a Success status.
Additional steps
 Authenticate your email sending
To keep your deliverability rates high, it’s essential that you authenticate your email sending with SPF and DKIM records.
Authenticating your email is an indicator of your trustworthiness as a sender.
SendPulse as an email service provider gives you the required details to add to your domain’s DNS.
Read more on how to configure your SPF record and DKIM record using SendPulse settings.
Add your custom tracking domain
With a custom tracking domain, you can expect up to 20% improvement in deliverability of this sender account.
Find out how to set up your own custom tracking domain in our guide.
Send a test campaign and start email warm-up
Once you connect your email account to Snov.io, we will send you the email message confirming the successful connection.
Now that you've set up your email account, you can select it as a sender in your email campaign and start an email warm-up.
Have more questions? We’re here to help at help@snov.io or live-support chat.

Sorry about that 😢
How can we improve it?