Snov.io Campaigns is a tool for personalized multichannel outreach. In this guide, we'll walk you through creating an automated engagement sequence.
With Snov.io, you can create and launch multichannel campaigns. Add both email and LinkedIn steps to your sequences to combine the limits and advantages of the two channels.
At each step, we’ll explain the campaign settings and provide tips for achieving better results.
Step 1. Build an engagement sequence
Step 2. Add campaign recipients
How to avoid duplicate contacts
Step 3. Configure campaign settings
Step 4. Review campaign before launch
To start creating your campaign, go to the Campaigns page in your Snov.io account. Select + New campaign from the right menu.
Step 1: Create a multichannel sequence
Start by creating your email flow or sequence using the visual editor. Your sequence can include email steps (with unlimited follow-ups), LinkedIn actions, delays, conditional triggers, and goals.
There are three ways to add an element to the sequence:
- Drag elements from the right side and place them in the desired order. To connect two elements, position one below the other until a dotted line appears, indicating they are ready to connect.
- Click on the desired element on the right side, and it will automatically move to the last step in the sequence.
- Hover the cursor over the black arrow below an element and select the next element to add to the sequence.
To build a sequence, add elements in the order you want them to execute in the automation.
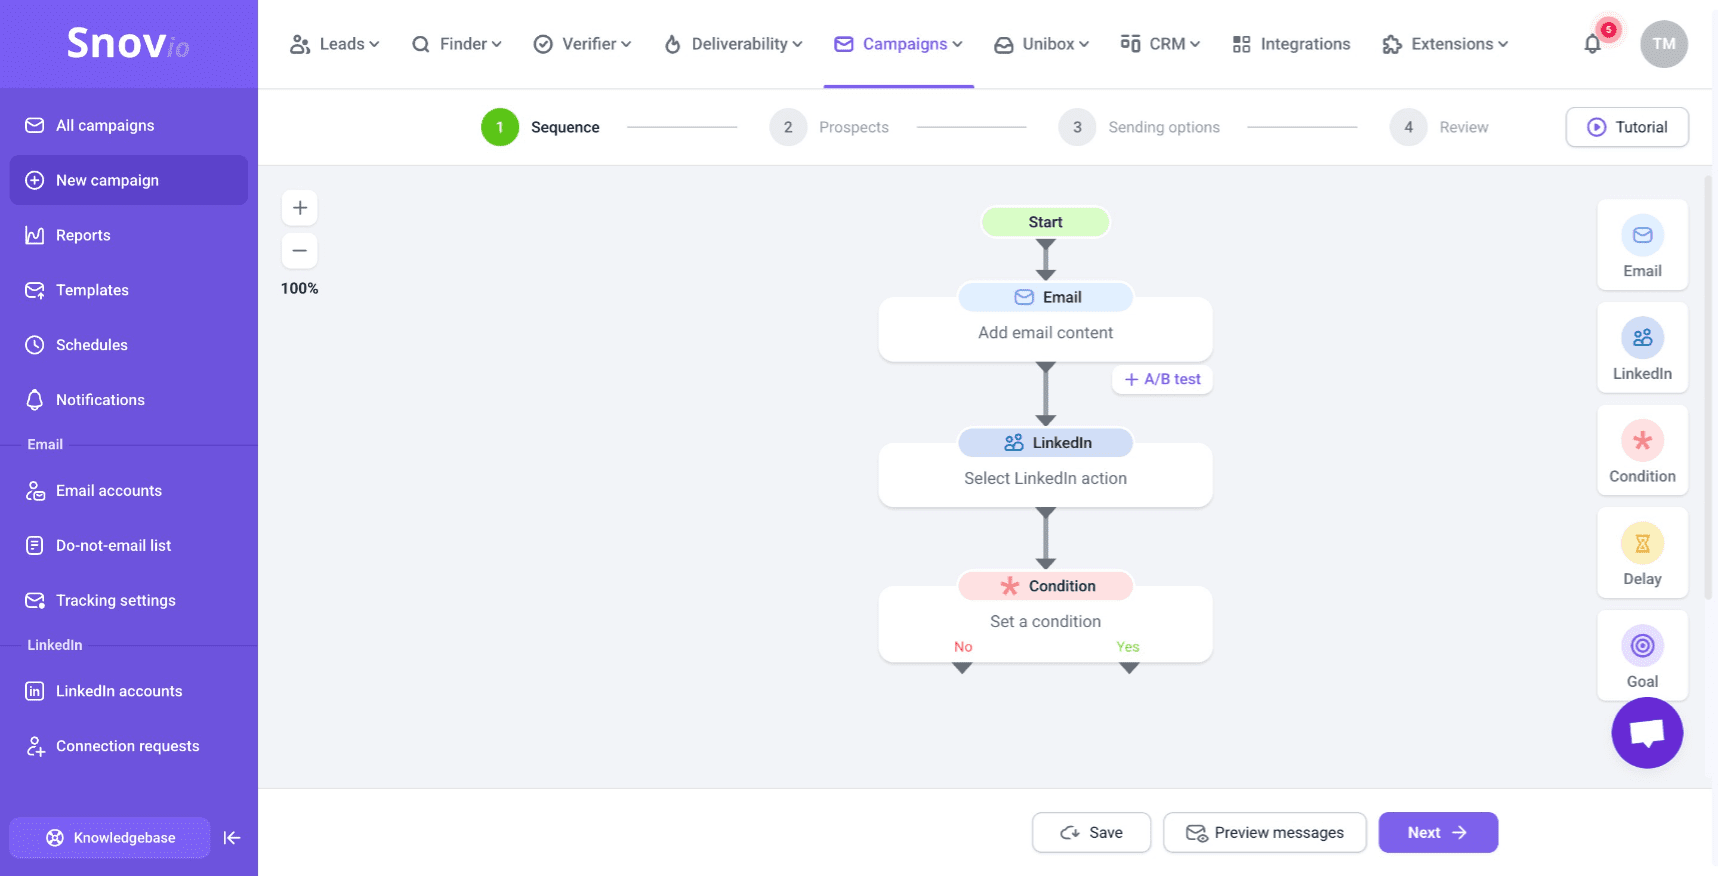
Sequence elements:
1) Email: Add dynamic personalization to your email content to make it more relevant for your recipients.
For higher engagement, send targeted emails highlighting specific benefits and value.
2) LinkedIn: Add LinkedIn actions to the sequence to automatically contact prospects on LinkedIn.
3) Condition: Set conditions to send follow-ups based on recipient actions.
You can send follow-ups that are triggered by the prospect’s action on the previous email. The action could be opening an email, clicking a link, or booking a meeting on Calendly.
This allows you to send them down a different flow that is better personalized to this action.
4) Delay: Set waiting times between emails.
Add delays of 2-4 days between your follow-up messages to avoid overwhelming recipients and gradually build their interest.
5) Goal: Use this element to close the sequence and segment leads based on their engagement levels throughout the sequence.
Step 2: Add campaign recipients
In this step, choose the leads you want to contact in this campaign. Select the list from the dropdown menu under List name.
What is the optimal list size for a campaign?
Send your campaigns to smaller lists, around 100-200 new leads per week. This makes it easier to send targeted emails, track engagement and manage responses.
Adding new leads to the same list after the campaign launch will automatically send them to the start of the sequence.
How to avoid duplicate contacts
In your new campaign, turn on the Skip duplicates option in the Prospects step of the settings.
How duplicate detection works:
After you choose a list, Snov.io checks if any prospects are used in other campaigns and removes them from the recipient list. The duplicate check will also run when you add new prospects after campaign launch. It works in email-only campaigns, LinkedIn Automation, and multichannel sequences.
What counts as a campaign duplicate:
A prospect with the same email address or LinkedIn URL counts as a duplicate as soon as they’re added to another campaign, even if that campaign hasn’t begun sending yet.
This helps you automatically filter out prospects who are already receiving your outreach or are scheduled to receive it.
If you want to exclude only those prospects who have already been contacted, filter your list by automatic prospect tag (Contacted) before selecting it for the campaign.
How to review duplicates in a campaign:
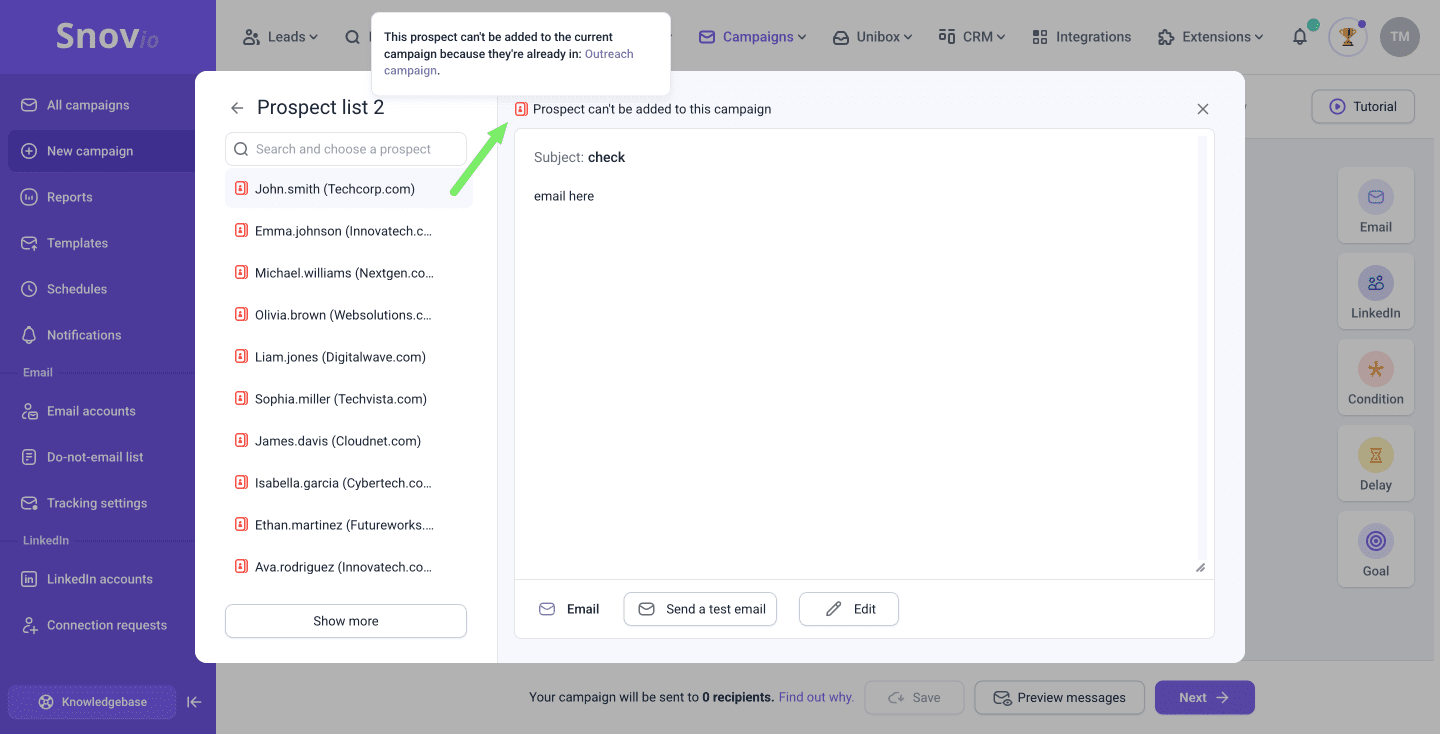
Once the recipient calculation is complete, you’ll see the exact number of prospects who will receive your campaign based on your settings.
If you see the message “Prospect can’t be added to this campaign,” it means the contact is already part of another campaign. If you still want to include them in the new campaign, first remove them from the recipient list of the existing campaign.
How to reduce email bounce rate
If there are unverified emails in your list, verify them using the built-in email verifier tool on the Leads page. After verification, valid leads will be added to the sequence.
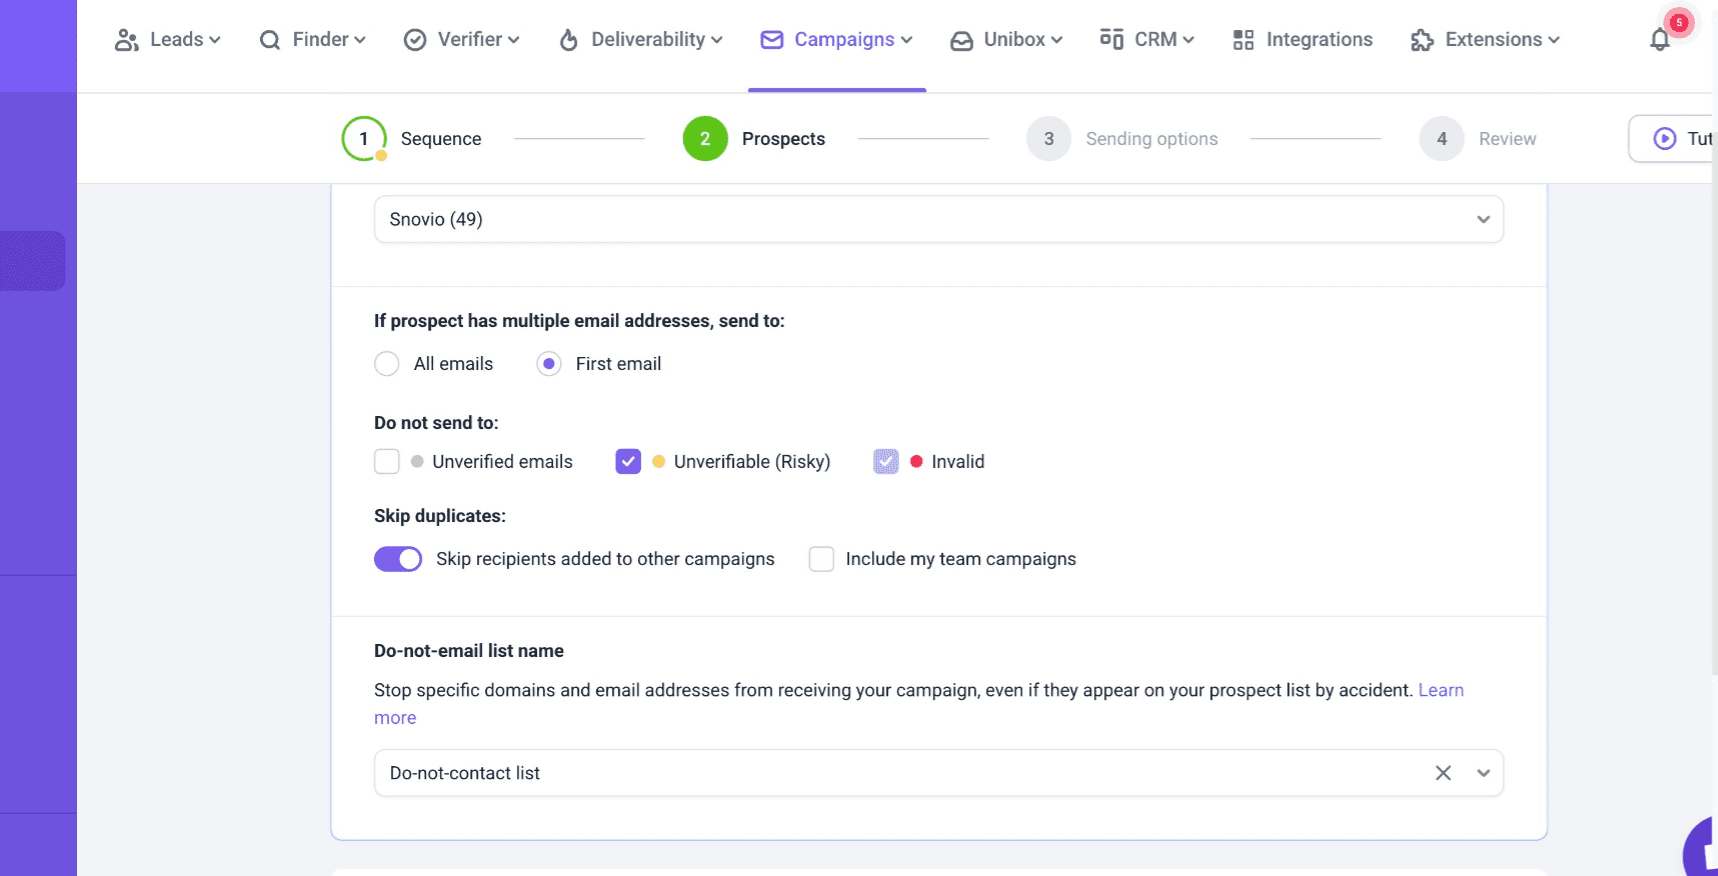
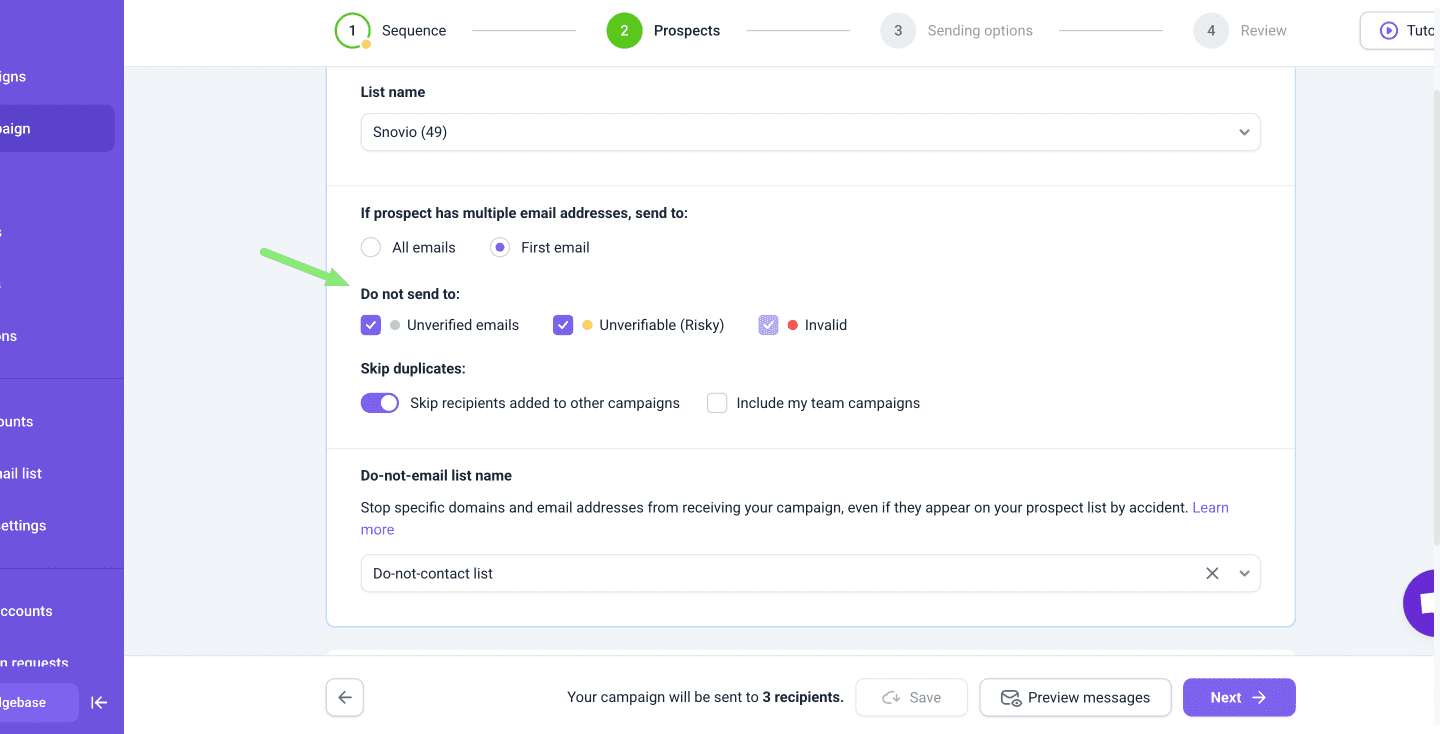
Choose "Do not send" options to remove leads with unverified and unverifiable emails from your recipient list. This will lower deliverability risks and protect your sender reputation.
By choosing both email filtering options under Do not send to, only valid emails will be included in the recipients list. This parameter determines the total number of recipients and cannot be edited after launch.
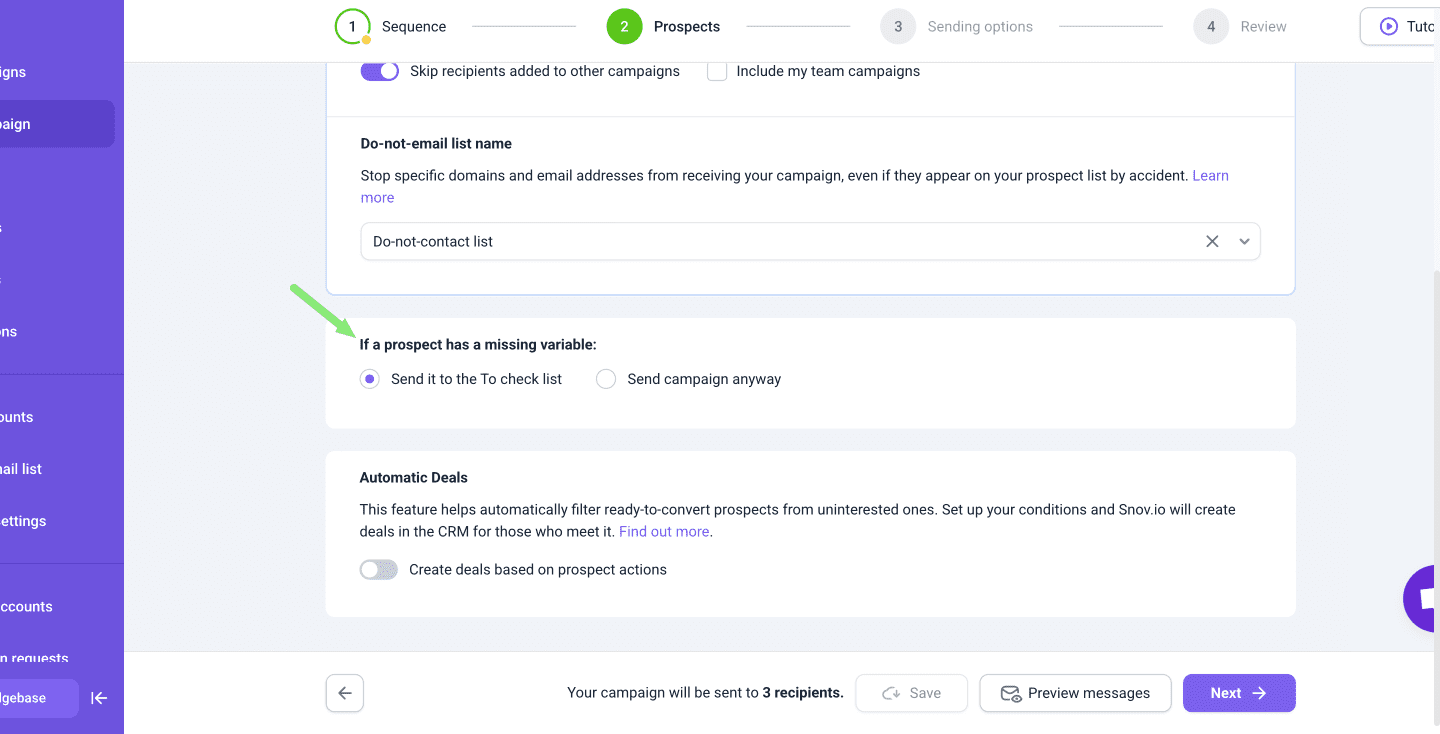
What if a prospect's profile is missing data for personalization?
A missing variable means that a required prospect field is empty. In this case, Snov.io automatically moves such prospects to the To Check list -->, where you can review leads with missing details.
In such cases, we recommend adding default text for variables to be used when personalization details are missing. Learn how to add fallbacks to variables.
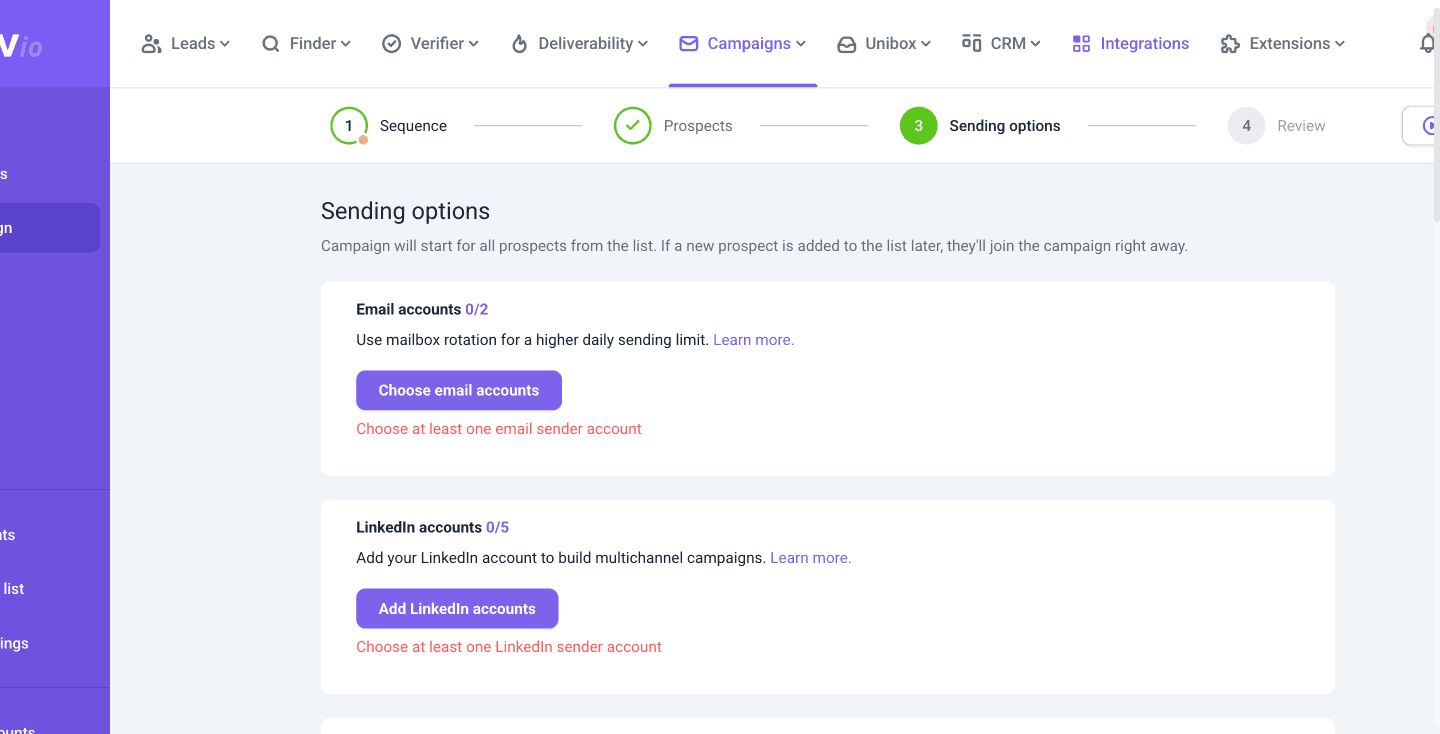
Step 3: Set sending settings
On the Sending options step, choose the sender accounts that will be used in this campaign, set tracking and schedule.
Sender accounts:
- Add email accounts for sending emails.
Select the connected email accounts that will send emails for this campaign. Make sure their daily sending limits are high enough to cover the total number of recipients you want to reach.
You can adjust the daily email limit for each account in the settings. If you need to increase the total daily sending capacity for your campaign, enable mailbox rotation to spread emails across multiple accounts.
- Add LinkedIn accounts to perform LinkedIn actions included in the sequence.
When you connect your account, we detect your SSI score to determine safe daily limits for actions. You can adjust these limits in the account settings to control the number of activities completed daily by this account.
How to send more emails safely?
1) Only use warmed-up accounts; 2) Add email accounts to mailbox rotation.
Tracking:
You can enable tracking for clicks and opens in sequences with email steps. Snov.io automatically tracks replies and stops the sequence for leads who respond to any email or LinkedIn message within it.
In campaigns that only use LinkedIn steps, email tracking is turned off. However, we'll still track LinkedIn activities like message opens, replies, and accepted requests.
How to use email tracking safely?
By default, you will be using a shared tracking domain, which may negatively affect your sender reputation. To minimize risks, use email tracking with your custom domain.

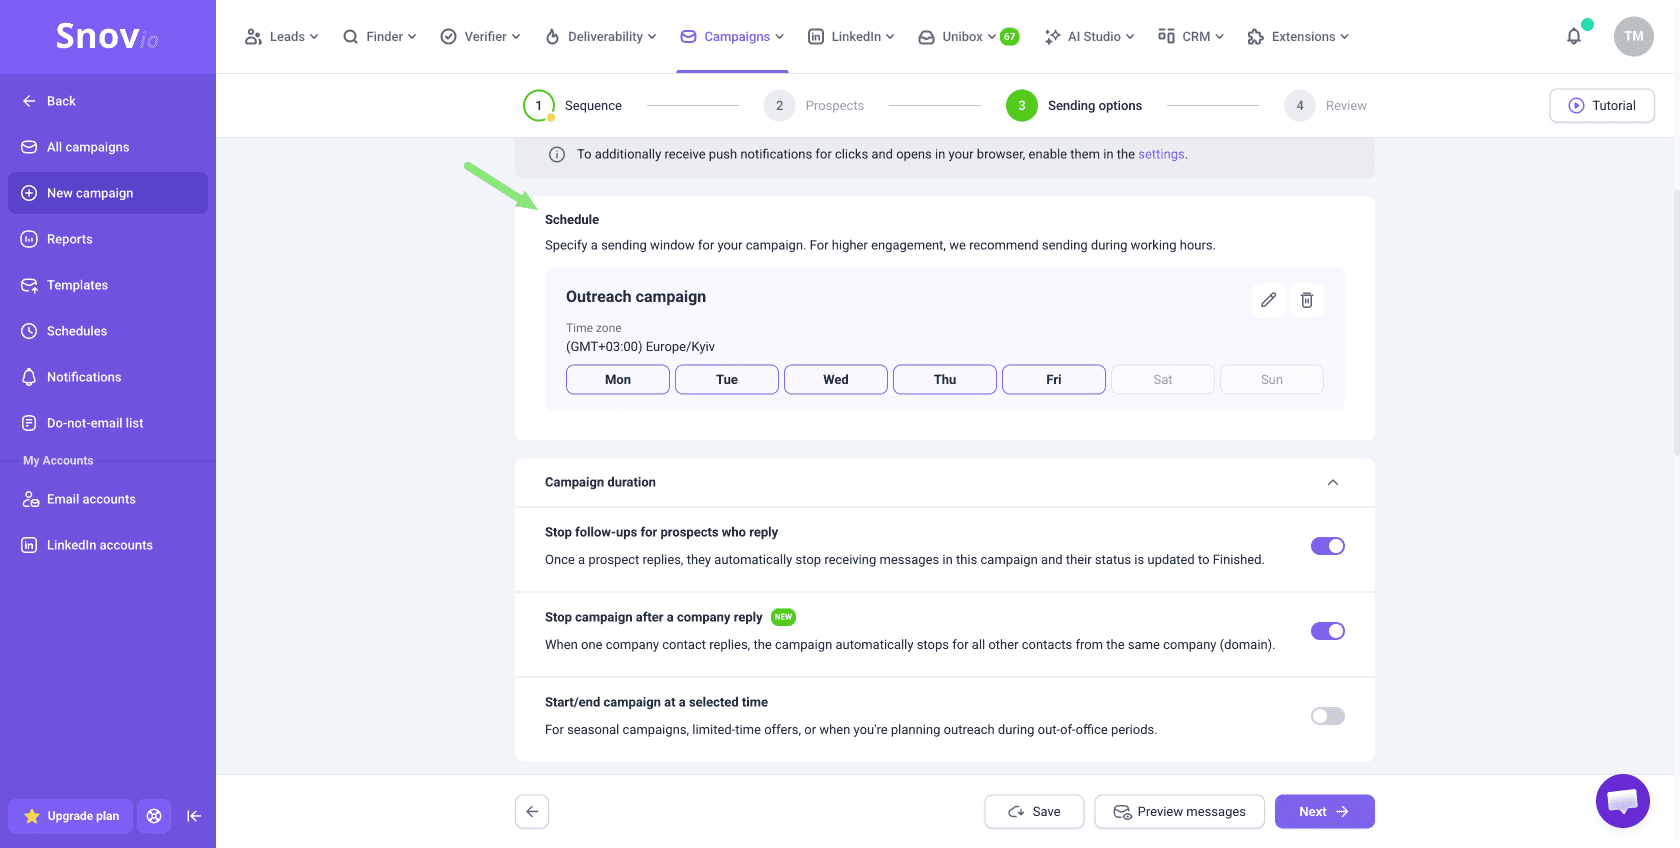
Schedule:
You can schedule email delivery and LinkedIn activities based on the recipients' time zones.
When you need to send campaigns that are only relevant on certain dates, you can schedule them to launch and complete at a specific time in the future. This allows you to set up campaigns well in advance.
How to make sure your emails and messages are noticed?
Set a schedule that matches the recipients' work hours to ensure your emails are delivered at the optimal time. To personalize the sending time for the entire list, ensure all leads are from the same location.
Campaign duration:
Configure how the sequence continues after you get a reply.
- Stop follow-ups for prospects who reply
By default, after a prospect replies, the campaign stops and the remaining steps in the sequence won’t continue. This includes any email follow-ups or LinkedIn actions.
- Stop campaign after a company reply
Enable this option so that in addition to the prospect who replied, the campaign will also stop for other company employees under the same domain included to this campaign.
Advanced settings
Advanced campaign settings let you optimize campaign performance, manage daily volume and limits, control which campaigns and prospects have priority.
Provider matching:
This option works in campaigns with Email steps that have at least two email sender accounts from different providers.
Matching means the sender account will be automatically chosen for each recipient based on their email provider. Snov.io will detect your recipient’s provider and use the appropriate sender from the accounts added to this campaign. Emails sent within the same provider’s emails (Gmail to Gmail) have a better chance of reaching the recipient’s inbox.
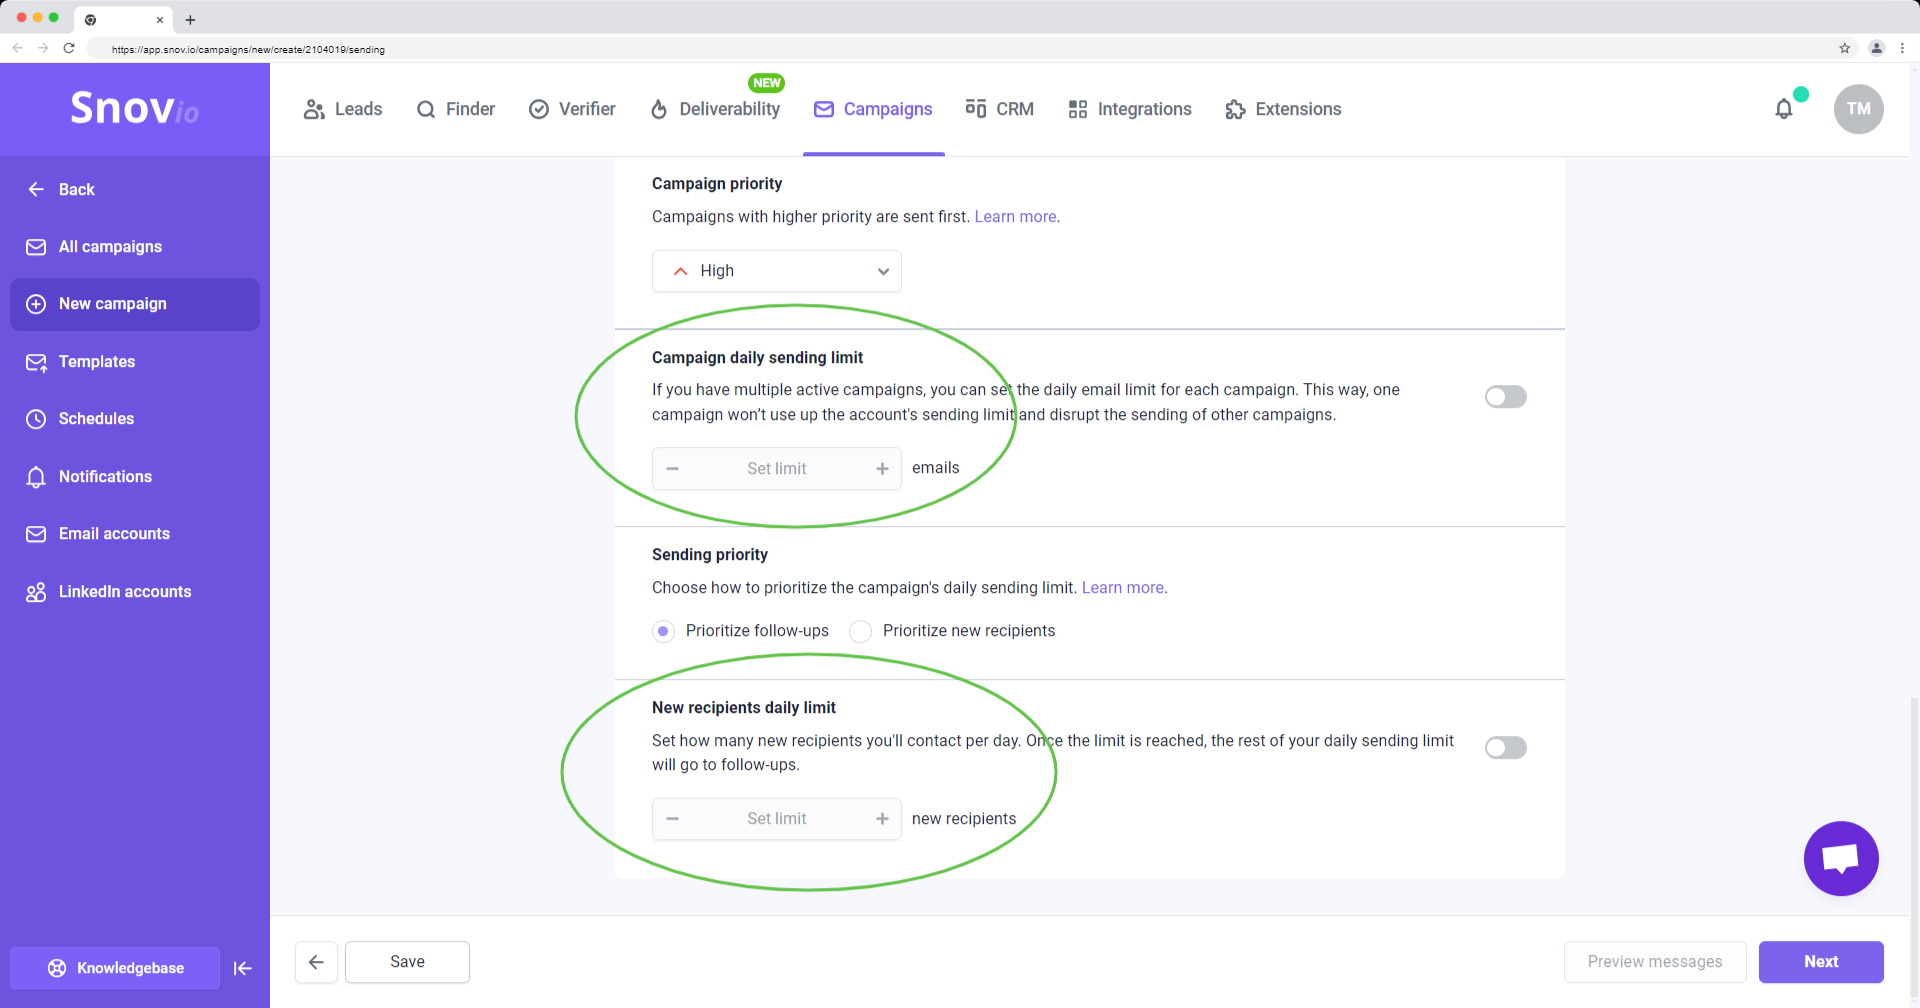
Set campaign priority:
Assign high, medium, or low priority to your campaigns based on their urgency and importance.
Lower-priority campaigns will only start sending once high-priority campaigns are completed.
Follow-up vs. new lead priority:
Adjust the priority based on your outreach strategy. You can determine how the total limit is distributed between new leads and leads already in the sequence (those who have received at least one email).
By default, the system prioritizes follow-ups before sending emails to new recipients.
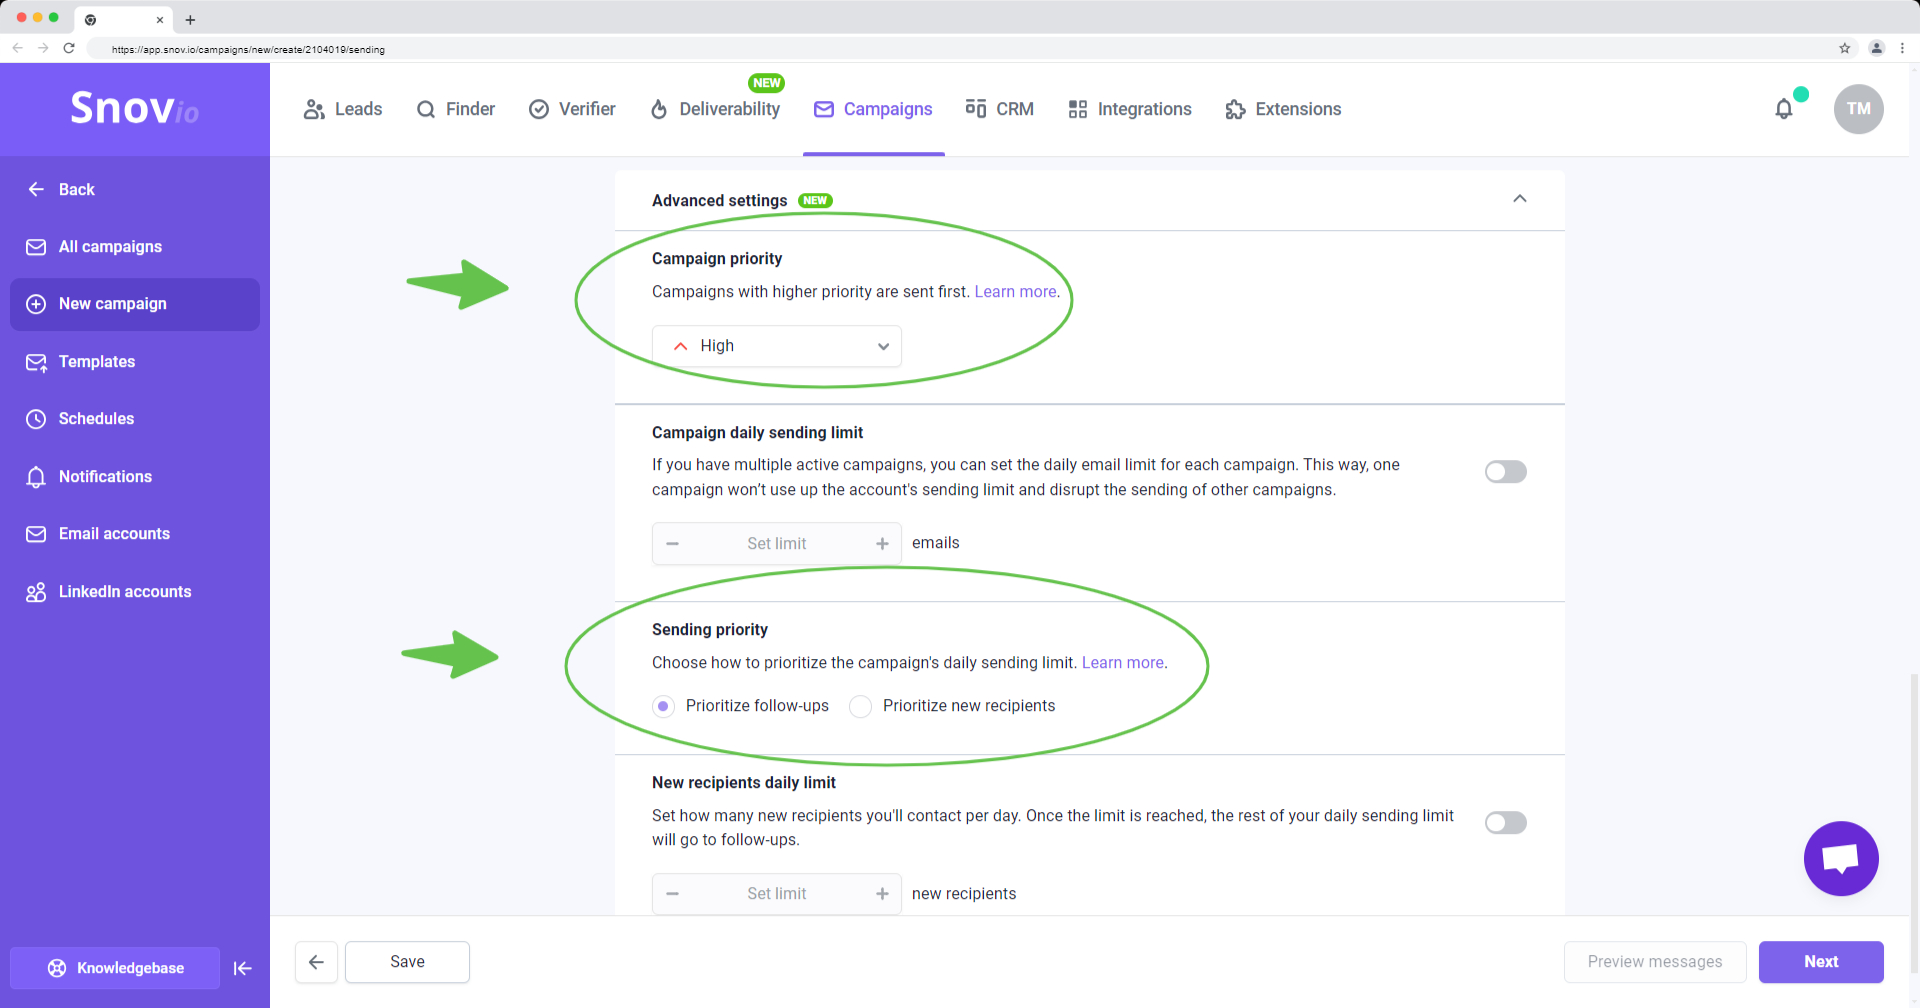
Campaign daily limit:
Control how the total sending limit is distributed between campaigns using the same sender account. Set the daily email limit for each campaign to ensure they send only the planned number of emails and do not use the capacity meant for other campaigns.
New recipients daily limit:
This limit determines the maximum number of new leads that can be contacted daily in this campaign. The rest of the daily limit will be used to send follow-ups.
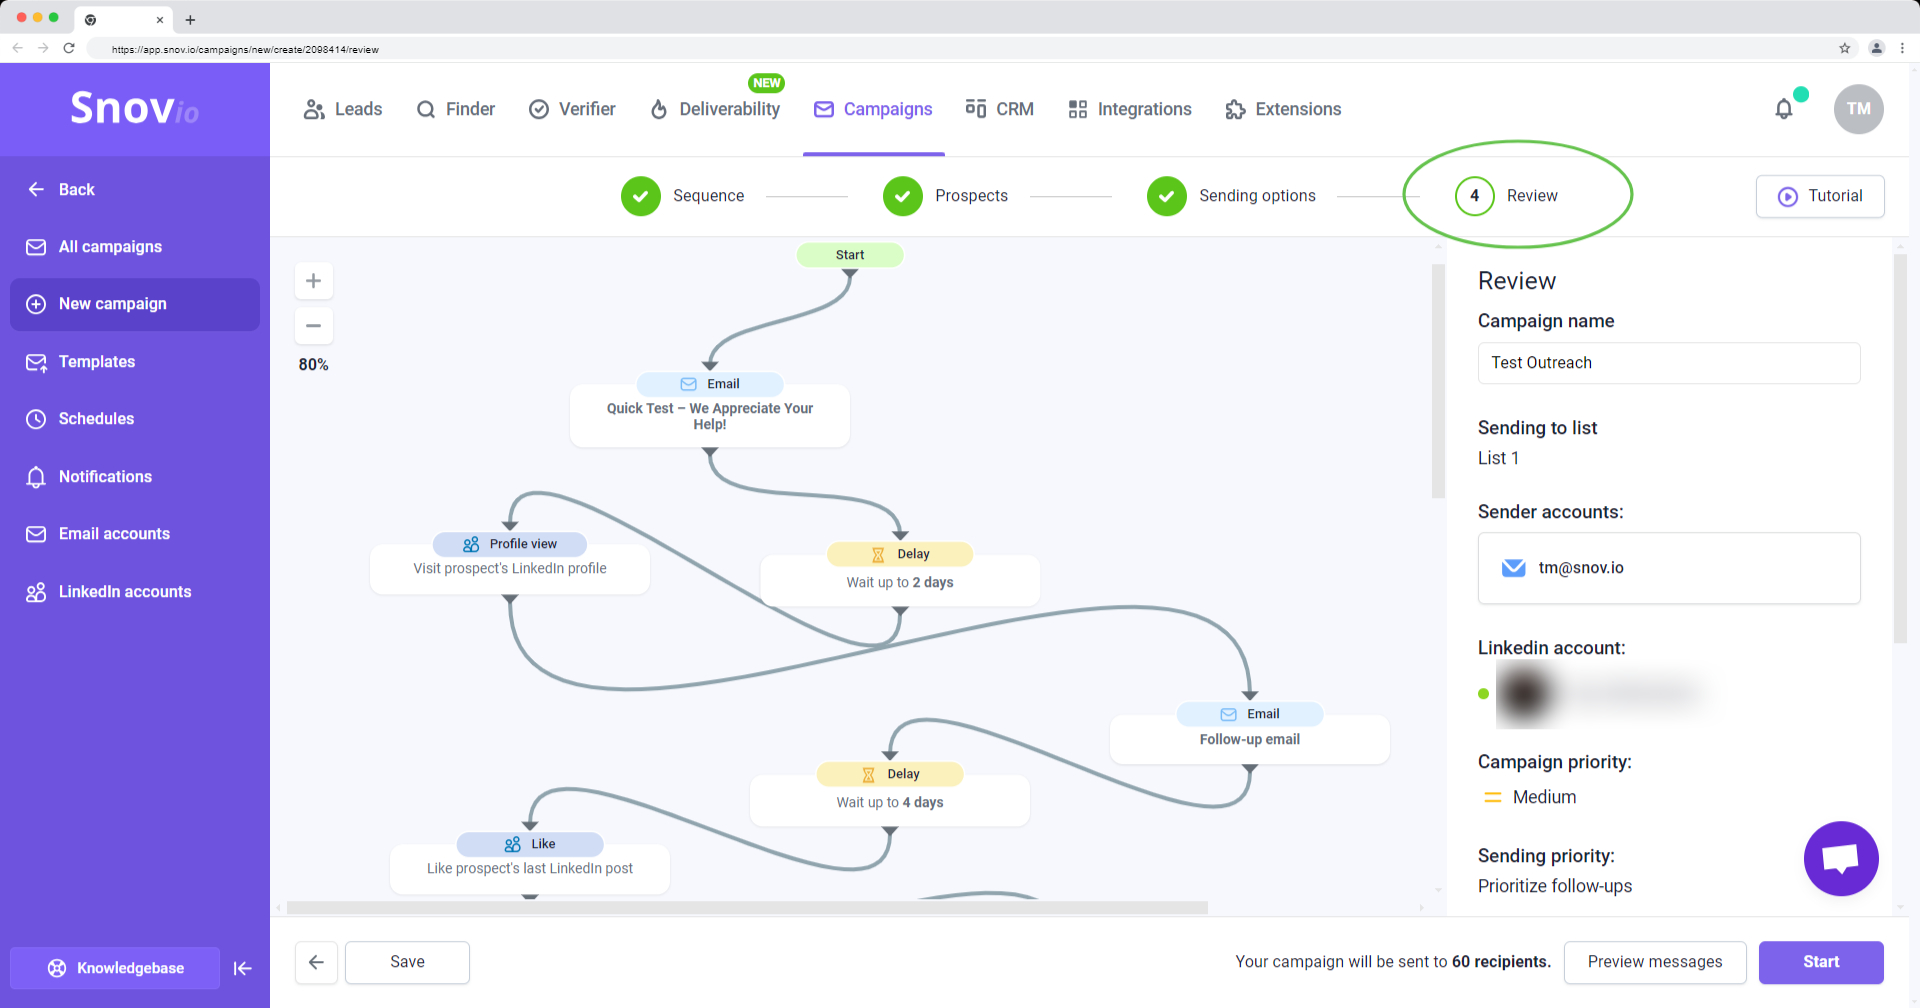
Step 4: Review the campaign before launch
In the final step, name your campaign, review your email sequence, and double-check all settings. If changes are needed, you can go back to the previous steps.
To see how your email will appear to recipients, especially with personalized elements, click on Preview messages below.
Once everything looks good, click Start at the bottom right to launch your campaign!
A note on email content restrictions
Remember, your email content should follow certain guidelines. Your campaign may not be allowed to start if your email content touches on any of the following topics:
- Loan offers
- Selling contact lists or databases
- Online casino promotions
- Adult-related content
- Free gift offers
If the email content in your campaign is deemed inappropriate, suspicious, offensive, or otherwise in violation of GDPR, the CAN-SPAM Act, CCPA, etc., we reserve the right to stop your campaign until clarification. Inappropriate content could lead to campaign suspension.

Sorry about that 😢
How can we improve it?