This tutorial explains the MX record and how to set it up in your domain settings to improve your domain’s health.
How to set up MX record:
Why MX record is important:
1) It ensures that your incoming emails are correctly routed to your provider's mail server so they reach your inbox.
2) It improves your overall domain health score.
MX record explained
MX records do not directly affect your sender reputation or deliverability when sending campaigns. They do not influence how spam filters evaluate your emails.
An MX record specifies which mail servers are responsible for receiving incoming emails for your domain. Missing MX records can cause bounces for your incoming emails (because there's no mail server to receive them).
Your email provider gives you the MX value, which you need to use when configuring the MX record in your domain’s DNS settings.
MX value looks something like this:
mail.yourprovider.com
If you use multiple email providers for receiving emails, you need to add a separate MX record for each provider and assign priority numbers.
Priority determines which email server is used first. Lower numbers mean higher priority (10 has a higher priority than 20). If the first server is unavailable, the next one in line is used.
How to setup MX records: general instructions
Step 1: Get MX record value from your email provider
An MX value should be generated by your email provider, not Snov.io. You can find specific instructions in your provider's help center or contact them for assistance.
Step 2: Add MX record to your domain
The MX record is configured in your domain’s DNS settings. Log in to your domain registrar or hosting account (the platform where you purchased your domain).
Go to the DNS menu, where you can manage domain records, and find the option to add a new record.
Your MX record should have the following parameters:
Type: Select MX.
Name/Hostname: Enter @ (or your domain address if @ is not accepted).
Value/Destination: Enter your provider's MX value. Your provider will give you the exact value you need to use here.
Priority: 10; If you have only one email server, you can set any priority number. However, if your domain already has other MX records, make sure to set the priority value correctly to avoid conflicts.
TTL (Time to live): Leave as default or set to 3600 seconds.
How to set up MX record for Google Workspace
If your email provider is Google Workspace, follow the steps below to generate MX record value or refer to the Google’s official guide for MX record set up.
You’ll need admin access to: 1) your Google Workspace account; 2) domain's DNS settings (where your domain registrar account is).
Step 1. Get MX record value
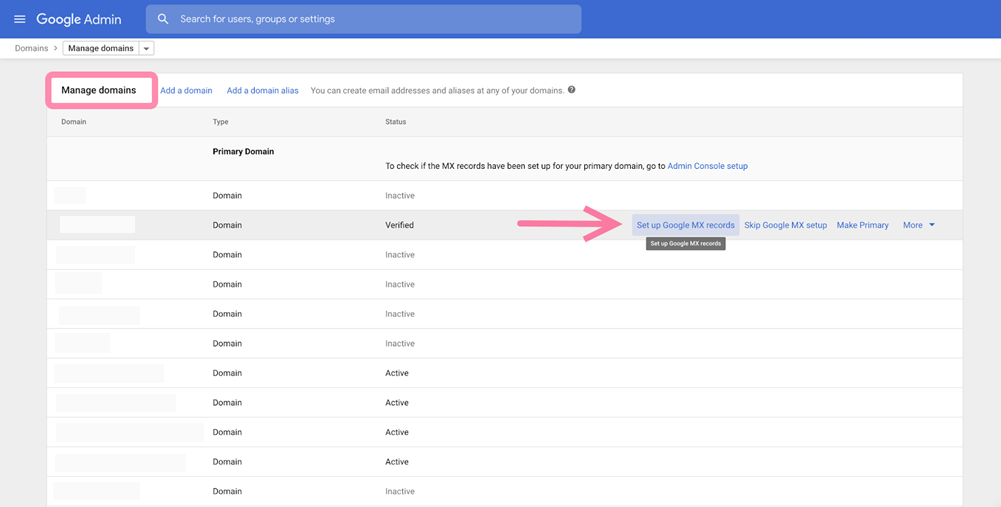
- Log in to the Google Admin panel. Choose “Domains” → “Manage Domains.”
- Select a necessary domain and click “Set up Google MX Records."
- Copy MX Server Address. You’ll need to enter it into DNS record settings in the next step.
- MX address should look something like this:
ASPMX.L.GOOGLE.COM
Step 2. Add MX record to domain's DNS
Below are examples of how to add MX for different providers:
If your domain provider is Namecheap:
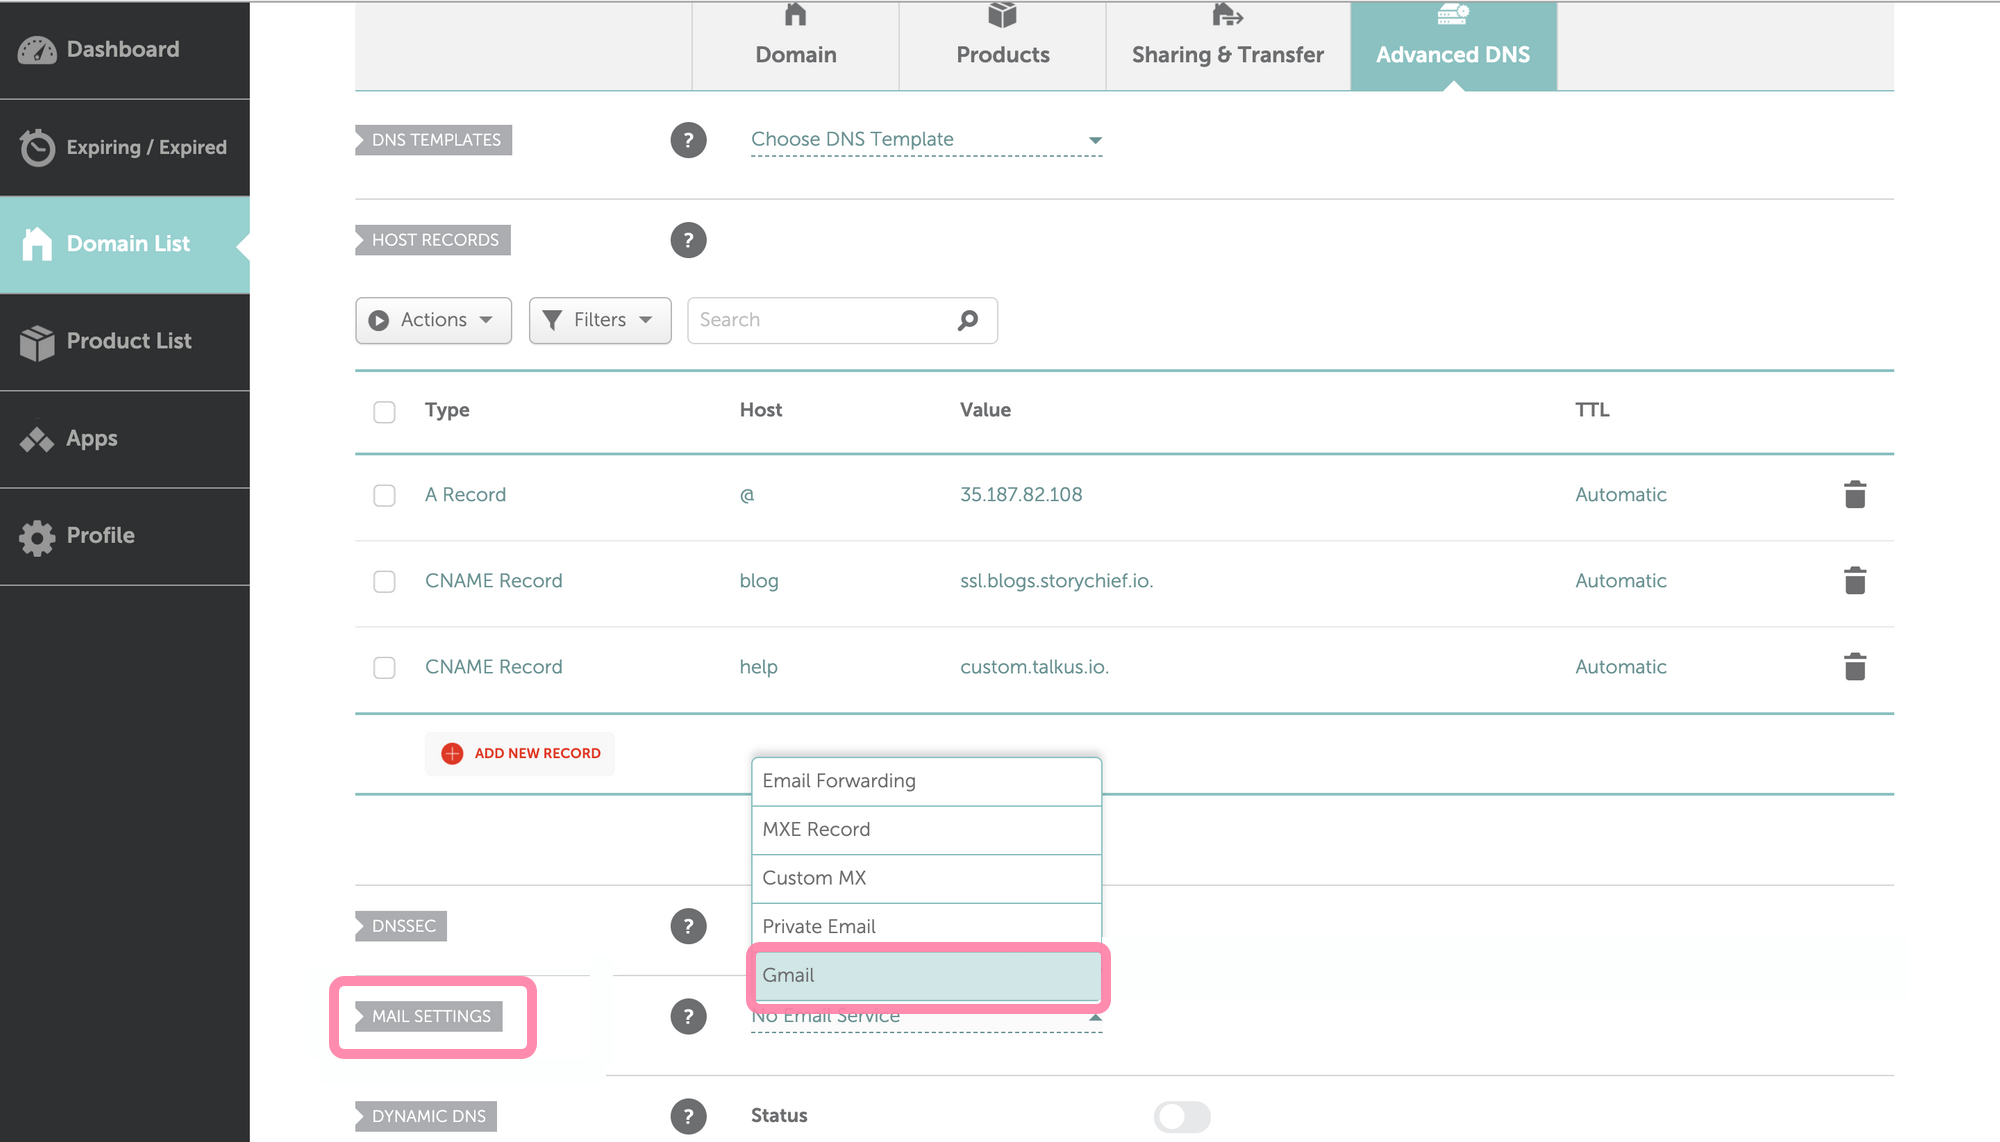
In Namecheap, you can add Gmail as your email server automatically. Follow the steps below:
- Log in to your Namecheap account.
- Open Domain list menu and choose your domain.
- Go to Advanced DNS tab.
- Scroll down to Mail settings
- Choose Gmail
If your domain provider is Cloudflare:
- Log in to your Cloudflare account and select your domain.
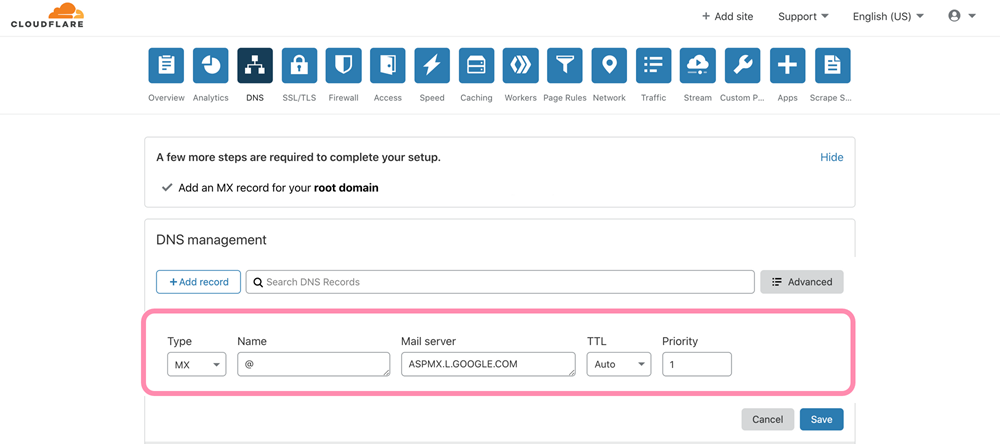
- Go to the DNS tab.
- Click Add record --> select MX record.
- Put @ in the Name field.
- Put MX value to the Mail Server field.
- In Priority field, choose 1 (if Gmail is your primary provider).
Step 3. Activate MX record
After adding MX record in your domain's DNS, the final step is to activate it in Google Workspace Admin.
How to set up MX record for Microsoft Office
Follow the steps below to generate MX record if your email provider is Microsoft Office (Outlook).
You’ll need admin access to: 1) your Microsoft Office account; 2) your domain's DNS settings (where your domain registrar account is).
Step 1. Get MX record value
- Log in to Microsoft Office admin panel.
- Go to the Settings --> Domains page --> Select your domain.
- Choose Manage DNS --> More Options > Add your own DNS
- See the list of DNS records -- Copy MX record value.
MX address should look something like this:
yourdomain.mail.protection.outlook.com
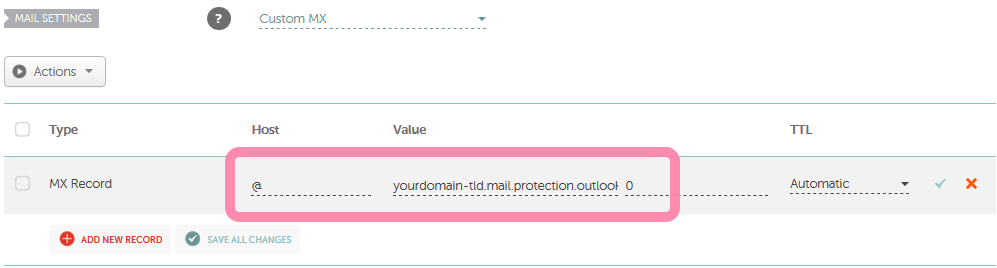
Step 2. Add MX record to domain's DNS
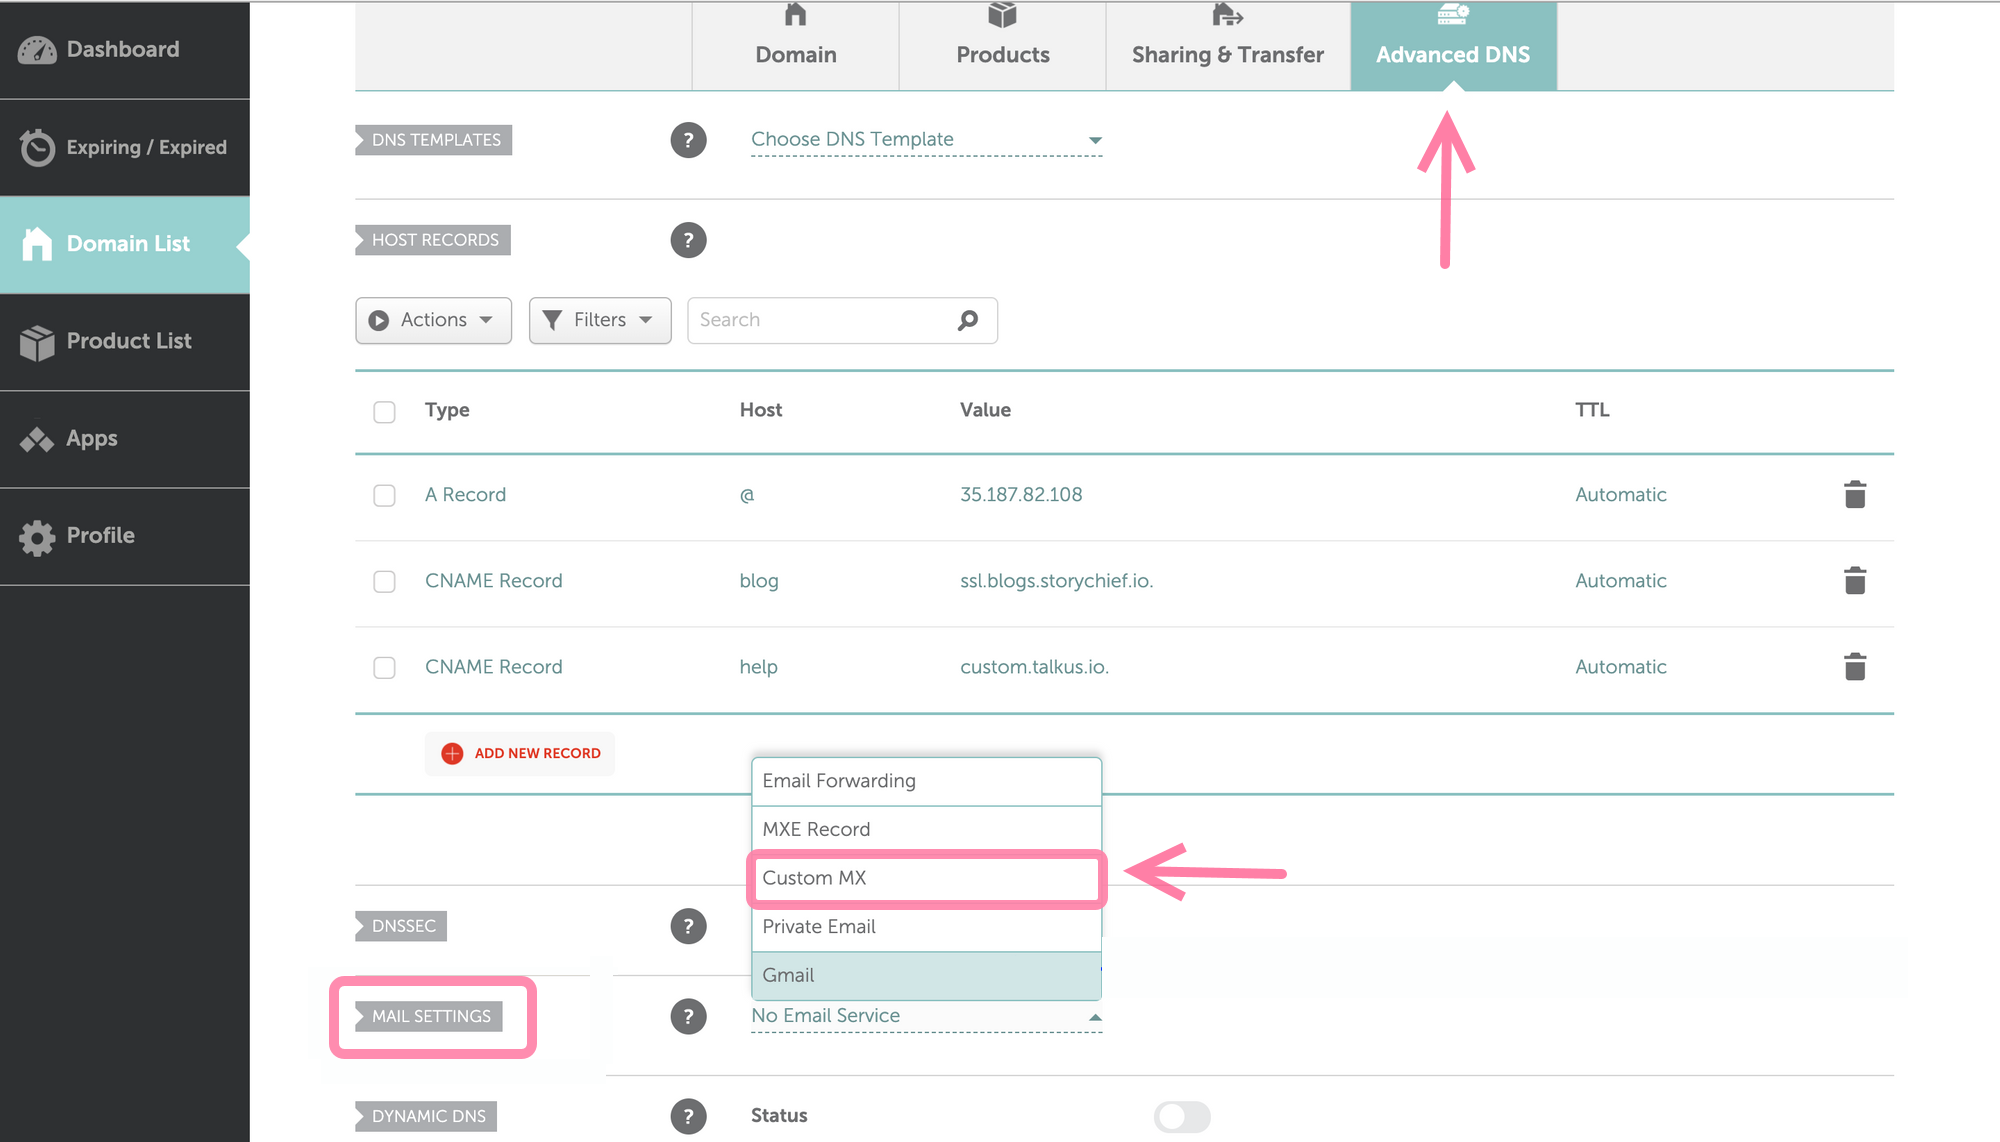
If your domain provider is Namecheap:
- Log in to your Namecheap account.
- Open Domain list menu and choose your domain.
- Click on the Manage button next to your domain.
- Go to Advanced DNS tab.
- Scroll down to Mail settings
- Choose Custom MX
- Paste MX record to the Value field.
- Type @ in the Name field.
If your domain provider is Cloudflare:
- Log in to your Cloudflare account and select your domain.
- Go to the DNS tab.
- Click Add record --> select MX record.
- Put @ in the Name field.
- Paste MX value to the Mail Server field.
- In Priority field, choose 1 (if Microsoft Office is your primary provider).

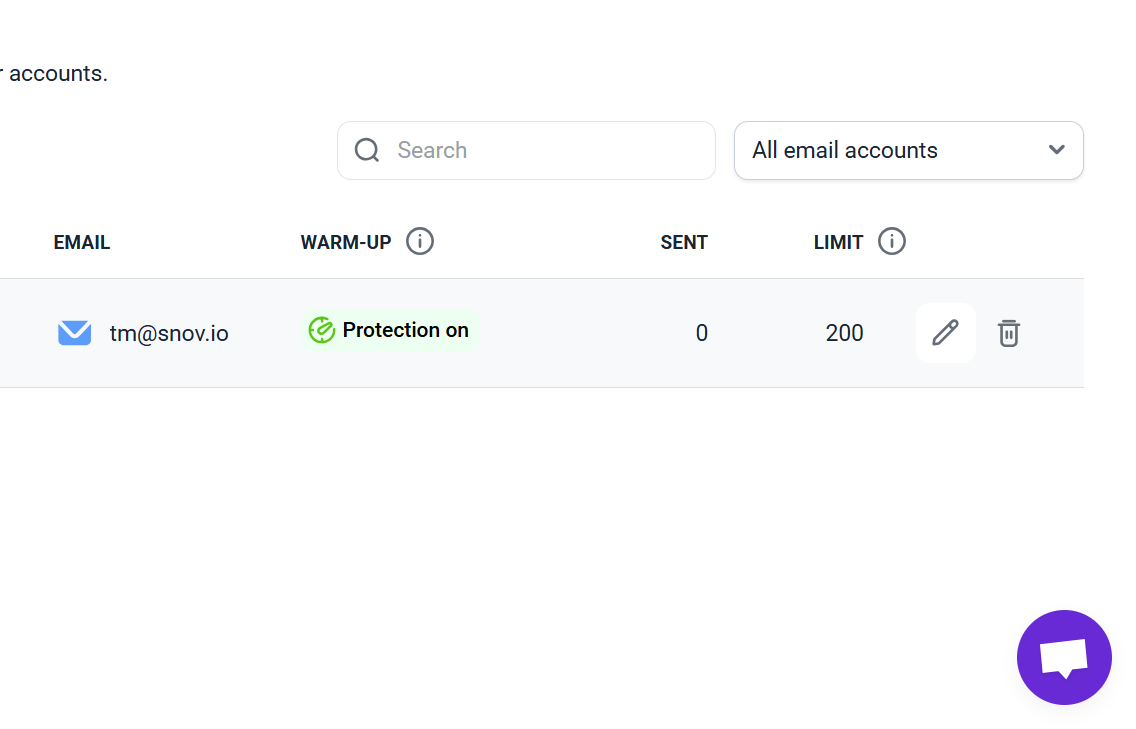
How to check MX record
To confirm that your MX record is correctly configured and has been updated in domain settings, perform a quick free test in your email account settings. Click Edit icon next to the relevant email account.
Before checking MX record, wait up 48 hours after making changes to ensure they are fully applied to your domain settings.
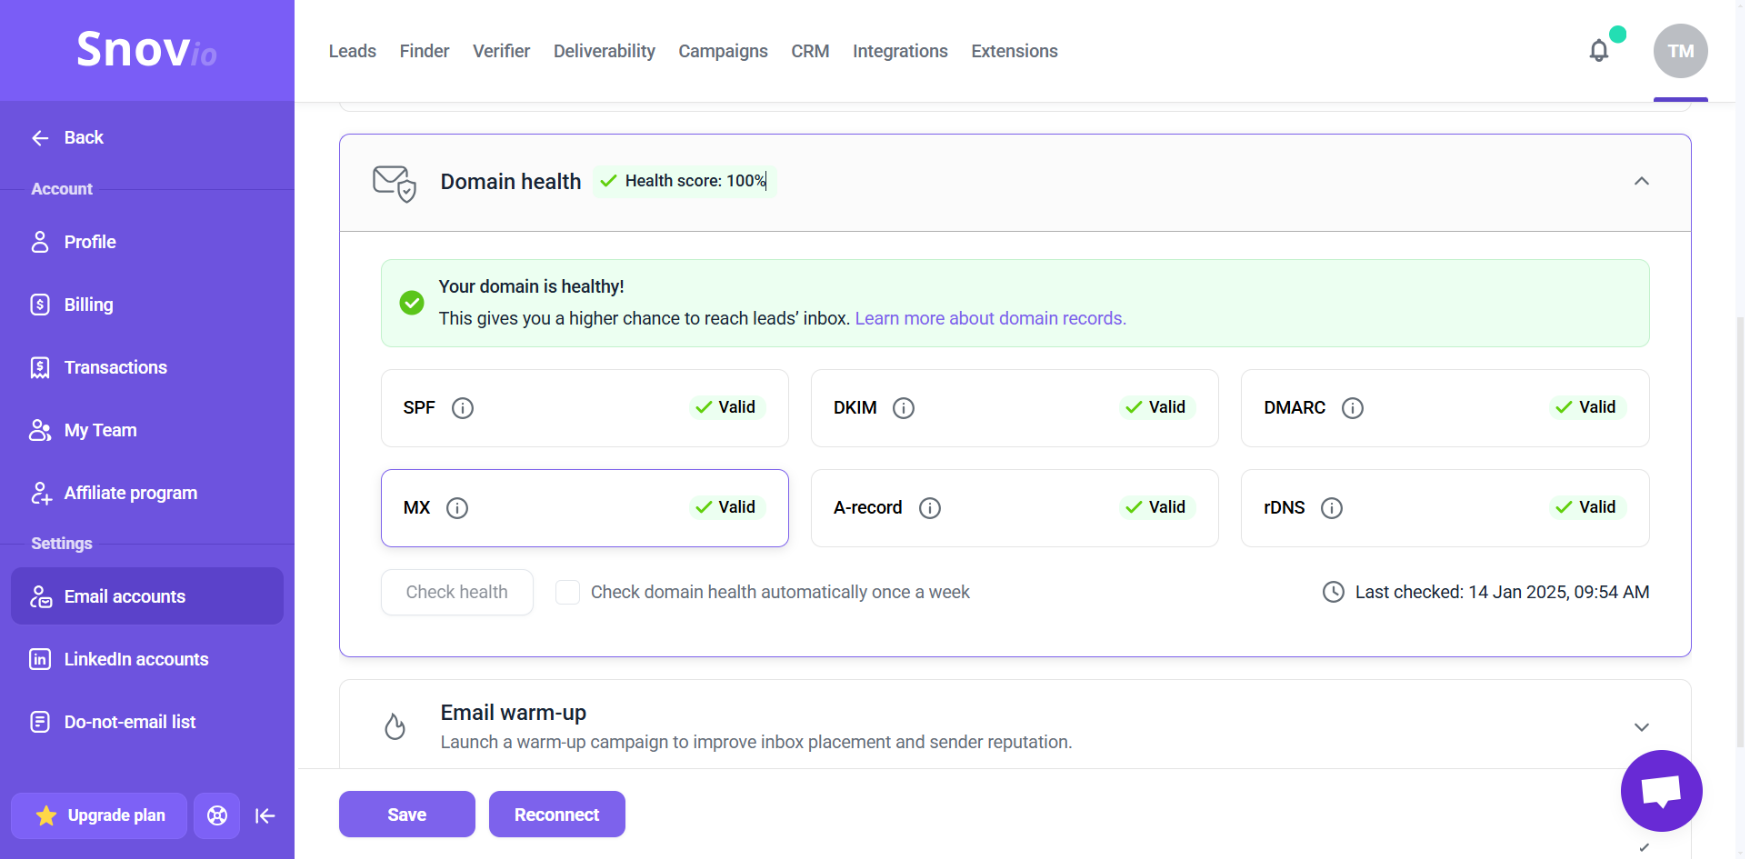
Go to the Optional settings section, select the Domain health tab, and click Check health. After the check is complete, you’ll see the status of your MX record (along with other DNS records). A Valid status means your record is correctly set up and active. If there’s an issue, the check will show it — contact your email provider for assistance.
Troubleshooting MX records
It might take up to 72 hours for MX record changes to work. If it's been less than 3 days since you set them up, wait before troubleshooting.
1. Check the number and priority of your MX records
If you switch to a new email service provider, remove the MX records related to the previous ESP before adding new MX records.
2. Add or remove the @ symbol in the Hostname field
A common MX record error that affects email delivery is the value in the Name or Hostname field.
When adding MX records to your DNS with your domain host, it may need the "@" symbol or leave the field blank altogether.
If @ causes an error leave this field blank.
Try adding "@" or leave it blank. Check again after 72 hours to see if it helps.
3. MX value error
If you see an error after saving MX record, try adding a period after the ".com" in MX value.

Sorry about that 😢
How can we improve it?