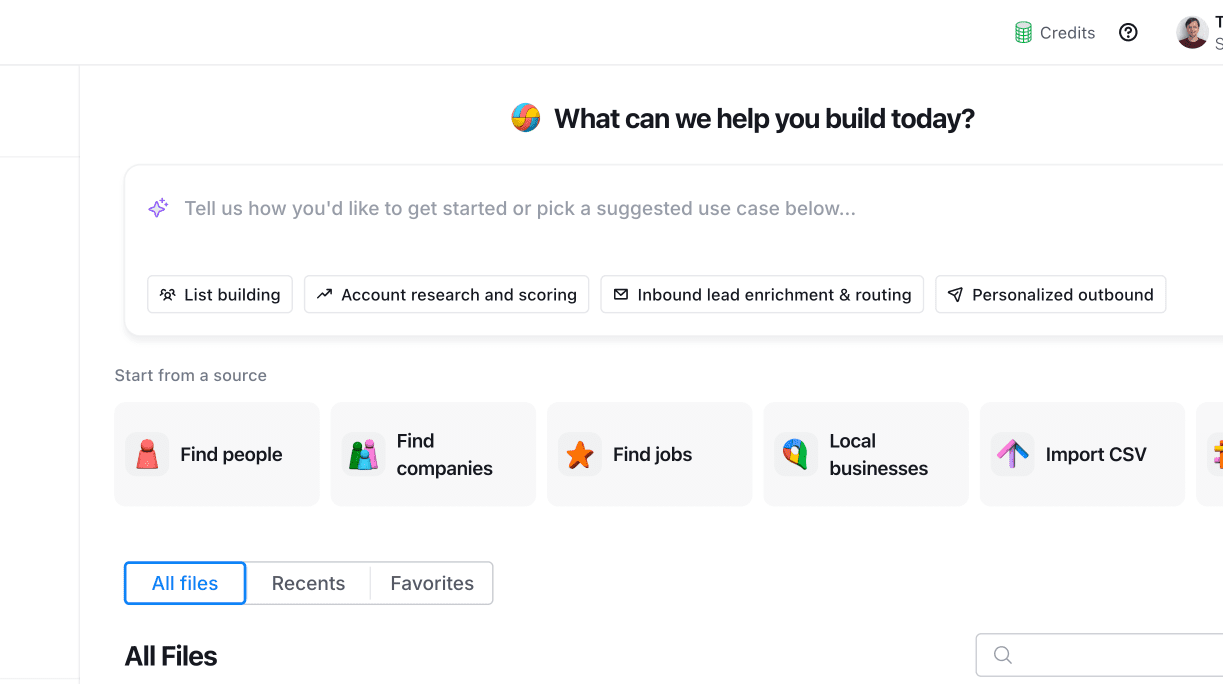
In this guide, you’ll learn how to integrate Snov.io with Clay for enrichment and outreach automation.
The workflow we’ll set up includes the following steps:
Action 1. Find and enrich prospects in Clay with Snov.io
Action 2. Add prospects to a Snov.io list
Action 3. Start a campaign in Snov.io
Before you start:
1. You can set up this workflow using a free Snov.io account.
2. Your Clay plan should include access to Integrations.
Action 1: Find and enrich prospects
When building Clay tables, select Snov.io as your data provider to enrich prospect data and find email addresses.
Find prospects or upload data
To get started, prepare your table with prospects in Clay.
- Use the Find people option in Clay
Add search filters on the right to find prospects that match your criteria.
When you’re done choosing filters, set the lead limit and continue to create a Clay table.
- Import your existing data from a CSV file
For enrichment with Snovio, Clay accepts the following fields as inputs: LinkedIn URLs, email addresses, prospect names, and company domains.
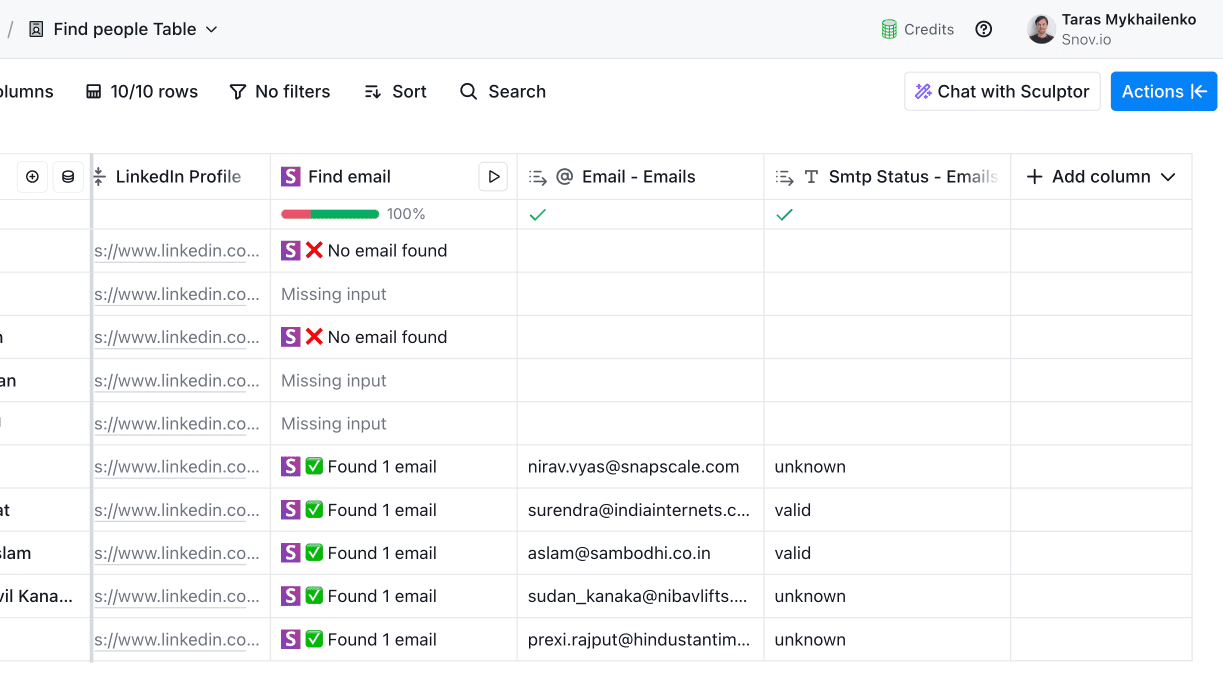
Enrich prospects with Snov.io
We’ll use Clay's data points with Snovio’s Find email action.
The data inputs required for this enrichment:
- Full name: The prospect’s first name and last name
- Company domain: The company's website
Clay automatically provides these fields when you use it to find people, and Snovio can then enrich those profiles with a verified email address.
Let’s set up the email enrichment action. While in a Clay table, add a new column at the top:
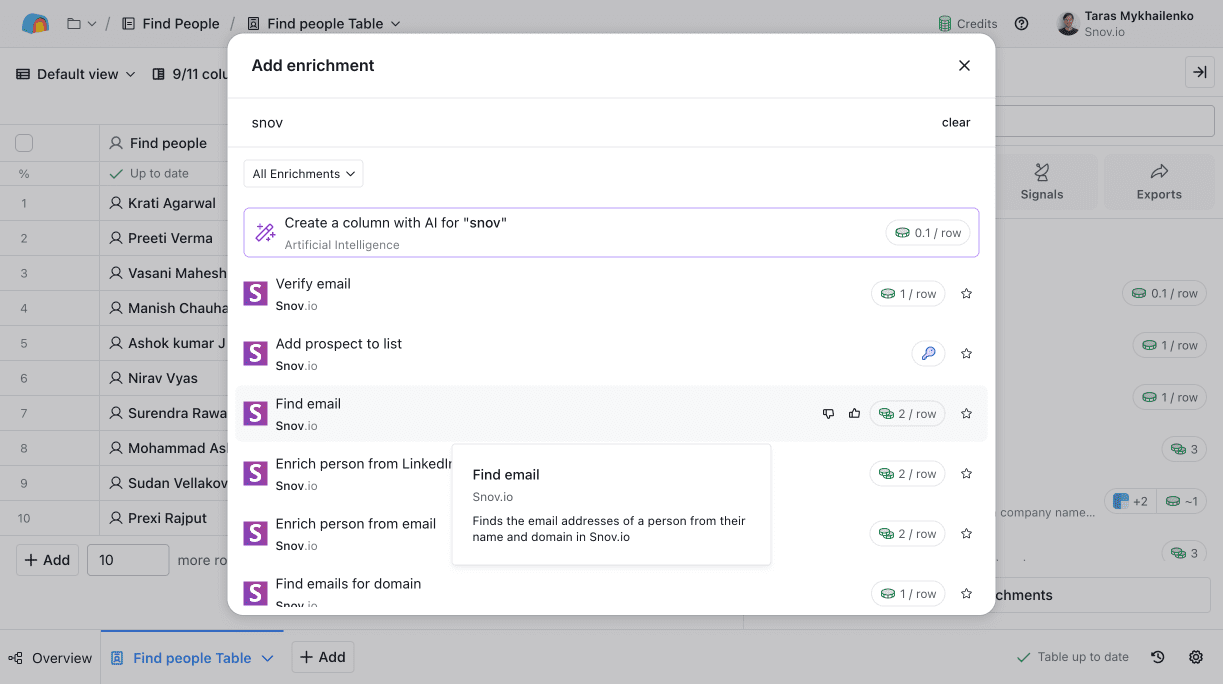
Clay supports multiple Snov.io enrichment actions. Select another action based on your current needs and data:
- If you only have LinkedIn URLs → use Enrich person from LinkedIn URL
- If you only have an email address → use Enrich person from Email
See full list of Snovio actions in Clay with inputs and outputs.
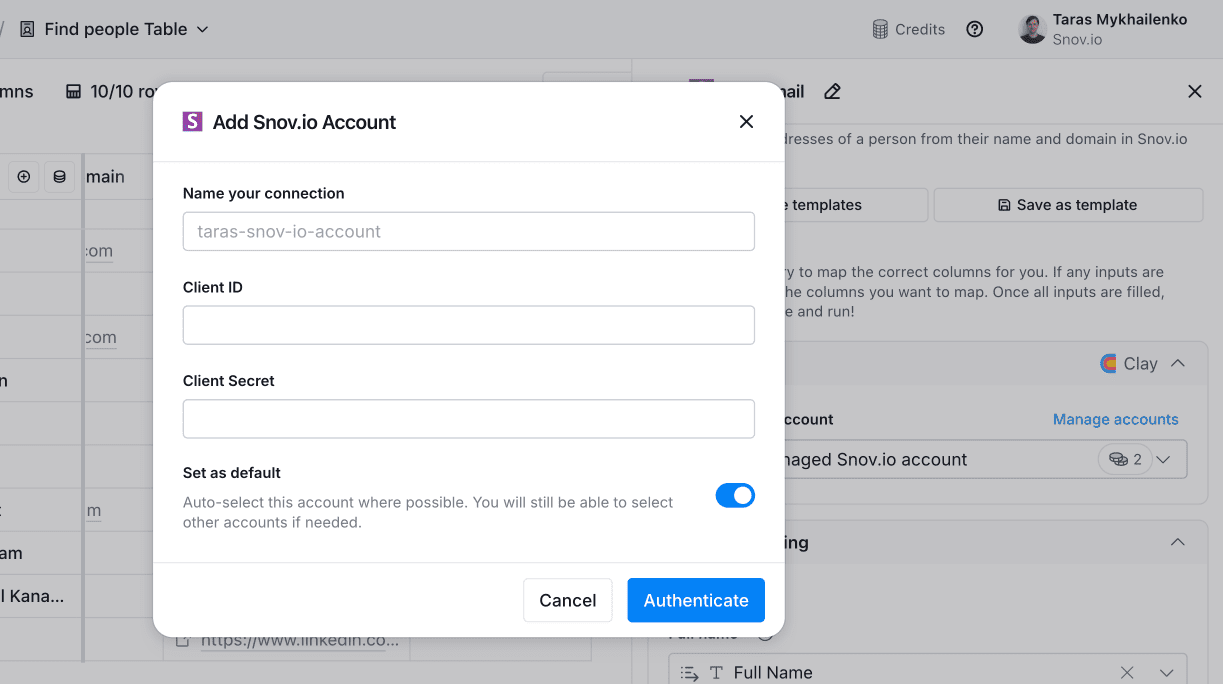
Connect your Snov.io account to Clay
This step is optional, but required if you want to run the full workflow (including Action 2).
Clay lets you use your Snov.io plan credits for enrichment. To do this, connect your Snovio account in Clay and select it when setting up the action.
If you prefer to use Clay credits only, you can skip the connection and continue to field mapping.
Connecting your own Snovio account to Clay will allow you to:
- Use credits from your Snov.io plan for all Snov.io enrichments
- Add enriched prospects to your Snov.io list and send them into a campaign

To set up direct integration, add your Snov.io account via API keys.
Go to Snovio account: Settings → API; Copy your API User ID and API Secret.
Return to Clay: In the action settings → Add new account. Paste the API keys and authenticate.
Choose your connected account from the dropdown.
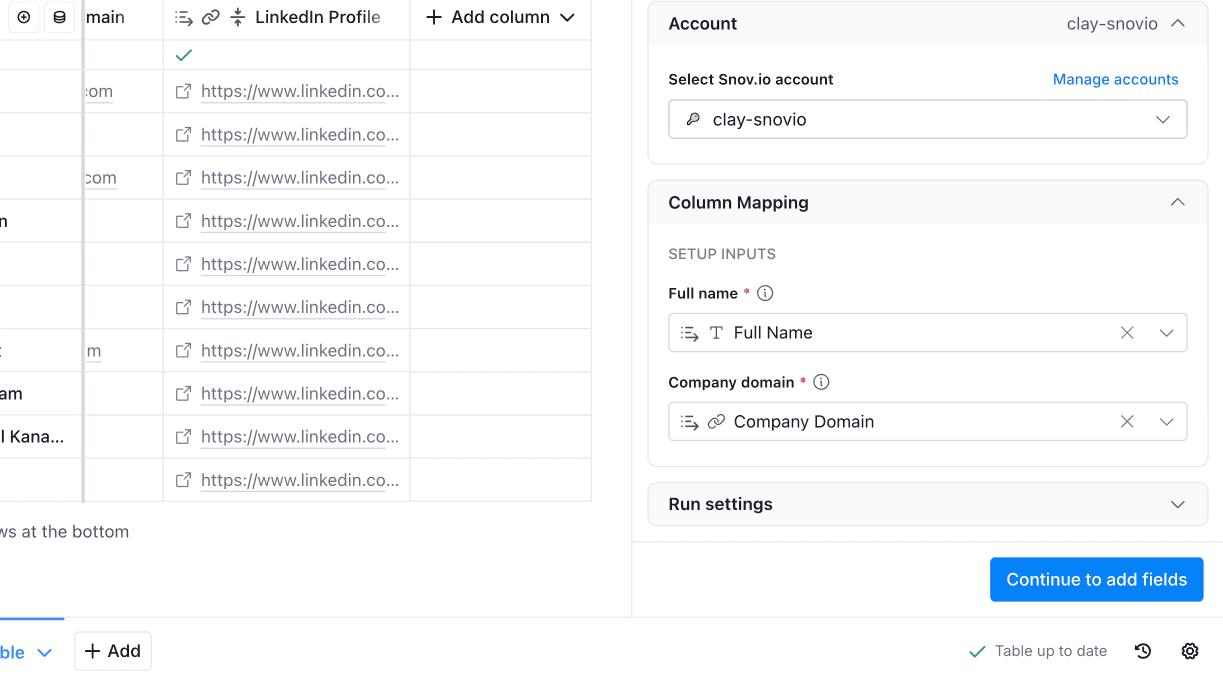
Map input columns
Clay automatically maps the columns Snovio needs as inputs for enrichment. Check all required fields under Column mapping in Clay.
In our example, the required fields are the Full name and Company Domain.
Add output columns
Next, select which fields enriched by Snovio will be added back to your table.
In our example, the output fields are Email and Verification status. After you run the integration, the enriched data will appear in the corresponding columns.
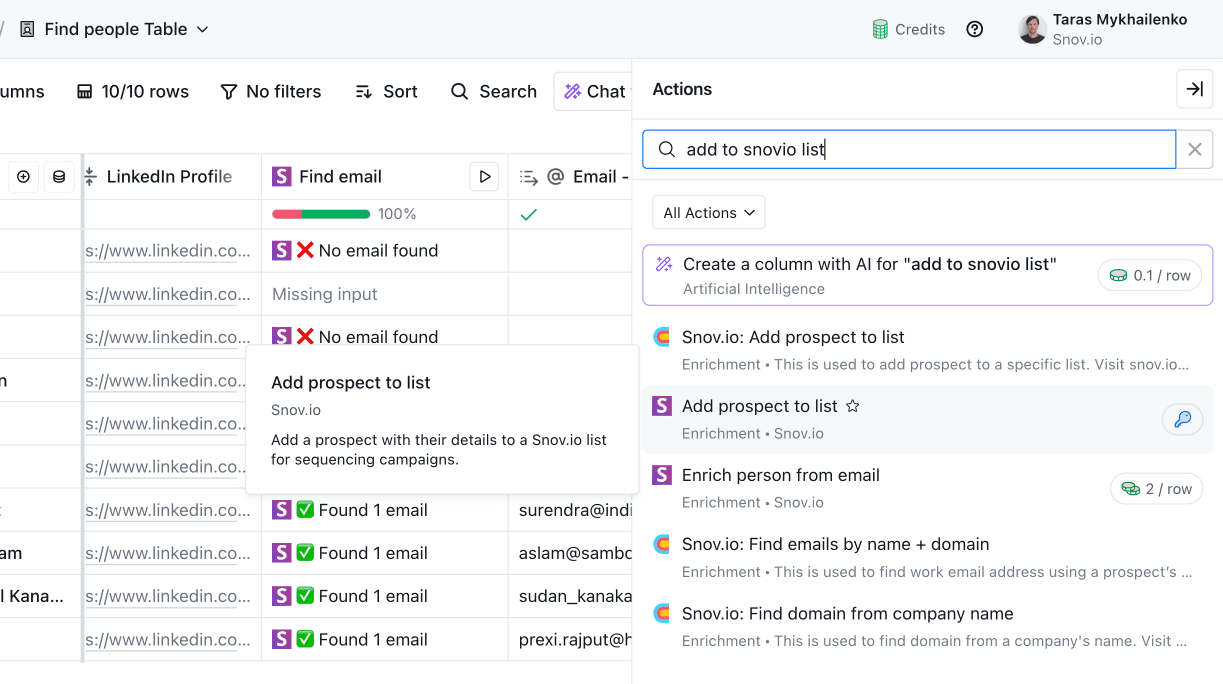
Action 2: Add prospects from Clay to a Snov.io list
Now set up the main part of the integration: sending prospects from the Clay table to a Snov.io list.
Use the Add to list action
While in your Clay table, click Actions at the top right. Search for Add prospect to list → choose the Snovio option.
Choose the target Snov.io list
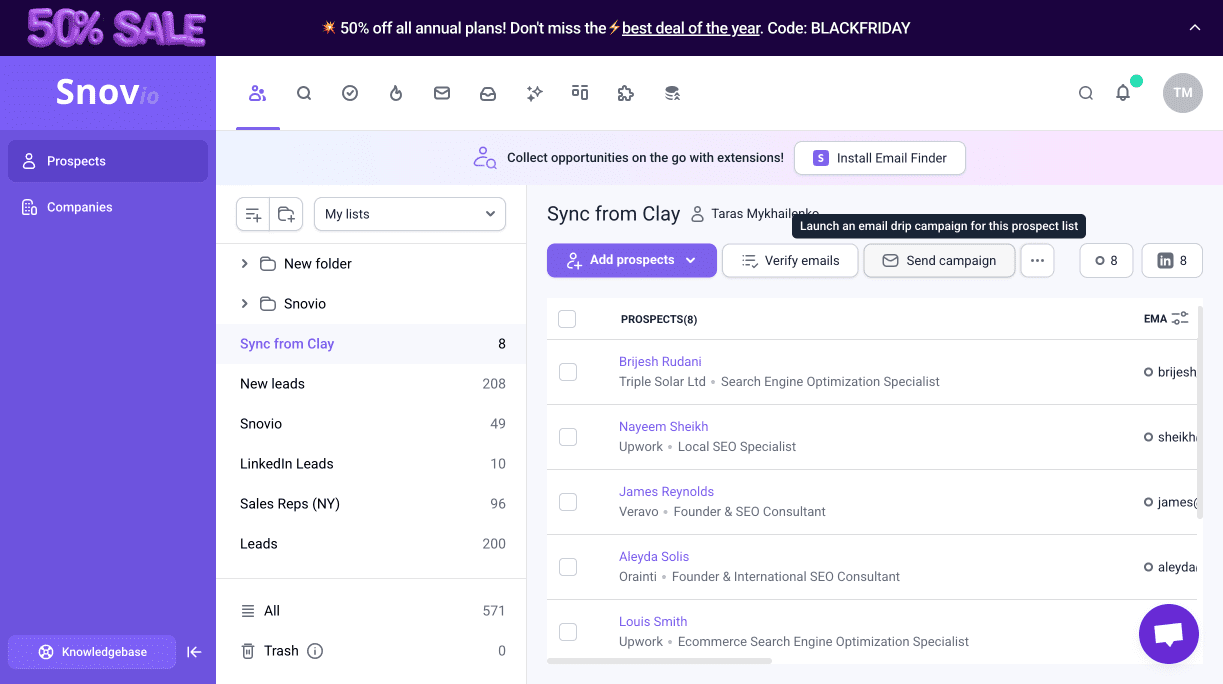
Next, we need a list in Snovio where the leads from Clay will be saved.
Go to Prospects and create a list or choose the one you already have. Return to Clay and select it in the List dropdown.
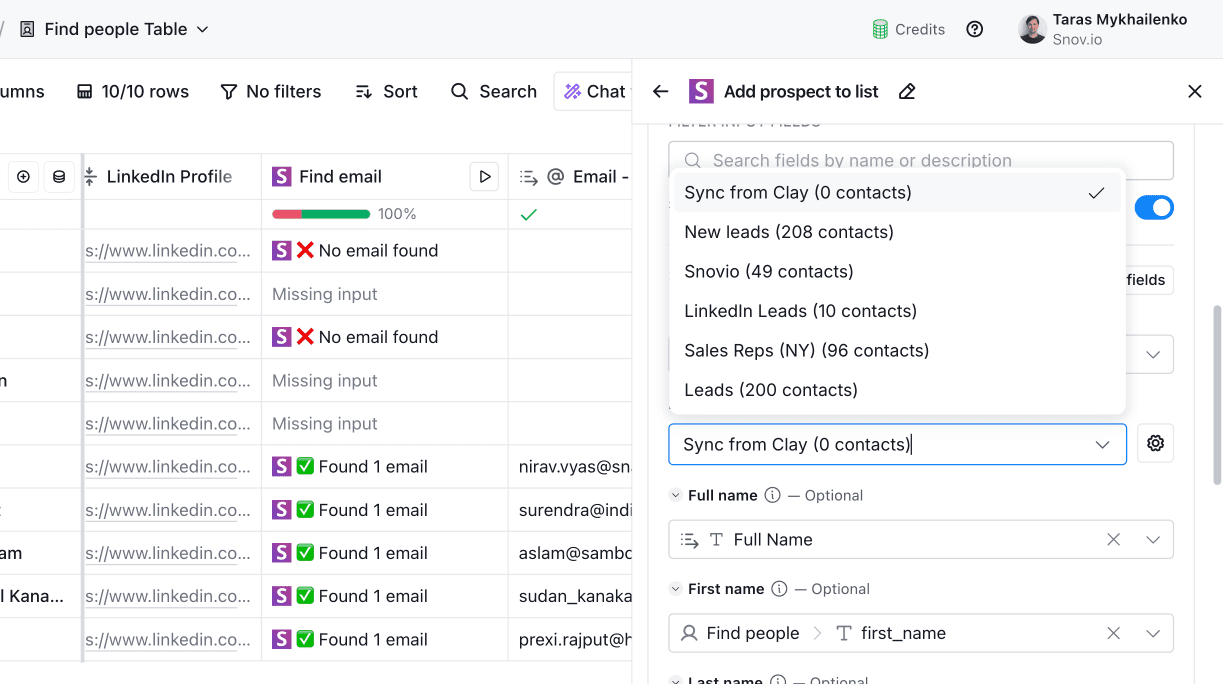
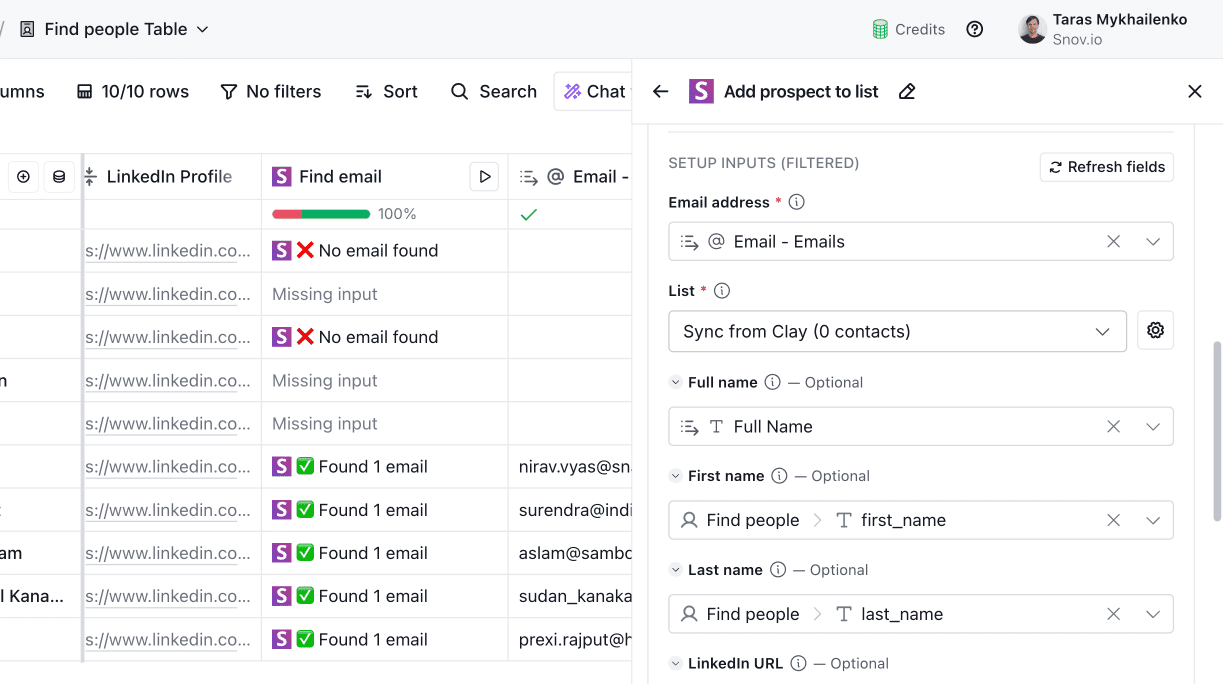
Map Clay columns to Snov.io fields
Choose which fields will be imported to Snovio when syncing prospects.
Clay will auto-map the default fields. You can also map other Clay fields you have to our custom fields.
Click Refresh fields to pull up the newly created fields from your Snovio account.
Qualify prospects
Map output fields
Because this workflow uses the API, Snov.io will return default status fields in the response.
If you don’t need this data stored in your table, leave the last section blank.

Activate the workflow
Before you enable the integration for the entire table, run a quick test.
Pick one prospect. In the Add to list column for that row, click Run cell.

After this, go to Snov.io → Prospects → check if the new prospect is there with all mapped fields.
If everything looks correct, activate the integration for the whole table.
Action 3: Start a campaign
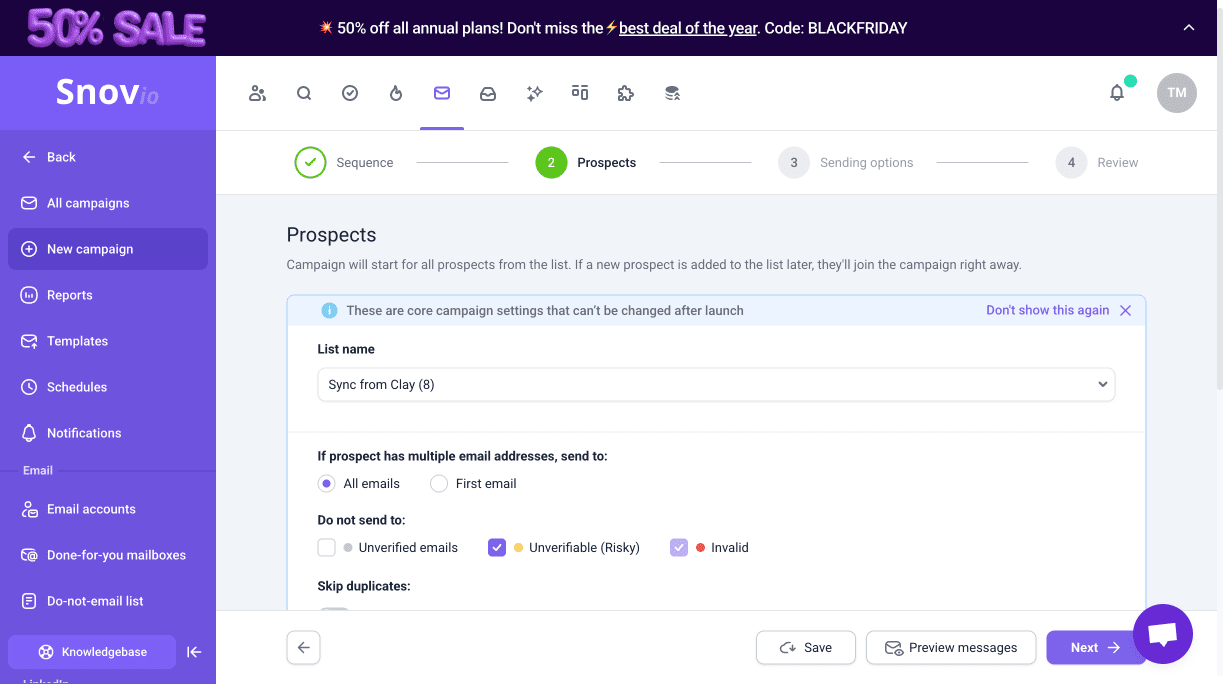
The final step in this workflow is to launch a campaign and start contacting your prospects.
From your prospect list in Snov.io, click Send campaign to create a multichannel sequence.
Use one of campaign templates or build your own sequence. Add emails and other steps in the Campaign editor.
Snovio sequences can contain emails, LinkedIn actions, behavioral triggers, delay steps, and goals.
Automate the Clay & Snovio workflow
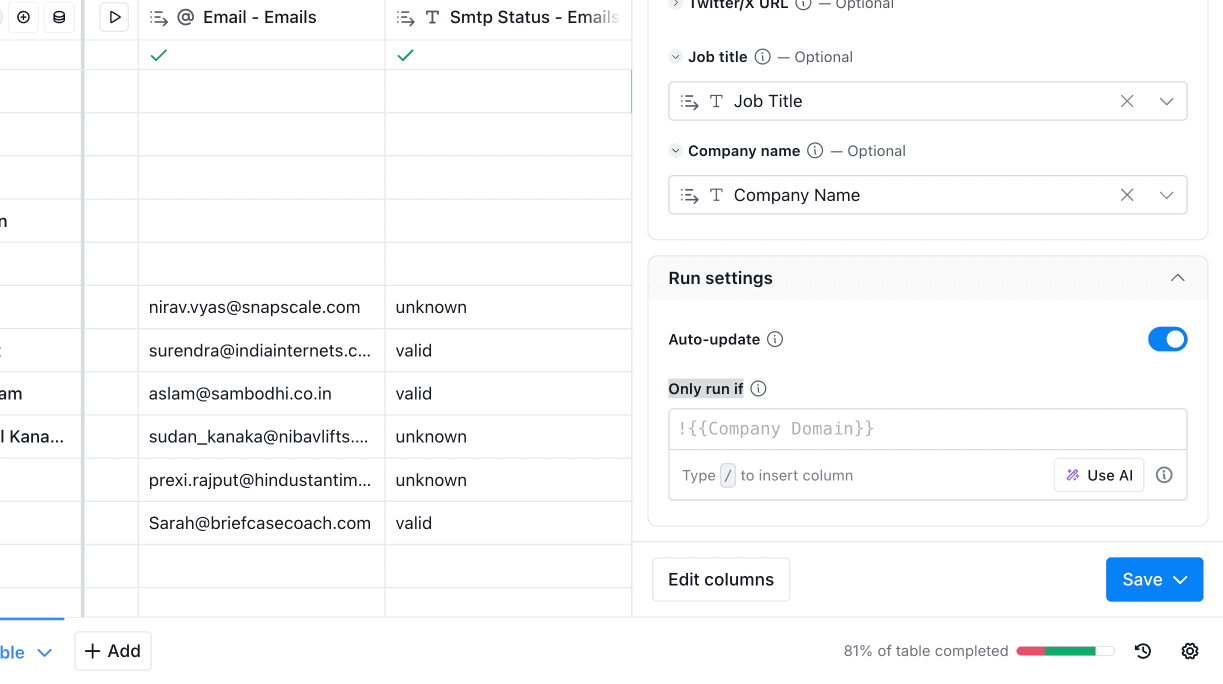
To keep your Snov.io list updated with new prospects without manual work, set up Clay to run Snov.io actions automatically.
In the Run settings, make sure the Auto-update is enabled in both Find email and Add to list actions.
With this workflow configured, the entire process runs automatically whenever new rows or prospects are added to your Clay table.
Snovio & Clay workflow:
Prospect added in Clay → Enriched and verified by Snovio → Qualified based on your criteria → Added to your Snov.io list → Enters your active sequence.


Sorry about that 😢
How can we improve it?