In this article, you will learn how to do deliverability tests to detect email issues and get personalized reports with advice on how to fix email issues and improve your results.
Email deliverability refers to an email's ability to reach the primary inbox and avoid spam filters. It depends on several factors, such as your domain health, sender reputation, email content quality, and whether your domain or IP is listed on blacklists.
With Snov.io's Deliverability Check, you can test your email account and content against all of these factors to detect and fix issues that might affect their performance in campaigns.
When to do deliverability tests:
Run tests regularly, before launching any campaign, and during active campaigns if you notice certain metrics are lower than expected:
An email open rate below 30% may indicate issues with emails being sent to the spam folder.
Step 1: Create a test
In your Snov.io account, find the Deliverability tab in the menu at the top.
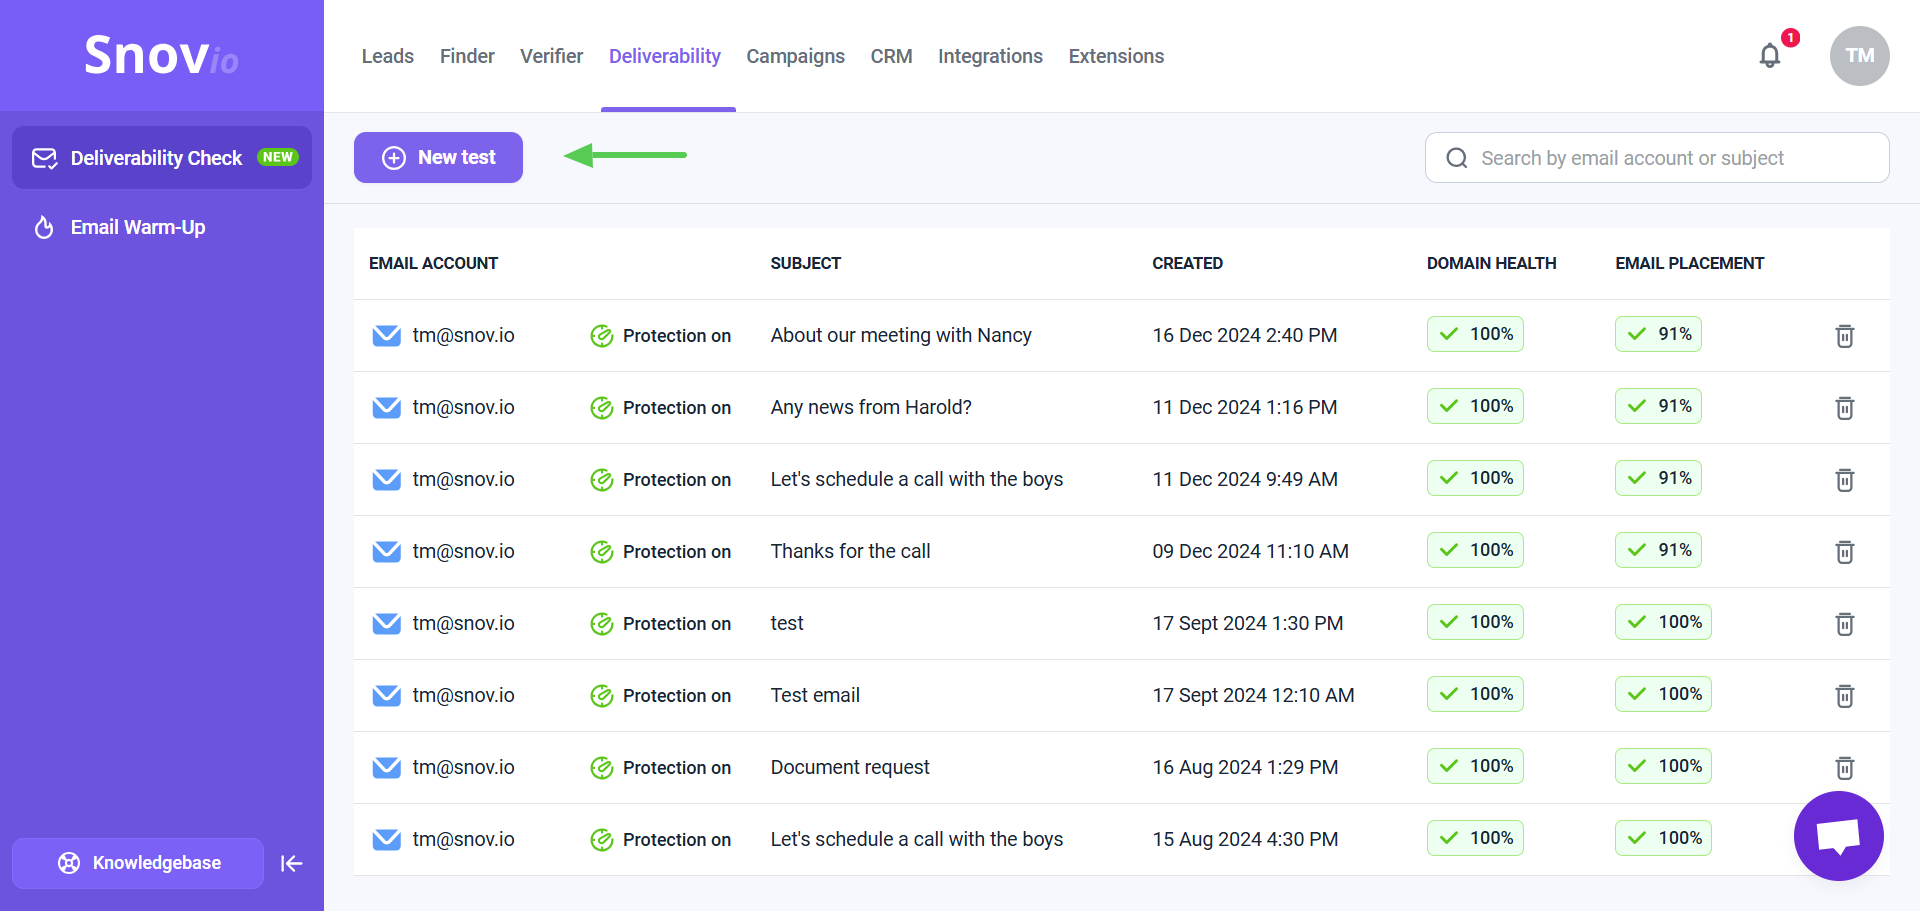
On the Deliverability Check page, click New test.
Step 2: Choose email account
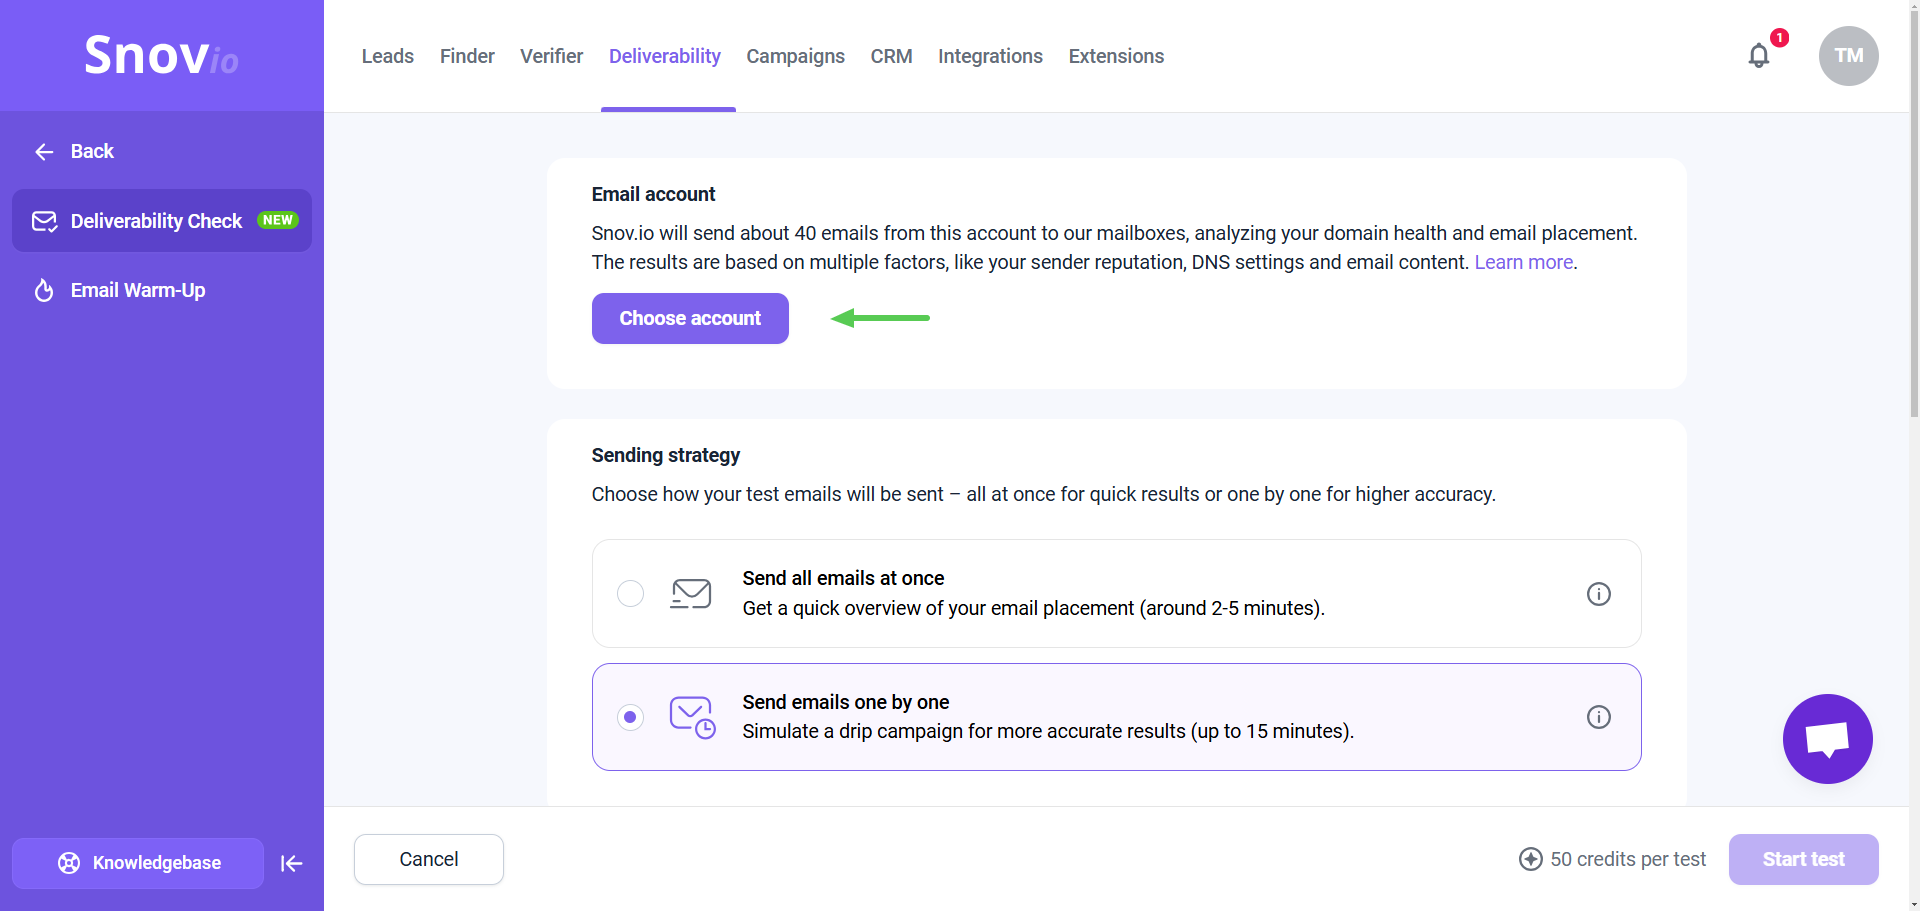
On the test settings page, select the email account from the pop-up window. The list will include all accounts previously connected to Snov.io.
You can test one account at a time - if you have multiple sender accounts, create a separate test for each.
Step 3: Choose sending strategy
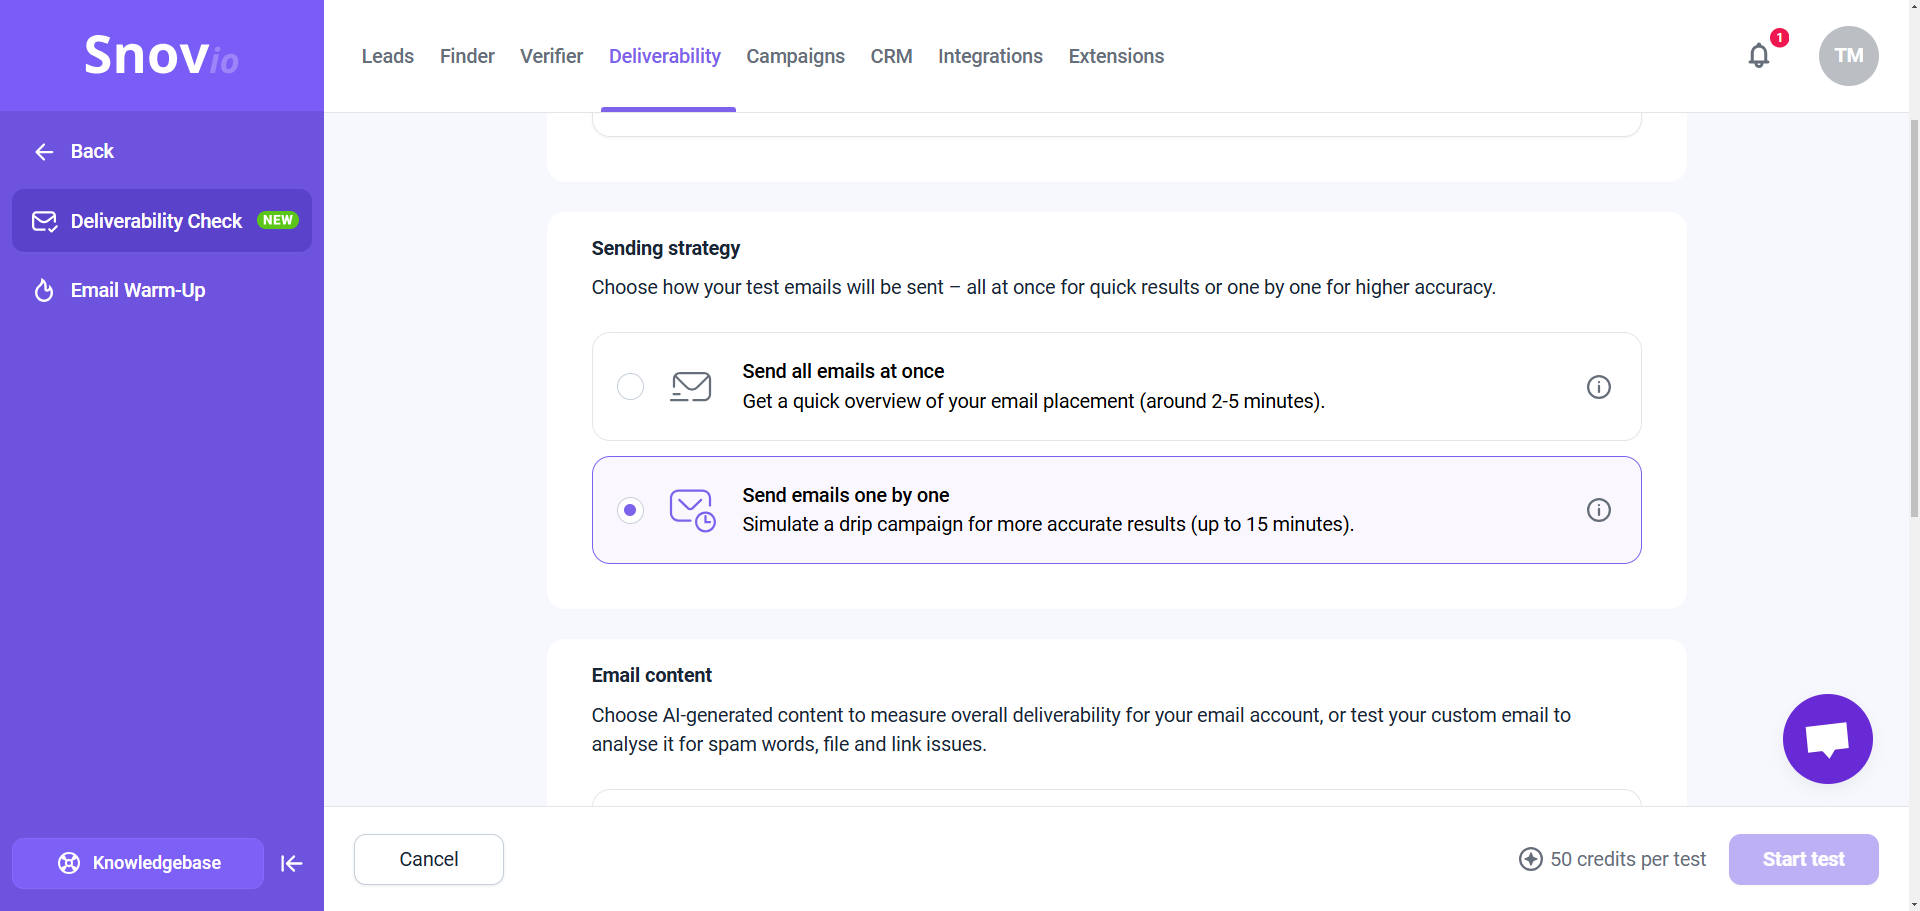
Here you can choose how you want to perform the test. The strategy you select will determine how the test emails are sent.
A quick test
All test emails are sent without an interval between them. We'll add all test recipients as CC (carbon copy) recipients and analyze their email placement.
A real campaign simulation
Test emails will be sent with a 10-second delay between each email. A test with a delay between emails provides more accurate results, as it simulates the real way of sending campaigns.
Step 4: Add email content
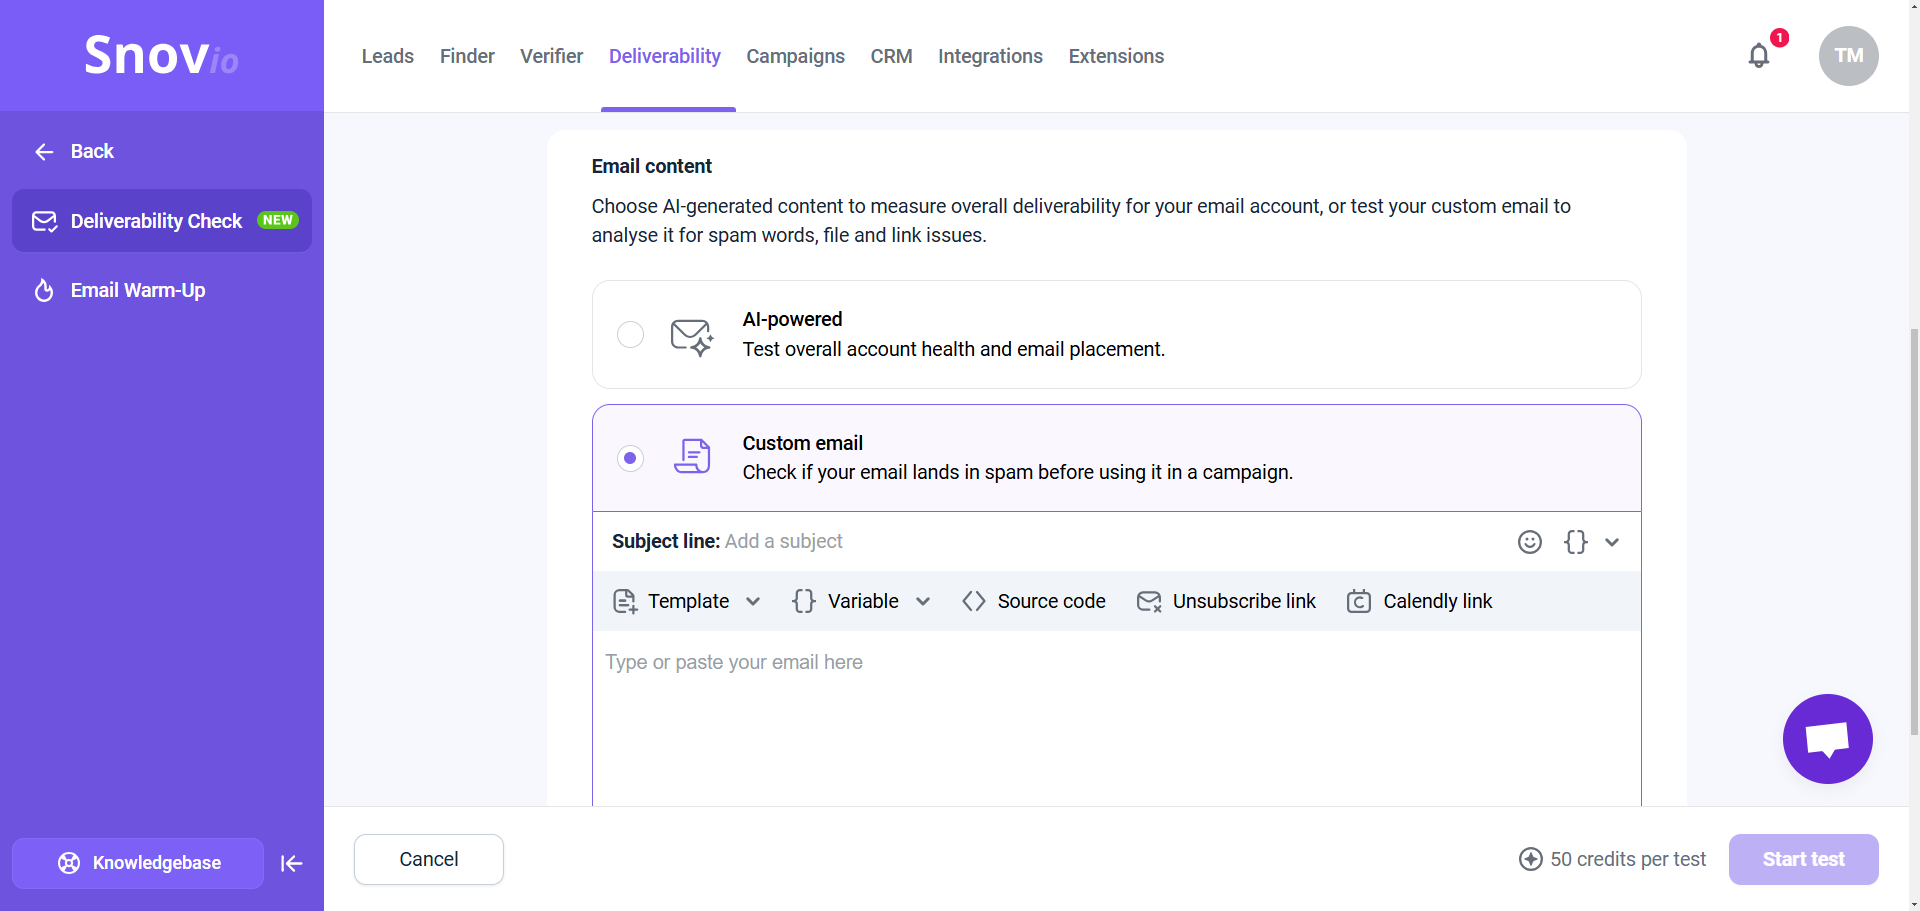
Next, add the email content for the test. Select from the following options:
AI-powered (default)
This option uses AI-generated content in the test emails. Use it if you want to test the overall condition of your email account.
Custom email
Use this option to test the actual email you plan to use in your campaigns. Add images, links, and attachments to check for any potential issues and ensure that your email content won't trigger spam filters. Choose it for testing the email copy you plan to use in campaigns and checking how well it is delivered.
Step 5: Start test
To perform the test, Snov.io sends a series of emails from your email account to specially maintained test mailboxes. During the test, your sender reputation, domain DNS settings, and email content are analyzed.
Each test costs 50 credits from your balance. If the test cannot complete due to the connection issues, the credits will be refunded to your balance.
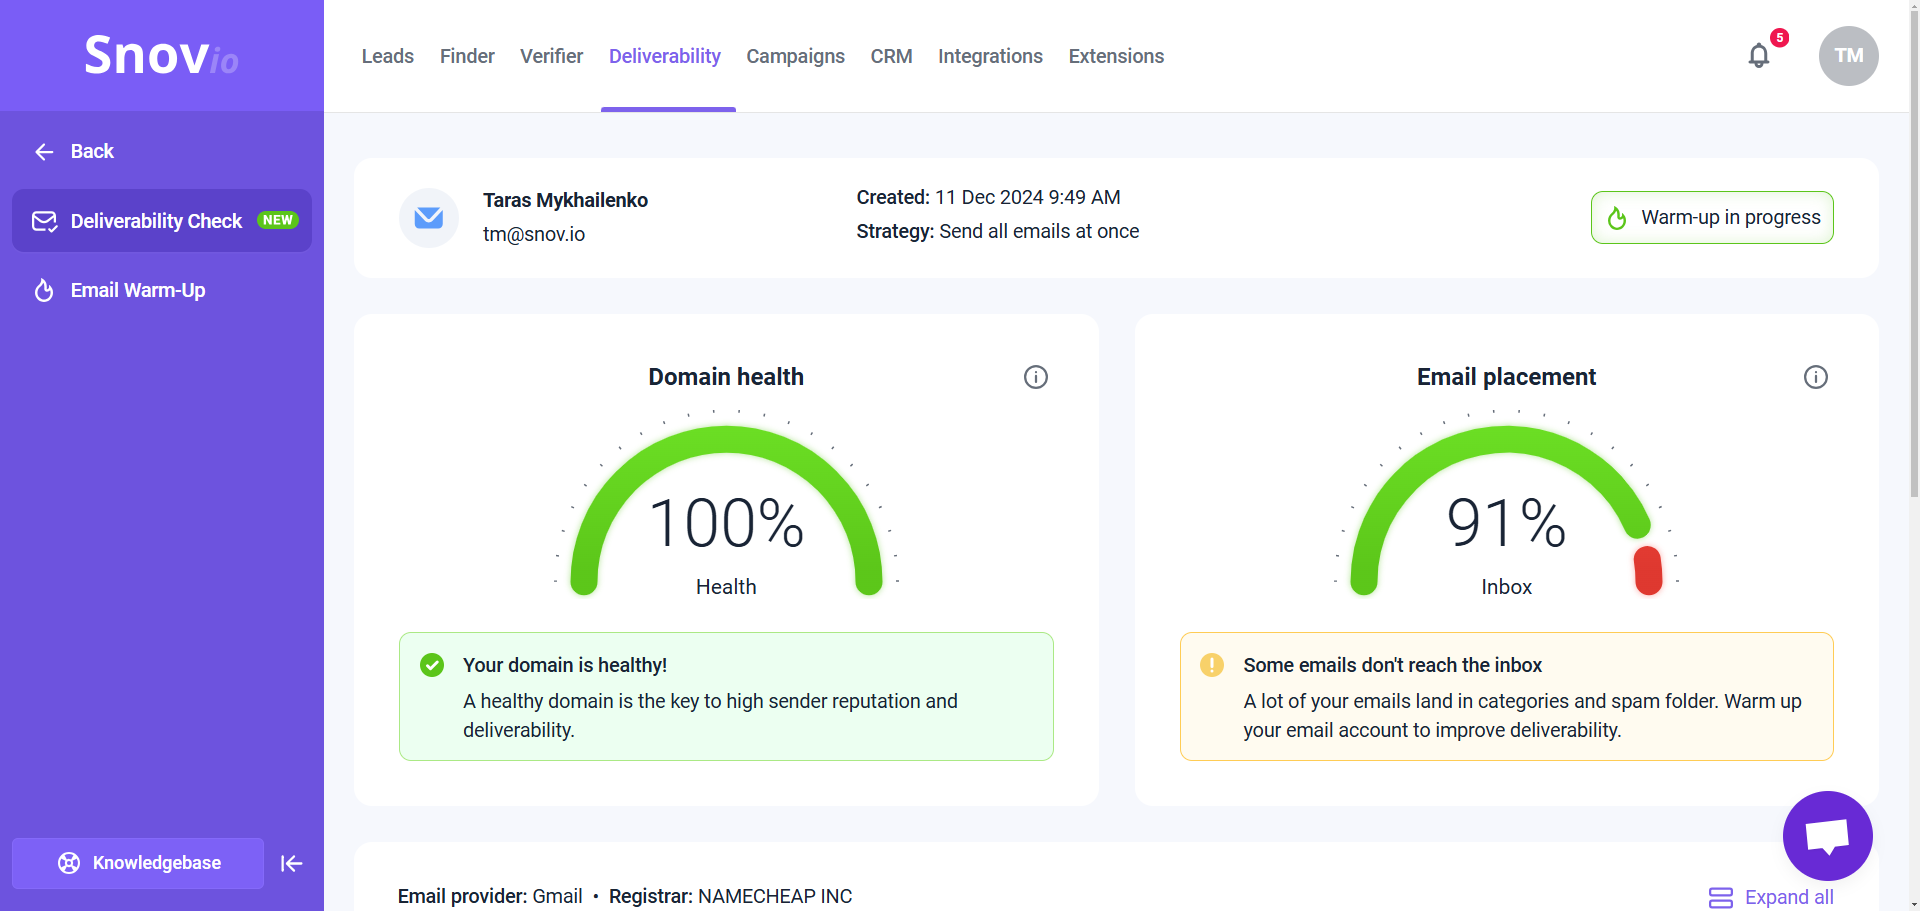
The test results preview gives you an overall score, providing a snapshot of the current condition of your sender account.
Domain health score
This score means the technical health of your sender domain. It is calculated based on the status of your domain's DNS records.
A score of 75-100% indicates that your domain health has passed the check. If some DNS records are missing or incorrectly configured, the test will detect it.
Email placement score
This score means your current potential deliverability — the percentage and the number of test emails delivered to the primary inbox, spam, or categories.
The email account passes the check if the Spam rate is below 2%. If the Spam rate exceeds 5-10%, it indicates that many emails are going to spam, and there may be issues.
If the Spam rate is above 10% in the test, we don't recommend launching campaigns yet. Start email warm-up and repeat tests every 1-2 days to monitor how your email placement improves.
Step 6: Review deliverability report
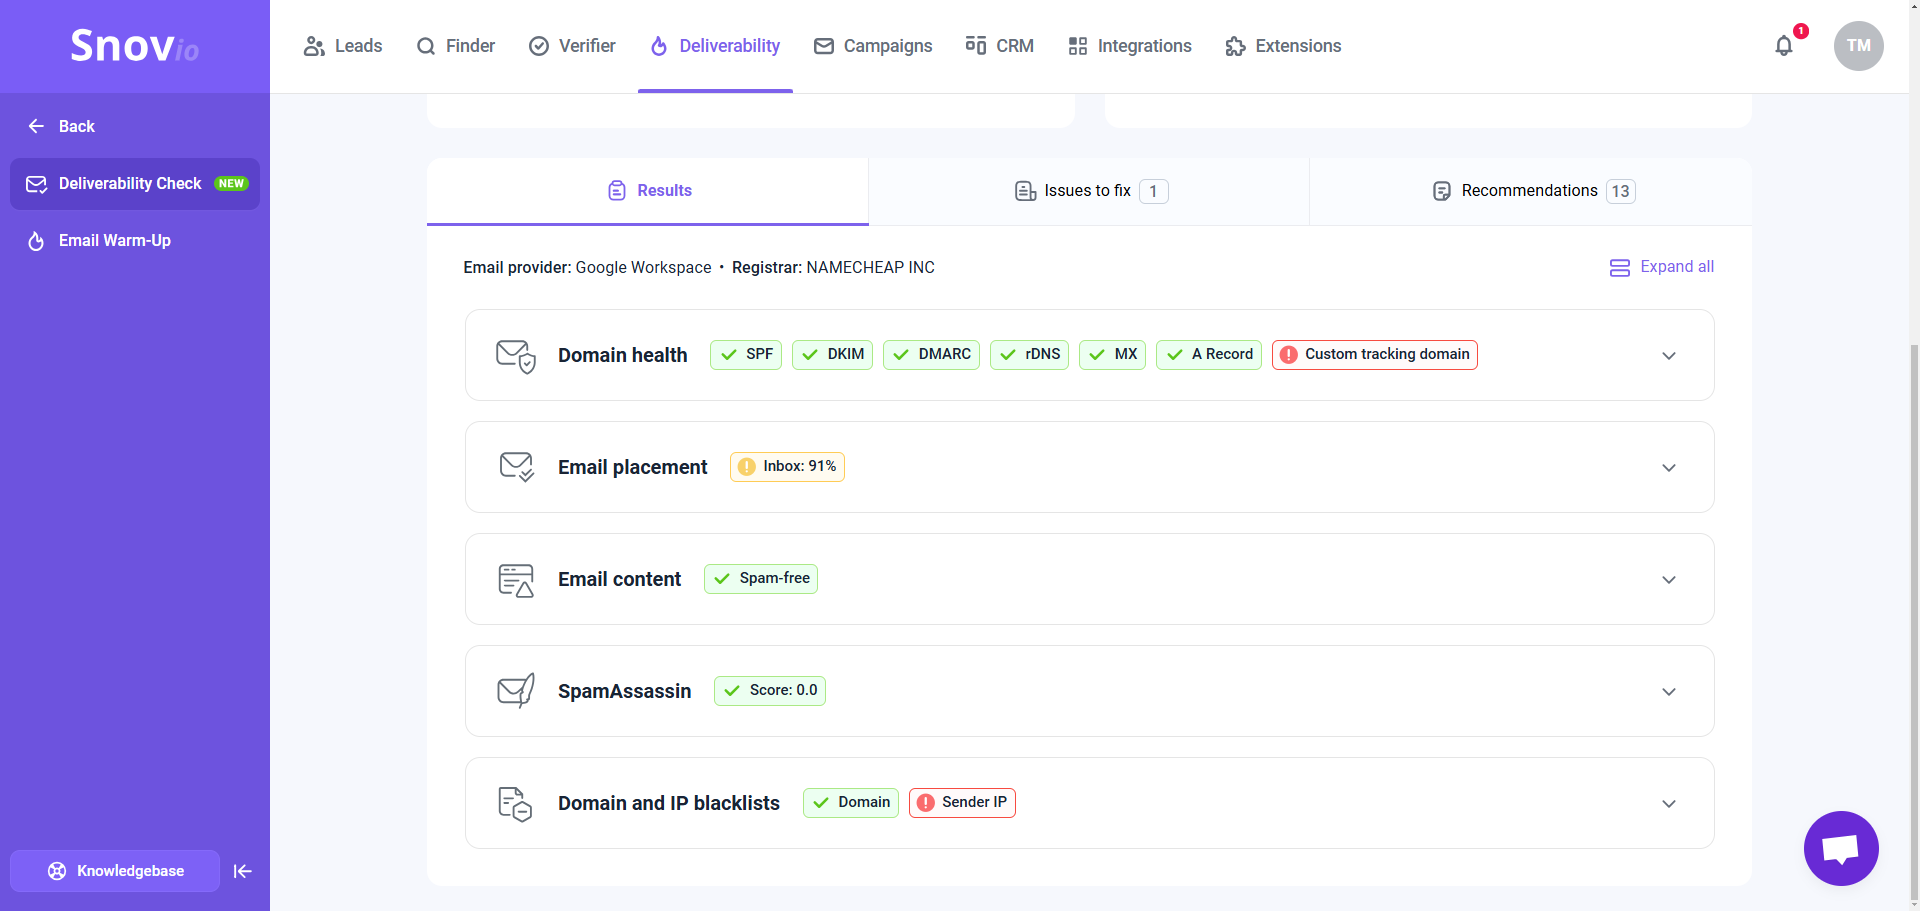
Once the test is complete, you’ll receive a personalized deliverability report. It includes detailed insights for each tested metric, a list of detected issues that need fixing, and personal recommendations to improve your results.
Domain health
In this section, you see the status of every DNS record on your domain and whether it is configured correctly.
Snov.io automatically identifies your email provider and domain registrar. In the test results, check the Domain WHOIS Information. There, you’ll see your domain’s information, including the Registrar URL (provider's website).
How to fix:
To improve your domain health, ensure all DNS records are added and verified as valid.
If any record is missing or can't be verified, the report will show which records need attention. Go to the Issues to fix tab and see details in the Domain Health section. You'll find instructions to update the domain settings for your specific provider.
Domains with valid records gain a higher sender reputation. Emails sent from a healthy domain automatically have a higher chance of reaching the inbox.
Email placement
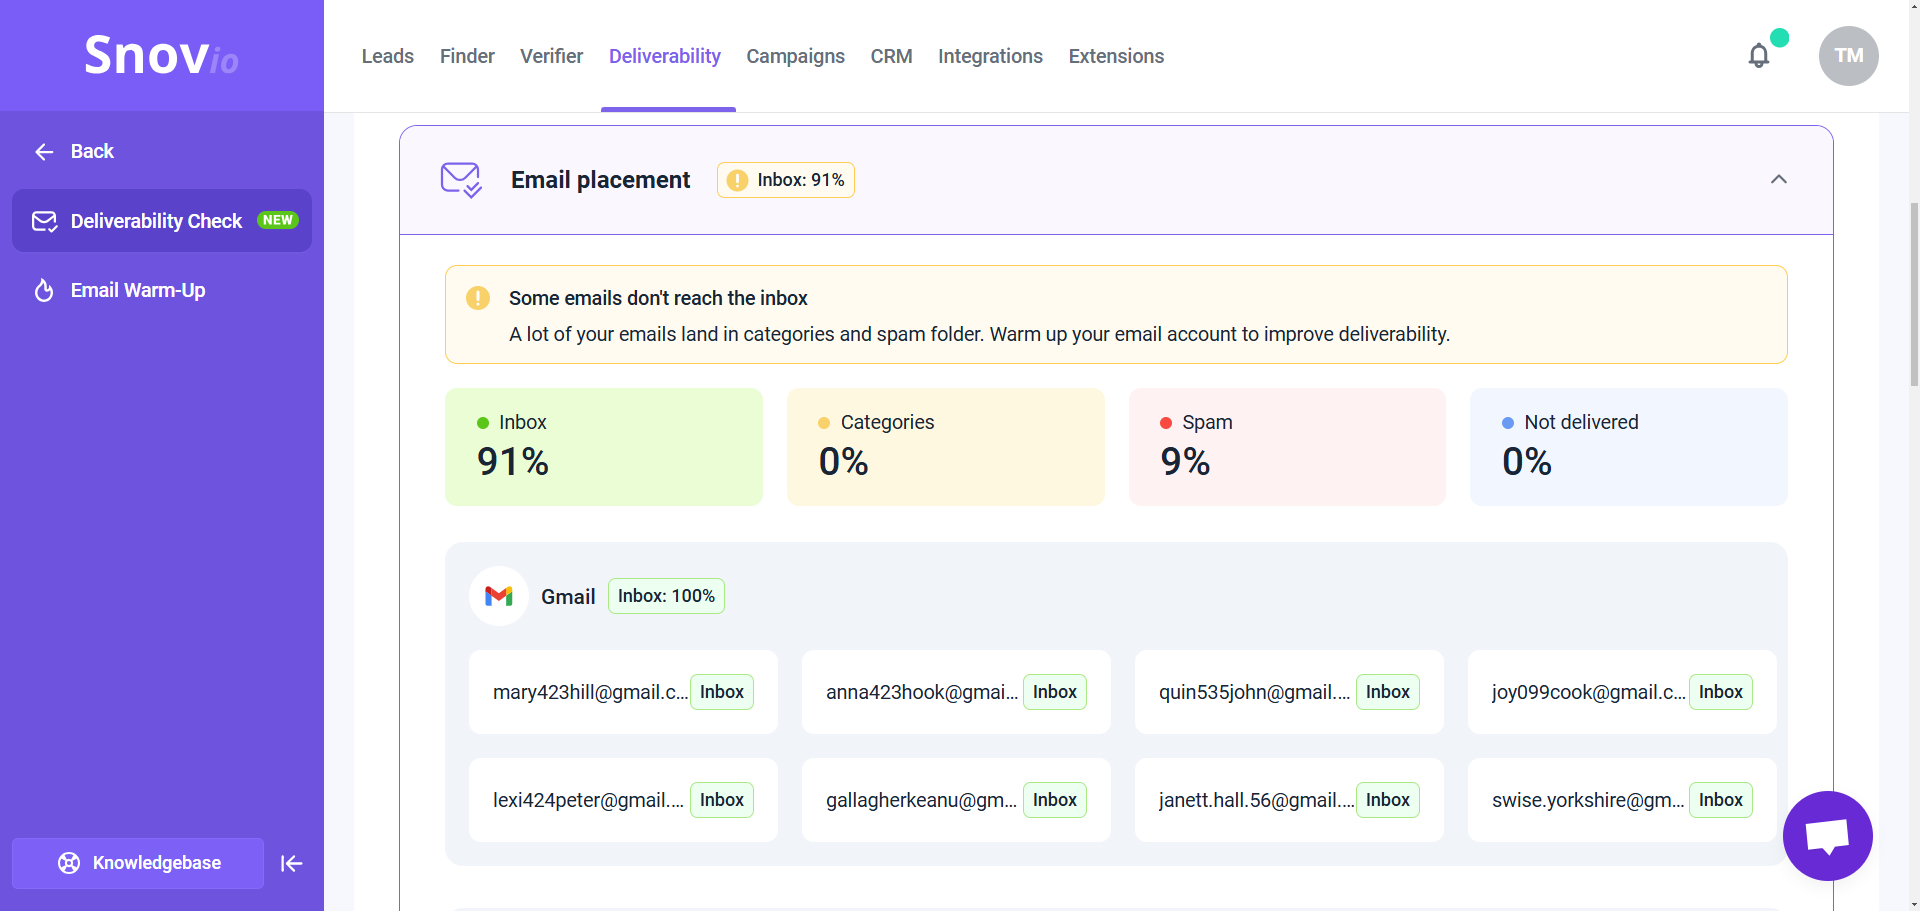
In this section, you’ll find a detailed report on the delivery status of your test emails and the folders they were delivered to.
The test includes all popular email providers: Gmail, Google Workspace, Microsoft Outlook, Microsoft 365 (Business), Namecheap (Private Email), Zoho, and Amazon Workmail. The report shows which folders your emails are delivered to for each of these providers.
Inbox: The percentage of emails delivered to the primary inbox.
The Inbox rate above 90% is considered excellent, though there may still be minor issues or areas for general improvement.
Categories: The percentage of emails delivered to the Categories folder. While not as bad as being marked as spam, it still reduces the chances of your recipient noticing it. For example, Gmail's categories include Social and Promotions, which means your email is classified as marketing. To avoid this, adjust your email content — it likely contains many HTML elements.
Spam: The percentage of emails were delivered to spam. It means some of the providers consider your email spam and it triggered their spam filters. If the spam rate is above 10%, it indicates there are issues with email your content or presence on blacklists.
Not delivered: The percentage of test emails rejected by the recipient. This may indicate temporary issues with your provider's server or that the email was rejected due to problems with your sender reputation.
How to fix:
If the "Not delivered" or "Spam" rate exceeds 10%, we recommend pausing any active campaigns, starting a warm-up, and reviewing the issues detected after your test.
Each provider may use its own criteria to mark emails as spam: it depends on your domain health, sender reputation, and the content of your emails.
The specific issues that could affect your results will be listed in the Issues to fix tab. In the Recommendations tab, you'll find tips and best practices to improve your inbox rate.
Email content
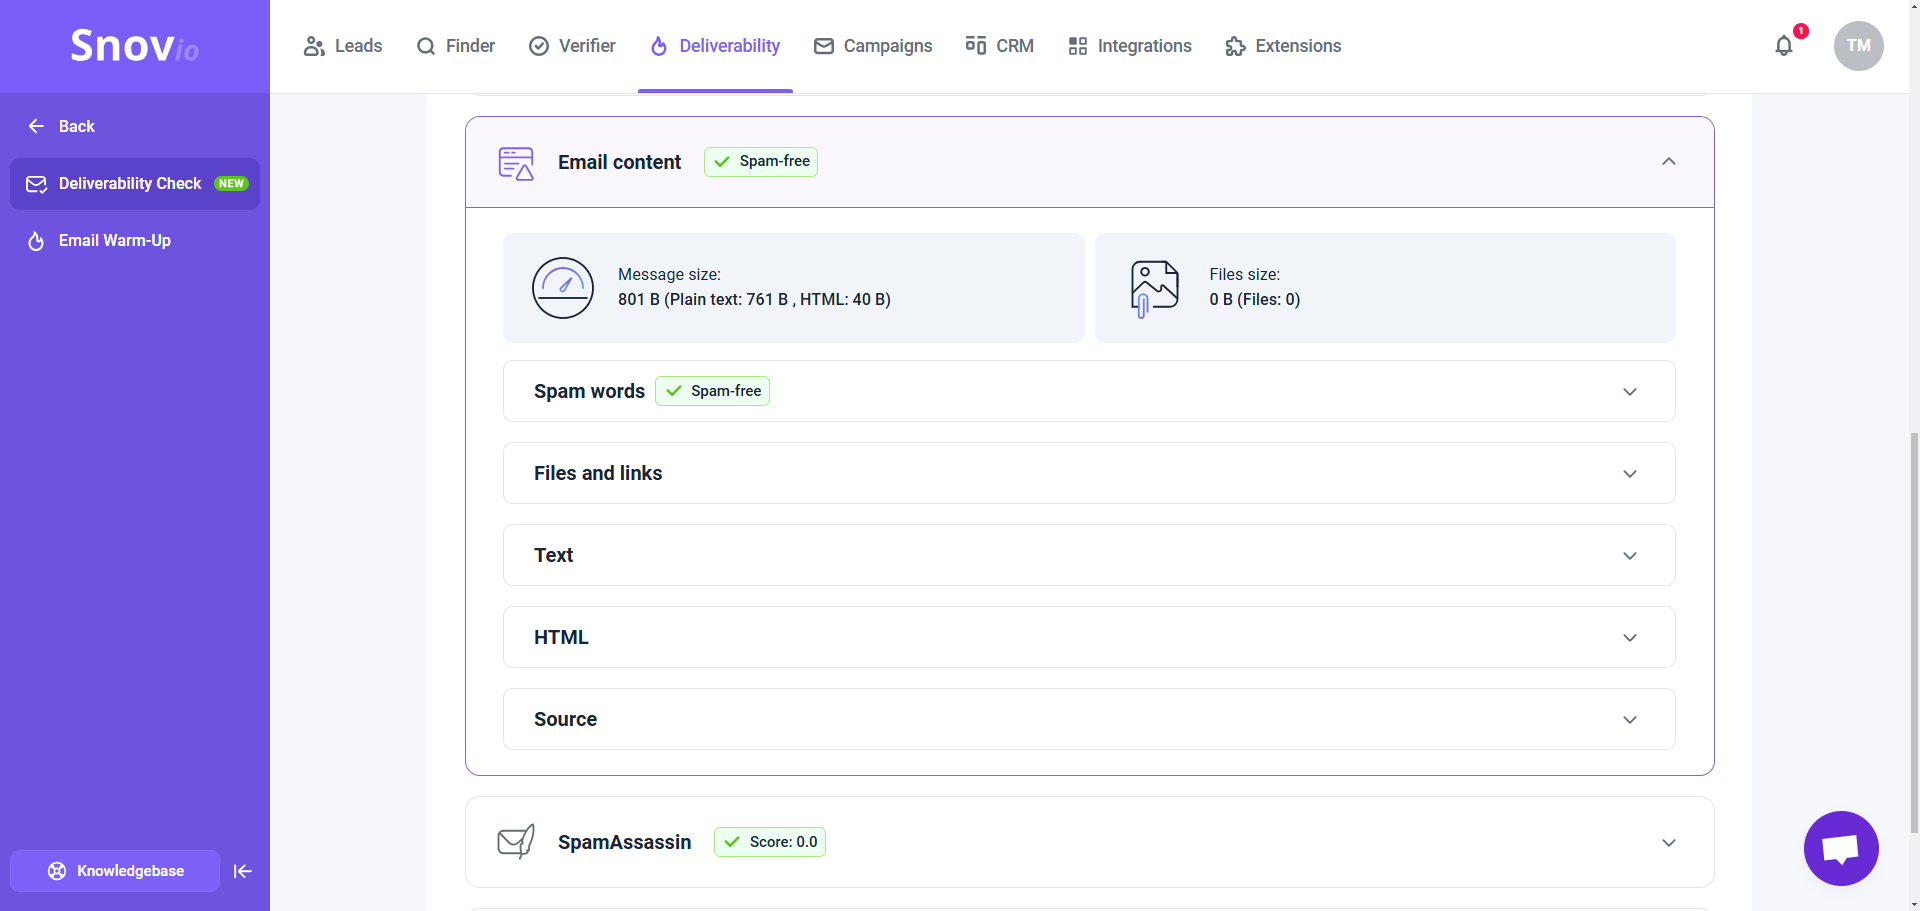
This section shows what in your email content might affect deliverability and what to fix to avoid being marked as spam.
Spam words
The test also checks your email content for potential spam triggers. It scans for specific words or phrases that might activate spam filters. If any are found, they'll be highlighted in the results. To improve deliverability, remove or rephrase these parts of the text.
Email size
The test checks the size of your email, including all its elements. "Heavy" emails are more likely to be marked as spam. The email size is measured in Kb (kilobytes) – the recommended total size is under 100 Kb. Read how to optimize email size.
The email size is measured in Kb (kilobytes) – the recommended total size is under 100 Kb. Read how to optimize email size.
Images in your email content can increase its size beyond the recommended limit. Make sure your images are optimized for size and format. This is important for fast loading and proper display on recipients' screens. Read how to use images in cold campaigns.
Attachments and links
The test checks that all inserted links work properly when clicked. If you plan to include any files in your email, ensure you have the recipient's consent. Adding attachments to your first email increases the risk of it being marked as spam.
How to fix:
The content of your emails may directly affect whether they are marked as spam. Each provider may use its own criteria to filter emails, but there are general guidelines for senders.
We check every component of the email that is reviewed by spam filters.
The specific issues with the email content that could affect your results will be listed in the Issues to Fix tab. In the Recommendations tab, you'll find tips and best practices to improve your email content and avoid spam filters.
Additional tests in Deliverability check
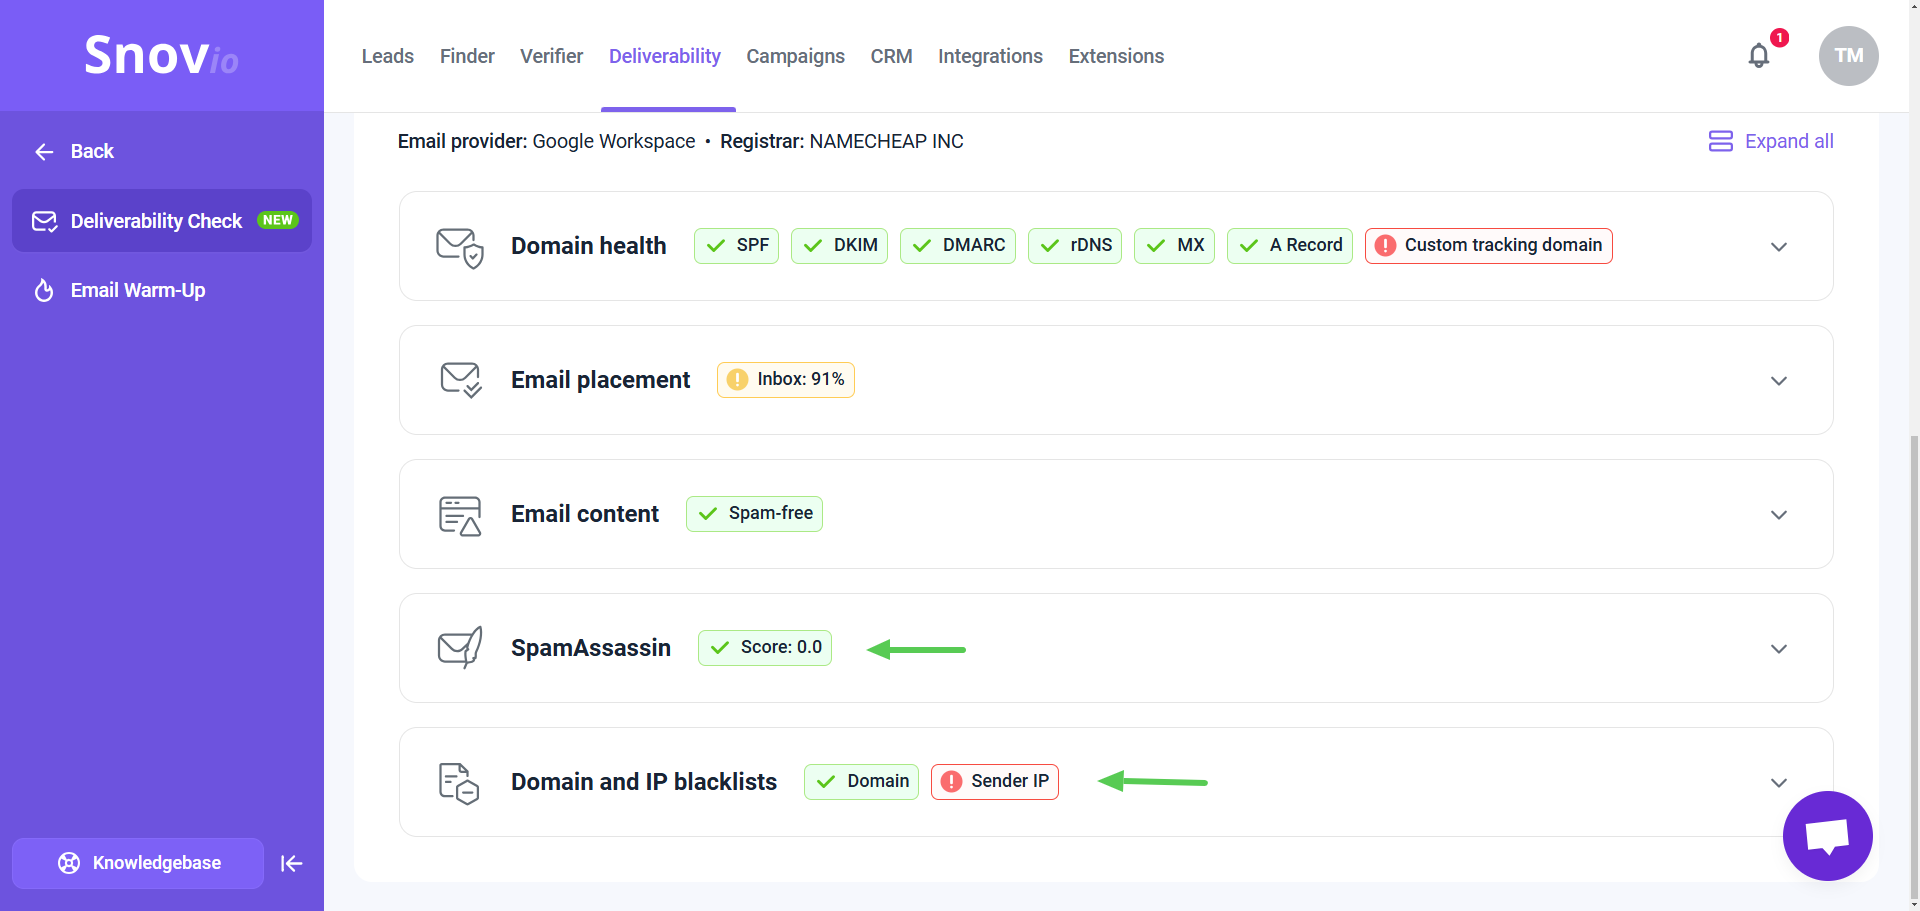
The deliverability report also includes these additional tests:
Spam Assassin analyzes your email and provides a spam score, indicating how likely your email is to be considered spam. Learn more.
The Blacklists check for Domain and IP provides information on whether your sender domain address or IP address is listed on any well-known blacklists. Learn more.
Keep in mind that real campaign conditions may be different than test scenarios, with additional factors that can affect deliverability. Your email sender accounts require continuous optimization for best results.
To achieve best performance in campagns:
- Start warm-up
- Check domain health automatically to detect possible errors in DNS
- Run regular deliverability tests to detect issues and get personalized advice on how to fix them
Here are some additional tips for your email outreach:
1) Send personalized campaigns to targeted lists
Don’t send generic emails to random prospects. Use our Finder tools to collect prospects that match your ICP (ideal customer profile). In your campaigns, personalize your emails with variables and dynamic content to make them more targeted.
Accurate lead targeting + relevant email content = increase in engagement → increase in reputation → increase in deliverability.
2) Use safe daily limits
Don't overload your sender accounts. A safe daily limit per email account is 20-30 emails per day. If you have multiple sender accounts, use Mailbox rotation to increase your total daily volume.
Read more about safe sending limits.
3) Maintain positive sender reputation
Your sender reputation is a score assigned by email providers to your domain. The higher your score, the more likely your emails will reach the inbox. This score is calculated based on recipients' actions and your sender practices.
To build a strong reputation, use an email warm-up to generate automated positive interactions and motivate your prospects to reply.
If you have a question that we haven't covered, feel free to reach out to our Customer Care team. You can contact us at help@snov.io or through live chat. We're here to assist you!


Sorry about that 😢
How can we improve it?