The first step in your outreach journey with Snov.io is to set up your sender domains, email and LinkedIn accounts for multichannel campaigns.
The preparation phase, including the warm-up process, usually takes at least 3 to 4 weeks. Before getting started, log in to your Snov.io account, as a key part of the setup will be done there.
If you skip and ignore these best practices, your emails are more likely to have deliverability issues. This can seriously hurt your campaign success.
We won’t just show you what to do - we’ll explain why each step matters, so you can set up your outreach system with confidence.
Follow the steps below to prepare your cold outreach setup the right way. Let’s dive in!
Step 1: Purchase domains and email accounts
Step 2: Connect email accounts
Step 3: Connect LinkedIn accounts
Step 6: Add custom tracking domain
Step 7: Warm-up email accounts
Step 8: Run deliverability tests
--> Bonus: Outreach system cost & expected results
Step 1: Set up sender domains and accounts
Strong sender domains and properly set up email accounts are crucial for successful cold outreach.
If you plan to do outreach with new email accounts
Start with low volumes/limits, build a positive sender reputation and then raise your limits gradually. It's the only way to avoid getting blocked and protect your sender reputation at the start of your outreach.
Email providers keep a close eye on new mailboxes. If you send more than the guidelines suggest, the provider can mark your emails as spam and even block them. In fact, even 50 emails a day can look suspicious for a new mailbox with no sending history.
Up to 30 emails per day - Our recommended daily limit for new email accounts.
20 emails per day - The optimal limit to start with, if you want to be extra careful.
Why follow our daily limit recommendations?
Do you agree that sending fewer emails and getting some engagement is better than sending more emails that go to spam folders and burn your accounts?
With low limits, you’ll gradually build your email/domain reputation while keeping your deliverability high. Your emails will actually start bringing you results instead of deliverability issues.
The outreach volume itself isn’t what you care about with cold outreach; you care about replies and sales. Your prospects will only see the emails that reached their inbox. While you may think it’s too slow for an outreach, sticking to lower limits will pay off in the long run.
What accounts are considered new?
Providers often have their own definition of it. "New" account doesn't mean it was just created. Generally, any email address that is up to one year old is considered "new." This affects whether the email provider trusts you as a sender; new accounts are always seen as potential spammers.
When is it safe to increase the daily limit for new accounts?
It’s safe to raise limits only after email providers see you as a trusted sender.
With “new” accounts, before you can increase your daily volume to 50 emails per day, you need to build your sender reputation.
It takes over a year of B2B emailing or at least having that domain age to establish a good sender reputation. You can speed up this process to some extent with email warm-up, but it cannot be rushed entirely.
Safe outreach for new accounts:
--> up to 20-30 emails per day is a proven limit for optimal deliverability
--> 3 - 4 mailboxes on the same domain to avoid reputation issues
--> After a year of consistent sending, raise gradually to 40–50 emails
If you plan to do outreach with existing email accounts
Mailboxes that are at least a year old and have a sending history will already have some reputation.
Use Email warm-up to strengthen it before starting campaigns.
To prevent this risk, start with a smaller volume and gradually increase it. This careful approach shows email providers you have a natural growth pattern and you're not just spamming people.
--> Day 1: 2-4 emails
--> Days 2-14: Daily increase by 2-4 emails each day
--> By day 14-18: 50 emails target limit reached
Eventually, as your reputation grows, you can raise the limit gradually to 75-100 emails daily per mailbox, but it will be a bit riskier.
Safe outreach limit for existing accounts:
--> Start with 2-4 emails on day one of your outreach
--> Raise gradually by a few emails every day to 40–50 emails
--> After that, keep the limit consistent and warm up accounts when campaigns are inactive
How to size your sending setup
First, decide how many emails you’ll send each day and how many people you want to reach. Then you can figure out how many domains and email accounts you need.
Calculate the email accounts needed:
Divide your planned daily volume by 25 (recommended limit) to see how many mailboxes you need. For example, to send 200 emails daily, you'll need 8 email accounts.
Calculate the domains needed:
3-4 mailboxes per domain keeps each domain safe while minimizing domain costs.
More than four email accounts on one domain can make the entire domain look suspicious. This increases the risk that providers will flag it as a "spam domain".
Example:
To send 200 emails per day, you’ll need 8 email accounts. If you need 8-10 mailboxes, spread them across 2-3 domains, and so on.
| Daily email limit | Email accounts (= 25 emails daily each) | Domains |
|---|---|---|
| 100 | 4 accounts | 1 domain |
| 200 | 8 accounts | 2 domains |
| 300 | 12 accounts | 3 domains |
Choosing cold email domains
- Purchase high-quality domains from reputable registrars. Consider GoDaddy or Namecheap as your domain providers.
- Consider domain age, as new domains (under 1 year) carry more risk and need to build a reputation
- Create multiple cold outreach domains for easy scalability in your outreach system
It allows you to spread sending volume across multiple domains, making it easier to scale your outreach and diversify the risks. If a backup domain is flagged or blacklisted, your main domain remains safe.
You can create a domain that is similar to your company name or just use a different extension (the part at the end).
For example, your primary domain is company.com. You could create cold email domains like сompany.io or company.org. Such domain variations will still be familiar to your recipients.
Which domain extension to use?
Use country-based domains (.ca, .fr, .co, .uk) for outreach in that region. Use global domains for international campaigns (.com, .io, .org) - these are generally the best choice for cold email outreach.
Avoid TLDs such as .biz, .online, .xyz, .digital - they are often seen as spammy and emails from these domains are more likely to get flagged.
Choosing email provider
When setting up your cold outreach system, always choose trustworthy email providers. We recommend Google Workspace or Microsoft 365 Business.
They offer stronger infrastructure, but you’ll still need to build sender reputation over time. If you're creating new accounts, keep in mind:
-
New accounts should follow gradual warm-up rules (as outlined earlier in this guide)
-
Stick to safe daily limits (start with 20–30 emails per day)
Microsoft:
- Sender domain and email address age are the main criteria, regardless of received engagement
- Only considers accounts older than one year as trusted senders
- New accounts (under one year old) are seen as potential spammers and face strict filtering
Google:
- Prioritizes positive engagement history with your previous emails
- Values metrics like open rates and replies for sender reputation
- New accounts (under one year old) get blocked for sending too many emails without a prior sender history
If you don’t have time to set up your own accounts, consider purchasing our DFY pre-configured mailboxes. Remember these accounts still need a warm-up period.
If you decide to go with Google Workspace, here are the general setup steps:
Step 1. Create your Google Workspace account.
Sign up at workspace.google.com and choose a company (business) plan.
Step 2. Add your sender domains
In the Admin console, go to: Menu --> Account --> Domains --> Manage domains --> Add a domain
– Follow Google’s prompts to verify ownership (TXT, CNAME, or HTML file) and update MX records so Gmail can receive mail.
Step 3. Create mailboxes for every domain
Go to Menu --> Directory --> Users --> + Add user and assign each user to the correct domain.
– Repeat for every sender domain you plan to use in Snov.io.
That’s it, domains are verified, email accounts are created. Now it's time to add them to your Snov.io account.
Step 2: Connect accounts to Snov.io
On this step, you'll connect your sender accounts in your Snov.io settings.
Connect unlimited email accounts for your outreach without any extra charges. This sets Snov.io apart from competitors who charge per account or have limits on the number of account slots per plan.
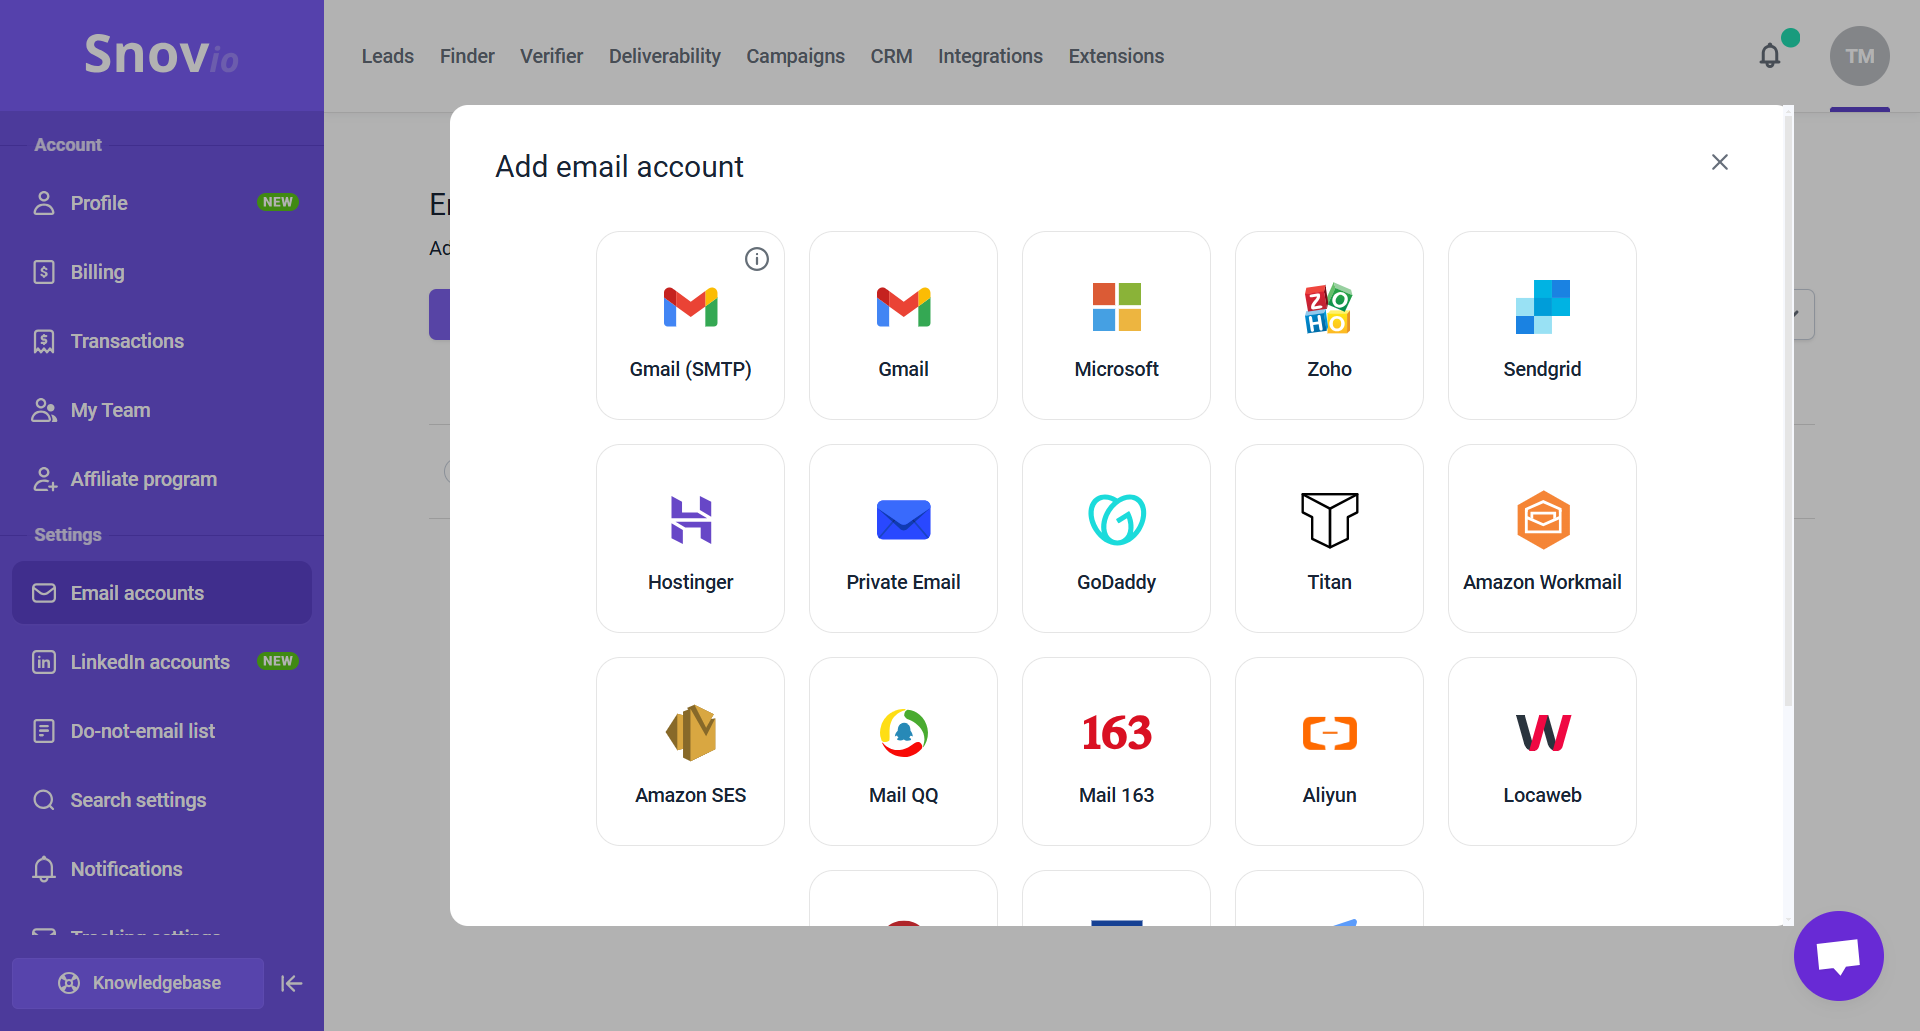
How to do it:
Go to the Email accounts page, click Add email account and choose your provider. We'll suggest the default settings based on your provider.
Snov.io supports API connections for Gmail and Microsoft Outlook accounts. For any other email provider, you can connect your mailbox using standard SMTP and IMAP settings.
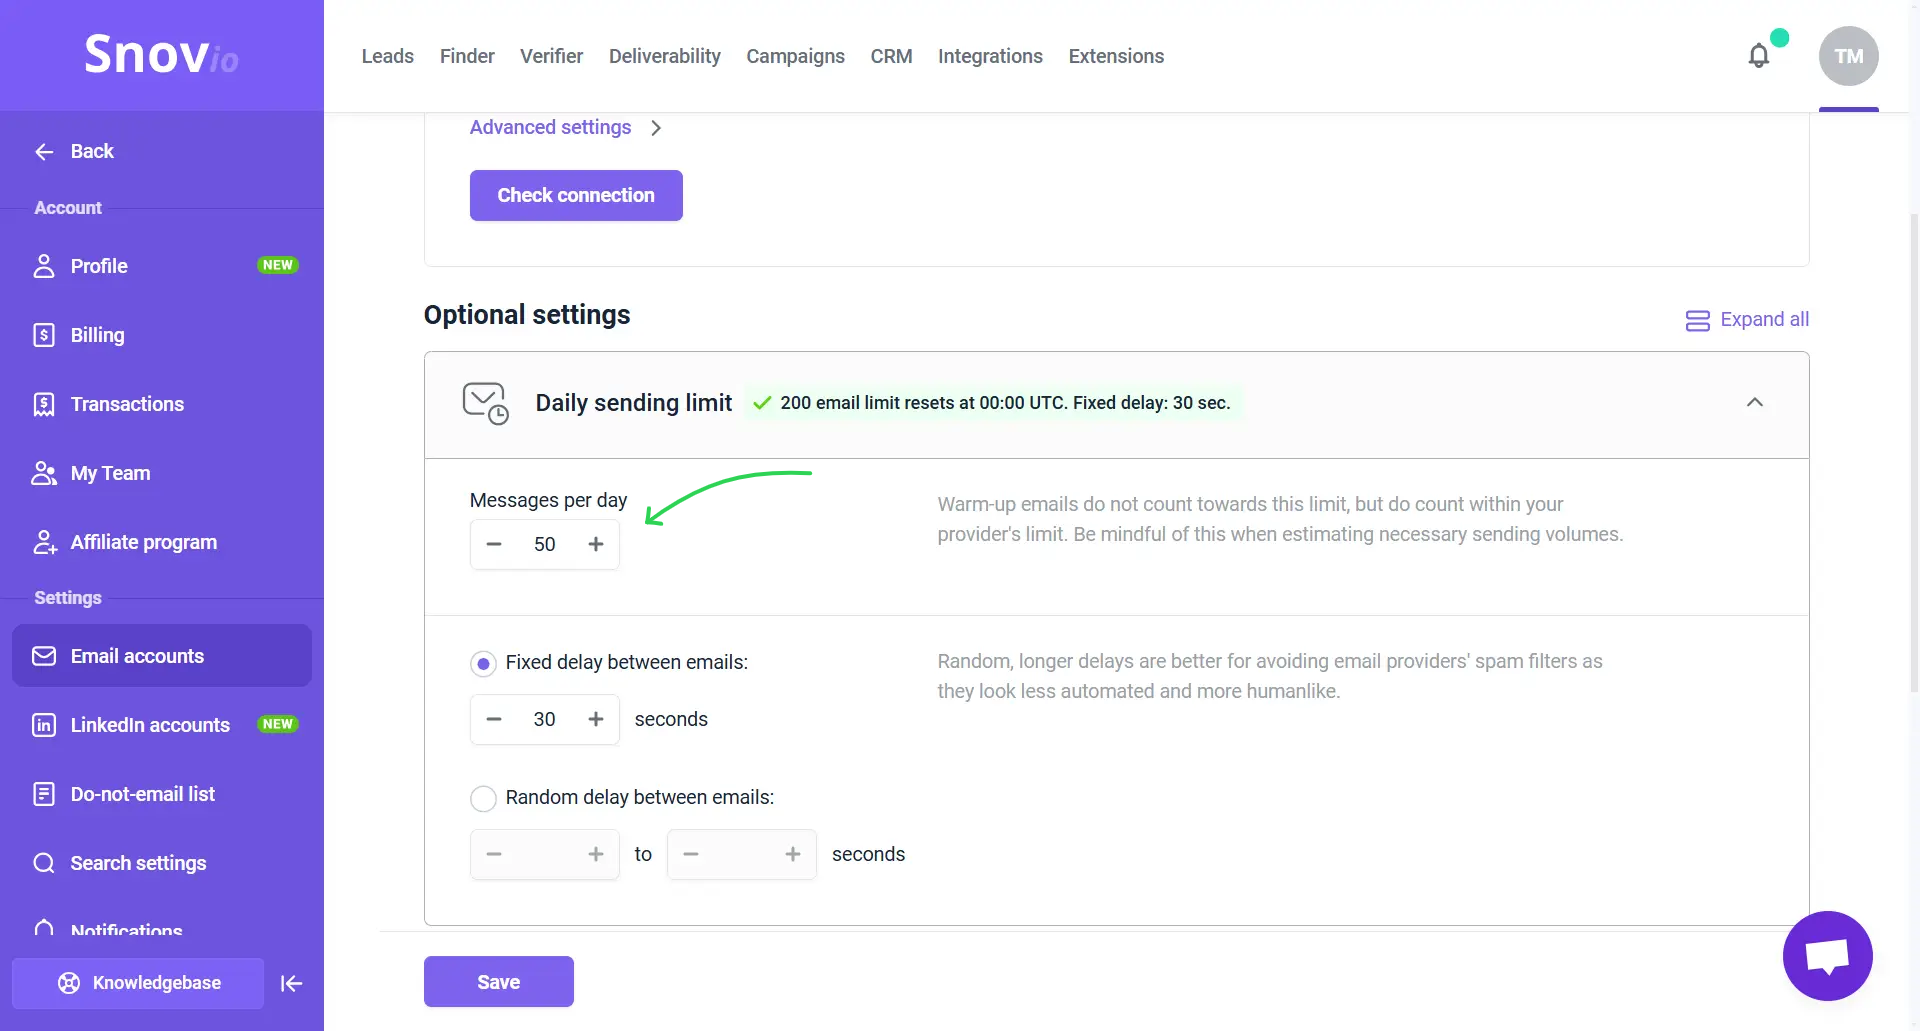
Set daily sending limits
To stay within the recommended limits, you can set a daily sending limit for each email account.
Click Edit to enter account settings and scroll down to the Optional settings. Select the Daily sending limit tab. In the Messages per day field, set your limit.
Snov.io automatically adds a 30-second delay between each email you send. You can adjust this interval or even set a random delay between emails. This means that the time between emails will vary, which helps your emails look less like automated outreach.
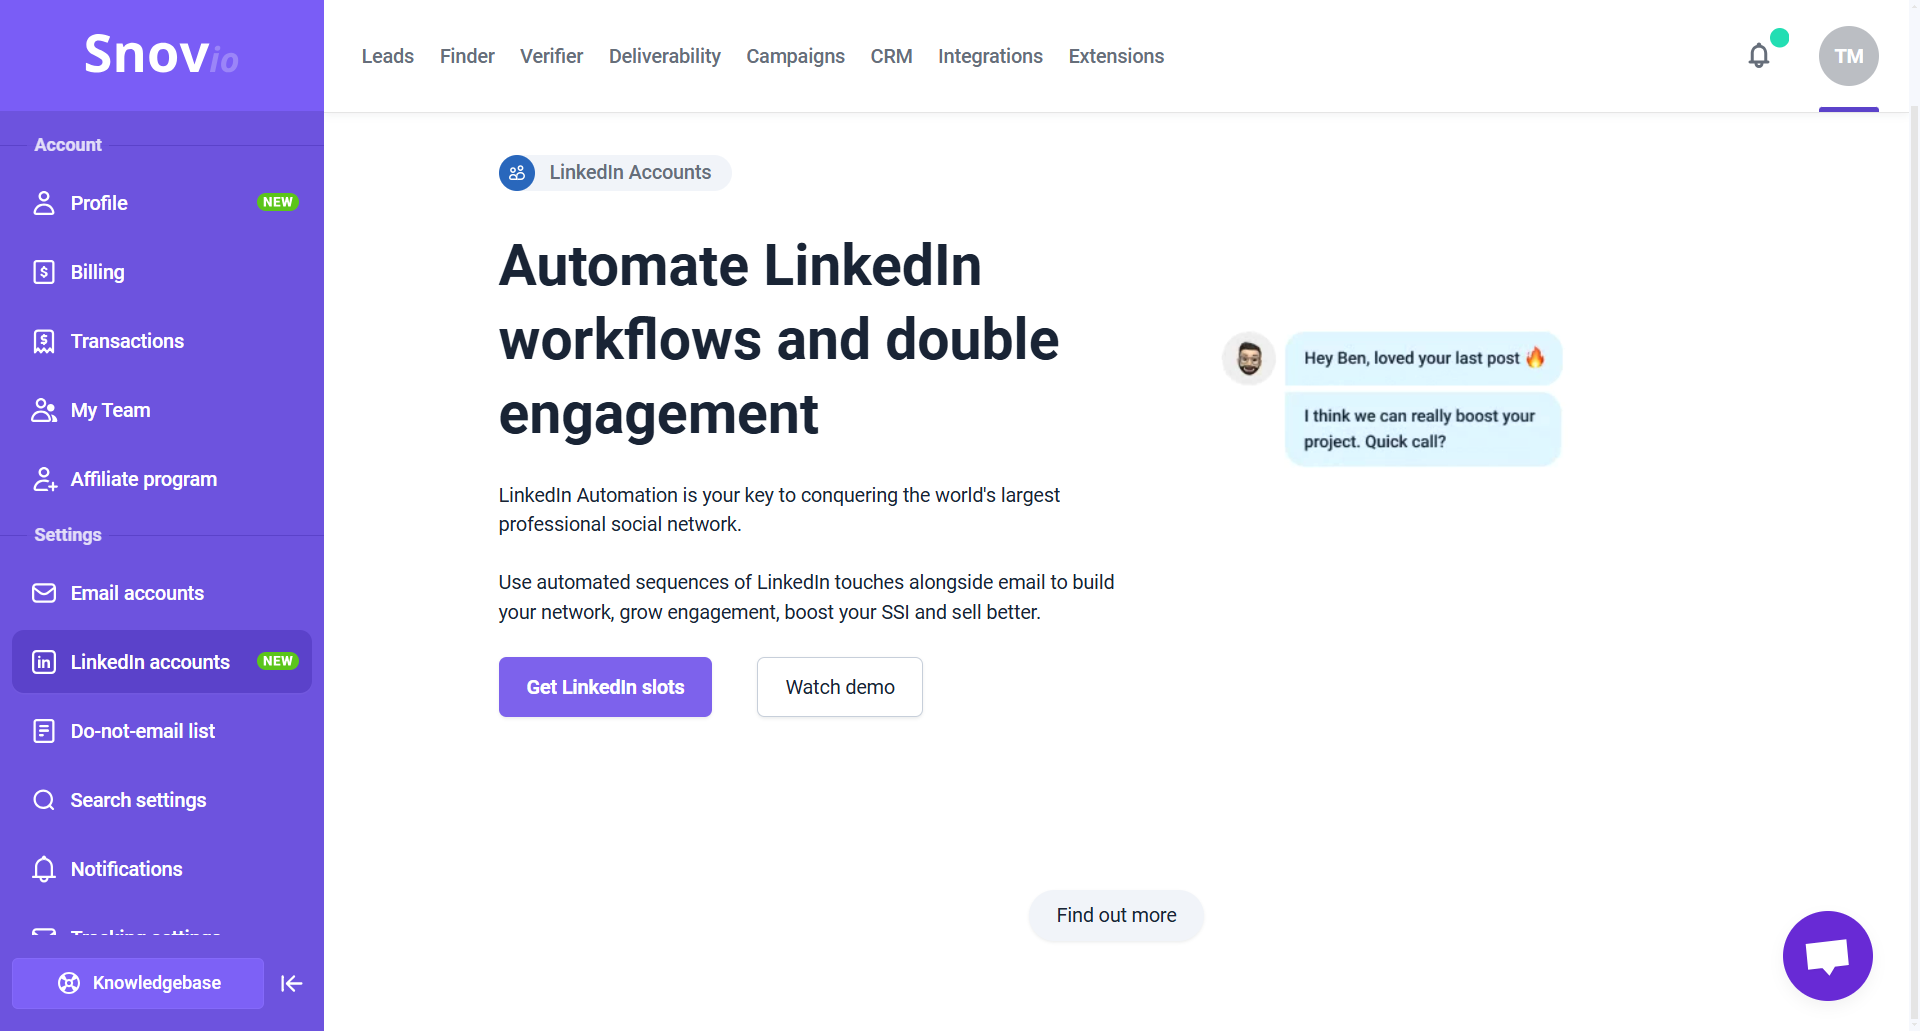
Step 3: Activate LinkedIn add-on
Your toolset in Snov.io also includes a LinkedIn Automation add-on, our tool for automating LinkedIn outreach.
You will be able to create sequences that automatically visit and follow LinkedIn profiles, like posts, and send connection requests and messages to your leads.
LinkedIn add-on also lets you send multichannel campaigns. Add LinkedIn actions as an additional engagement channel. In combination with email, this will improve your reply rates.
Here are some of its key features:
- Extra account security: The price includes built-in proxies for LinkedIn account connection at no extra cost.
- Personalized and unique LinkedIn messages: We’ve added Dynamic Content and Spintax features to LinkedIn campaigns as well.
- SSI score tracking: Grow your SSI score and monitor it directly in your account settings.
- Safe daily limits: We'll provide personalized recommendations for daily limits based on your SSI score.
- Manage proxy location: You pay for the slot, not the account, meaning you can update the location in the built-in proxy up to 3 times a month for free.
- Pending requests management: We’ll help you track requests in your Snov.io account and stay within the recommended limits to avoid any account restrictions.
How to enable the LinkedIn add-on:
Go to the LinkedIn Accounts page and buy a slot for your account. With prorated billing for slots, you never lose any value and only pay for the days used.
If you're using Snov.io as a team, Team leaders can purchase slots under the Team admin account and assign them to members.
Set daily LinkedIn limits:
After connecting, your account will be in "Safety limits" mode to ensure a safe start (20 actions per day). You can adjust these limits in the account settings to control the number of activities completed daily by this account.
Snov.io tracks your Social Selling Index to help you choose a safe limit for actions based on your account's reputation. LinkedIn actions performed via automation will increase your score. You can track it in account settings and set higher daily limits as your score grows.
To safely increase your connection request limit, enable the warm-up mode in the settings.
Step 4: Check domain health
Don't skip this important step: run a domain health check to ensure your technical configuration is correct.
How to do it:
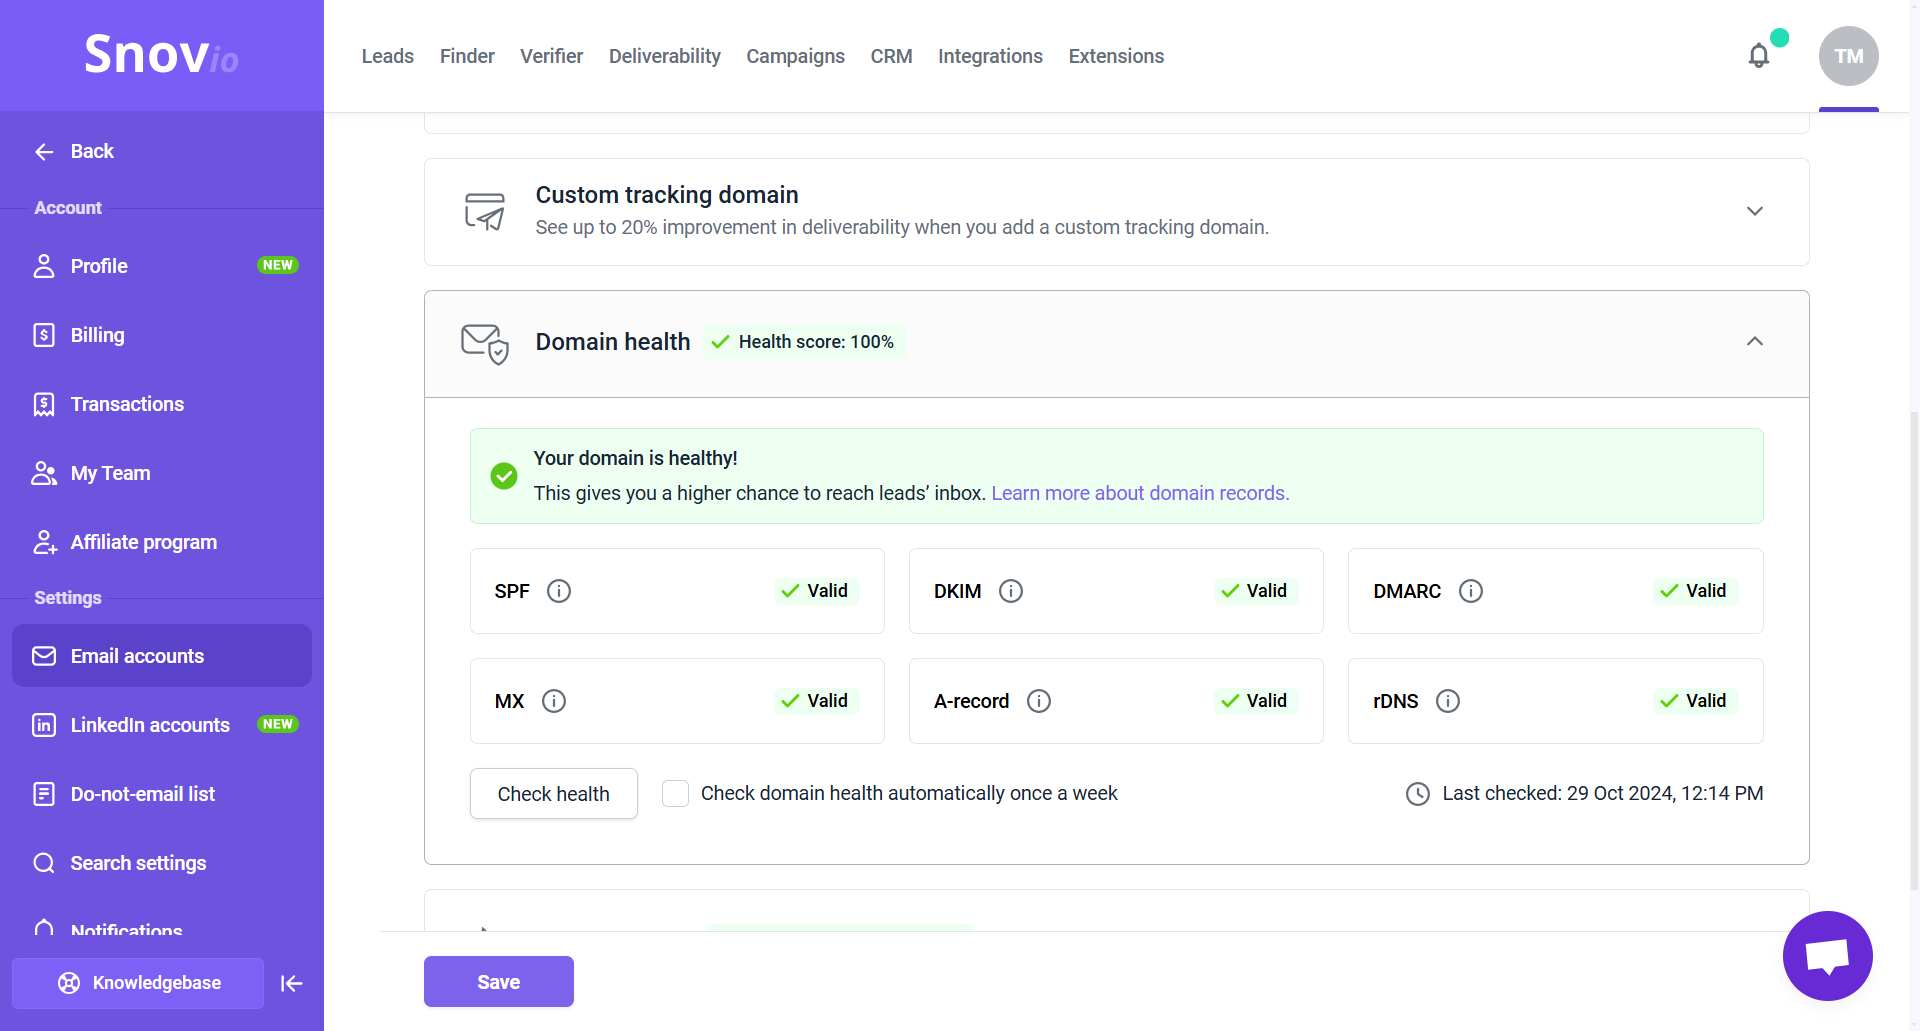
Use our Domain Health checker for this task. This tool verifies all DNS records and identifies any potential issues with them.
To access it, go to your email accounts list and click Edit next to the email account you want to check.
Scroll down to the Optional settings section. Select the Domain health tab and click on Check health. If the setup is correct, you'll see a "valid" status next to all DNS records.
A domain is considered healthy when its score is 85 % or higher. Don’t forget to check every email account on your other domains.
Step 5: Set up DNS records
After checking domain health, set up any missing domain records or update those with issues.
If your domains are newly purchased, you may need to set up everything from scratch. But take our word for it - the benefits are worth it; you'll have a better inbox placement and domain reputation.
→ Configure domain records:
These records include SPF, DKIM, DMARC, MX, A, and rDNS. You'll find the necessary guidelines in the info window for every record in the checkup results.
Why it matters:
Correct DNS records improve email deliverability and sender reputation. They also enhance email security, protecting you from spoofing and phishing.
How to do it:
Log in to your domain’s admin account (on your registrar’s website) and find the DNS settings. This is where you add and update DNS records. For example, if you bought domains from GoDaddy, you'll manage the DNS settings in your GoDaddy admin account.
→ Set domain forwarding:
This is important if you've made separate domains for sending emails. Sometimes your recipients may want to check the email sender's domain. To make sure visitors are redirected to your main website, set up forwarding in the settings of the alias domains.
How to do it:
Follow the provider's help documentation.
To verify it's working, visit the web address of your alias domain. If it's set up correctly, it should automatically redirect you to your main website.
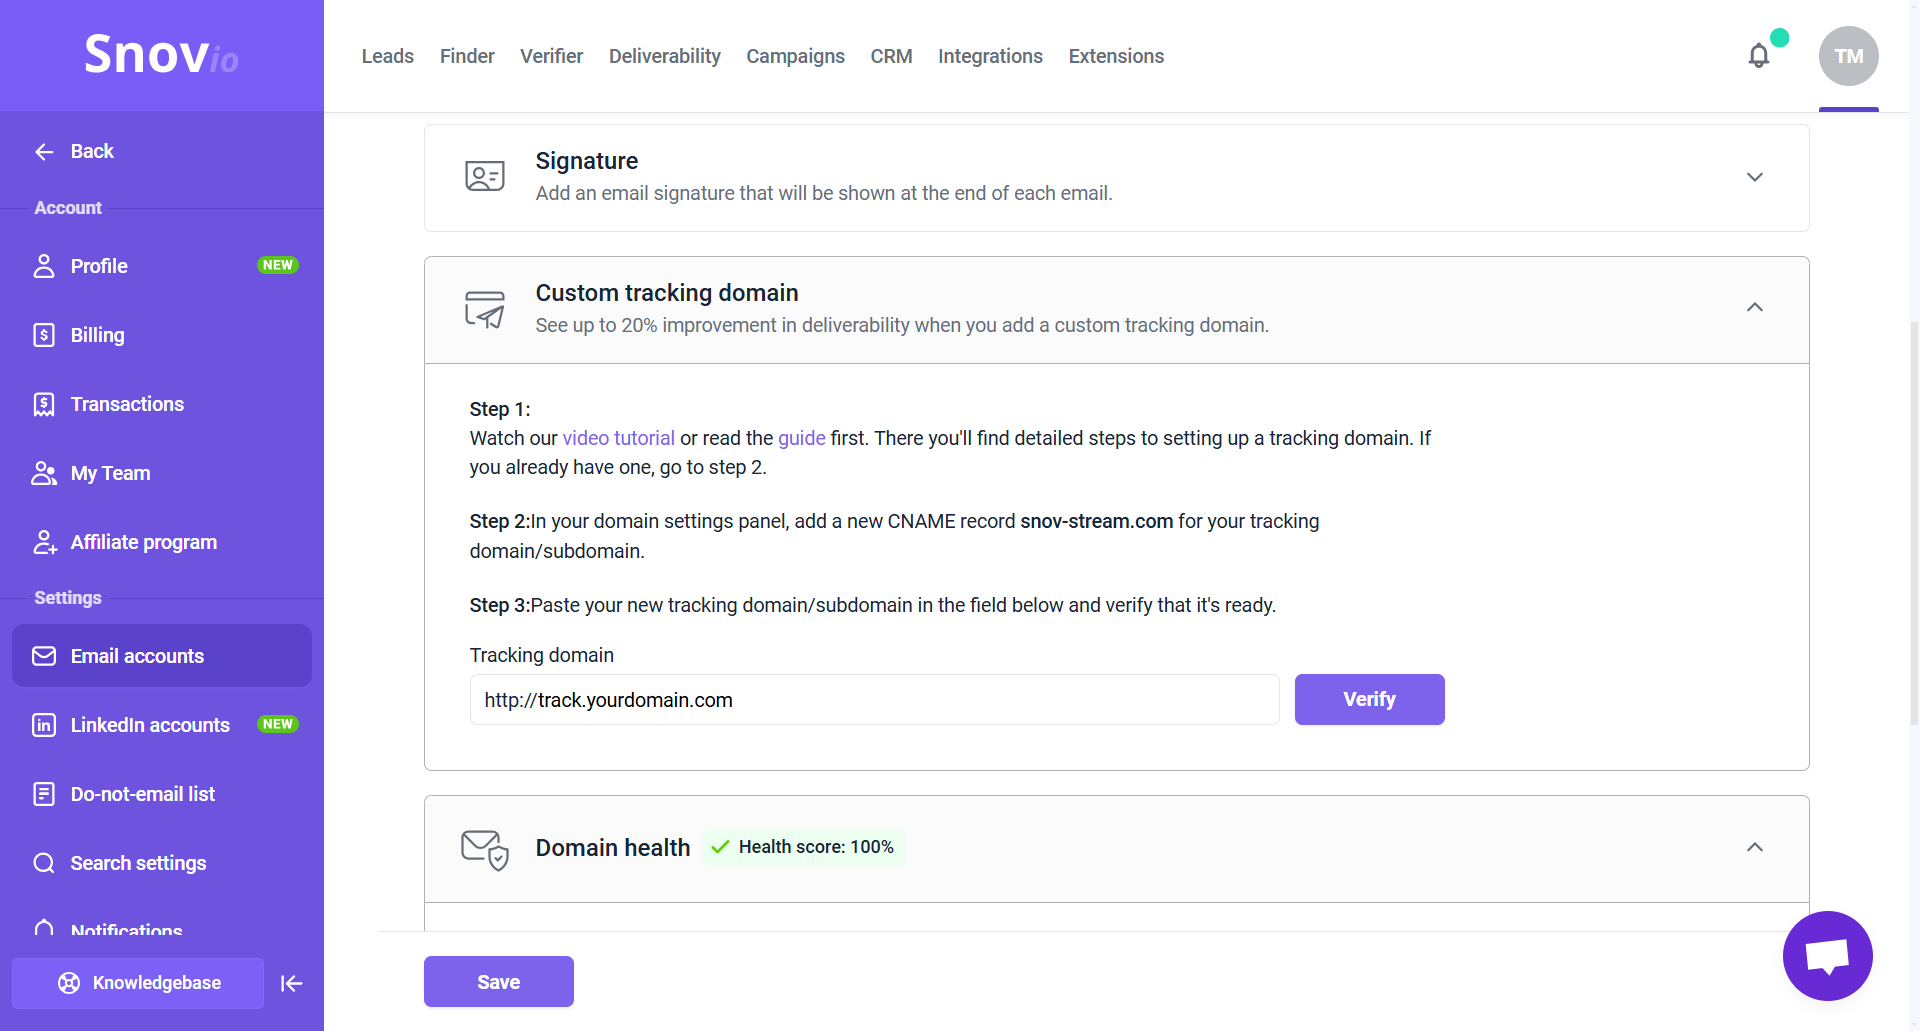
Step 6: Add a custom tracking domain
Next, add a custom tracking domain to your email account. This domain will be used instead of the default shared domain for tracking opens and clicks. It will appear in all tracked links in your campaigns.
Snov.io has its own tracking method that lowers the chance of Gmail flagging your emails. Although it’s more effective than standard tracking pixels, no solution can guarantee complete invisibility from spam filters. Enable tracking only when open- and click-rate data is critical for your sequences or reports.
Note on email tracking and Gmail warnings:
Using a custom tracking domain reduces the chance of being flagged, but it can’t hide tracking completely. Gmail and other providers can detect any tracking pixels and display a “suspicious” banner, regardless of the domain.
A custom tracking domain helps improve deliverability and reduce the risk of spam filters, but it doesn’t make tracking invisible.
While it strengthens your sender reputation and supports brand consistency, it can’t fully prevent email providers from flagging your emails.
How to enable custom tracking domain:
Go to your email accounts list and click Edit. Scroll down to Custom tracking domain and follow the steps described there.
Create a new CNAME record snov-stream.com in the DNS settings: this record's name will be your tracking domain.
Once it's added to the DNS of your domain, add it to your email account settings.
Remember, all email accounts from the same domain can use the same custom tracking domain; just add it in the settings of each email account in Snov.io. If you have email accounts on different domains, create CNAME records on every domain.
Step 7: Warm-up email accounts
Don’t skip this crucial step. Always dedicate 2-3 weeks for the initial warm-up period. This sets a strong foundation for successful outreach.
To build a strong sender reputation and ensure consistent high deliverability, your accounts must go through a warm-up period.
You can achieve better deliverability and sender reputation with any email service you use. It is compatible with almost any ESP, whether you’re using a popular service or a specialized SMTP host.
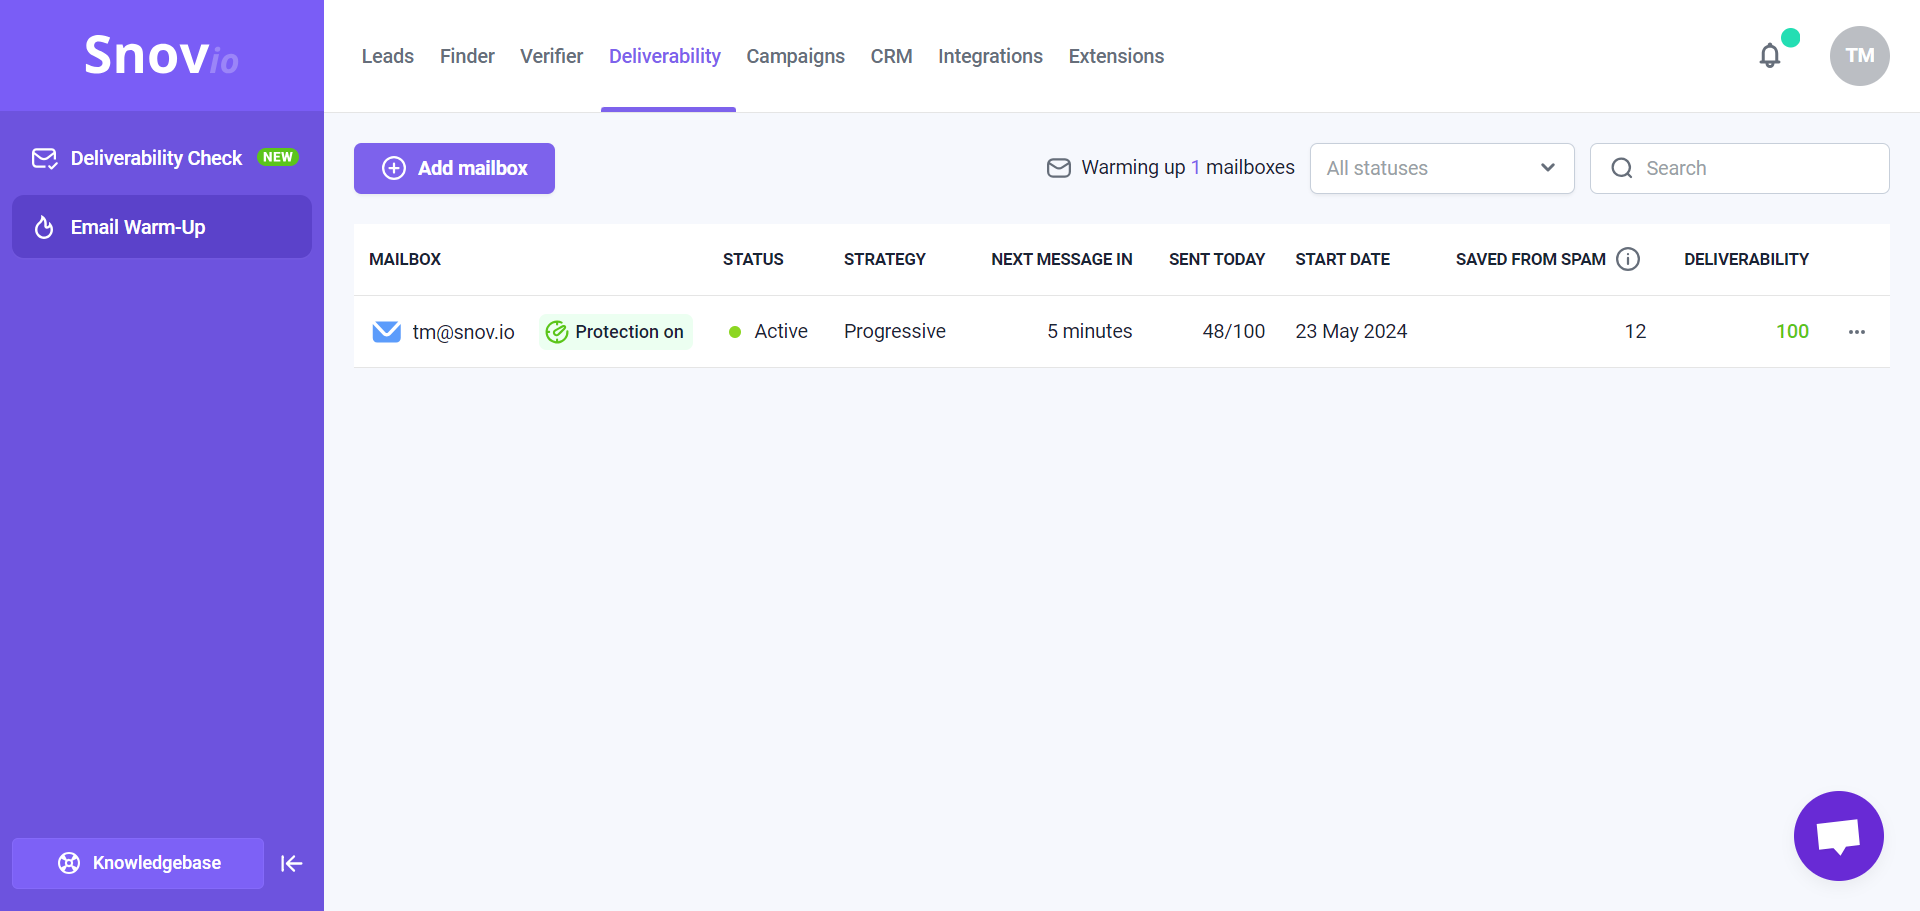
How to start a warm-up:
Snov.io automates the warm-up process, saving you time and money.
Go to your Email accounts list and click Start warm-up to configure it for all the connected accounts. In the warm-up settings, select a progressive strategy and set your daily sending goal to the desired limit.
If your goal is to send 100 emails per day in real campaigns, it's important to gradually build up to that volume before launching your campaigns.
Warm up your email account for at least 3-4 weeks. During this time, don't start your campaigns just yet. To get good deliverability from the start, you need to build a reputation for new email accounts.
During the warm-up, keep an eye on these key metrics:
- Saved from spam: This shows how many emails were removed from the spam folder (marked as not spam), which helps improve your sender reputation.
- Deliverability: The overall inbox placement rate achieved during the warm-up. This gives you an idea of the potential deliverability for this account.
Later, when you start real campaigns, keep the warm-up active alongside your campaigns, but reduce its daily limit to 10-20 emails (warm-up emails also count within your provider's daily limit). This helps upkeep your sender reputation. Read more tips and advice for best warm-up results.
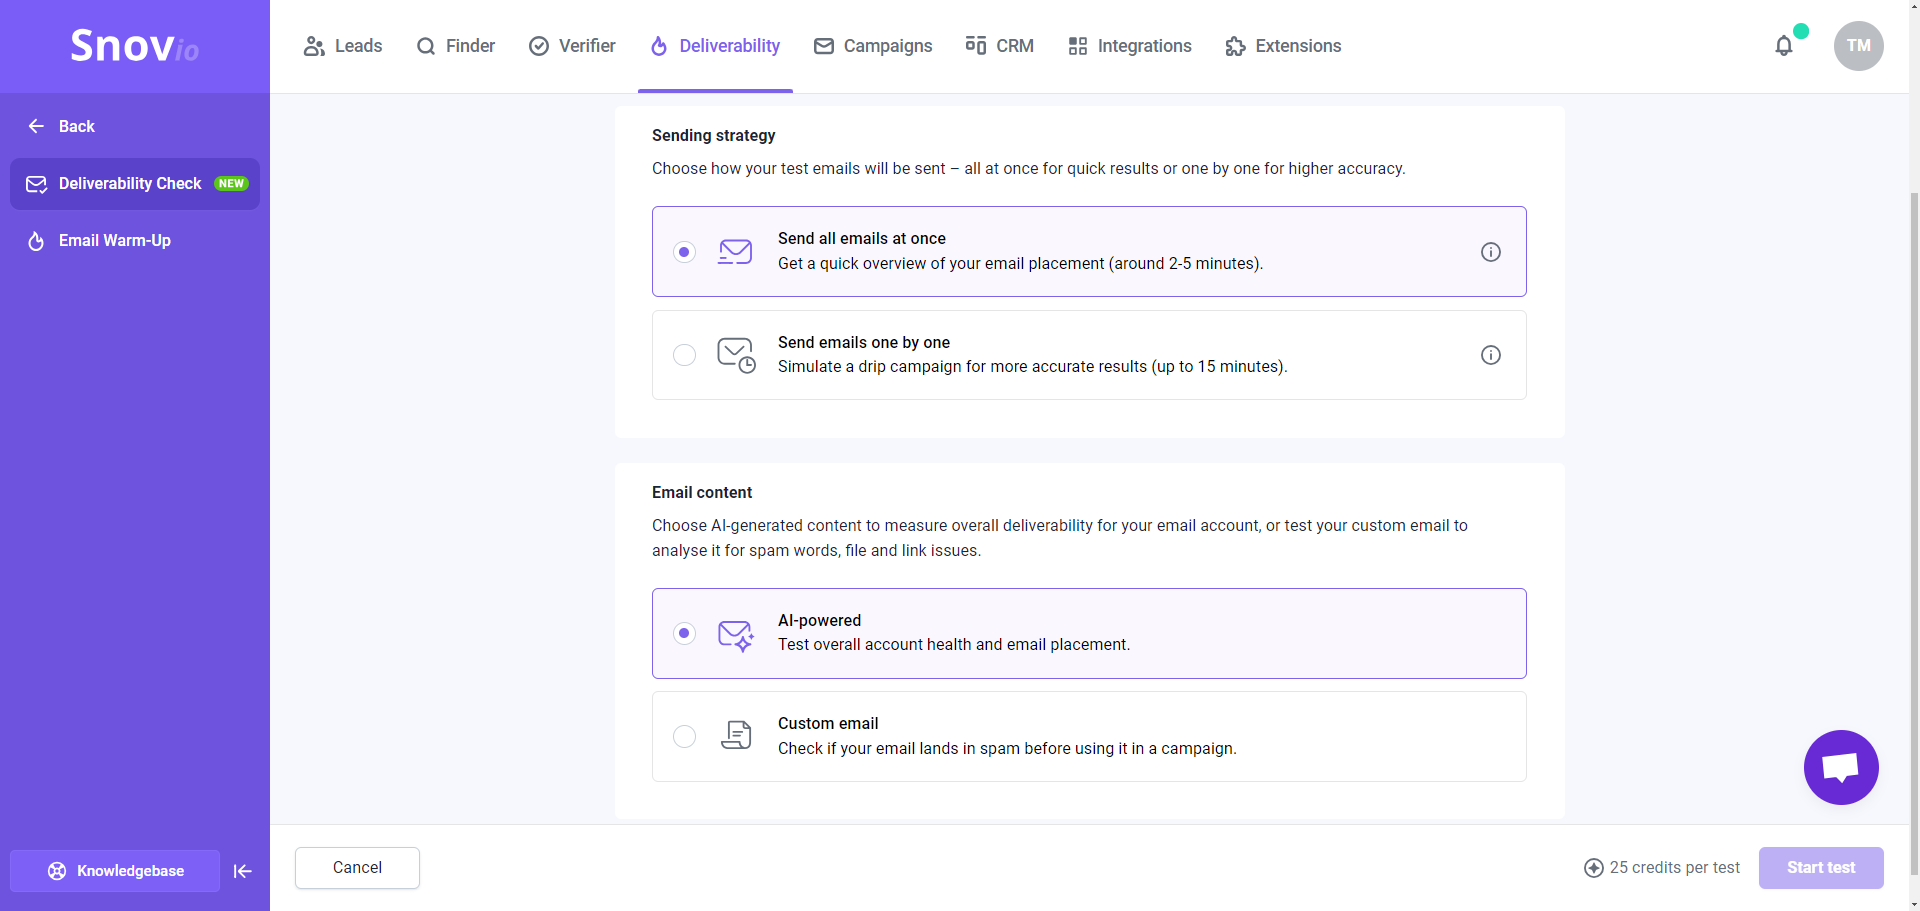
Step 8: Run deliverability tests
As your account is warming up, check its performance using the Deliverability check every few days. It will run several tests to ensure your email setup is well-prepared. These tests simulate real sending conditions to give you insight into the expected deliverability.
At this stage, you can run quick tests (all emails at once strategy) with generated content to check how your email placement improves during the warm-up. Once your actual email content is ready, run a real campaign simulation (one by one) to ensure more accurate results before launching the campaign.
In the test results, you'll get personalized recommendations for better deliverability and guidance on troubleshooting issues that may affect your results.
What’s next:
Now, let’s do a quick recap to ensure everything in your setup is complete.
✅ Purchased domains
✅ Set up email accounts
✅ Connected email accounts
✅ Connected LinkedIn accounts
✅ Checked domain health (DNS records setup)
✅ Set up a custom tracking domain
✅ Started email warm-up
✅ Performed deliverability tests
While you're building your sender reputation and preparing accounts, this is an ideal time to research your target leads and test your offer on small lists.
Let's move on to creating your Ideal Customer Profile (ICP) and finding targeted leads.
Bonus: Outreach system cost & potential revenue
The tables below show a sample outreach setup with 3 domains and 8 mailboxes (about 3-4 mailboxes per domain).
This configuration lets you email more than 4,000 leads each month while keeping risk low by spreading sending across multiple domains.
$45 (domains) + $48 (mailboxes) + $99 (LinkedIn) + $189 (Snov.io monthly plan) ≈ $381.
Domains are prepaid yearly, so that cost will decrease in the second month and beyond. You can save up to 25% on Snov.io subscription costs if you switch to annual billing.
| Sender domains | 3 outreach domains (.com) | at $15 / yr each = $45 | ≈ $4 / mo |
| Email accounts | 8 Google Workspace Business Starter mailboxes | $6 / user/mailbox / mo | $48 / mo |
| LinkedIn account | 1 × Sales Navigator account | $99 / account / mo | $99 / mo |
| Cold outreach software | Snov.io Pro M (50,000 recipients + 20,000 prospect + verification credits) | $189 / mo (or $142 / mo on annual) | $189 / mo |
Expected sending volume & engagement
(30 % opens, 3–4 % reply rate, 20 % positive replies)
A 3–4 % reply rate is a solid baseline for cold outreach. With a well-targeted list and high-quality, personalized email copy, you can achieve even higher response.
| 3 % reply rate | 4 % reply rate | |
|---|---|---|
| Daily emails | 200 | 200 |
| Monthly emails | ≈ 4 400 | ≈ 4 400 |
| Opens (30 %) | ≈ 1 300 | ≈ 1 300 |
| Replies (3–4 %) | ≈ 130 | ≈ 176 |
| Positive replies (20 %) | ≈ 26 | ≈ 35 |
| Booked meetings (70 % show-up) | ≈ 18 | ≈ 25 |
| Closed deals (25 % close-rate) | ≈ 4–5 | ≈ 6 |
If you have any questions or are unsure about something, please contact us directly via the live support chat. We'll be happy to hear your feedback.

Sorry about that 😢
How can we improve it?