
TL;DR: Email drip campaigns
Email drip campaigns are automated sequences sent at set intervals or triggered by user behavior to move prospects toward a specific goal. They rely on core elements like emails, delays, conditions, and goals to adapt messaging based on opens, clicks, or replies.
Here’s how to build a Snov.io drip campaign step by step:
- Create an email list
- Fill it with prospects (upload or find on the web)
- Add your signature
- Build the sequence (emails, conditions, delays, goals)
- Choose your audience
- Set sending options
- Review everything
- Launch and track replies
As for performance in drip email campaigns, it comes down to several aspects. These include clean lists, tight segmentation, smart personalization, controlled send limits, and tracking replies over opens.
Spending hours on follow-ups that go nowhere? I’m going to show you how to build automated email campaigns in Snov.io from start to finish. You’ll see how to find prospects, set up sequences that shift based on what people do, and launch campaigns that keep running while you handle replies and close deals.
Outline:
What are email drip campaigns?
Drip email campaigns are automated emails sent to leads based on specific triggers or schedules. This means that rather than sending everything at once, you deliver a sequence that moves people closer to booking, buying, or whatever action you want them to take.
Let’s look at a quick example:
Say someone abandons their cart. Your drip email sequence automatically sends:
Day 1: Reminder with product details
Day 3: Customer reviews and social proof
Day 7: Discount code to close the deal
The point? Stay relevant without manual follow-ups.

How email drip campaigns actually work
Before choosing tools or platforms, I believe it’s important that you understand how drip email campaigns work.
At its core, a drip email campaign is more than just a set of scheduled messages. It is a sequence that responds to how someone interacts with your emails. Meaning, it changes based on whether they open your messages, click a link, or take no action.
Here are the key building blocks that make drip campaigns work:
Conditions: Adapt to engagement
Conditions are for splitting your sequence based on recipient behavior. They essentially guide each prospect down a relevant path.
Common conditions include:
- Email opened
- Link clicked
- Meeting booked
Simply put, more engaged leads move forward while unresponsive ones get a different follow-up path.
Delays: Control timing
With delays,you determine how much time passes before any next actions. This can be minutes, hours, or days, depending on the action taken.
Goals: Track outcomes
Goals define what success looks like, such as booking a meeting or clicking a key link. Once a goal is reached, contacts can be filtered out of the sequence. This is especially useful when running multiple flows within a single campaign.
Hope this is clear. But which tool can execute all of this cleanly? I’d recommend looking for strong integrations, ease of use, scalability, solid analytics, personalization options, and reliable security. There are plenty of automation tools out there, but from my experience, Snov.io drip campaigns check all of these boxes.
Snov.io is the most complete platform for cold email and prospecting strategy! It speeds up the process and turns possible future revenue into actual present.
CEO of Populus Sales
Now, let’s review how to send your first email campaign.
How to set up your first drip campaign
Below are a few simple steps to build Snov.io drip campaigns.
Create an email list
First, create a new prospect list and name it based on what the contacts have in common or how you plan on using it. Remember that clear naming makes lists easier to manage and reuse down the line.
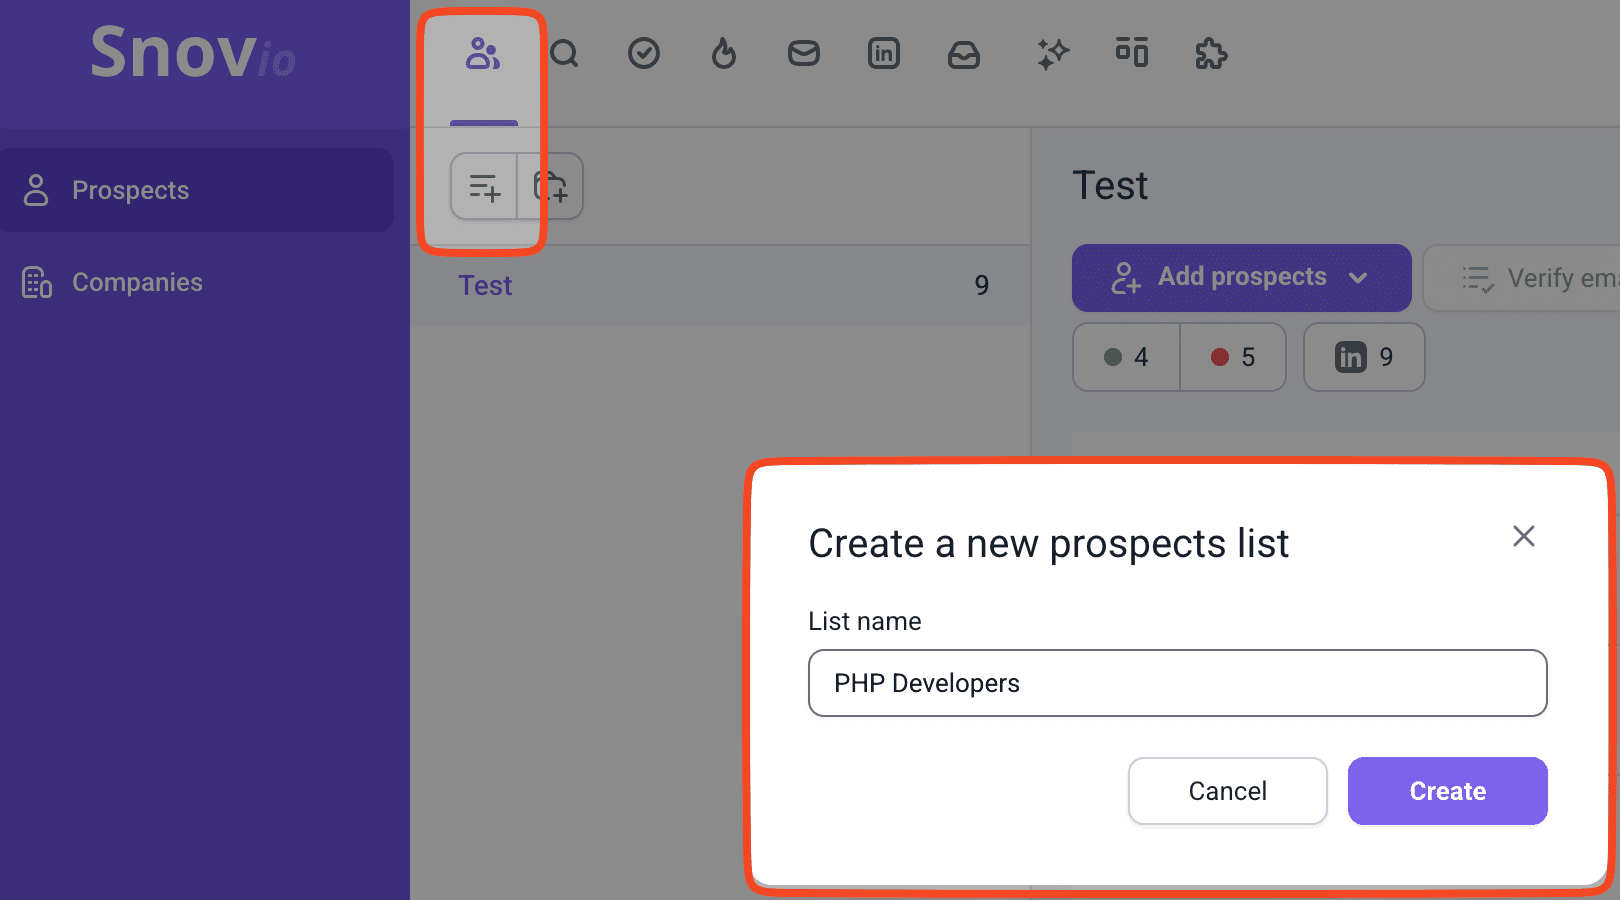
Common list types include:
- Job role (UI/UX Designers, PHP Developers)
- Industry (SaaS, eCommerce)
- Behavior (opened emails, clicked links)
- Funnel stage (new leads, active prospects)
- Location (country or region)
Once saved, this list becomes the starting point for your drip email sequence.
📍 Why segmentation matters
List segmentation means grouping your contacts into smaller, focused groups before reaching out. It matters because email drip automation campaigns live or die on relevance. When everyone in a sequence shares similar needs or pain points, your messaging lands better and gets more replies.
Once you’ve grouped the right people together, personalization takes over. Segmentation decides who gets the campaign. Personalization decides what they see in each email. Both matter, and both improve results.
Fill the list with email addresses
Once your list is set up, the next step is adding contacts to it.
Leads can come from various sources, including existing databases, events, partnerships, and web-based prospecting. How you fill the list depends on whether you’re nurturing known leads or starting cold email drip campaigns.
There are two main ways to do this:
Option 1: Upload a list of prospects
Best for: existing CRM data, event leads, or past outreach lists
If you already have a list, just upload it. This approach works well when you’re bringing contacts over from a CRM, spreadsheets, or event sign-ups.
The process is super easy. Simply start by uploading your file.
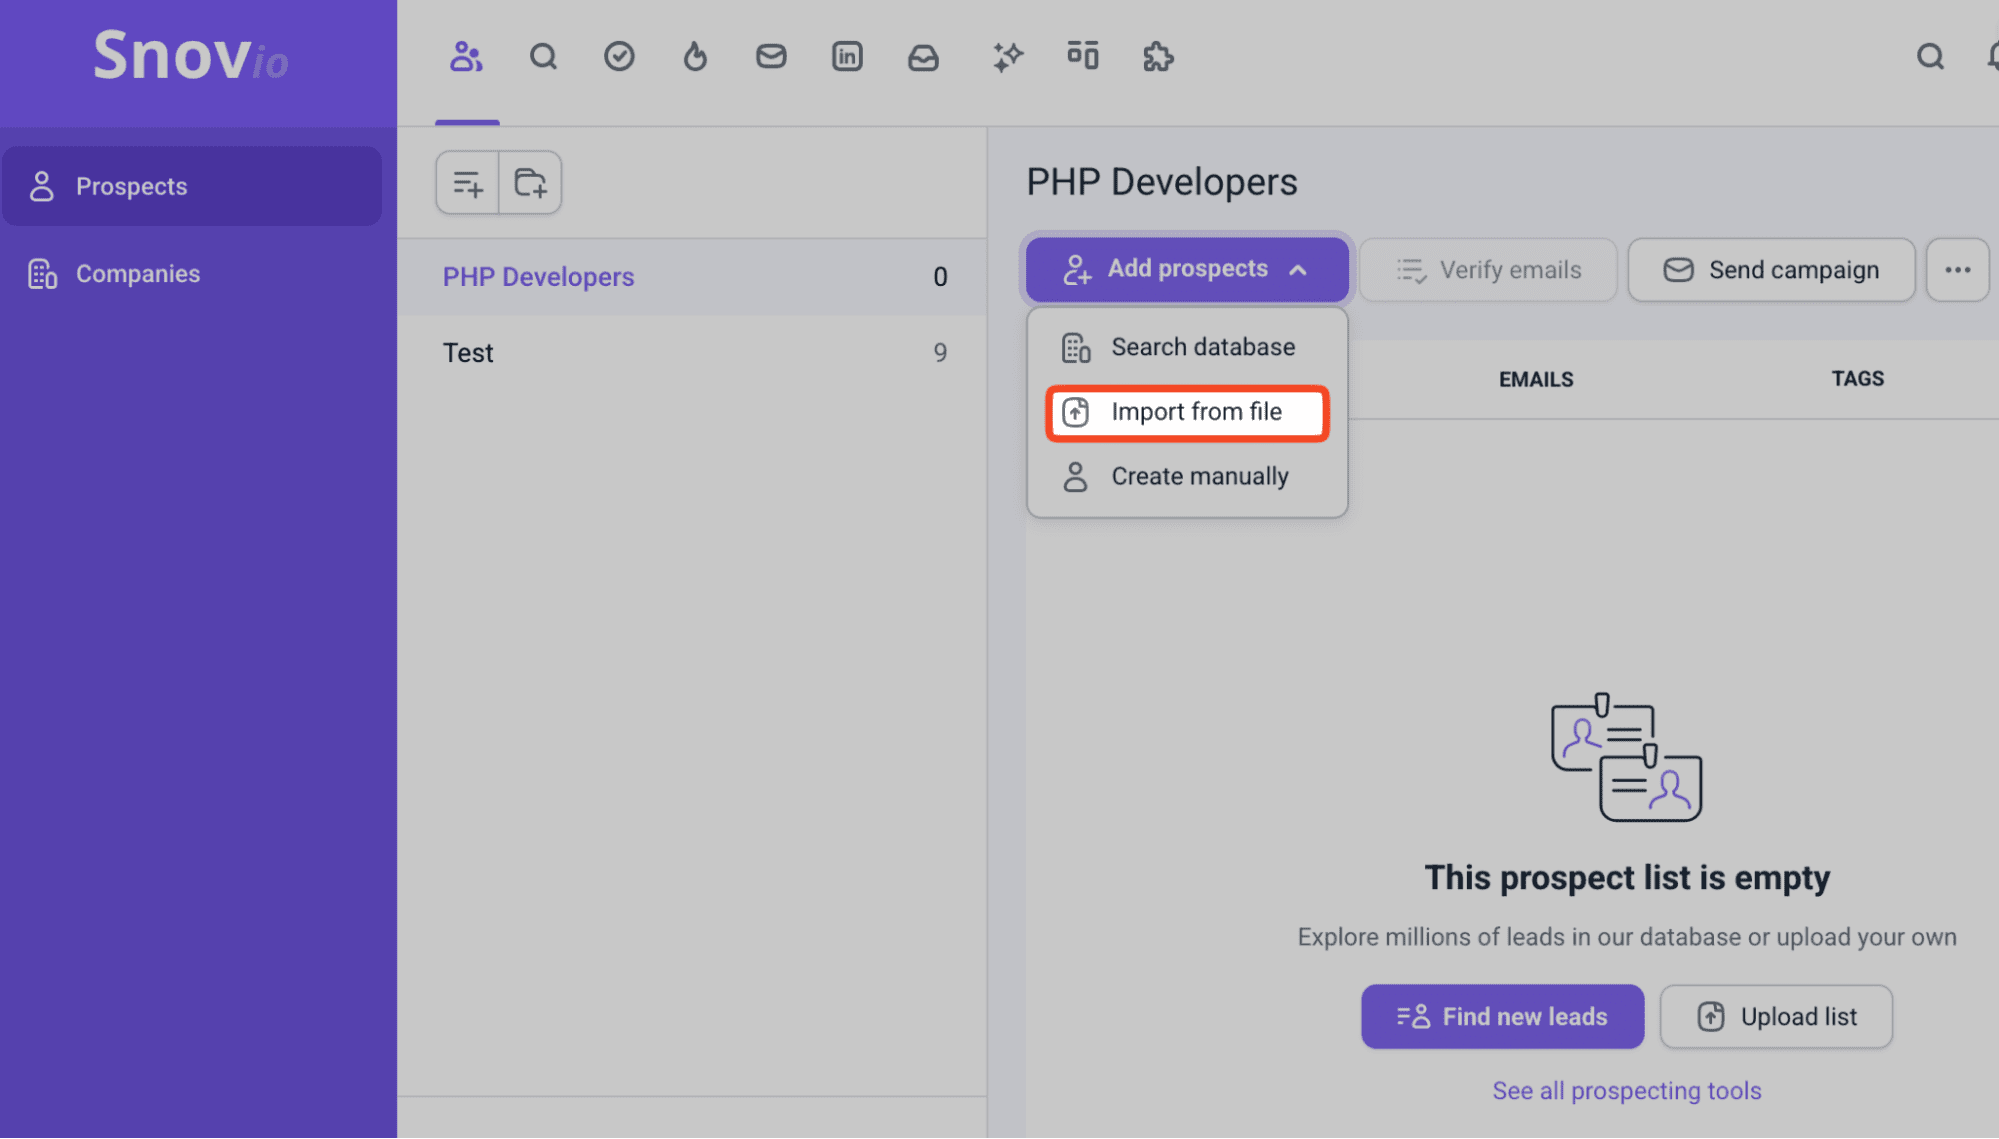
Then map each column to the appropriate contact field.
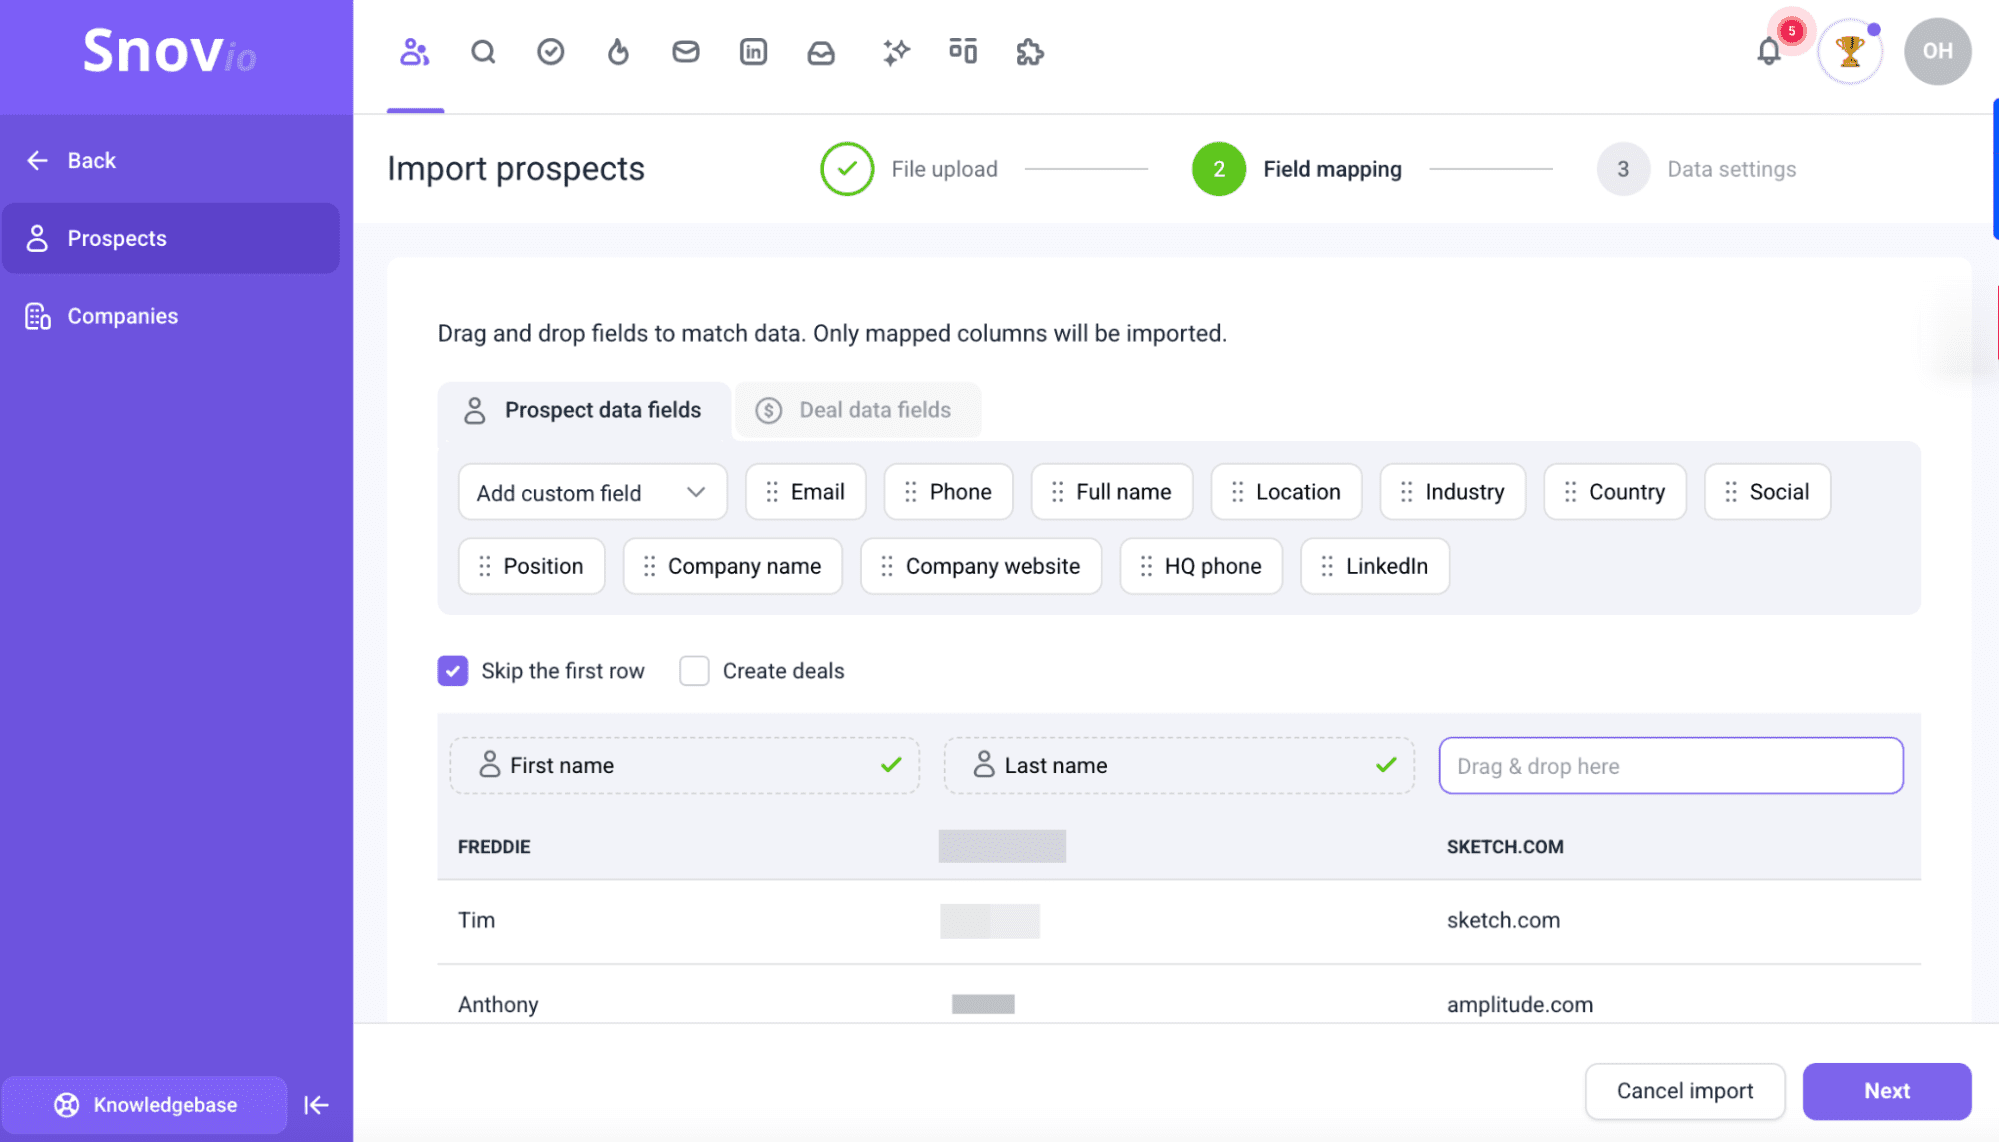
Finally, select your target list and specify how duplicates should be handled.
By the way, you can import up to 100,000 contacts at once, update existing records, as well as store rich data that later powers segmentation.
Option 2: Find emails on the web
Best for: cold outreach or new lead generation
Don’t have contacts yet? Try Snov.io Email Finder. It helps you spot emails by domain, generate addresses from names and companies, or pull contacts from specific organizations.
Use existing data or build new lists from scratch. Either way, you can begin launching cold email drip campaigns.
Add an email signature
An email signature might seem small, but it plays a big role in trust, branding, as well as compliance. In drip email campaigns (especially cold email drip campaigns), it convinces recipients that there’s a real person and company behind that message.
Keeping it simple, clear, as well as professional is key. Include:
- Your full name
- Your role or title
- Your company name
- A clear unsubscribe option or opt-out line
Optionally, you can add a logo or a single link (such as your website or booking page), but avoid clutter. The goal here is credibility, not promotion.
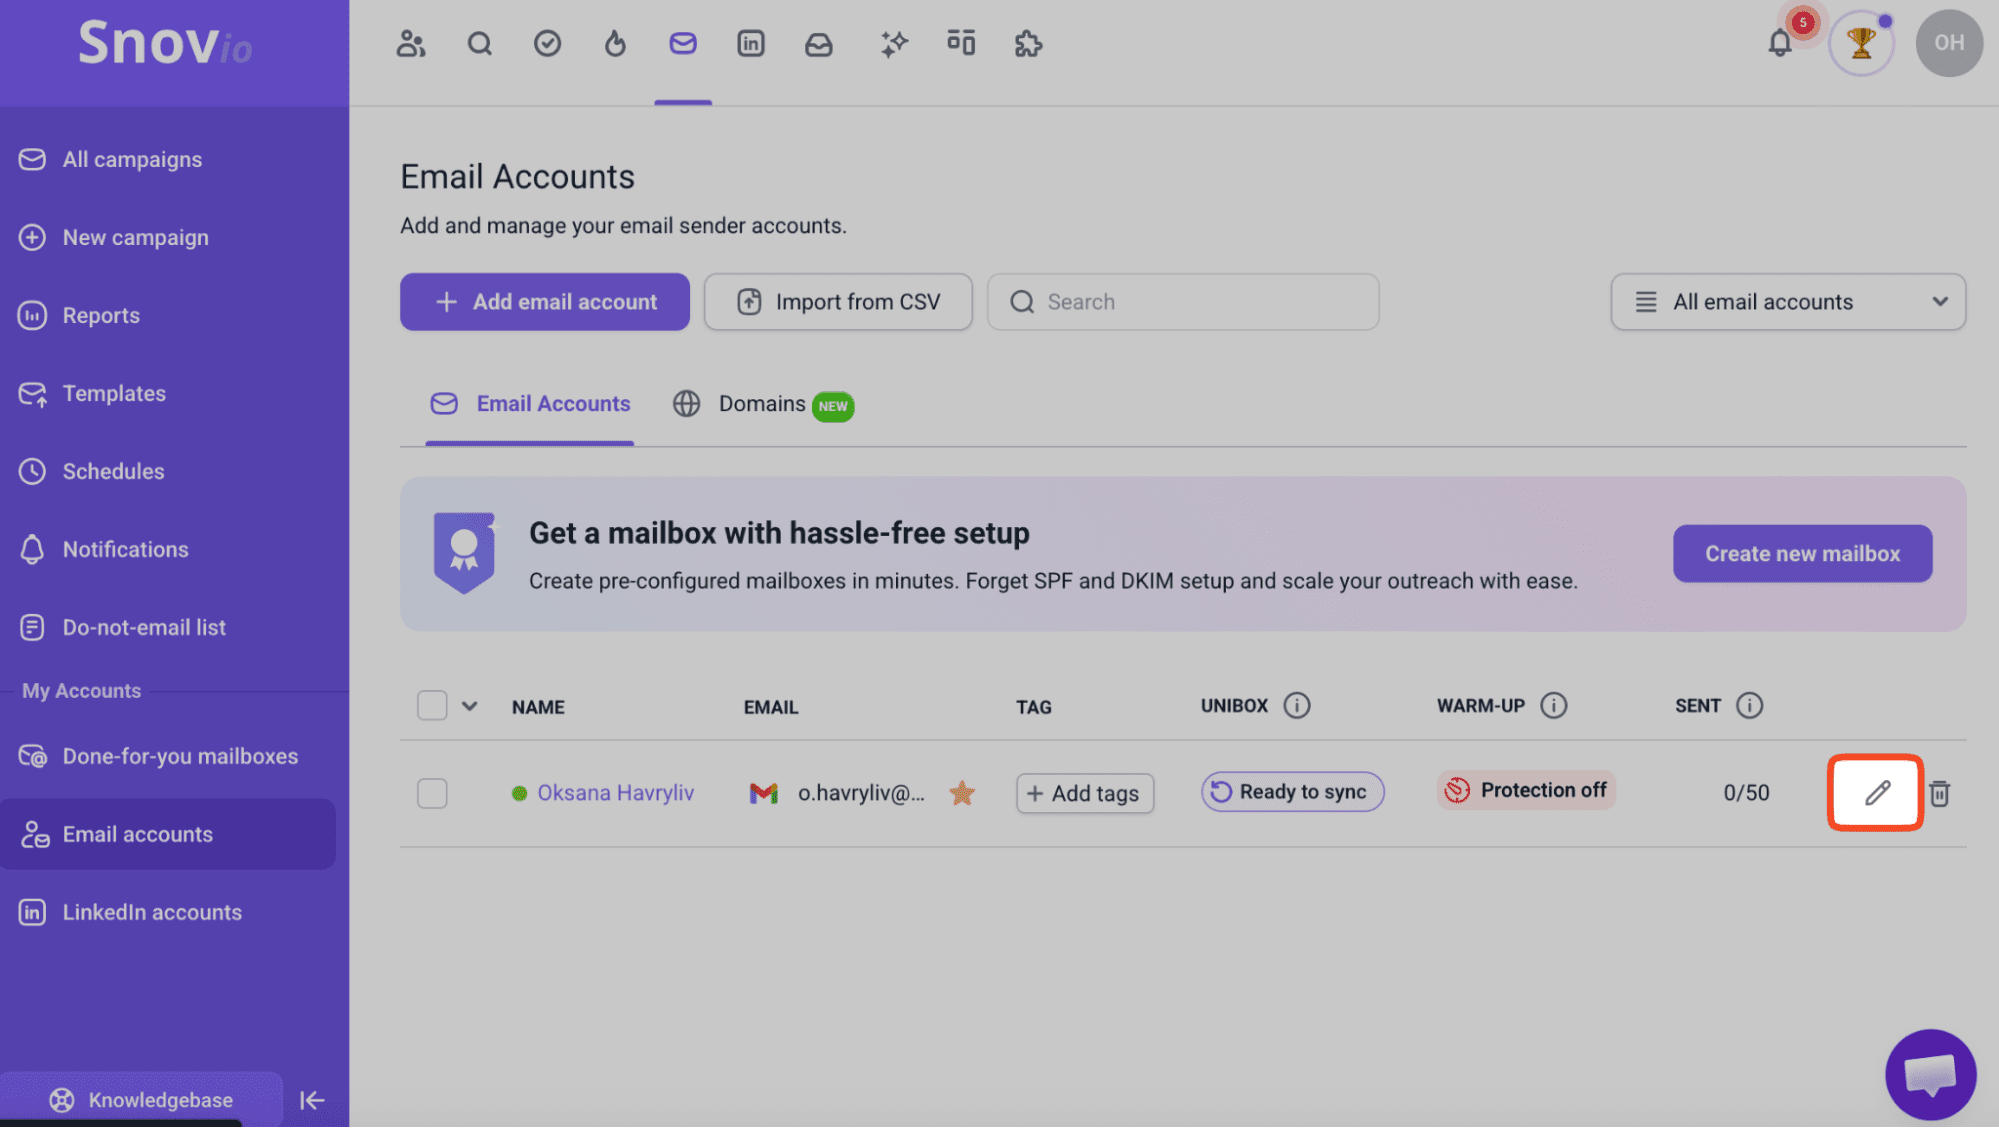
To set up your signature in Snov.io, open Email accounts.
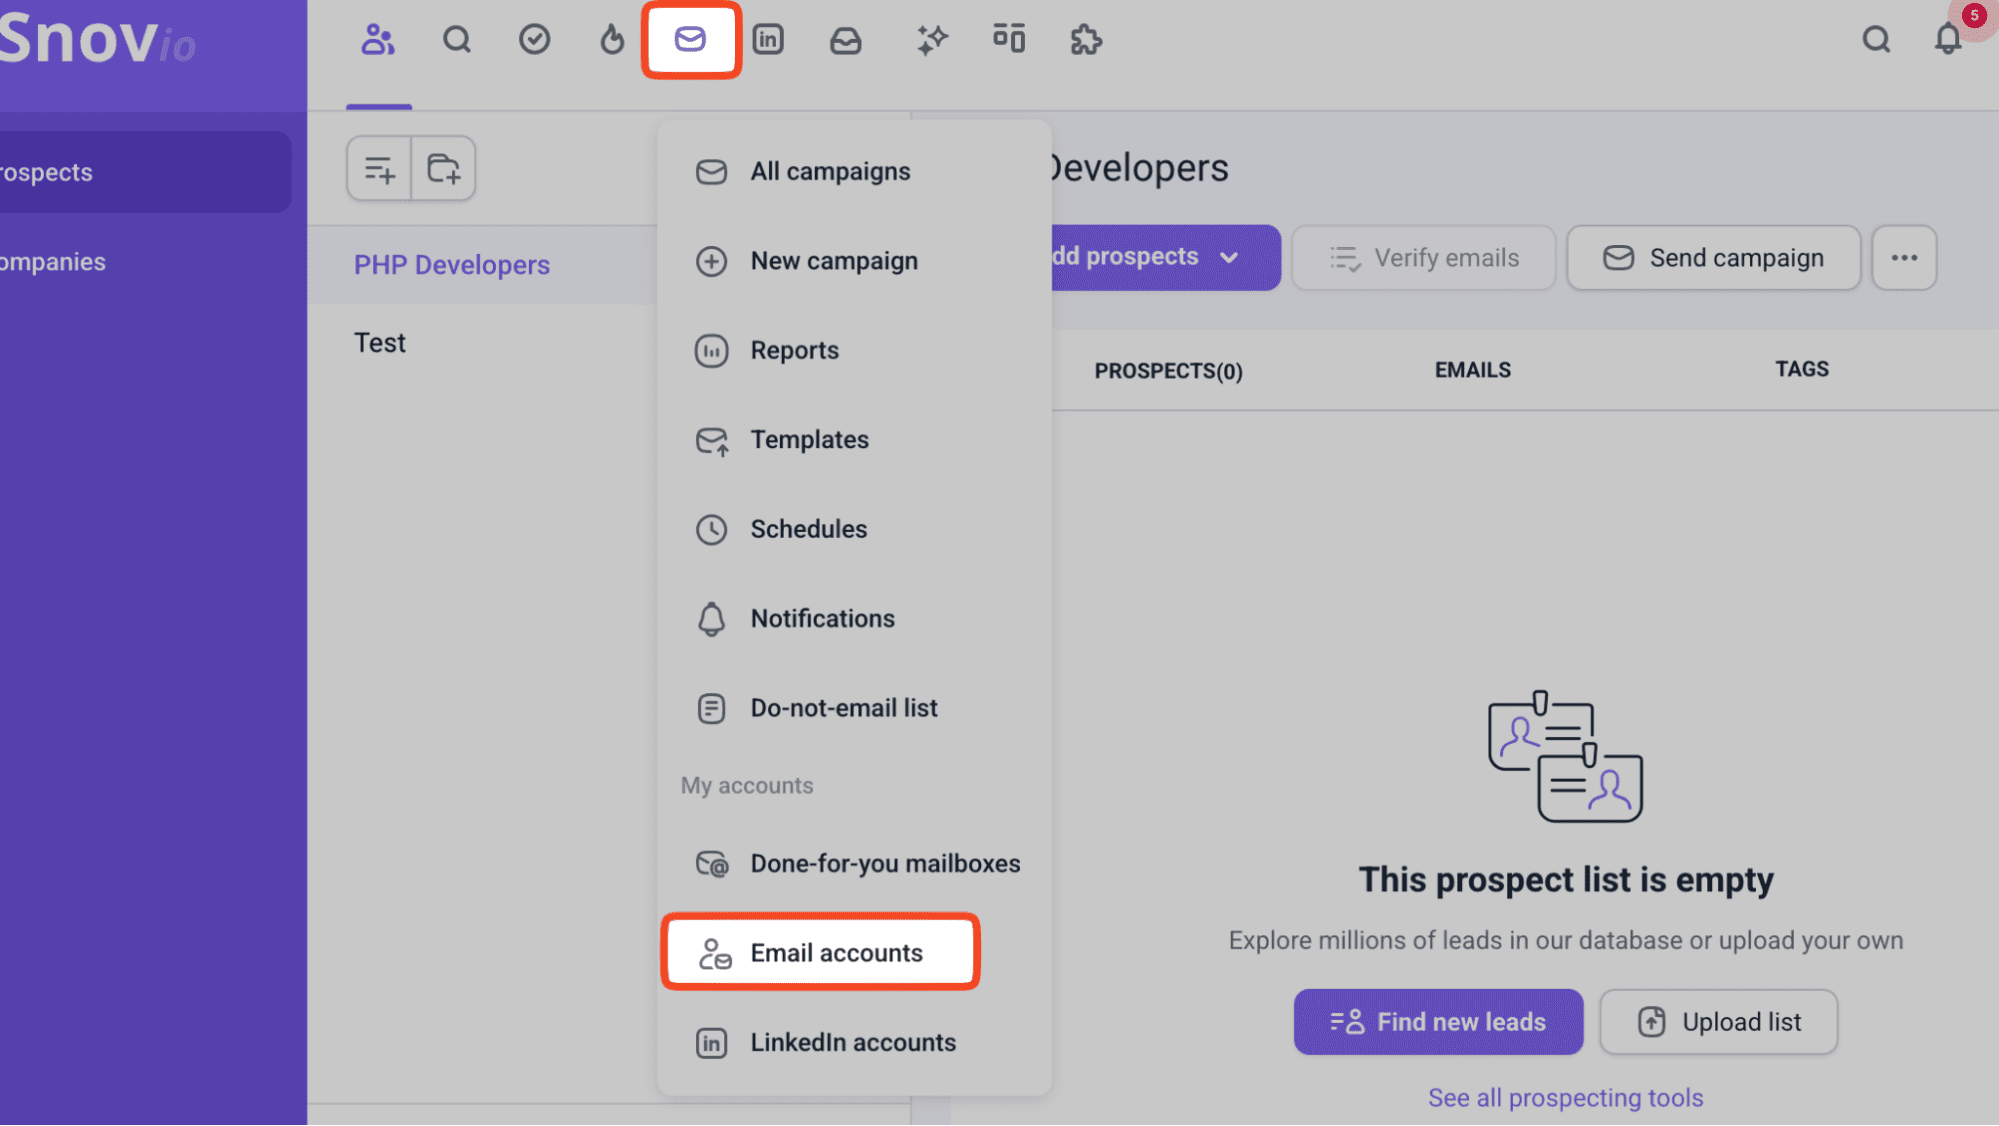
Select the email you use for campaigns.
Now, add or paste your signature in the editor, then save your changes.
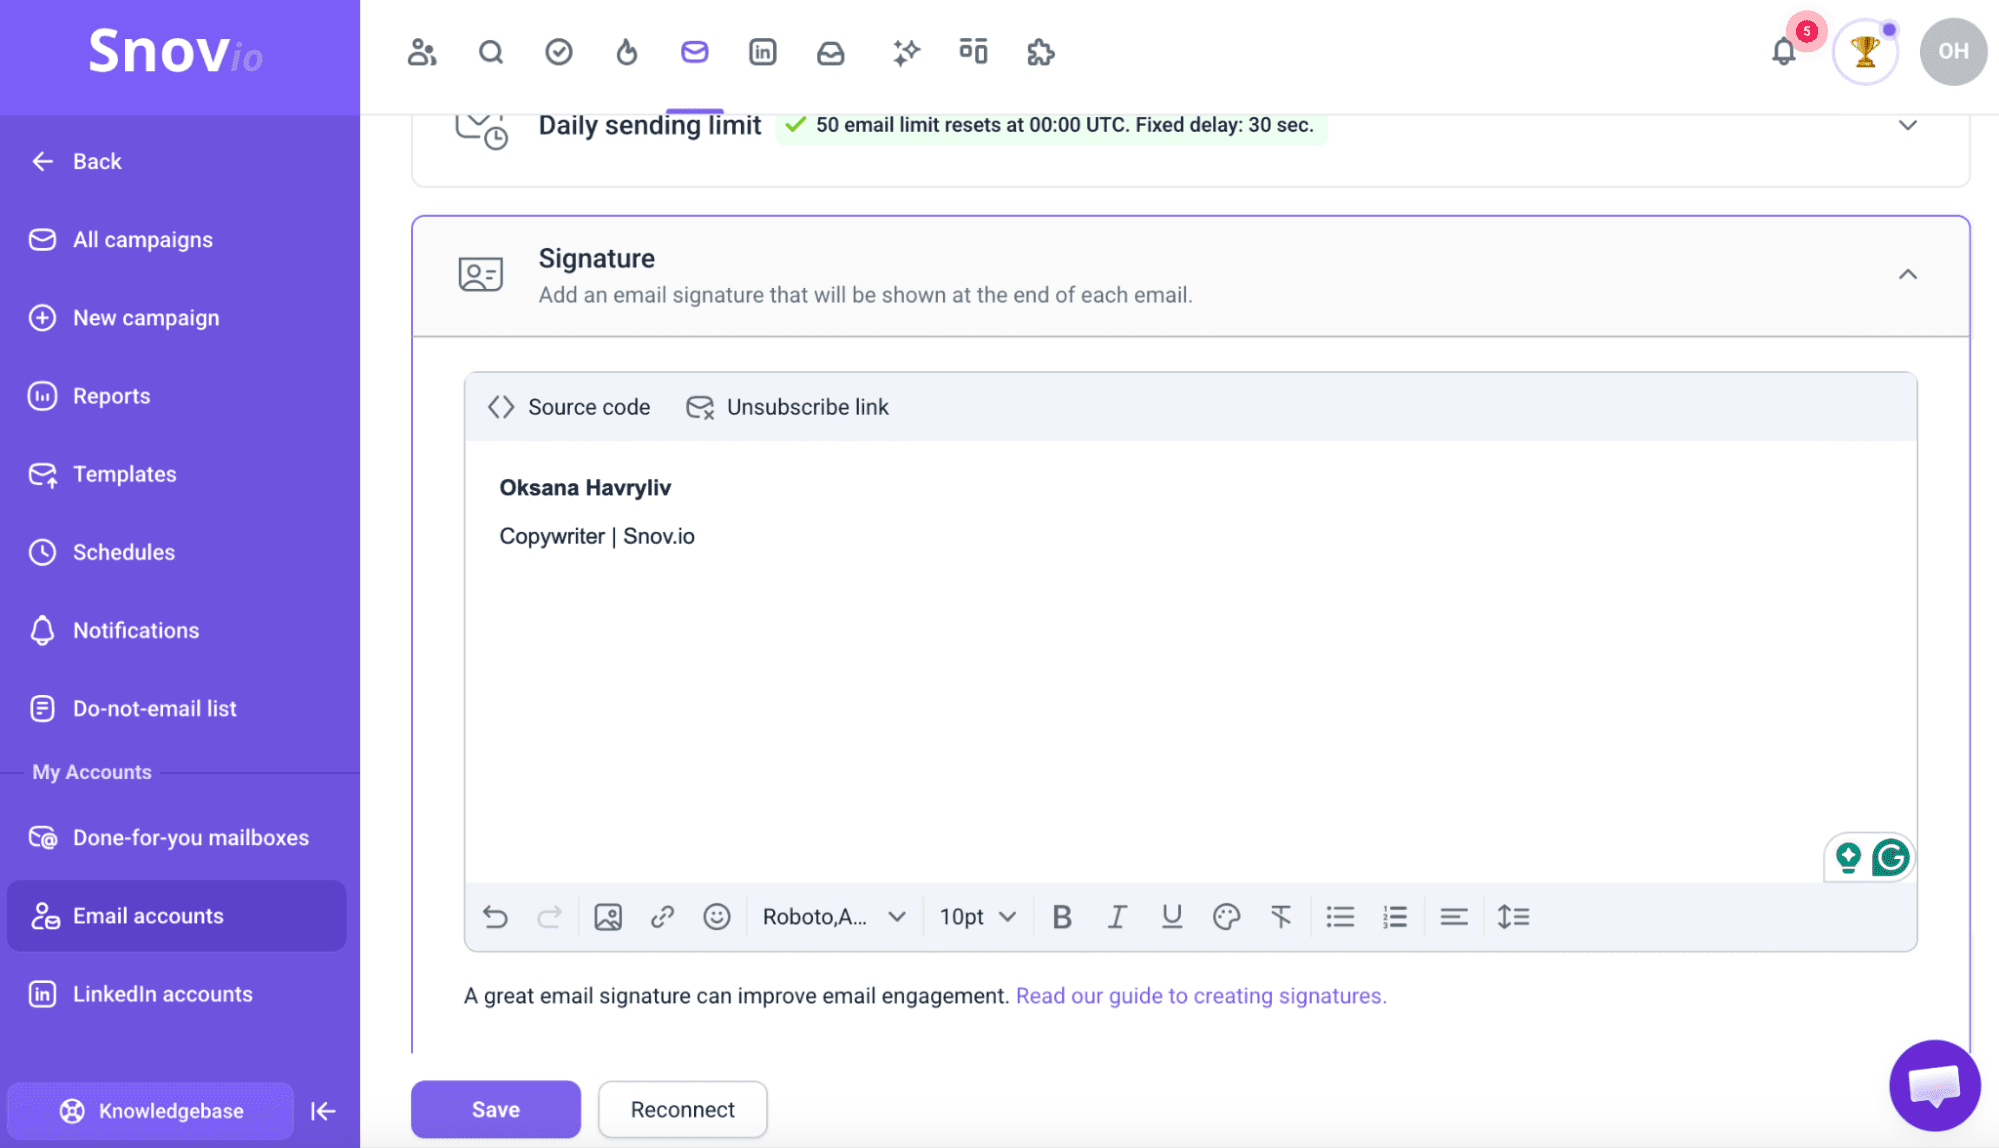
Once added, the signature is automatically included in all messages sent from that account. Don’t think about it twice.
Create a new campaign
This is where everything comes together.
Creating new campaigns is essentially building your email drip automation workflow: defining what gets sent, to whom, and under what conditions.
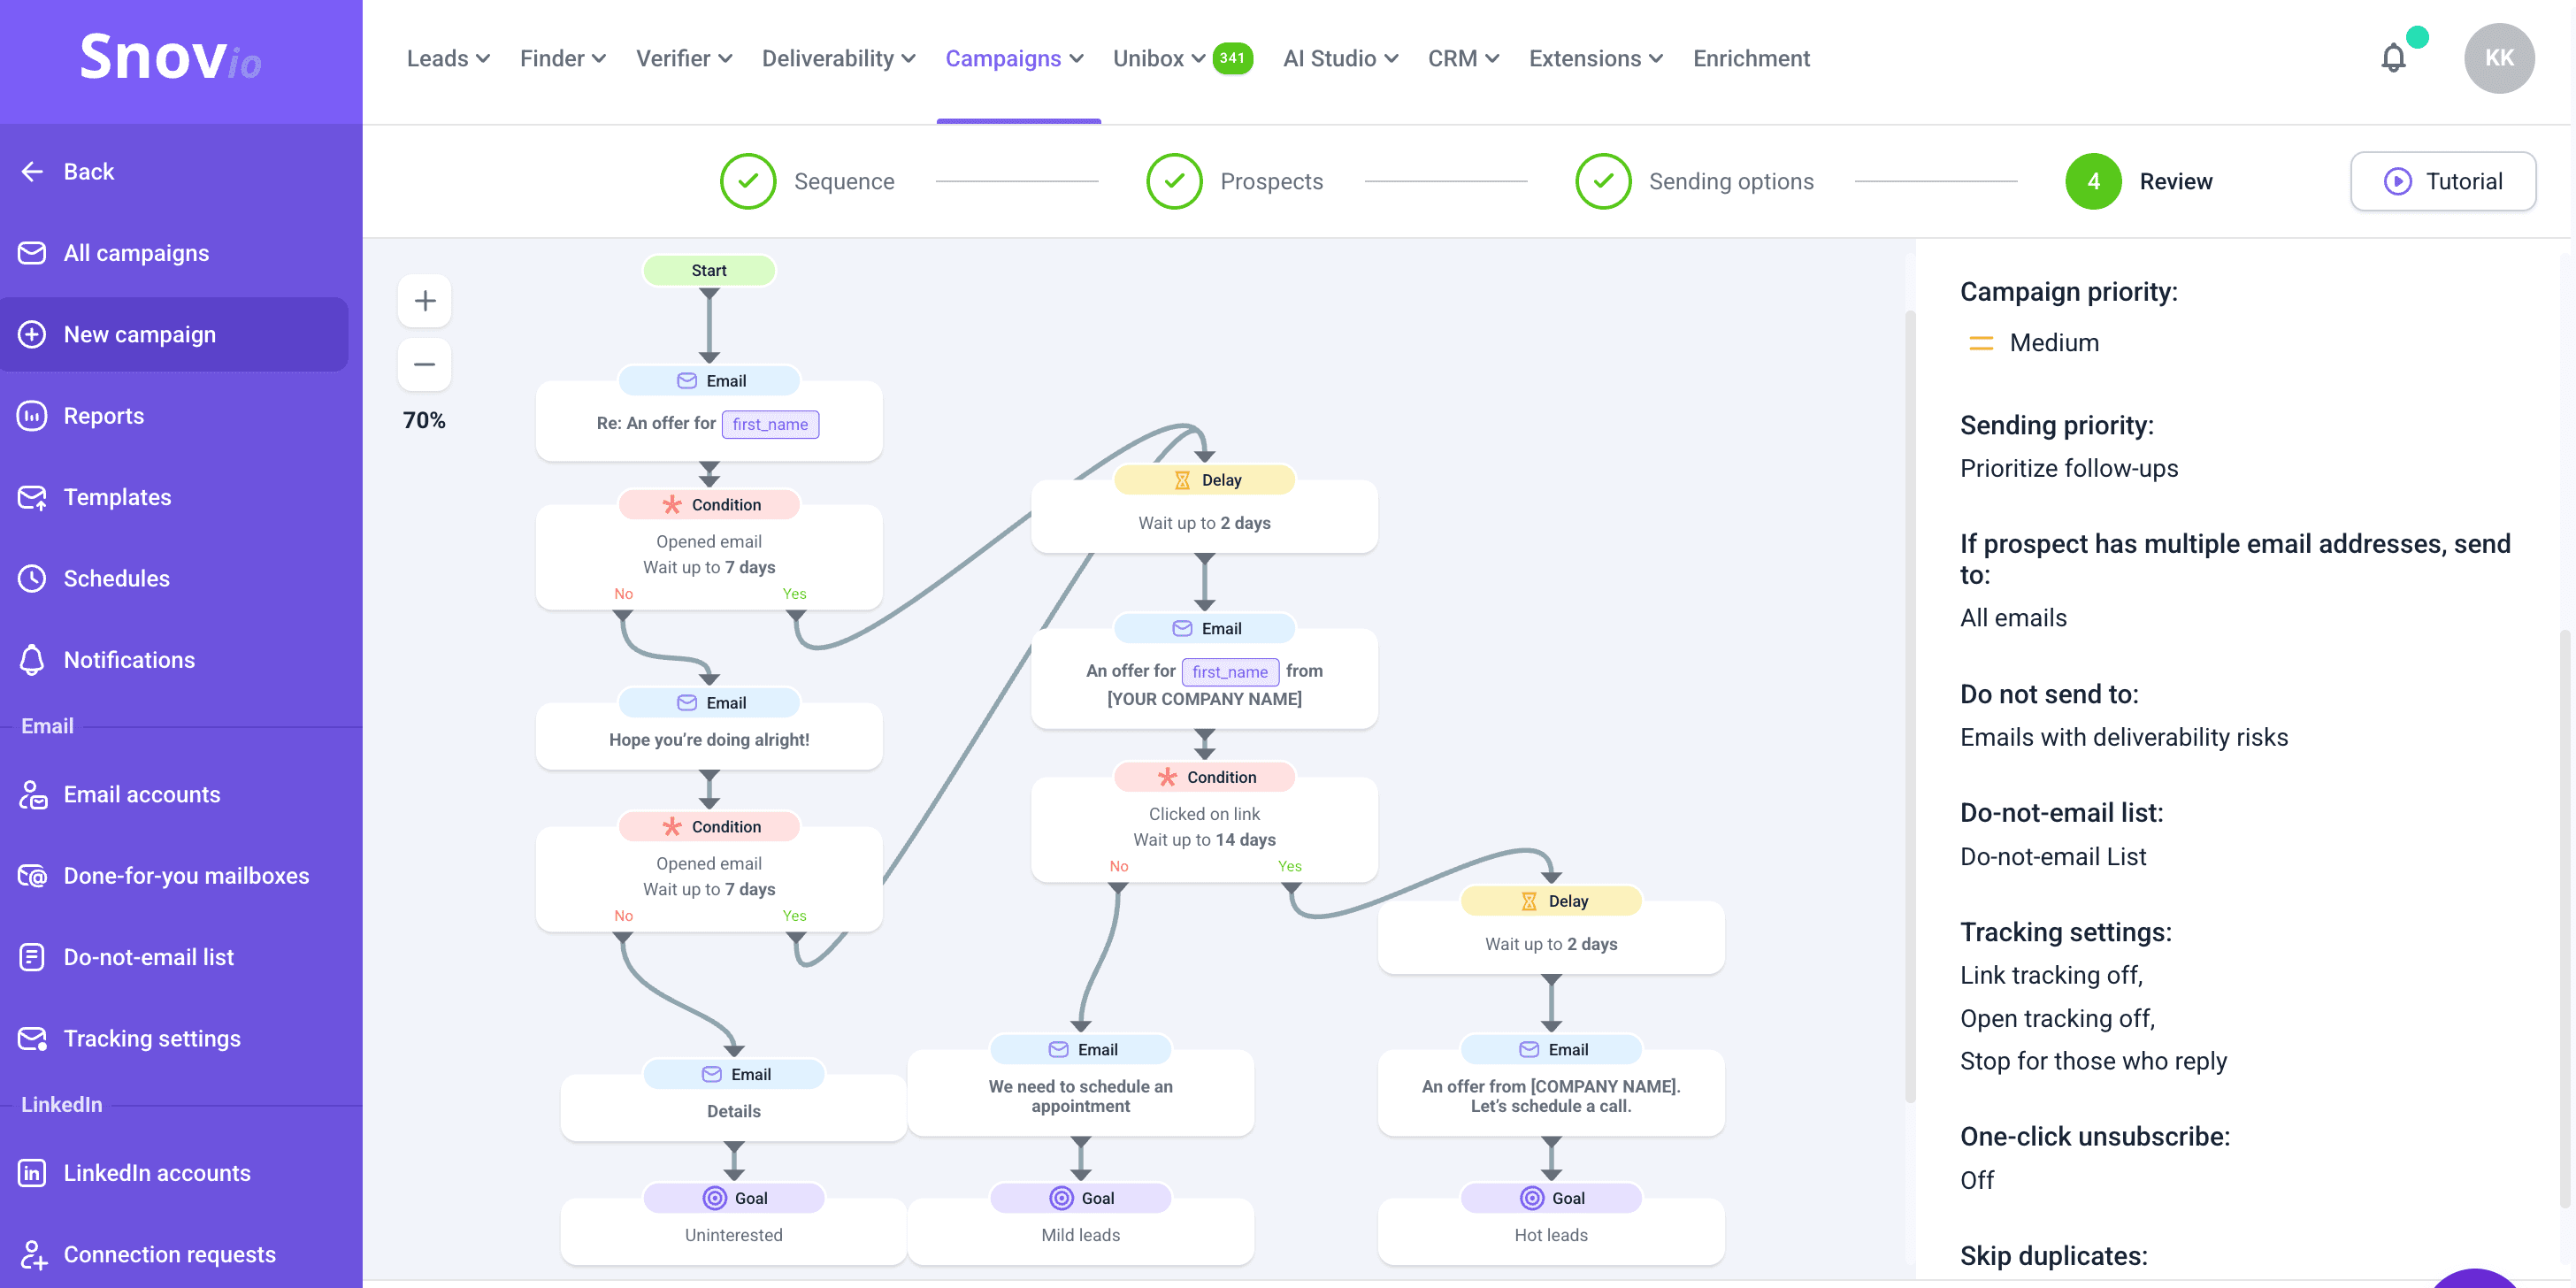
This process consists of 4 stages:
- Sequence – define messages as well as logic of your email drip automation flow
- Prospects – choose the list that will enter your campaign
- Sending options – control timing, limits, delivery behavior
- Review – double-check everything before launch
Start by going to the Campaigns section, then clicking New campaign.
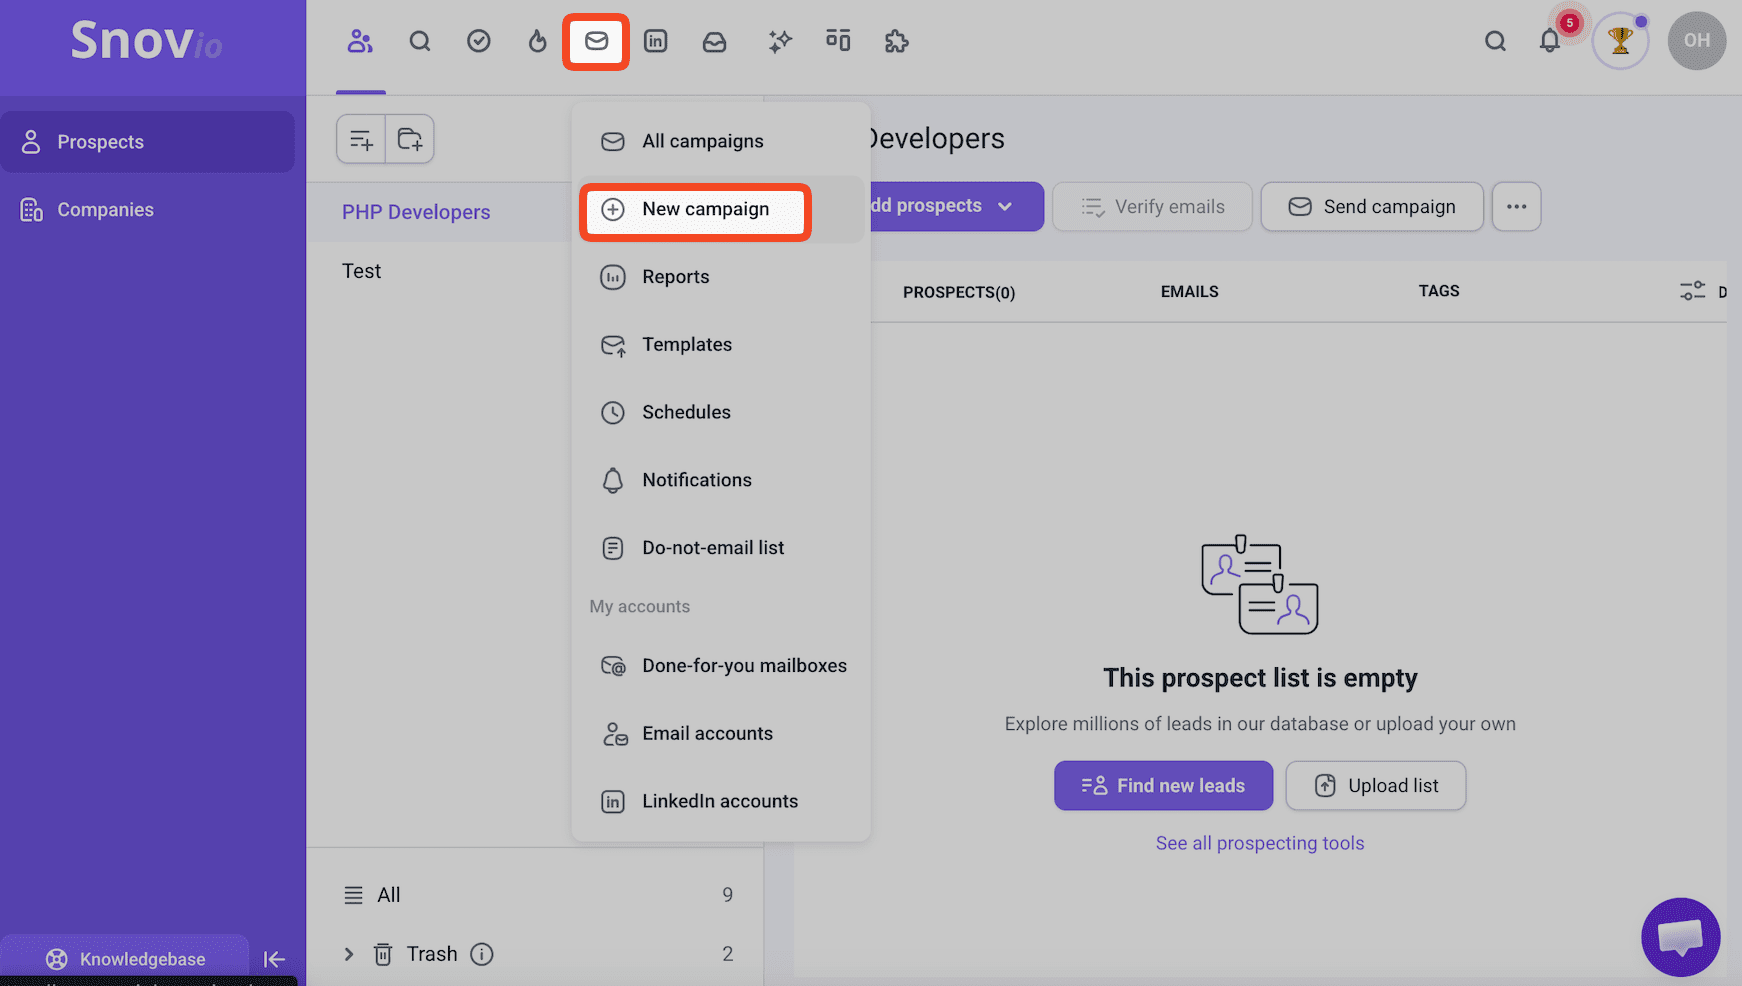
This opens the campaign builder, where you’ll move through the four steps above in order.
Each step builds on the last: first, you shape the sequence, then assign your audience, configure delivery, and review the setup.
Next, let’s break down each stage.
Build an email sequence
A drip email sequence defines the logic of your campaigns.
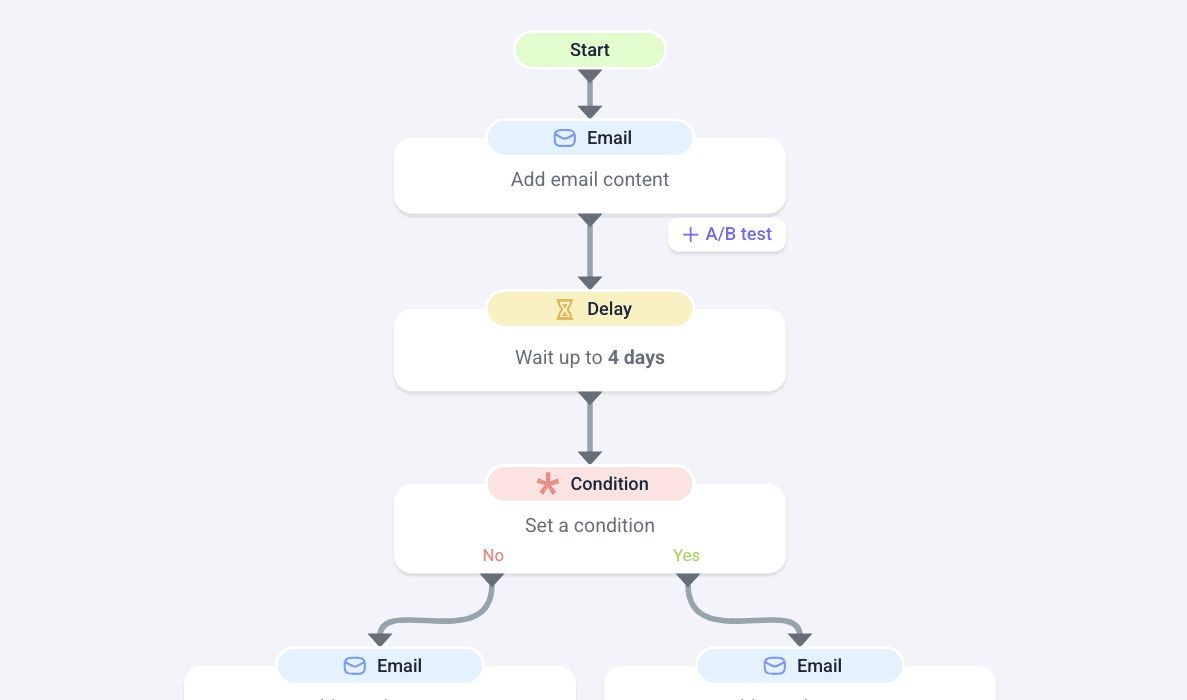
It essentially controls what gets sent, when, and how your flow adjusts based on responses. Strong sequences feel personal, timely, and easy to track.
Emails are the heart of drip email sequences. Each message here should be relevant. That’s where personalization is of utmost importance.
In Snov.io, personalization options go way beyond simple variables like {{first_name}}. You can tailor messages using dynamic content based on a prospect’s role, industry, or location.
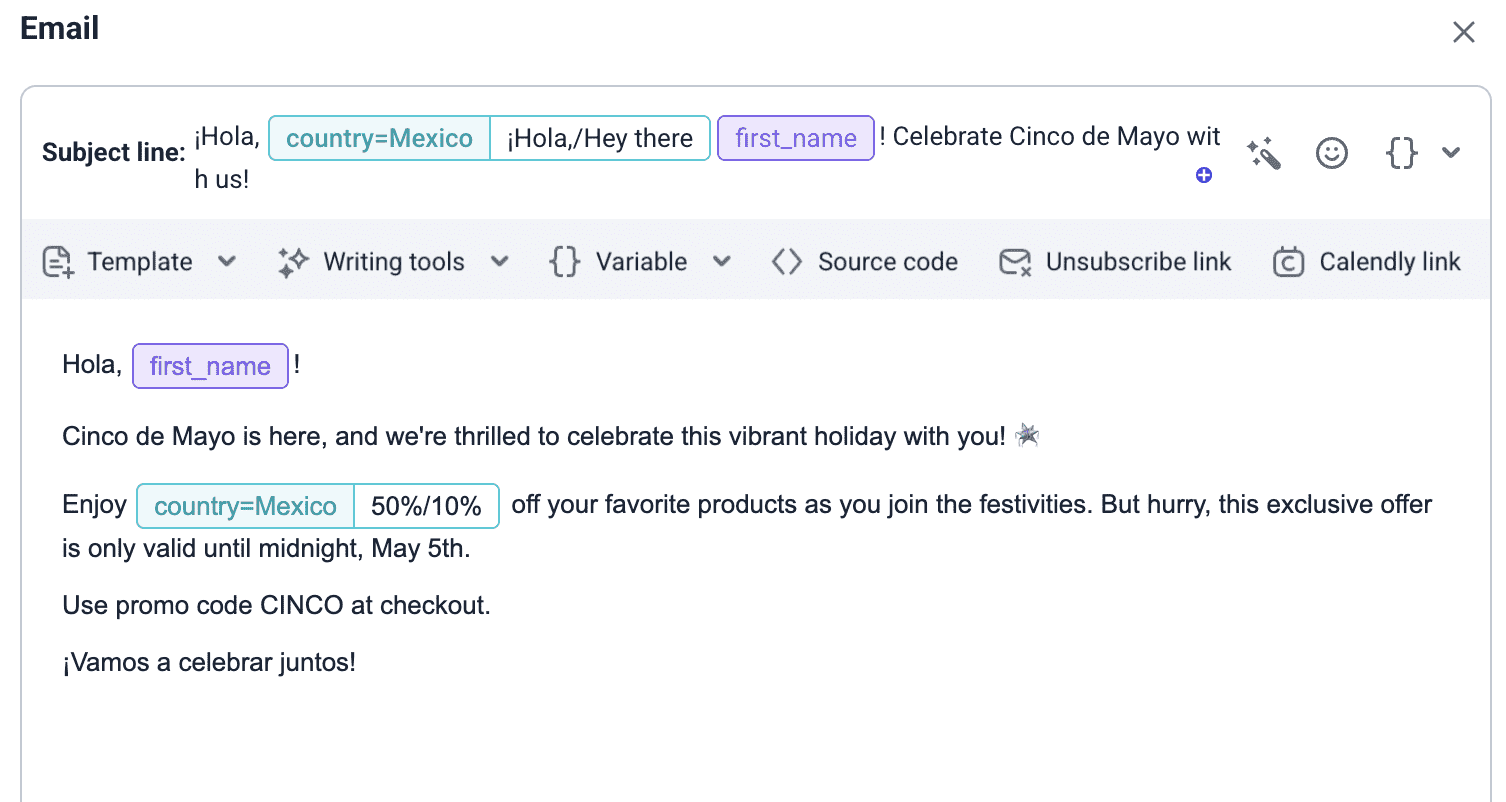
Custom variables add context unique to each lead. While Spintax lets you rotate intros, CTAs, or sign-offs, making your sequence feel natural even when sending at scale.
💡 Expert tip
Snov.io drip campaigns aren’t limited to email. You can add LinkedIn steps like profile views, connection requests, and InMails directly into your sequence.
Why does this matter? Because reaching prospects on multiple channels often increases replies, as you meet them where they’re already active.
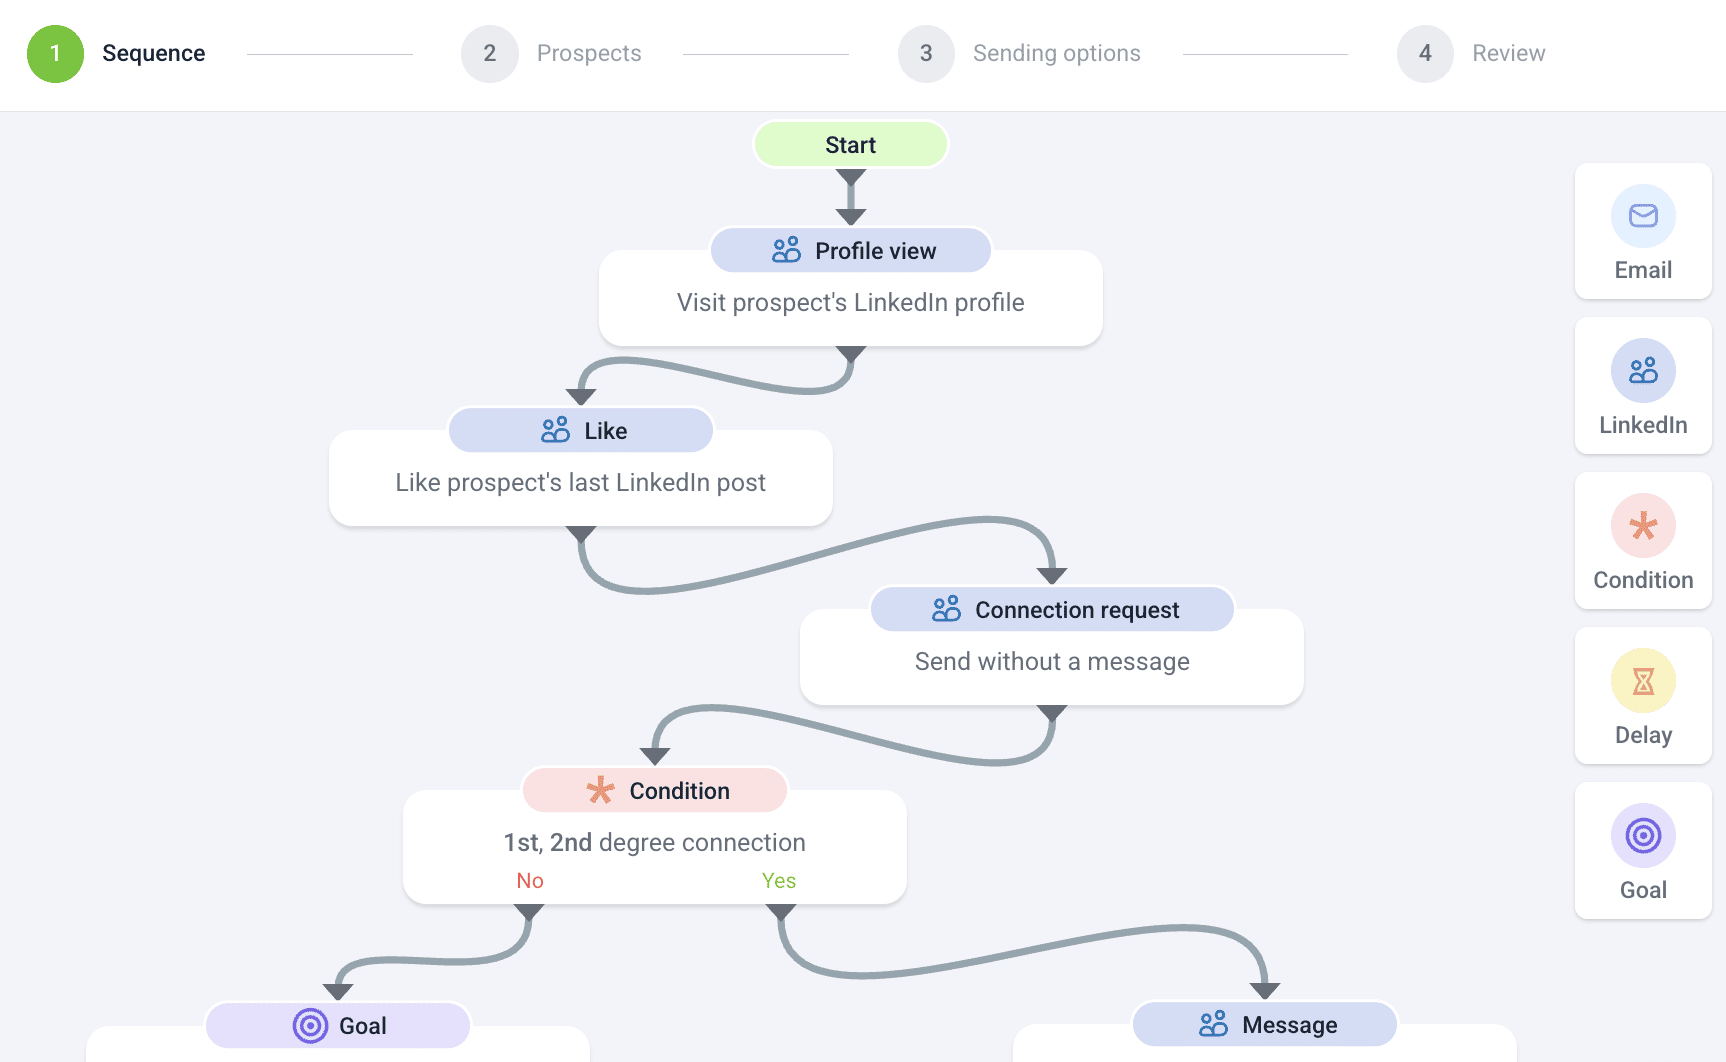
Snov.io manages timing and security with built-in delays and proxies, helping keep your accounts safe while your outreach runs automatically.
- Condition
Conditions enable the sequence to branch based on actions such as opens, clicks, or meeting bookings.
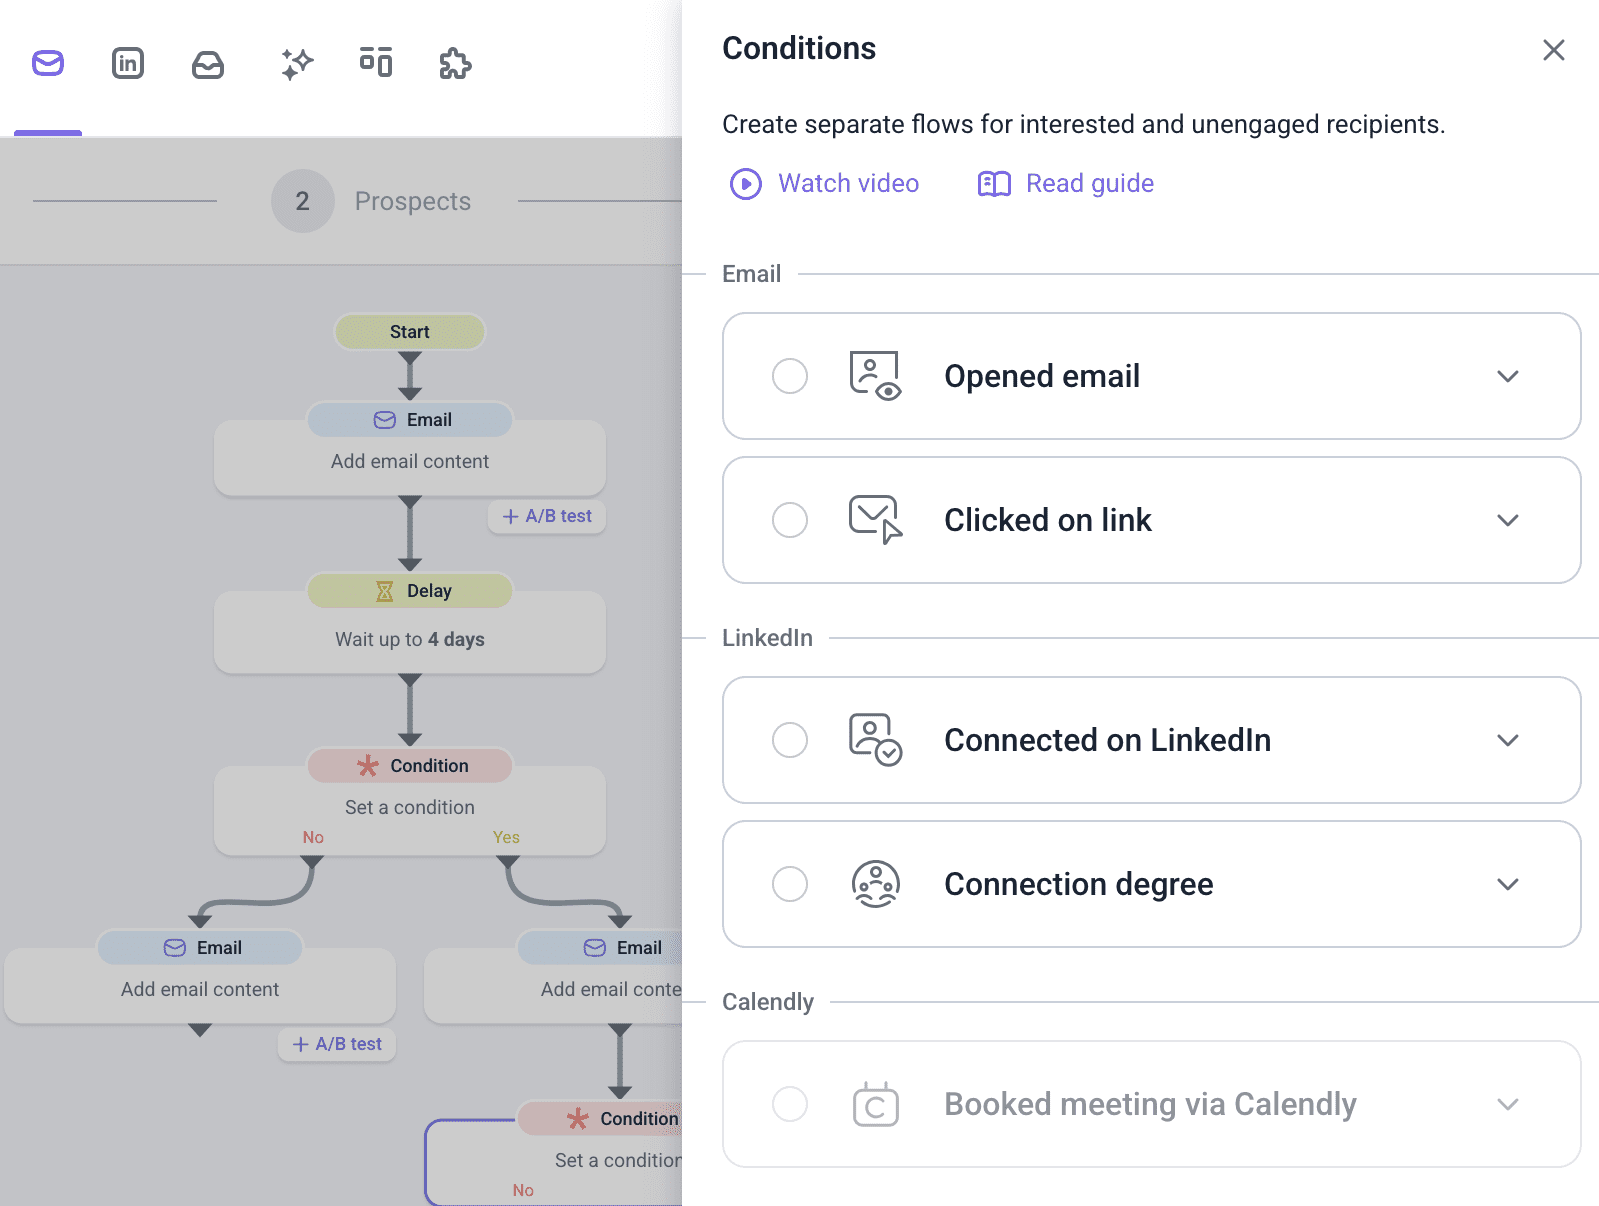
Engaged prospects can receive more direct follow-ups, while unresponsive ones move into a softer path. This keeps outreach relevant without manual intervention.
- Delay
Delays control pacing between steps.
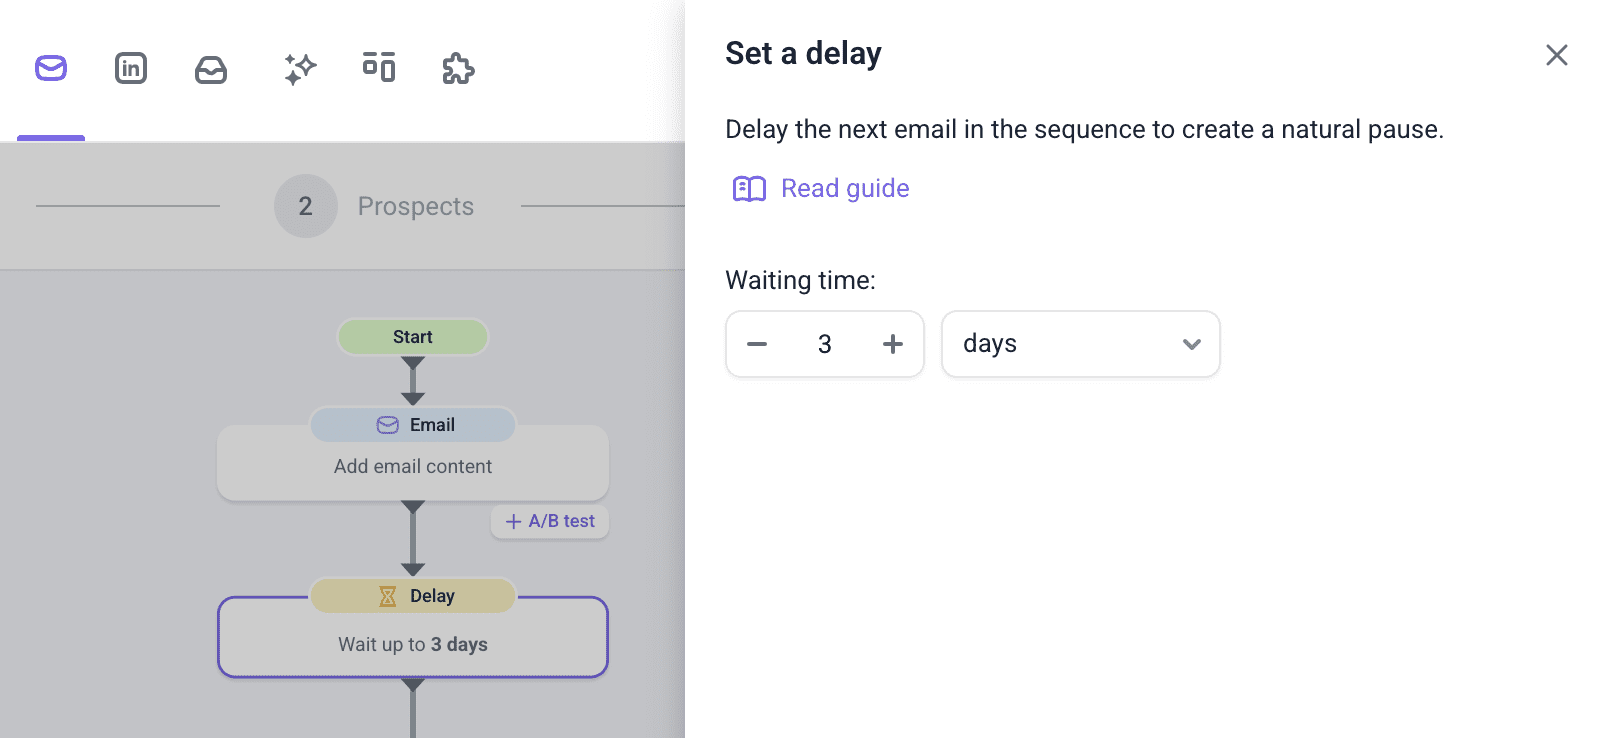
Typical timing ranges include:
- Hours to one day after high-intent actions
- Two to four days between standard follow-ups
- Longer gaps for colder leads
Good timing improves engagement and reduces inbox fatigue.
- Goal
Goals define what success looks like, such as a reply, a booking, or a key click.
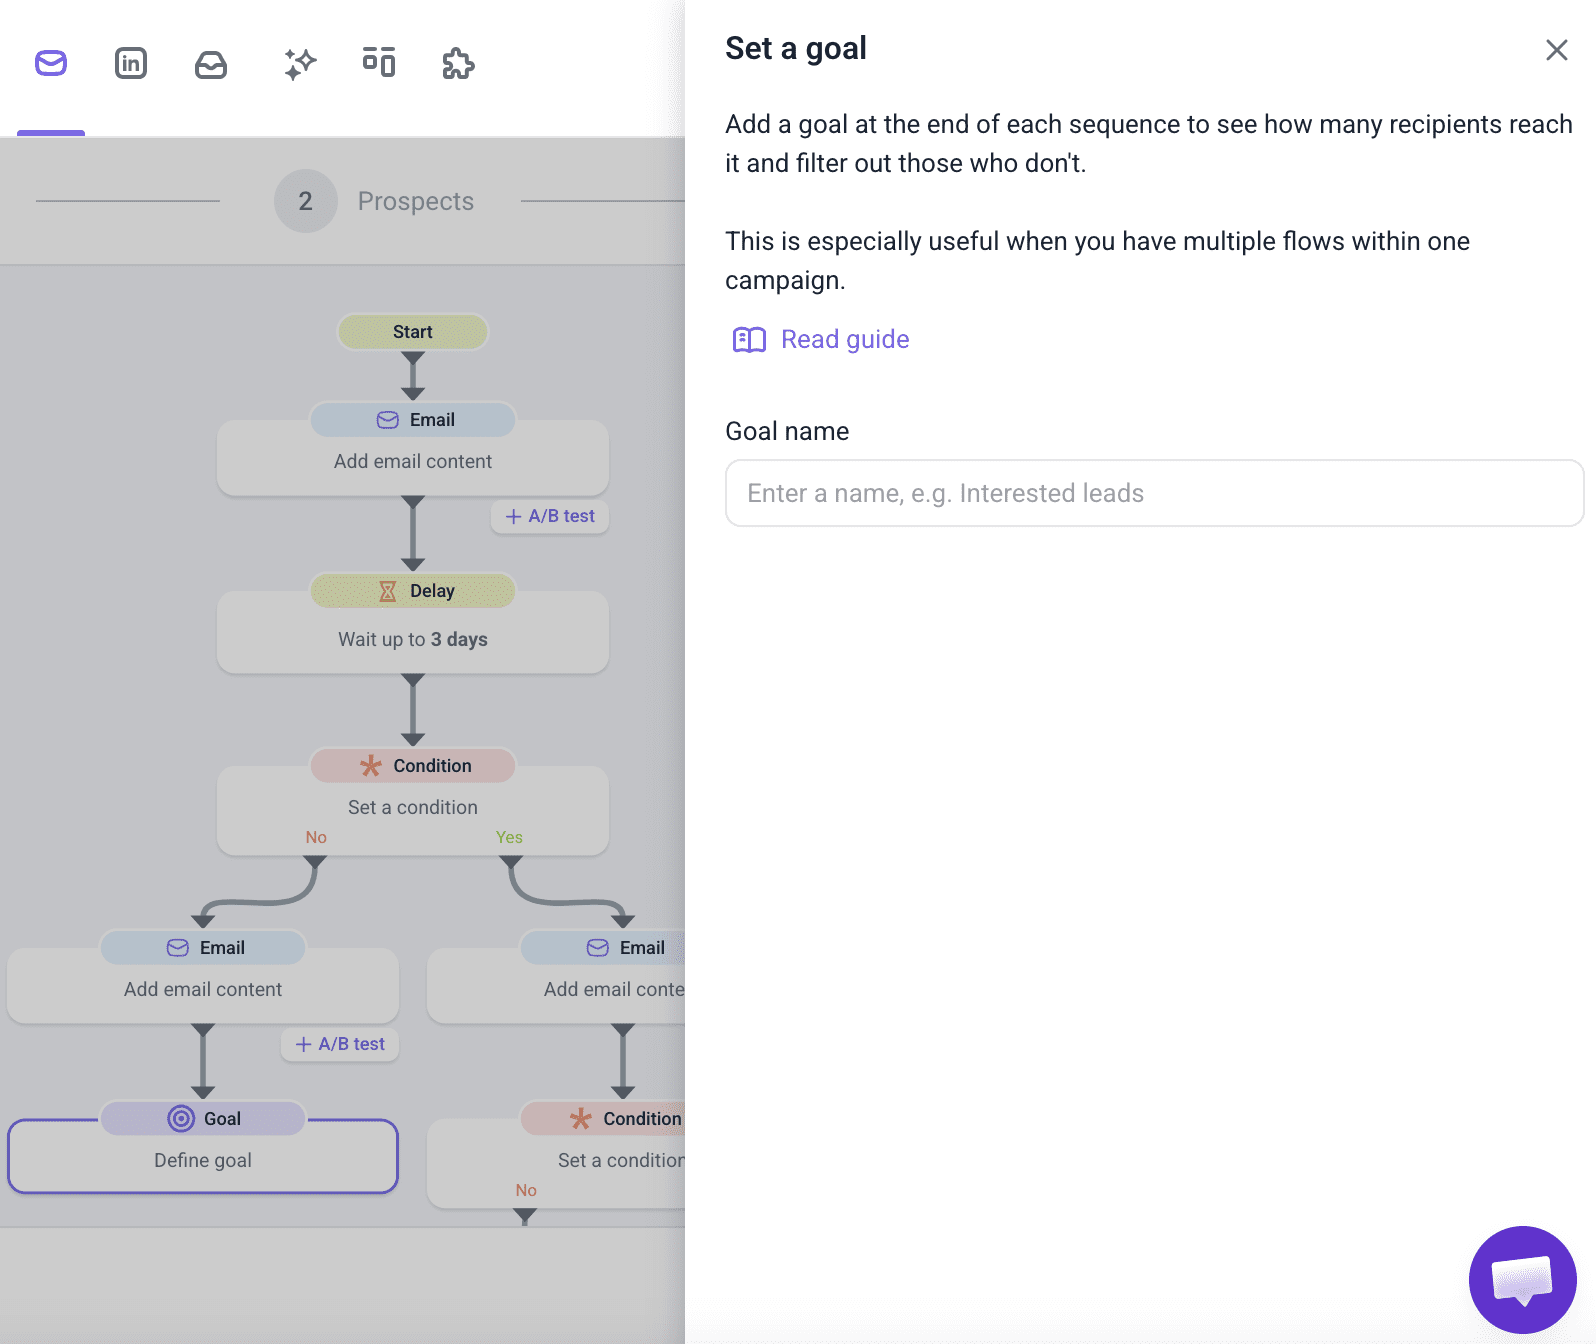
When a prospect reaches a goal, they exit the sequence automatically. This makes it easier to track performance and avoid unnecessary follow-ups.

How to Send 10000 Cold Emails Safely and Effectively in 2026
February 11 2026

At this stage, it’s also important to decide on what you want to measure. Avoid vague goals like “increase sales.” Instead, use the SMART framework, making sure your goals are specific, measurable, achievable, relevant, and time-bound. This ensures your drip email campaigns are focused, and their impact is easy to assess.
Choose a prospect list
This step defines who enters your email drip automation workflow. Here, simply select a list that closely matches the intent of your sequence and manage other options.
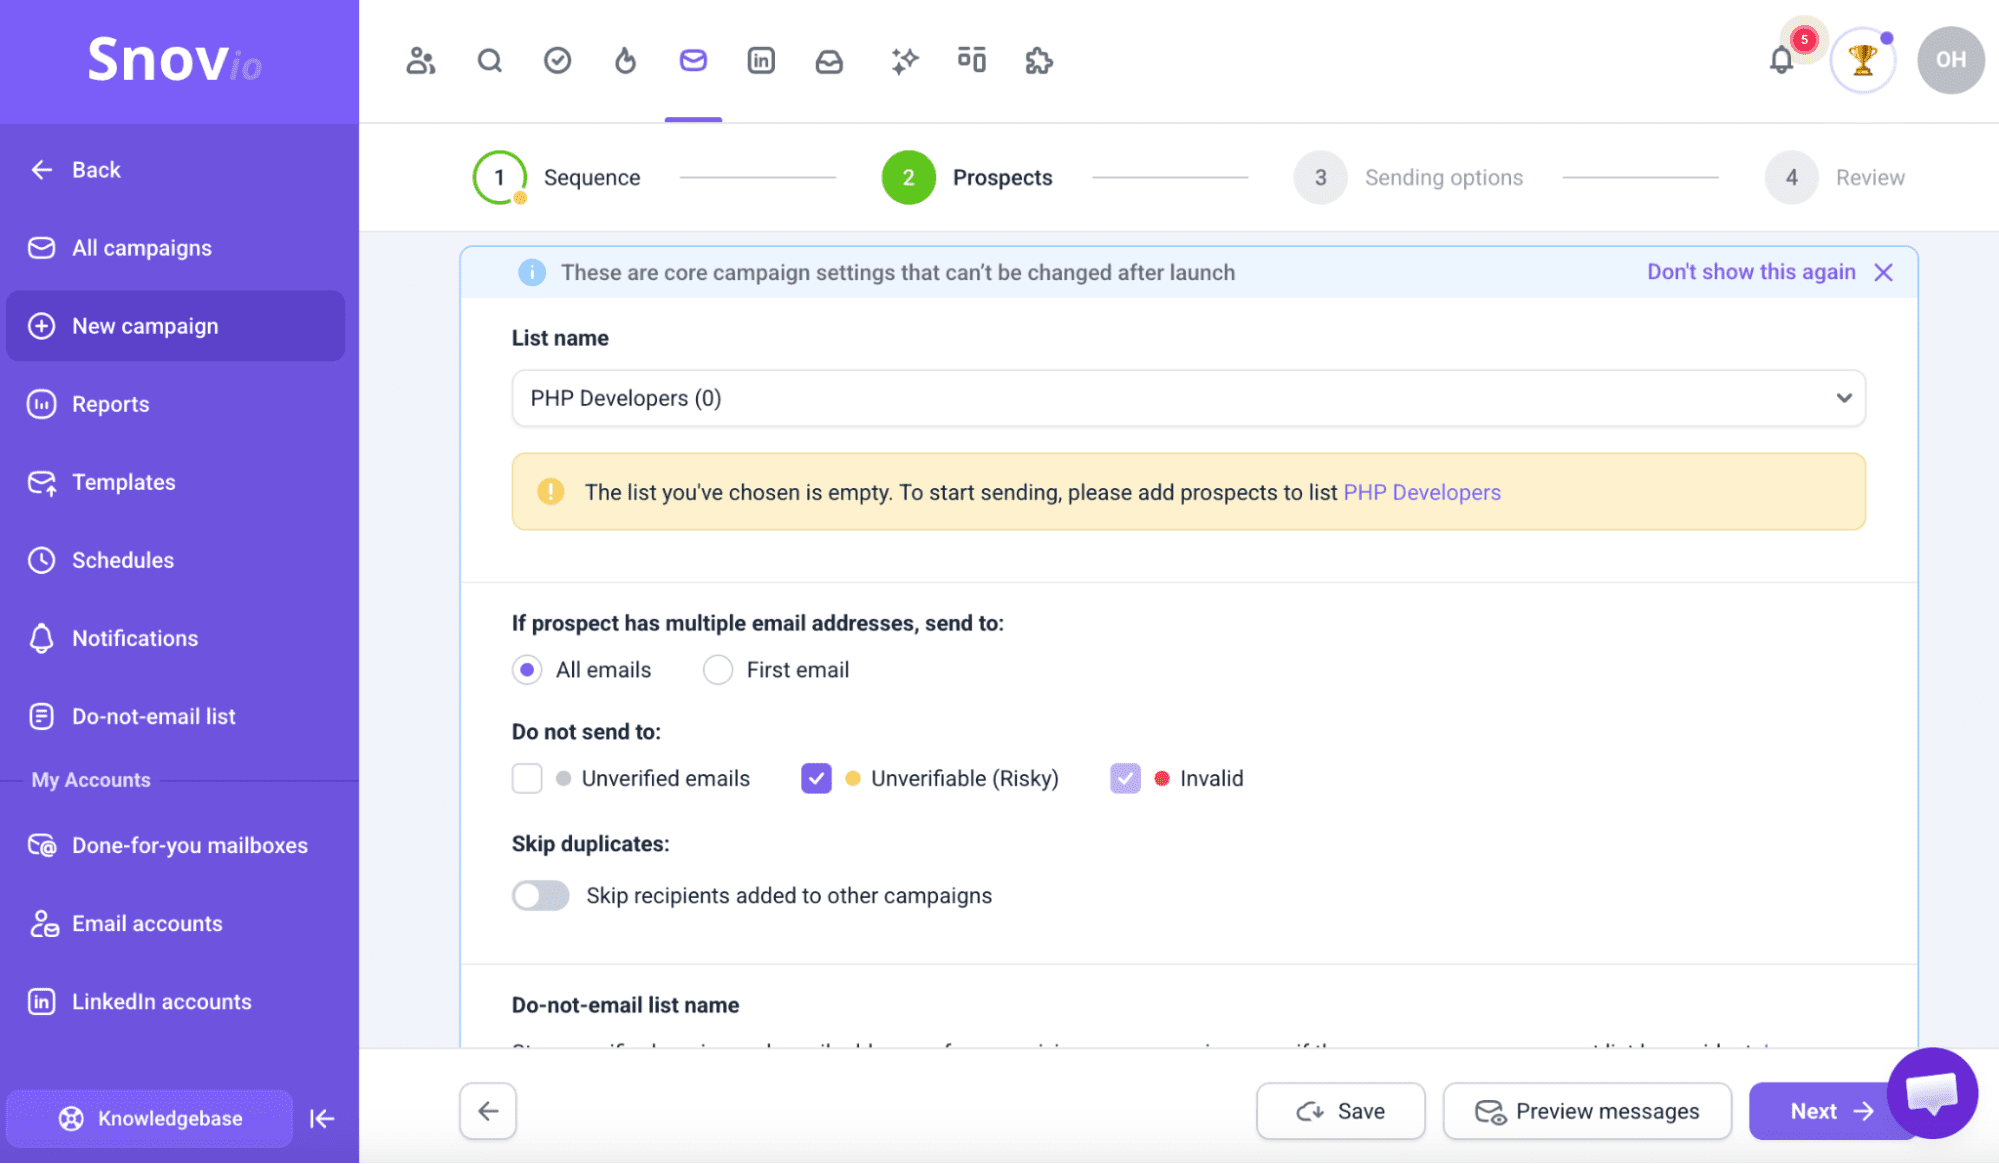
Keep in mind that smaller, targeted lists usually perform better. Also, avoid over-emailing the same prospects. Repeated outreach erodes trust, so enable duplicate detection that automatically excludes contacts already used in other campaigns.
Set sending options
Sending options control deliverability, volume, and timing. Select the email (LinkedIn accounts) that will send the campaign and ensure they are warmed up and have sufficient daily limits. If needed, rotate across multiple inboxes to safely spread volume.
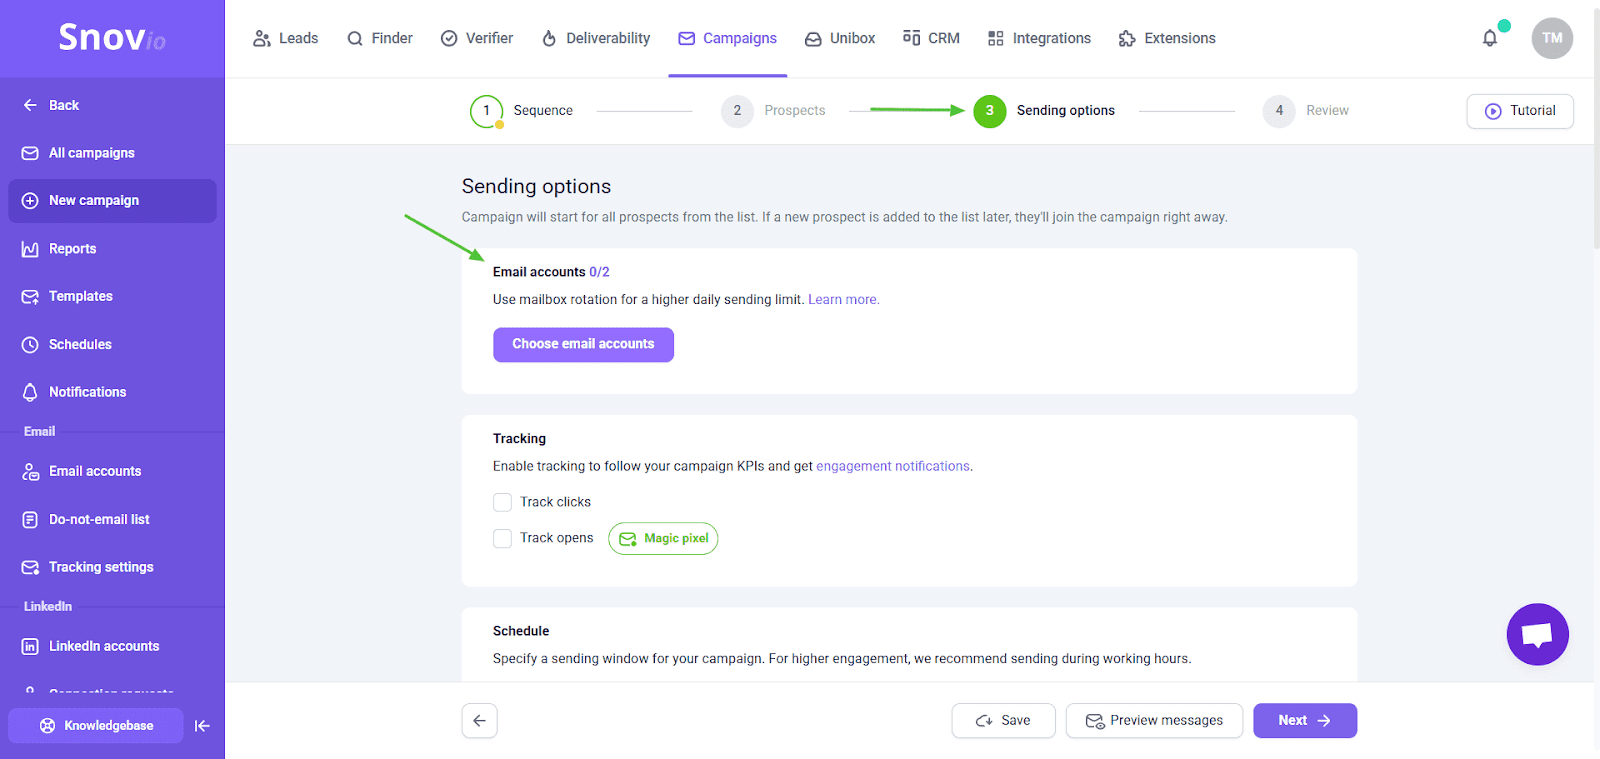
You can track opens and clicks, but it comes at a cost. At Snov.io, we discovered that campaigns without open tracking get up to 2x more replies. So I recommend skipping open tracking altogether. Focus on those metrics that show actual engagement: replies, booked meetings, conversions, etc.
Also, time your messages to land during your audience’s working hours in their own time zone.
Review the campaign
Before launching, run a final quality check to avoid costly mistakes. Rely on this quick checklist:
- Links work and lead to the correct pages
- Personalization variables have fallback text
- The correct prospect list is selected
- Sending limits and schedules are accurate
- The sequence logic and timing match your intent
Once everything checks out, launch that campaign. That’s it, your email drip automation workflow now runs automatically.
Launch and track your email drip campaign performance
Once your campaign is live, it’s crucial that you keep an eye on how it’s performing. The right metrics show you what’s working and what needs some intervention.
Focus on real engagement:
- Reply rate: How many people actually responded to at least one message. If you’re getting under 2-3%, your targeting or messaging likely needs work.
- Goal completion: Did prospects do what you wanted? Book a meeting, click your link, send a positive reply?
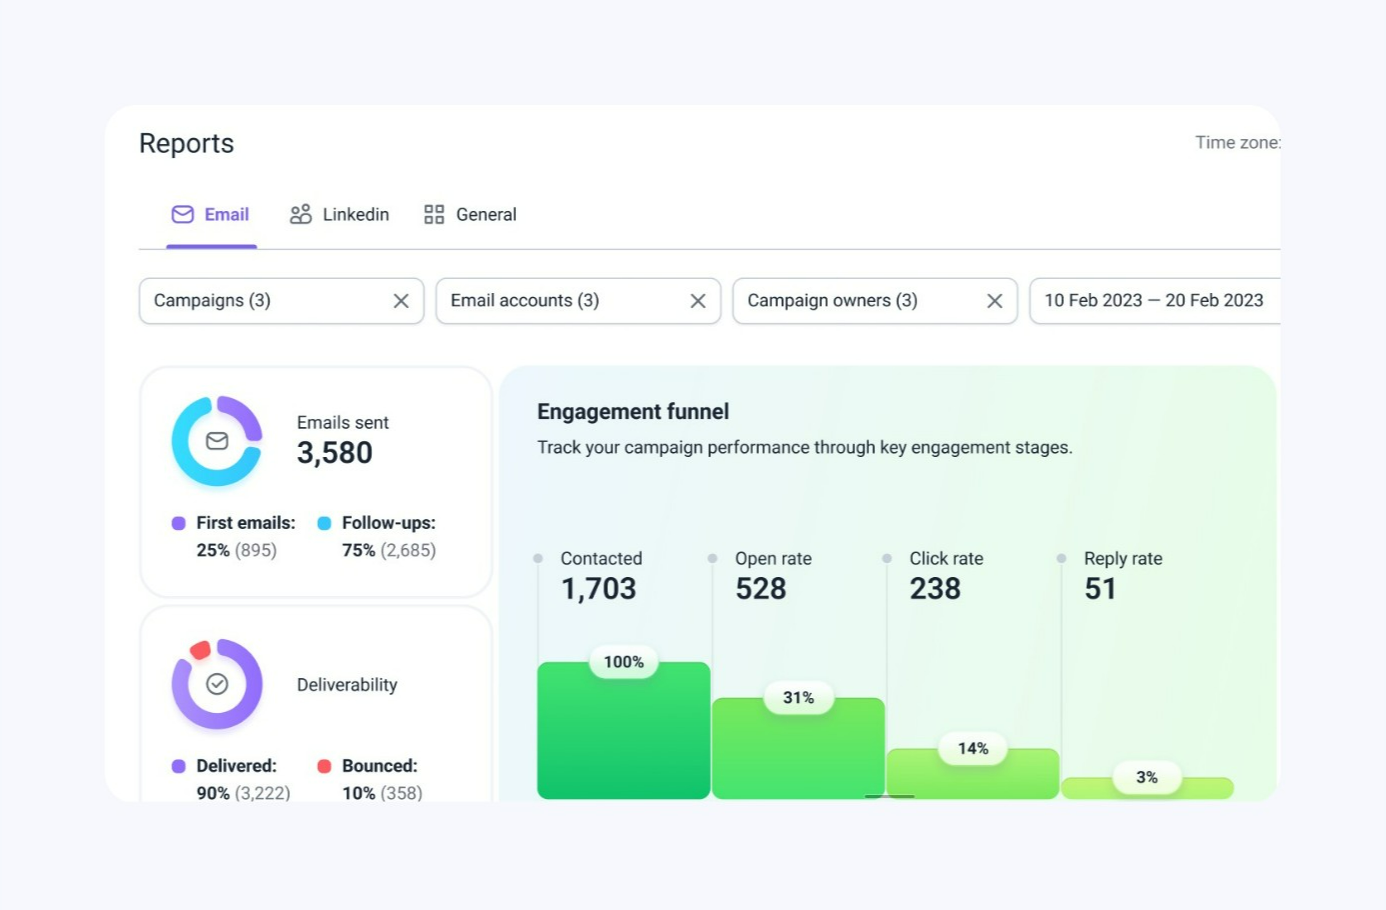
In Snov.io, use the Statistics dashboard for tracking KPIs over time.
Preview messages, compare A/B variants, and see which ones perform best. Once again, focus on replies, bookings, and conversions to measure real engagement.
Email drip campaigns best practices
Want better results from your Snov.io drip campaigns? Here’s what I recommend focusing on:
Start with clean lists
Verify email addresses before sending anything. This helps maintain a healthy sender reputation and a low bounce rate.
Also, keep a close eye on your deliverability metrics. As a rule of thumb, aim for a domain health score between 75-100%, a spam rate under 2%, and inbox placement above 90%. If your numbers drop below these benchmarks, it is high time to start warming up your account.
Personalize the right way
Don’t just use their name. Show that you understand who they are and why this matters to them.
Reference something specific they said or did, and then connect it to what you’re offering. If you can’t draw that line clearly, you’re reaching out to the wrong person, or you haven’t researched enough.
Keep emails short
People usually skim emails, especially cold ones. Use plain language, break up your text, and give the eye somewhere to rest. If your email is over 150 words, you’re probably saying too much.

Key takeaways
Snov.io’s email drip campaign service helps you automate outreach and build and customize campaigns, improving both campaign performance and workflow.
But in the end, it’s only a tool, and the success of your campaigns depends solely on YOU. This is why we want to share some tips for you to make sure every campaign you send is perfect:
- Create a buyer persona. If you don’t know your target audience, you will never be to the point.
- Always personalize your emails. It’s been said before, but personalization is the closest to a magical solution when it comes to marketing.
- Always verify your emails. We’ll never stop repeating how important it is to maintain email hygiene.
Study in depth how successful campaigns are built and evolve your methods and approach with each campaign. Implement new ideas, but never forget the golden rules.
You have everything you need to build a great campaign. We hope you use the Snov.io Drip Campaigns tool to take your marketing to the next level. Many more features and updates are in the works.
Good luck and enjoy!


If only I could add my original email signature
Hi, Hesam! We’re excited to let you know that html emails will soon be available in drip campaigns, meaning you’ll be able to add your custom email signature!
How do we unsubscribe a email from our campaign or remove from campaign without removing from list?
Hi, Sysamone! Click on the Status button next to the recipient’s name and in the drop-down menu select Pause. You can find more details about this in our Knowledgebase article here.
Let us know if you have any more questions! 🙂
While reading this I just kept thinking why the hell are people still using bulk emails when personalized triggered emails are a thing??
Thank you, Dana, great article and an amazing tool too
Thanks, Mary!
We’re doing our best 🙂
Let us know if there are any other features you would like to see in our Drip Campaigns!
Thank you, guys, for this comprehensive guide!
It covers all the points of using your drip campaigns and it has become far easier for me to set one up!
Thanks, Jerald!
If you have any questions as for other tools, look through our knowledgebase.
Thanks for the guide, guys! The tool definitely seems much easier to understand now 🙂
Glad we could help, Mitchell! Let us know if you ever have any questions or issues by contacting our Customer Care team at help@snov.io or via the live chat.
any more features coming soon?
Surely, Judi!
We are currently working on the Team Work feature, integrations with numerous CRMs, and some other exciting features.
If there’s something definite you’d like to see in our tools, you are most welcome to share your ideas here.
Stay tuned for updates!