This guide shows how to prepare and launch your first cold outreach campaign in Snov.io without hurting deliverability.
You’ll follow the full setup flow: prepare sender accounts, warm them up, build a targeted prospect list, write your sequence, launch the campaign, and monitor early results before scaling.
Set up domains and mailboxes
Your first campaign starts with the right sending setup. This is the foundation for deliverability and long-term outreach results.
Keep your setup simple at first. Use 2–3 sender domains, with up to 5 mailboxes per domain.
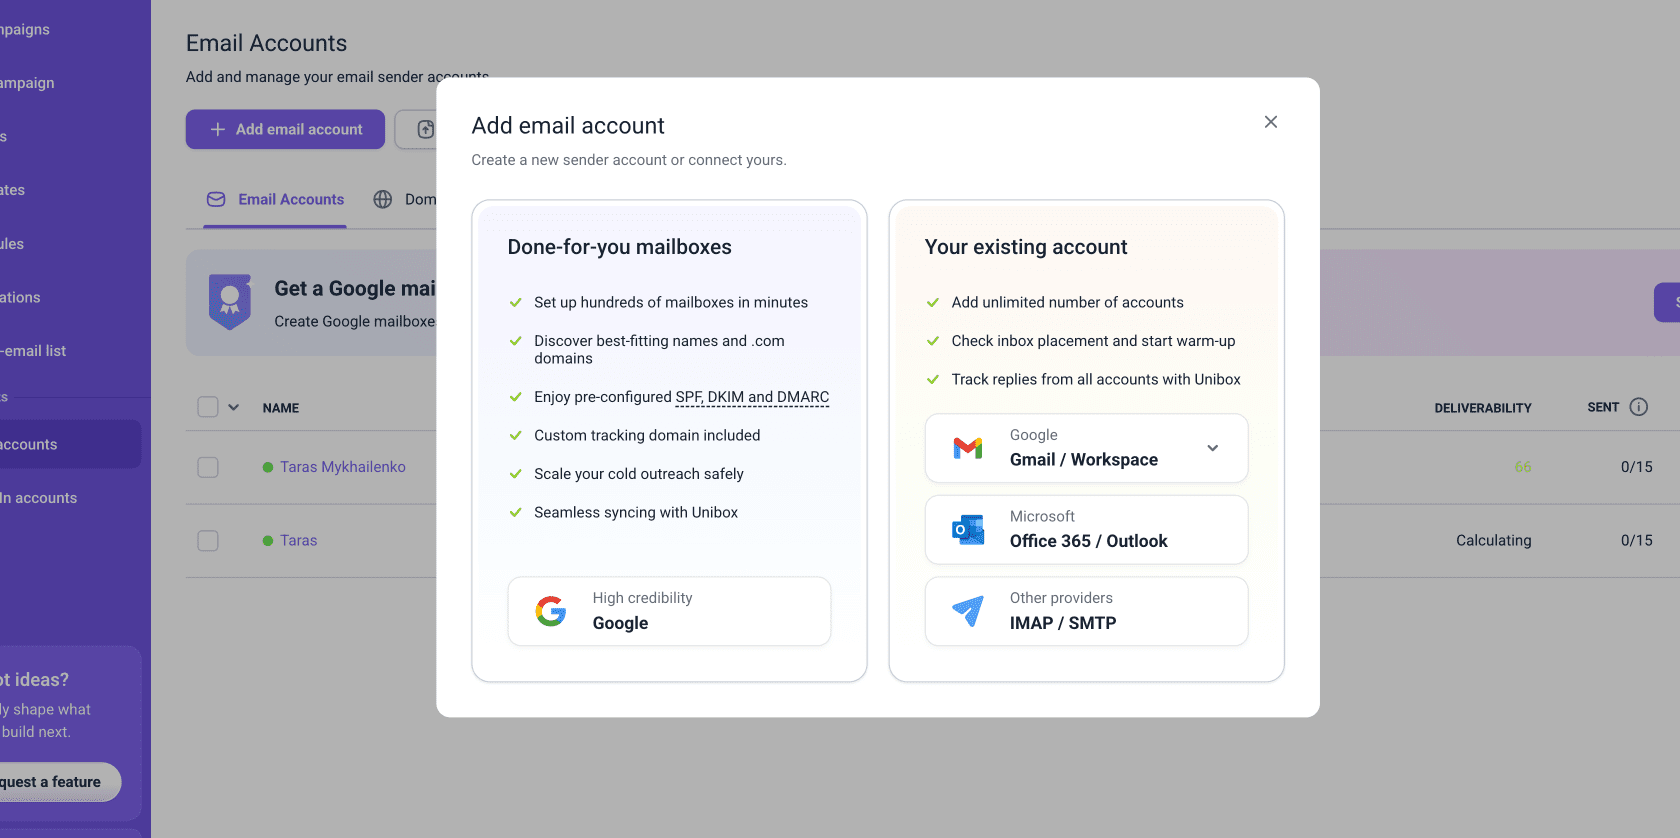
Go to Email Accounts, click Add email account, and choose how you want to connect your mailboxes.

Connect your existing accounts
You can connect mailboxes you already use:
- Google Workspace or Microsoft Outlook: use direct sign-in for a faster API connection
- Other providers: connect through SMTP/IMAP
Purchase done-for-you mailboxes
If you don’t have sender accounts ready, you can buy done-for-you mailboxes in Snov.io. You can use them together with your existing accounts. Warm them up in advance so you have ready-to-use senders when you need to scale.
Add accounts to warm-up
Start warm-up right after connecting your accounts. Both existing accounts and done-for-you mailboxes need warm-up before campaigns.
You can start warm-up in two ways: quick launch or manual configuration with advanced settings.
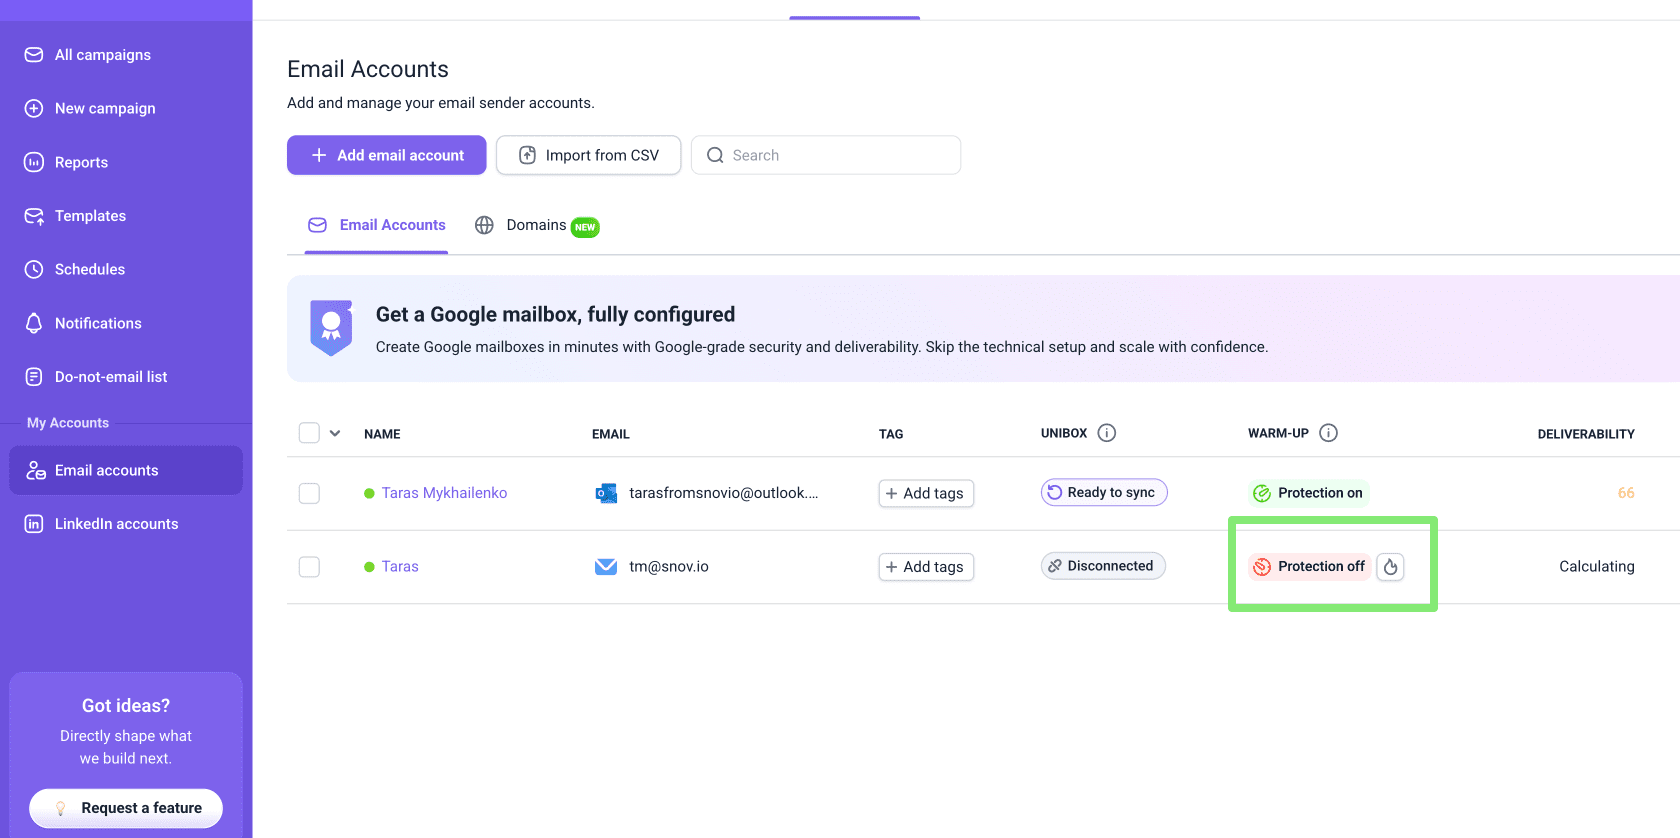
Click the quick launch button under Warm-up for a specific account.
To launch warm-up in bulk:
In the Email Accounts list, select accounts with checkboxes on the right, and click Start warm-up in the top panel.
To review progress or adjust warm-up settings, go to the Email Warm-up dashboard.
Recommended warm-up presets
For new or low-activity accounts:
Progressive strategy: gradual ramp-up during the first month.
- Starts with 2 emails on the first day
- Increases by 2 emails per day
- Ramps up to the warm-up goal: 40 emails/day
For active accounts already used in outreach for more than a month:
Steady strategy: fixed daily warm-up to maintain deliverability. Sends the same number of warm-up emails every day: 10 emails/day recommended.
Prepare mailbox settings
Before you use any mailbox in a campaign, check the sender settings that affect deliverability.
Go to Email Accounts, click Edit next to a mailbox, then scroll to Optional settings.
Control daily sending limits
When you connect a mailbox, Snov.io applies safe campaign limits based on your provider to help you avoid spam filters.
- 15 emails per day for Gmail accounts
- 5 emails per day for Microsoft accounts
First week of outreach:
- 10 campaign emails per day
- 40 warm-up emails per day
Each following week:
Increase campaign sending gradually and monitor deliverability.
- Add 5 emails to campaign sending
- Remove 5 emails from warm-up
To update limits in bulk, go to Email Accounts, select one or more mailboxes with checkboxes, then click Edit → Daily sending limit. In the left-side panel, enter the campaign limit in Messages per day.

Add a custom tracking domain
If you plan to track opens or clicks, set up a custom tracking domain. This makes tracking safer and reduces the risk that email providers will flag your emails as suspicious.

Check sender health
After your sender accounts are connected, check their technical health before starting warm-up.
What to do in Snov.io:
Go to the Domain Health tab and run a test for each sender account you plan to use.
Check these results:
- Domain Health: aim for 100%
- DNS records: make sure SPF, DKIM, DMARC, MX, and CNAME are configured correctly

Build a targeted prospect list
Your first campaign should not start with a large list.
Define your ICP
Choose one customer profile and one value angle for the campaign.
Go to Products & ICPs and enter your product description. Snov.io will suggest possible customer profiles you can use for targeting.

Collect prospects
Use your ICP details to find prospects that match your target segment.
Go to Database Search. Add filters such as job title, management level, department, industry, location, or company size. Save the best-matching prospects to your list.

Check list health
Before launching the campaign, make sure your list is safe to use. A healthy list has enough verified emails and a low share of risky addresses.
Go to Prospects, open your list, and check email statuses.
- Unverifiable emails have a higher bounce risk. Use them carefully, in small batches, and monitor bounce rate closely
- Invalid emails are excluded from campaigns automatically, but it’s still better to keep your list clean
If you imported the list from another source, verify all email addresses before launch.

Write your email copy
Your first sequence needs one initial email and 2–3 follow-ups. Write the copy before you build the campaign, so you can focus on setup and testing inside the campaign builder.
Draft emails with AI
Use AI Studio to create the first draft faster.
Go to AI Studio, generate a few draft options and choose the best version.

Optimize email content
Here are a few best practices to follow to make sure your emails land in the inbox:
For the first email:
- Avoid images
- Avoid links
- Avoid attachments
- Use plain text when possible
For follow-ups, use no more than one extra element per email if needed, such as one link or one image.
Recommended email length:
- Subject line: around 5–6 words
- First email: 50–100 words
- Follow-ups: 20–50 words
Test inbox placement
After your email copy is ready, run a deliverability test to check how the actual message performs in inbox placement.
Here, you’re testing the email content itself: the subject line, body copy, links, formatting, spam score, and inbox placement.
The test can also show sender-related risks, such as Sender IP score and blacklist status, but the main goal at this stage is to check how your email copy performs.
- Sender IP score: shows the health of IP addresses used by your provider
- Blacklist status: shows whether your domain or sender IP is on any blacklist
What to do in Snov.io:
Go to Deliverability Check, insert your email copy, and run the test.
Check these results:
- Spam score: make sure the email does not trigger spam filters
- Spam words: remove or rewrite risky wording
- Inbox placement: check whether the email lands in inbox, spam, or promotions
- Provider-level results: review Gmail and Outlook separately, since each provider may treat the same email differently

Create a sequence
Your first campaign does not need a complex flow. Start with a short sequence that helps you test your setup, understand what gets replies, and learn what to improve before scaling.
What to do in Snov.io:
Go to Campaigns → Create a new campaign → Sequence.
In the sequence builder, add steps from the right-side panel. You can also start with sequence templates and customize them for your offer.
Build a basic sequence
For your first campaign, use a simple sequence.
Recommended structure:
- 1 initial email
- 2–3 follow-ups
- 2–3 days between follow-ups
Write emails directly in the editor or use the templates you created in AI Studio.

In the sequence settings, there are a few ways to improve your email content for better deliverability and make it feel more personal to each recipient.
Enable plain text mode
In the email editor, switch to plain text to remove extra formatting. Plain text emails look more like a message from a real person and are less likely to trigger spam filters.

Add dynamic content
If your list includes different roles, industries, or seniority levels, use Dynamic content to send the right message to each segment without creating separate campaigns.
In the email editor, open the Variables menu and choose Dynamic content. Select a condition, like job position, then write a text variant for each audience group. Snov.io will automatically send the right version to each contact.
Add Spintax
Use Spintax variables to randomize words and phrases across your emails so no two messages look exactly the same. This reduces the chance of being flagged as spam when sending at volume.
In the email editor, open the Variables menu and select Spintax to add variants to any part of your copy.

Add sender accounts
Use multiple sender accounts to automatically distribute emails across them. In campaign settings, go to Sending options and choose the email accounts you want to use.
To increase volume, create new sender accounts and add them to mailbox rotation for safer scaling. Keep up to 5 mailboxes per domain, and only add accounts that are fully warmed up and within the recommended daily sending limit.
Enable provider matching
Provider matching helps send emails within the same provider ecosystem when possible.
For example, Gmail senders can be matched with Gmail recipients, and Outlook senders with Outlook recipients.
- Use filters on the Prospects page to check how many prospects use Gmail, Outlook, or other providers. Add sender accounts from at least two providers
- Go to Sending options → Advanced settings and enable Provider matching
Choose tracking options
Open and click tracking can give you useful engagement data, but it may affect deliverability and is disabled by default.
If you use tracking, you can add behavioral triggers to the sequence. Conditions help you create separate paths for interested and unengaged prospects. For your first campaign, use them only if you already understand how the basic flow works.
In campaign settings, go to Sending options and choose what you want to track. If you enable open or click tracking, make sure you’ve set up a custom tracking domain.

Add sending schedule
Send emails during your prospects’ working hours. If your prospects are in different time zones, segment them by location and create separate campaigns with the right schedules.
A good starting schedule is:
- 2-hour sending window in the morning
- 2-hour sending window in the afternoon
Create schedule presets on the Schedules page, then apply the right preset in Sending options.
Stop follow-ups after a reply
When a prospect replies, the sequence stops for that person automatically. If you contact multiple people from the same company, you can also stop follow-ups to everyone from that company after one person replies.
In campaign settings, go to Sending options → Campaign duration and turn on Stop after a company reply.

Launch and monitor results
After launch, check your campaign metrics daily. Your early results show whether you can scale, pause, or adjust the campaign.
Start with these metrics:
- Reply rate: aim for 5–10%
- Bounce rate: aim for 5% or lower
Check campaign statistics
Go to Campaigns to see a live summary of each active campaign. Open a campaign to view the full Statistics dashboard with sends, opens, replies, and bounces.
You can also read the guide on campaign metrics.
Scale sending only when engagement is strong.
Before increasing volume, check your open rate, reply rate, and bounce rate. Adding more prospects to a campaign that isn't getting replies won't improve results.
If engagement is low, pause the campaign and fix the issue first: review your lead targeting or email copy, and keep warm-up running while you make changes.
Once engagement looks healthy, scale gradually:
- Reply rate at 5% or higher → increase by +5 campaign emails per mailbox per week
- Reply rate below 5% → reduce the daily limit and review your targeting or copy before scaling again
Monitor replies in Unibox
When replies start coming in, you can manage communication from all your accounts in Unibox.
Check sender health
After launch, use Deliverability Check as an ongoing monitoring tool.
Run weekly tests for every sender account used in campaigns.
- Inbox rate below 90%: reduce campaign emails for this account and increase warm-up
- Spam rate of 10% or more: pause this sender and replace it with a warmed-up backup mailbox
Filter prospects by engagement
After your campaign starts getting engagement, focus on the prospects most likely to convert.
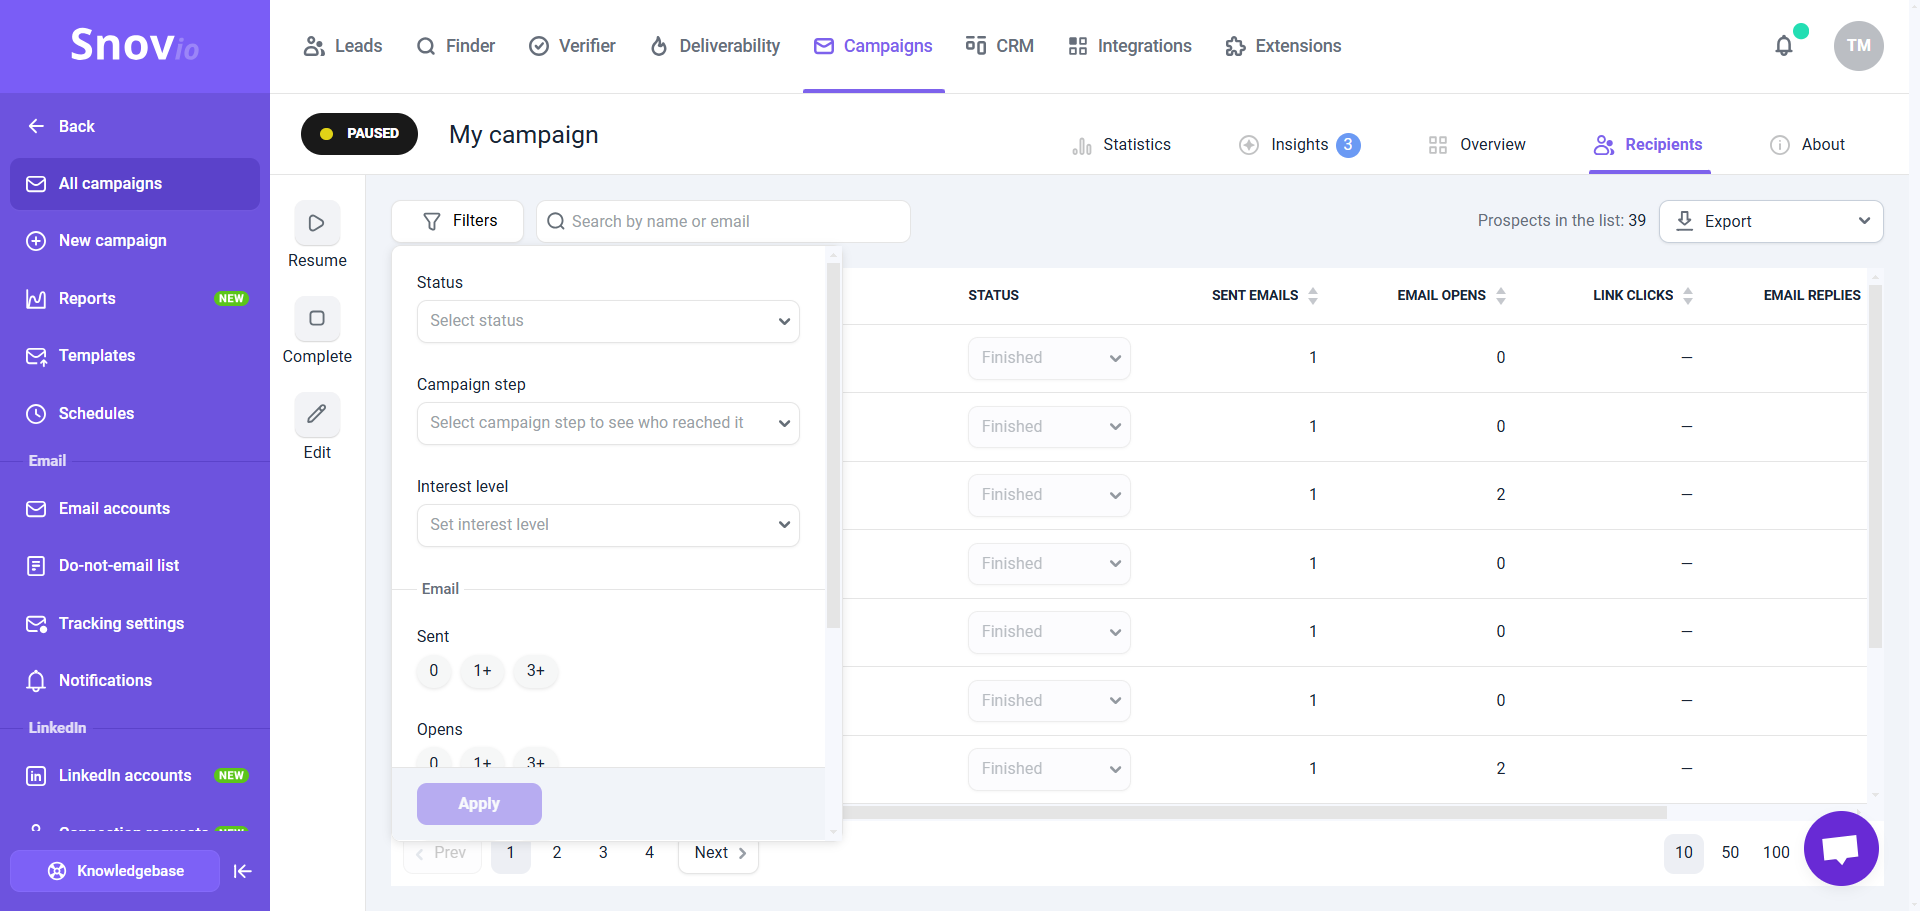
Whether or not you use open or click tracking, you can always filter prospects by reply sentiment: interested, neutral, or not interested.
Open your campaign and go to the Recipients tab. Use the Filter menu to find prospects who showed interest, then move them to a separate list, export to CSV, or create CRM deals directly.
See the detailed guide on exporting recipient data from campaigns.
Next steps: Optimize your setup
Not getting the replies you expected yet? That's completely normal — most campaigns need a few rounds of tweaking before they start converting. Here's what to look at first.
If the open rate is low:
- Run A/B tests on subject lines or opening lines — change only one element at a time for a clean result
- Check your sending schedule: reaching prospects at the wrong time can mean your email gets buried and ignored
If the reply rate is low:
- Revisit your email copy and test different angles — your message may not be connecting with the pain points of your current segment
- Review your prospect list and collect more leads that closely match your ICP

Sorry about that 😢
How can we improve it?